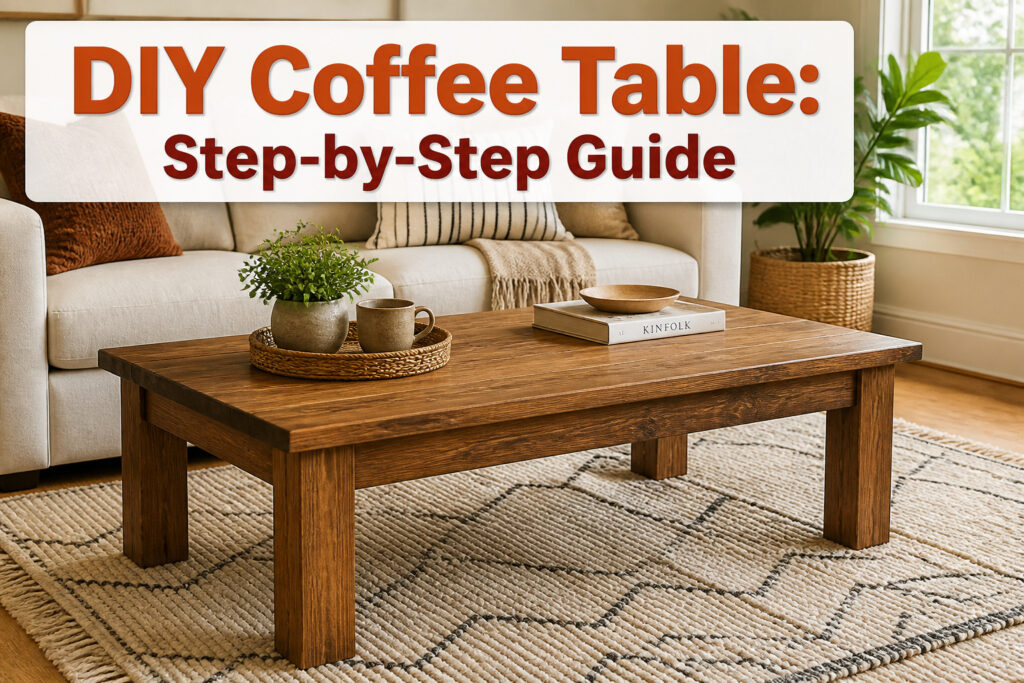
A DIY coffee table is a flat-topped piece of furniture you build yourself, usually from boards and legs, meant to sit in front of a sofa at roughly knee height. The catch is that height matters more than most people think: too tall and it blocks sightlines, too short and you reach down for your mug. The build laid out here lands at 46 inches by 23 inches, with legs cut to 17 3/4 inches, a proportion that clears standard cushions without crowding the walking path. Pine gets you started for about $25 in lumber, though oak or maple will survive the years better if you plan to actually use the thing.
Planning the Size and Shape
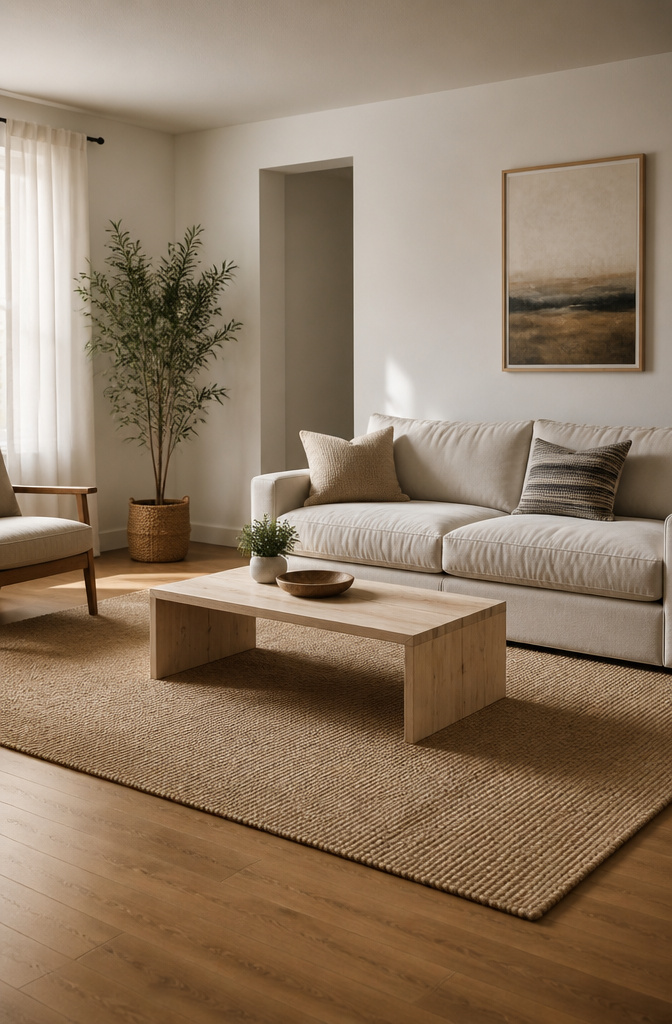
A coffee table that looks right in the room usually comes down to height before anything else. The standard range is 16 to 18 inches tall, and most sofas sit comfortably with something in that window. If your cushions are lower or higher than average, nudge the number an inch either way, but don’t chase a perfect match to the seat; you want the tabletop level with your forearm when you’re sitting relaxed.
For length and width, the build I keep coming back to lands at 46 inches by 23 inches, with that 17 3/4 inch height sitting right inside the standard band. Those proportions fit a full-size sofa without crowding the walking path in front of it. The shape follows the room more than any rule: a rectangle fills a long sofa straight on, while a square or round table buys you space in a tighter seating cluster where you need to cut corners, literally. Measure your gap first, then pick the style. A table that forces a shuffle step every time you stand up is a table you stop using.

RUSTIC COFFEE TABLE – Add a rustic touch to your living space with the Log Coffee Table. The classic design makes this center table for a living room perfect to enhance the look of your decor.

Quality Wood Coffee Table with Shelf: The rectangular coffee table with storage features a solid pine wood tabletop and legs offering a refined look and exceptional durability. The solid wood 2 tier coffee table for the living room with non-toxic finishes complements your healthy living space.
Cutting the Wood
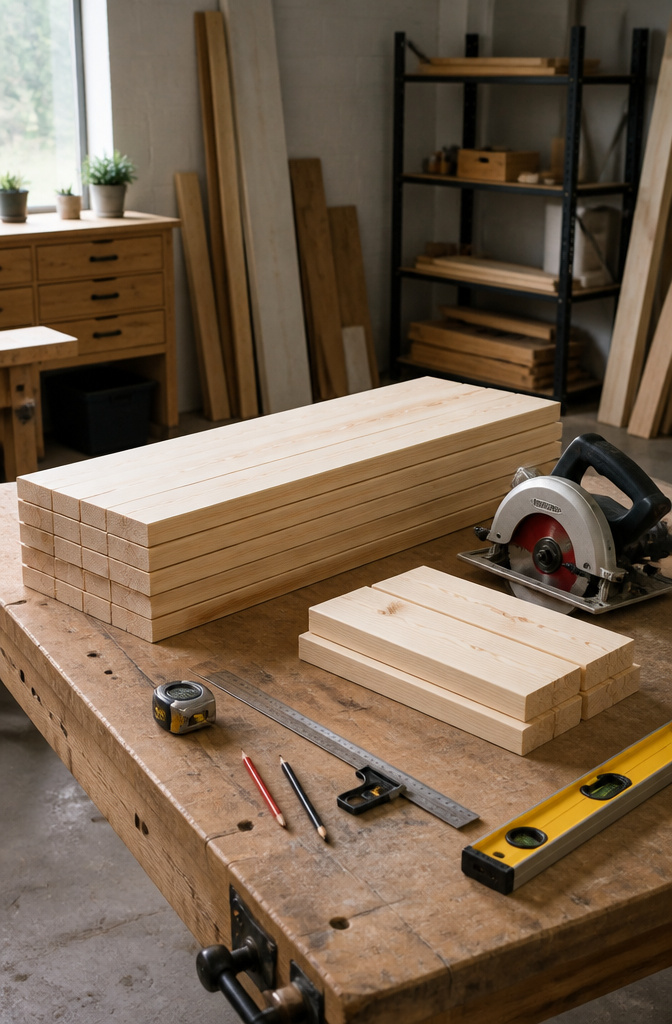
Pine boards cut clean and fast, which matters when your Saturday morning is all the time you have. For the tabletop, I mark four boards at 46 inches and rip them to a finished width of about 23 inches total. The legs need four pieces at 17 3/4 inches, exactly the height that clears most sofa cushions without feeling like a dining table. Oak, maple, or walnut will hold up better if you plan to stand on this thing to change a lightbulb, but pine gets the job done and the whole frame runs about $25 in basic lumber. Basswood works too if you want something even softer under the saw, though it dents if you look at it wrong. I always have the hardware store make the first crosscut on their panel saw if my circular blade is dull, because a wandering cut at the start turns into a gap at the end you cannot sand away.

💎【NEW UPGRADED MATERIAL】Our New Version Clear Table Cover Protector Tablecloth is made of improved quality Eco- friendly PVC vinyl, odorless and no plastic smell. Ideal for families with kids or pregnant women! It can effectively protect your Wood Glass Granite Marble Table from scratches, burns, oil stains,pen marks, and keep your table's original beauty and neatness. Used as Heavy Duty Plastic Tablecloth Table Protector Cover Mat Pad, Crystal Kitchen Table Mat, Dining Room Desktop Protector.
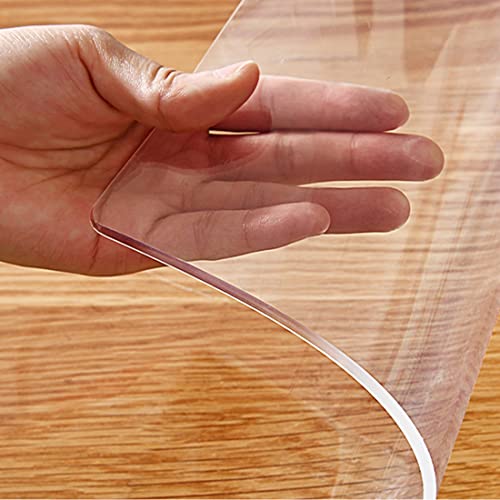
A.Application and Bpa-free Pvc table pad,furniture top protector,clear plastic vinyl tablecloth cover , use as table runner or placemats top cover mat. To better protect your table, desk, tablecloth and furniture tops against scratches, scuffs, stains, spillage etc. Great for dining table, wooden table, glass, marble, stainless steel top, office desk, writing desktops, coffee and end table, Tv bench, dresser and chest table, night stand, countertop, office chair mat, hard floor
Assembling the Tabletop
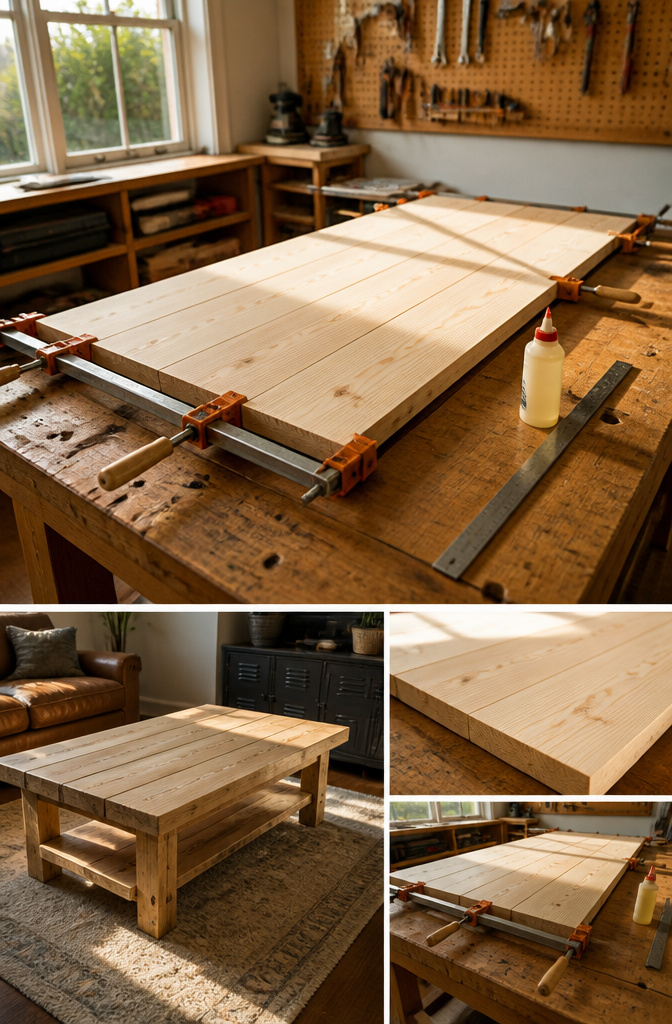
The tabletop pieces need to come together flat and stay that way, because every step after this one assumes the surface is true. I line the boards on a work surface with the best faces up, check for crown, and mark where the seams will land. Wood glue goes on both mating edges, then I clamp them and check with a straightedge before anything permanent goes in. 2 1/2 inch screws are what most builds call for here, driven through pocket holes or countersunk from underneath so the heads disappear. One source I read offsets those screws to one side even when the spacing looks even; later legs or aprons may need that same real estate, and two screws trying to share a grain line is how you split the plank. The sawdust-and-glue trick works for filling the seam if you want the top to read as one solid board, though wood filler is there if you prefer it. Either way, the surface has to be flat now. Sanding will not fix a tabletop that rocks on its own glue line; it will only make the problem thinner.

HOW TO FIT: Fits 19mm Outer Diameter Round Tubing With Inside Hole Diameters (Inner Diameter): 17mm/0.67inch, Height: 13mm / 0.51inch, You will get 36 Pcs of Plastic Plugs. Please be careful of the edges when using this product to avoid cuts.

☛【Applicable Size】- Fit Round leg diameter 0.6'' to 0.75" (15-19mm).

High Quality Material and Fine Workmanship: Our chair leg tips caps has smooth outlook and made of wear-resistant and odorless material. Thicken the rubber Leg tips’ Bottom and side. Best protect your floor and chair legs
Building Legs and Frame
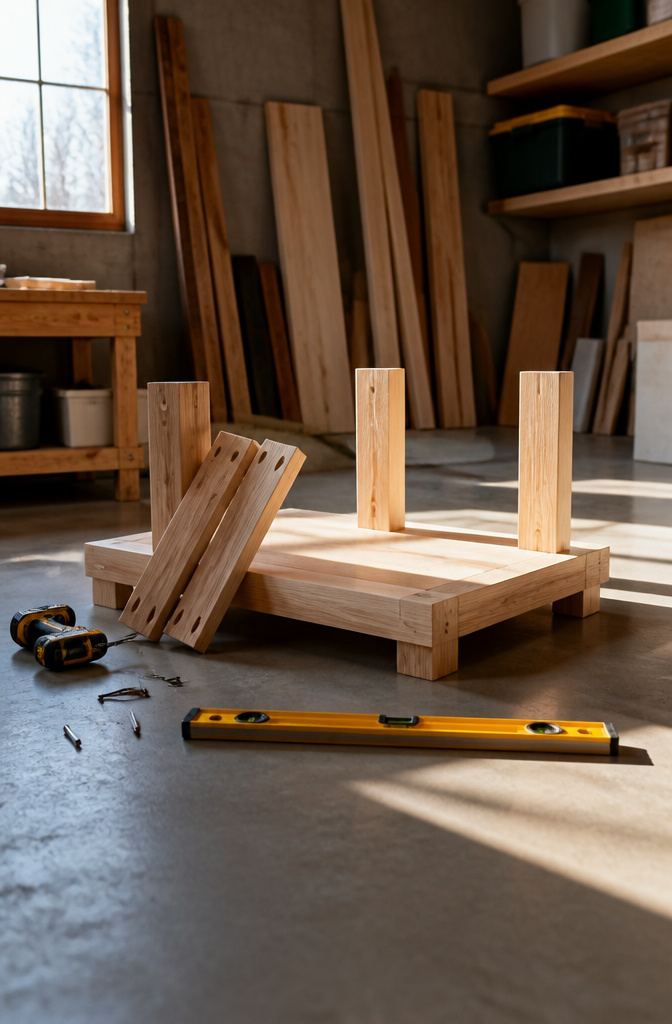
The legs are where a coffee table lives or dies. A tabletop can forgive a small gap, but a wobble telegraphs instability every time someone sets down a mug.
I set the legs in place before driving a single screw, then run a level across the top in both directions. A reading that looks square on one axis often surprises you on the other. The first time I skipped this check, I ended up with a table that rocked on flat floors and needed felt pads stacked three deep to compensate.
The sources differ on fastening. Screws or brackets both work, though brackets add hardware you will see. Whichever you choose, pre-drill with a countersink bit so the heads sit flush and the wood does not split. If you are building a box frame, offset your screws on the early joints. Two screws landing too close together at the leg connection will fight each other and weaken the hold.
Wood glue on the joints before you screw gives you a backup bond. The mechanical fastener does the clamping while the glue cures. Let it set before you move the piece, or the legs can shift a degree and the wobble returns.

【Includes 3 Adjustment Pads】Three adjustment foot pads are included for use as an additional stabilizer for the shaking table.Also protect the floor from damage.

✅ FITS 18-INCH COFFEE TABLES, END TABLES & NIGHTSTANDS — Designed for the standard 18" height that pairs with sofas (15-18" seat height) and beds. Compatible with rectangular tops 24"-48"L and round tops 18"-36" diameter.

【Unshakable 800lbs Heavy-Duty Support】800 lbs of heavy-duty weight capacity, specifically engineered for DIY solid wood coffee tables, resin river tables, and solid slab wood coffee tables! Whether you're using a heavy black walnut slab, a butcher block solid wood top, or a family coffee table laden with tea sets and snacks, it will hold everything securely without sagging or wobbling. Even when the whole family gathers around for tea and conversation, it remains rock-solid and unwavering.
Sanding Every Surface
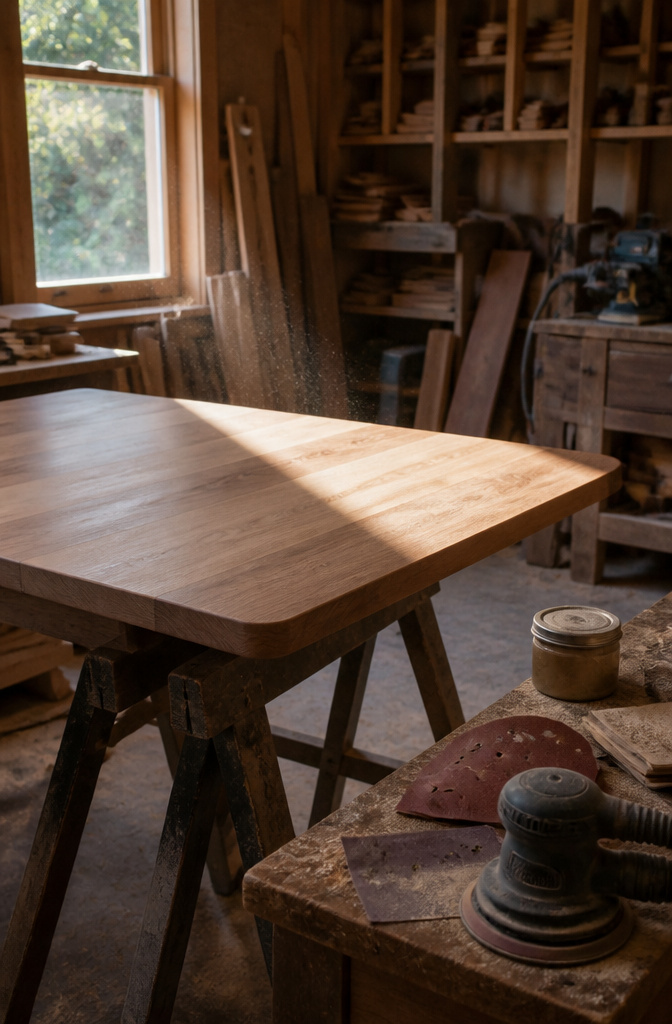
Sanding starts rough and finishes fine, or the stain will tell on you later. I run an orbital sander over every surface with 80 grit first, then 120, then 220. That progression matters. The coarse paper removes saw marks and mill fuzz from the build, but it leaves scratches deep enough to catch light. Step up to 120 to erase those, and 220 to level the field completely. Skip from 80 straight to 220 and the deep grooves stay put, hiding under stain like cracks under ice. The finish only reveals what is already there.
I learned this after watching a whitewash pool into gouges I thought I had erased. The divots showed up anyway, catching the diluted paint like tiny cups. Now I spend the extra twenty minutes on the middle grit. The table top, the apron, even the inside corners of the legs where a sander will not reach, all need the same attention. Hand sanding with a folded quarter-sheet works for those tight spots. The dust mask is non-negotiable; plywood glue and softwood resin make a haze that settles in your throat for hours.

FAST CLAMP TIME: Bonds strong and fast with a clamp time of just 20–30 minutes; fully cured in 24 hours to keep your projects moving on schedule

DUAL-FUNCTION VERSATILITY - Instantly convert to 9.7" spreaders with a simple screw reversal, providing 2-in-1 functionality perfect for woodworking, crafts, and DIY projects requiring both clamping and spreading actions

Durable Cast Iron 3/4" Pipe Clamp: Built from high-strength cast iron, this 3/4" pipe clamp fixture provides superior durability and long-lasting performance. The rugged cast iron woodworking clamp design resists wear, making it ideal for professional woodworkers and DIY projects.
Staining and Finishing
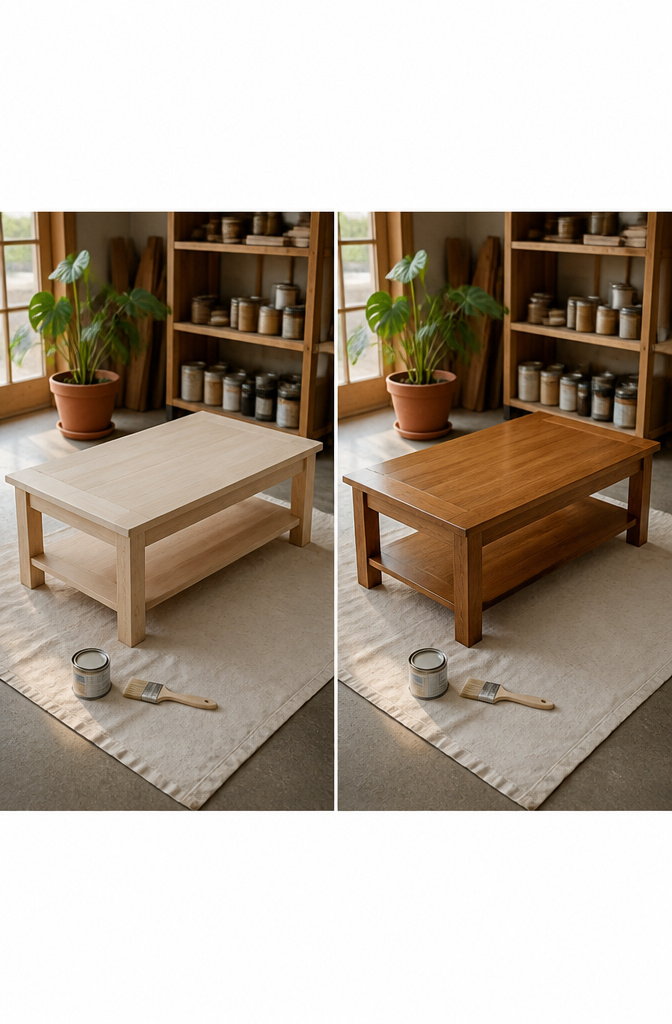
Minwax Water Based Pre-Stain Wood Conditioner goes on first if the wood is soft or porous, and skipping it is the first way to get blotchy results. I brush on the stain itself, Minwax Water Based Wood Stain in Desert Sand or Pure White, working with the grain and wiping back the excess before it tacks up. One coat rarely gives the depth I want, but two thin coats beat one heavy coat every time, and the second layer goes on only after the first is fully dry, about two hours in decent humidity.
The real mistake is treating drying time as a suggestion. I have closed up a project at midnight with the topcoat still tacky and woken to fingerprints and dust nubs permanently sealed in. Polycrylic needs a full day between the final stain coat and the first topcoat, then another day before light use. Rushing this stage wastes every hour spent building the thing. Two or three thin coats of Minwax Water Based Polycrylic, sanded lightly with 220 grit between them, give a surface that survives coffee cups and dog paws without the plastic look of thick polyurethane.

SRL Rustic Log Coffee Table: Enjoy your coffee with our special wood coffee table. This unique coffee table is the perfect addition to any cabin, cottage, or rustic home. The coffee table features a spacious top surface perfect for keeping your coffee mug, magazines, or laptop nearby for easy access.

Included pieces: One coffee table. Furniture and decorative accessories shown with the table are not included.

【Exclusively Yours: One-of-a-Kind Artistry】 Hand-carved from a single organic wood slab, every table features its own distinct "Live Edge" and natural grain pattern. Unlike mass-produced fiberboard, this handcrafted masterpiece ensures no two homes have the same piece, providing you with a unique functional art treasure that serves as the ultimate conversation starter for your guests.
Final Checks
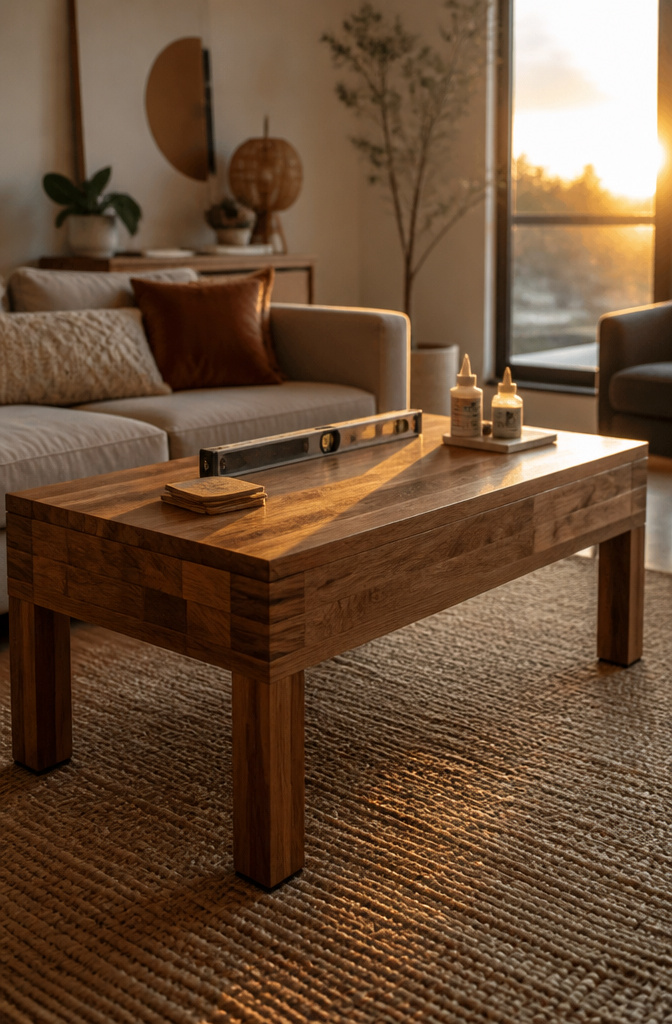
The legs went on last, and that order matters more than it looks. With the tabletop already built, you can set the whole frame on a flat floor and see the wobble before you drive the first screw. A level helps, but the real test is a slow rock corner to corner with your palm on the surface. If it tips even a little, shim the short leg or back out the screws and trim.
Pre-drilling buys you that chance to adjust. Wood splits when screws bite dry, and a split leg never sits flush again. I drill a hair wider than the screw shank, not the threads, so the screw still grips without fighting the grain.
Tighten in stages, not one leg to death. The frame shifts as the last screw seats, and by then the first is locked crooked if you rushed. I go around twice: snug, then final. A drop of wood glue in the hole before the last quarter-turn keeps vibration from backing anything out later, though it also means you are not disassembling this for a move. For a renter’s table, skip the glue and check the bolts in six months. They loosen. They always do.

INDOOR IRREGULAR COFFEE TABLE:Sculptural cloud curved outline makes this coffee table center table a gorgeous living room focal decor. Fully rounded edges prevent bumps, letting you decorate your house safely with artistic home furnishings
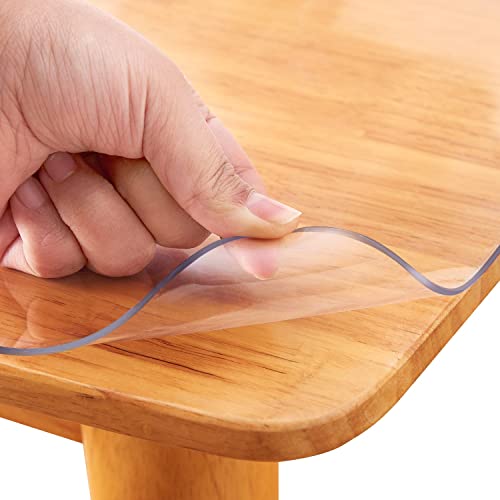
A.Eco-friendly Materials: Use the New Upgraded Version Eco-friendly thicken PVC material,BPA-free.Protect your table, desk, tablecloth and furniture tops against scratches, scuffs, stains, spillage etc. Great for wooden Furniture desktop,dining table, garden table protector mat,wooden table, glass, marble, stainless steel top, office desk, writing desktops, coffee & end table, TV bench, dresser and chest table, night stand, countertop, hard floor,pet feeding mat,chair mat for hardwood , etc.

Mid-Century Style with Rounded Safety: This oval coffee table for living room features a clean mid-century modern design that complements various home decoration styles, from contemporary to farmhouse. Thoughtfully designed with smooth rounded corners, it offers added safety for households with children and pets
Tools You’ll Actually Need
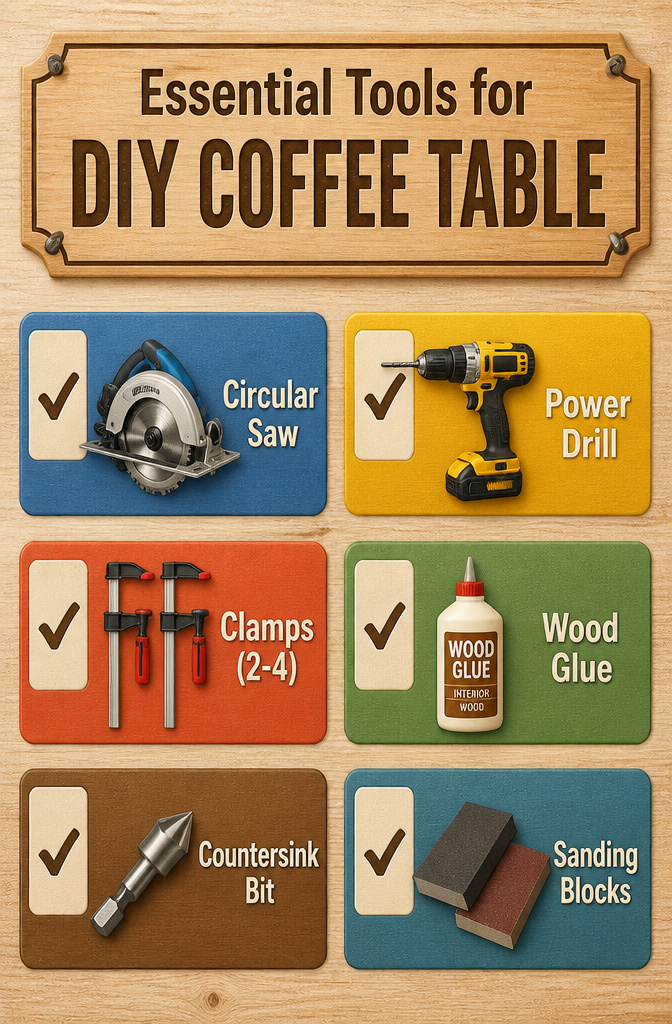
A circular saw handles every cut in this project, though a hand saw works if you’re patient. The drill matters more than you’d think; driving screws without one strips holes and splits cheap lumber. I borrowed clamps from a neighbor for my first table and learned two is the bare minimum, four is better, and anything less leaves you wrestling the frame alone.
Wood glue is what keeps the table from wobbling six months later, so buy the bottle marked for interior wood even if you already have the school-grade stuff in a drawer. A countersink bit lets screws sit flush, which matters once stain goes on and every raised head becomes a dark dot. Sanding blocks are cheap enough to skip the rental decision entirely.

High Quality Material and Fine Workmanship: Our chair leg tips caps has smooth outlook and made of wear-resistant and odorless material. Thicken the rubber Leg tips’ Bottom and side. Best protect your floor and chair legs

【4Pcs Round Telescopic Table Legs】Table legs metal length from 17inch to 30inch, telescopic adjustable design. 4pcs 30inch furniture table legs meet your DIY needs for tables of different heights, DIY Premade Round Desk Legs make furniture design more flexible, 4 inch round panel, enough to support the desktop
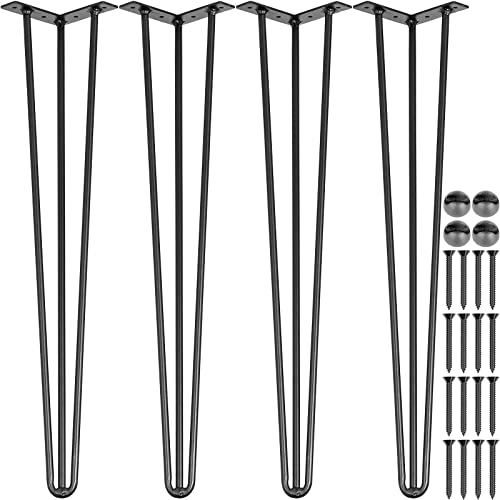
【PREMIUM QUALITY】- Amount: 4 PCs; Color: Black; Legs Height: 18"; Tube Thickness: 0.0473". The 18" hairpin table leg is constructed with carbon steel and features a steady three-rod design for stability. It is anti-rust & smooth on the surface with powder coating craft.
What the Wood Costs
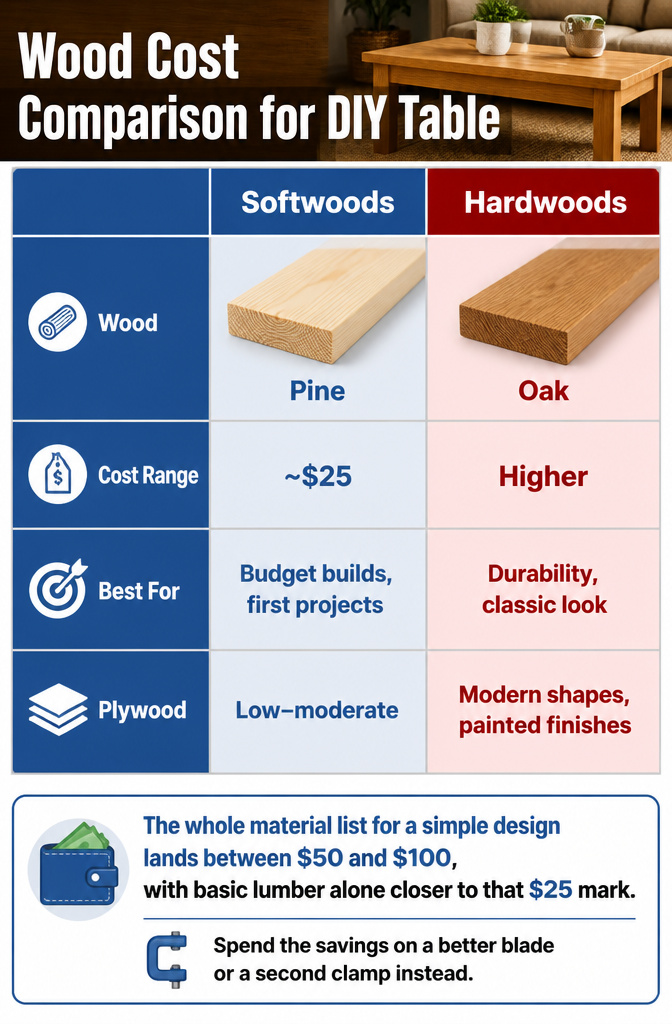
Softwoods like pine run cheap and cut easy, which is why most weekend builds start there. The downside shows up fast: dents from a dropped mug, scratches that a stain only highlights. Hardwoods cost more but earn it back in years of use. Oak, maple, and walnut all take a beating and finish smooth, though your saw blade will feel the difference.
Reclaimed wood carries its own math. The boards arrive with character built in, nail holes and all, but plan on extra hours pulling fasteners and flattening warps. For a rustic coffee table that sells the story, that labor is the point. For a clean rectangle by Saturday night, new lumber wins.
Plywood splits the difference. A sheet of decent birch runs less than solid hardwood, takes paint without complaint, and builds flat by default. It will not survive a move across town the way oak would, but for a first apartment piece, it does not need to.
| Wood | Type | Cost Range | Best For |
|---|---|---|---|
| Pine | Softwood | ~$25 | Budget builds, first projects |
| Oak | Hardwood | Higher | Durability, classic look |
| Maple | Hardwood | Higher | Hard-wearing, smooth finish |
| Walnut | Hardwood | Higher | Premium appearance |
| Plywood | Sheet good | Low–moderate | Modern shapes, painted finishes |
| Reclaimed | Varies | Variable | Rustic style, sustainability |
The whole material list for a simple design lands between $50 and $100, with basic lumber alone closer to that $25 mark. Spend the savings on a better blade or a second clamp instead.

【Includes 3 Adjustment Pads】Three adjustment foot pads are included for use as an additional stabilizer for the shaking table.Also protect the floor from damage.

GEOMETRIC ART TABLE LEGS: Matte dark black silky finish creates an industrial, modern and stylish look. The perfect and sturdy structure combines beauty and practicality. The geometric base design is stronger and more durable than standard 2-leg table leg

⚖️ NO MORE SPILLED COFFEE: Uneven living room rugs or patio tiles are no longer an issue. Our M12 levelers offer a 1.57" adjustment range to keep your table perfectly flat. The thick polymer base also protects your floors from scratches.
How Long This Takes
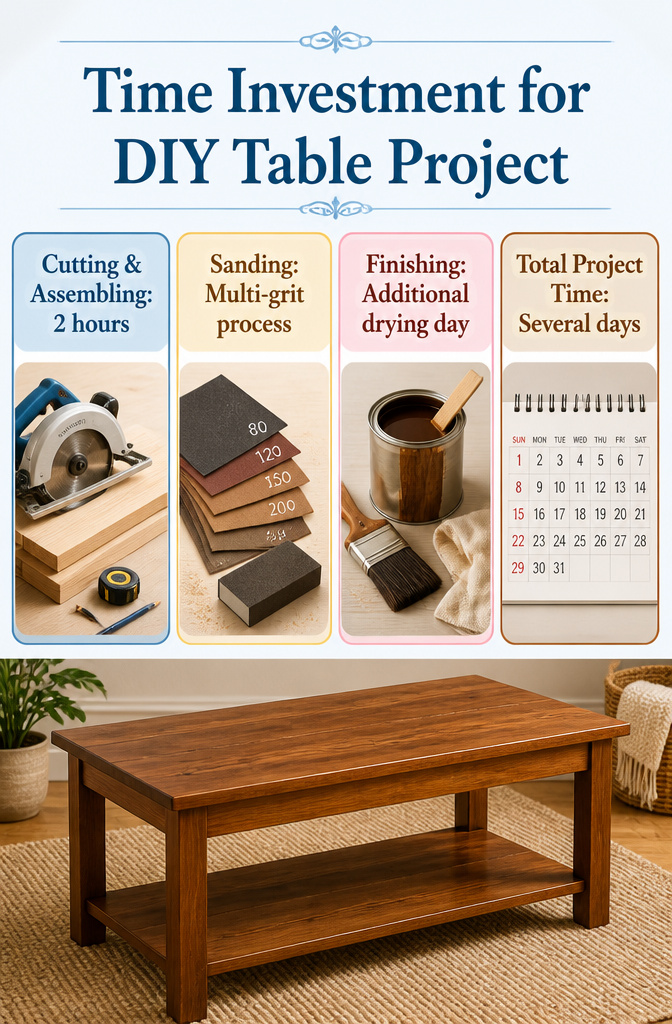
The build itself moves fast: about two hours to cut boards and assemble a table roughly 46 inches long by 23 inches wide. That part feels like progress you can see. What stretches the project across days, or into a full week, is the finish work. Sanding runs through multiple grits, from coarse 80 up to 200, and any gaps you fill with wood filler need their own drying and sanding cycle before stain can even touch the surface. Stain and topcoat add another day once you count drying time between layers. The real bottleneck is rarely the assembly; it is the patience required between sanding passes and finish coats. If you are working in a garage, dust settling on wet stain can set you back an hour of touch-up sanding you had not planned.

STRONG 75 LBS CLAMPING FORCE : Each mini bar clamp provides up to 75 lbs of squeeze capacity. Built with a metal ratchet mechanism, these clamps deliver stable holding power for woodworking, home repair, and light-duty assembly tasks.

The 4-Way Panel Clamp:With parallelogram couplers, our 2 pack panel clamps are very convenient to use. It clamps in two directions at once, making it easier to achieve flat panels and flush joints.

Package includes 2 carpenter clamps.
Five Styles That Work in Real Rooms
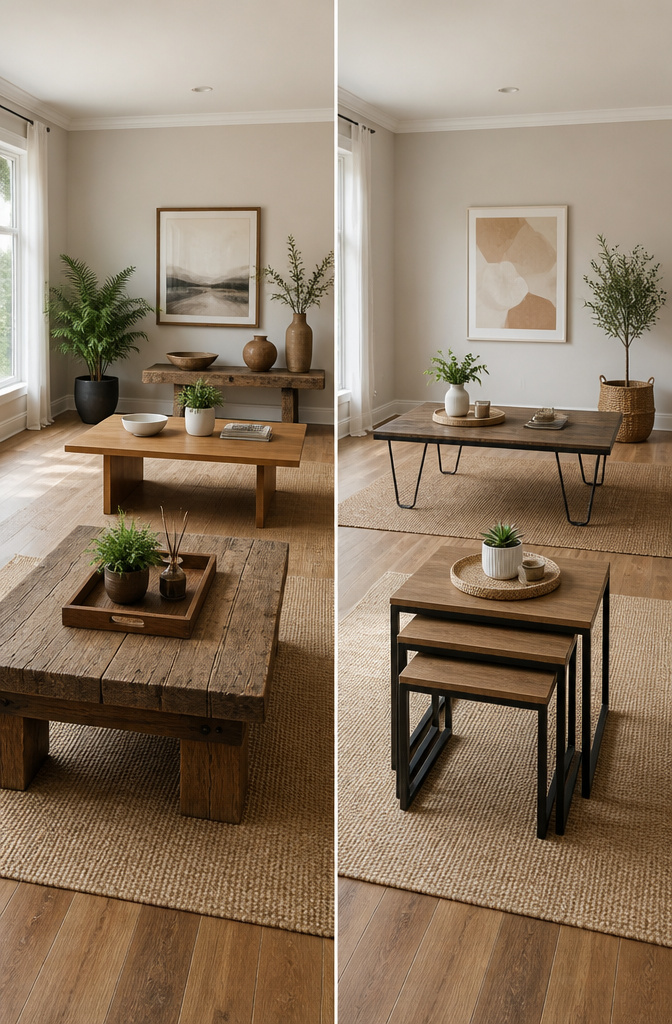
Most weekend builds fall into one of five buckets, and the right choice depends on what your room already has too much of.
- Rustic with reclaimed wood works when the rest of your furniture reads new and flat. Pallet lumber or barn boards give the surface some scarred character, and the dark stain most people reach for here hides the mismatched grain. Casters are a common add-on, though they raise the height; check against your sofa cushion before committing.
- Modern wood keeps the lines clean and the hardware minimal. A few basic tools get you there, and the plans tend to be straightforward enough that you can finish in a single Saturday. Oak, maple, or walnut hold up to daily use; pine saves money upfront but dents faster under serving trays and laptop feet.
- Industrial pairs metal with wood, usually hairpin legs or a steel frame base against a thick slab top. The contrast reads intentional, not mixed-and-matched, and the metalwork means less fine joinery on your end.
- Nested tables give you two or three surfaces that tuck together or split apart when company spreads out. The flexibility matters more in small rentals where the coffee table becomes dining table becomes desk.
- Storage means drawers, an open shelf, or crates underneath. Shelves are simpler to build; drawers take more fitting but keep the clutter invisible. Either way, measure your storage baskets before you cut any opening; standard crate sizes vary by an inch or two, and "almost fits" wastes the whole point.
Hardwoods like oak, maple, and walnut are durable and offer a premium finish, making them ideal for high-use tables. Softwoods like pine are more affordable and easier to work with, but they may not be as durable.
Frequently Asked Questions
What type of wood is best for a DIY coffee table?
Hardwoods like oak, maple, and walnut hold up best for daily use and take stain smoothly, while pine works fine for a first build at about $25 in basic lumber. Pine dents easily from dropped mugs and laptop feet, so choose based on whether you want the cheapest start or the longest life. Plywood splits the difference for painted modern shapes, and reclaimed wood adds character if you have time to pull nails and flatten warps.
How long does it take to build a coffee table?
Cutting and assembly takes roughly two hours for a 46 by 23 inch table, but the full project stretches across days once you count finish work. Sanding through multiple grits, filling gaps, and waiting for stain and Polycrylic to dry between coats adds the real time. Rush the drying and you seal in fingerprints and dust nubs that ruin the surface.
What tools do I need to build a coffee table?
A circular saw handles all cuts, a drill drives screws without splitting cheap lumber, and clamps hold joints square while glue sets. Add a measuring tape, pencil, countersink bit for flush screw heads, and an orbital sander or sanding blocks to work through 80, 120, and 220 grit. Wood glue marked for interior use matters more than you think; it is what keeps the table from wobbling six months later.