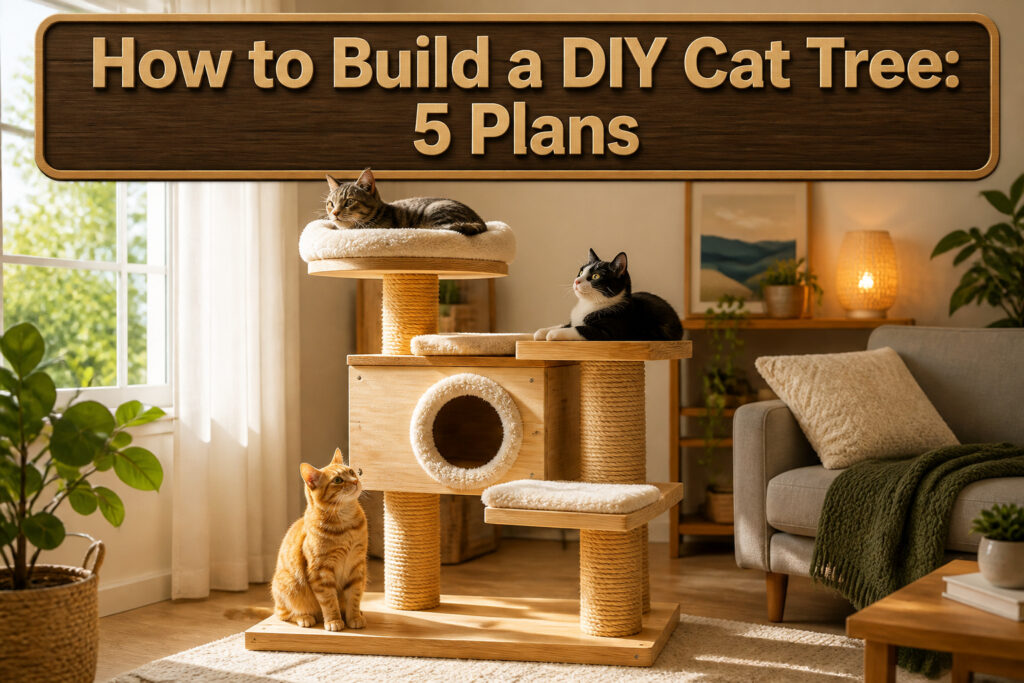
A finished DIY cat tree that survives a full-speed sprint costs between $40 and $75 in materials and an afternoon of work.
Most builders get the base wrong: a 24-inch pine round looks wide until an eight-pound cat launches from the top tier and the whole thing rocks toward the wall.
The fix is weight, not diameter alone. A 2′ x 4′ plywood rectangle loaded to 25 pounds, or a 30-inch round with stones set inside, lets the tree stand free without ceiling anchors most renters cannot install.
1. Gather Materials and Tools
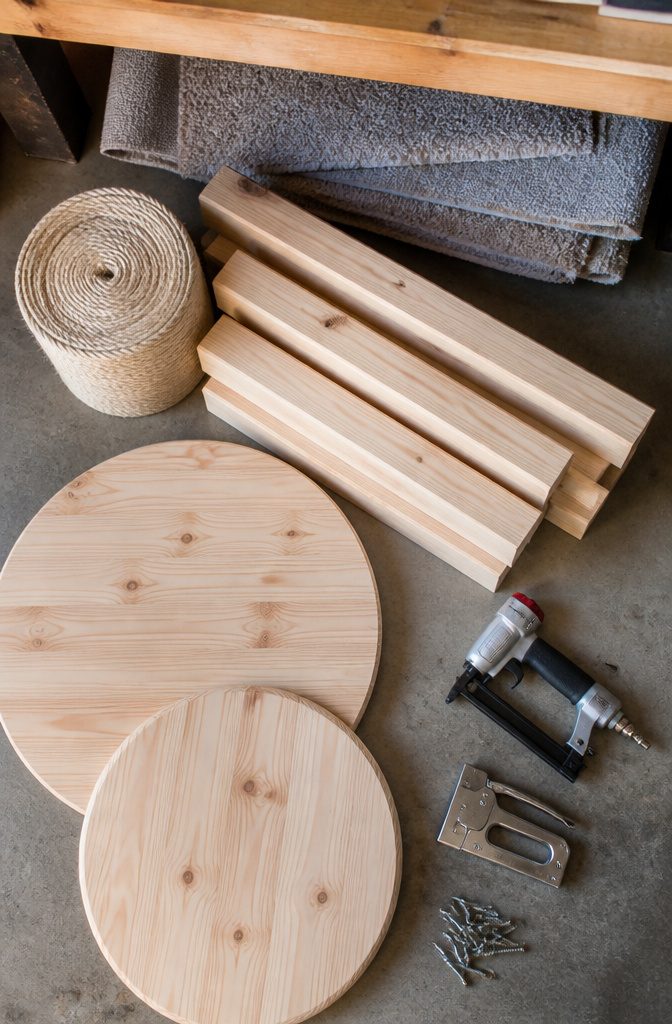
Most builds start with a 1" x 24" or 1" x 30" pine round for the base, something wide enough that a cat hitting a platform at full sprint won’t tip the whole thing.
The vertical posts are usually 4x4s, and the platforms can be plywood or more pine rounds spaced about 20" apart so cats can leap between them without a running start.
For the scratching surfaces, 3/8"–1/2" sisal or hemp rope is what holds up to daily clawing.
Fifty feet of ¼" or 3/8" sisal rope total is a practical starting figure for wrapping one post and a few accent spots. You’ll want 2" screws for attaching platforms to posts, driven from above so the heads disappear into the surface.
Carpet remnants keep the budget low and the landing areas soft.
A pneumatic stapler makes that part fast, though a manual staple gun works if you already own one. Either way, aim the staples where claws won’t pull them loose first.
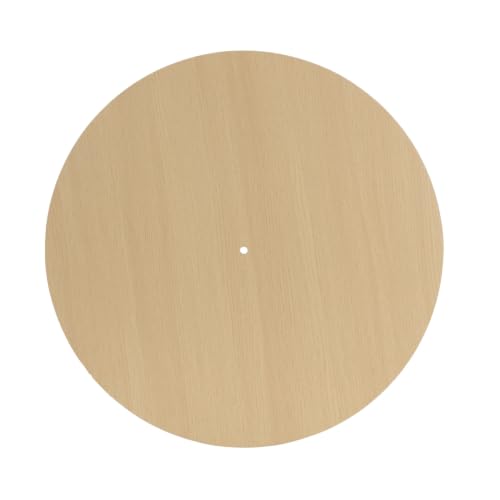
UNIVERSAL COMPATIBILITY: Round wooden base plate designed specifically for cat tree towers and cat furniture replacement needs

LOW-ENTRY ACCESSIBLE DESIGN: The cat tree boasts a low-profile frame for easy climbing, ideal placement next to sofas, beds or bed footboards. It aids senior cats, kittens and munchkin cats to climb up and down beds & household furniture with ease

FUNCTION: This is a soft plush for covering cat stratching post base, ensuring your cat's comfort and safety. It's perfect for all breed cats.
2. Prepare the Base
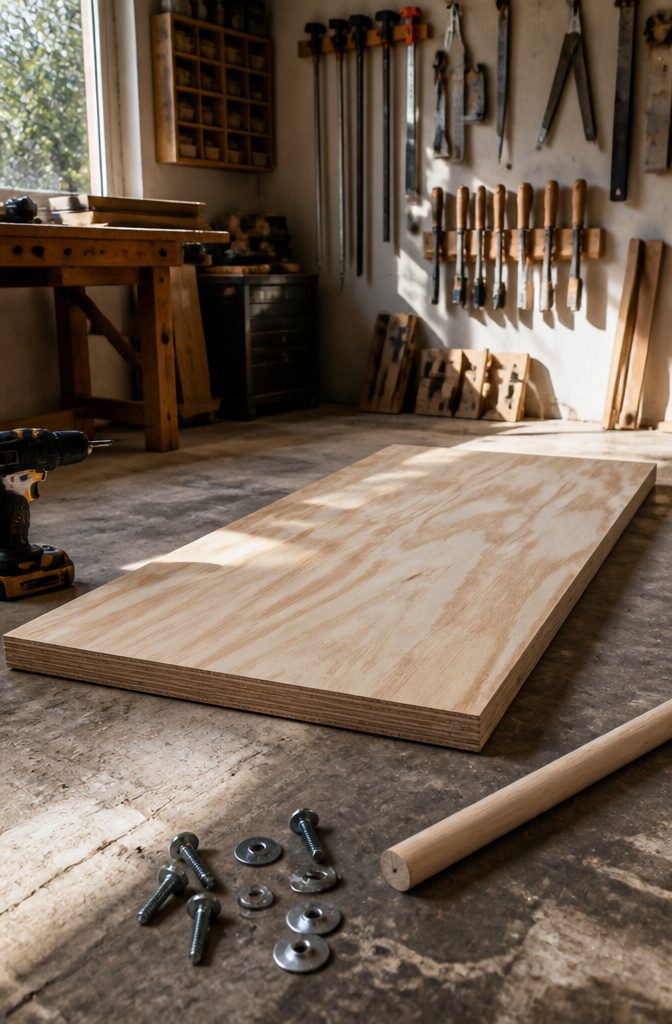
A base that is too small is the reason most homemade cat trees end up against a wall or in the garage.
Plywood cut to 2′ x 4′ gives you the weight and footprint to survive a cat launching from the top tier without rocking.
If you prefer a round base, a 1" x 24" or 1" x 30" pine round from the home center works, though at 30 inches you are getting closer to what I would call genuinely stable.
The 2′ x 4′ rectangle has the advantage of sitting flush against a wall or sofa back if you want the tree in a corner, which hides the base and frees up floor space.
A round base looks cleaner in an open room but needs that extra diameter, 30 inches minimum, to offset the leverage when a cat hits a high perch at speed.
Thickness matters too. Three-quarter-inch plywood flexes under torque; one-inch stock or doubled 3/4" layers glued and screwed together do not.
Weight is what saves you from anchor bolts in the ceiling, which most renters cannot install anyway. A heavy base lets the tree stand on its own even with an eight-pound cat sprinting up the side.
I would rather haul a 25-pound base up the stairs once than listen to the thing thump against the floor every evening.
NATURAL LIFELIKE APPEAL: Our artificial branches look ultra-realistic and lifelike. With 371 individually crafted branch tips, this full bodied tree is as charming as the real thing.

Festive Dual-Purpose Design: Bring holiday cheer with this 35.5" diameter Christmas tree cat tunnel featuring classic plaid and snowflake prints. The 18" diameter detachable insert is fixed with plastic horn buckles, works as both a desktop mini tree skirt and cozy lounge for cats, doubling as a functional under tree cat tunnel that keeps fallen needles off the floor while giving pets a festive hideaway

【LARGE CAT TREE FOR MULITPLE CATS】A great window cat tree to provide a comfortable viewing spot for your feline friend up to 30lbs or 2 to 3 cats.
3. Attach Vertical Supports
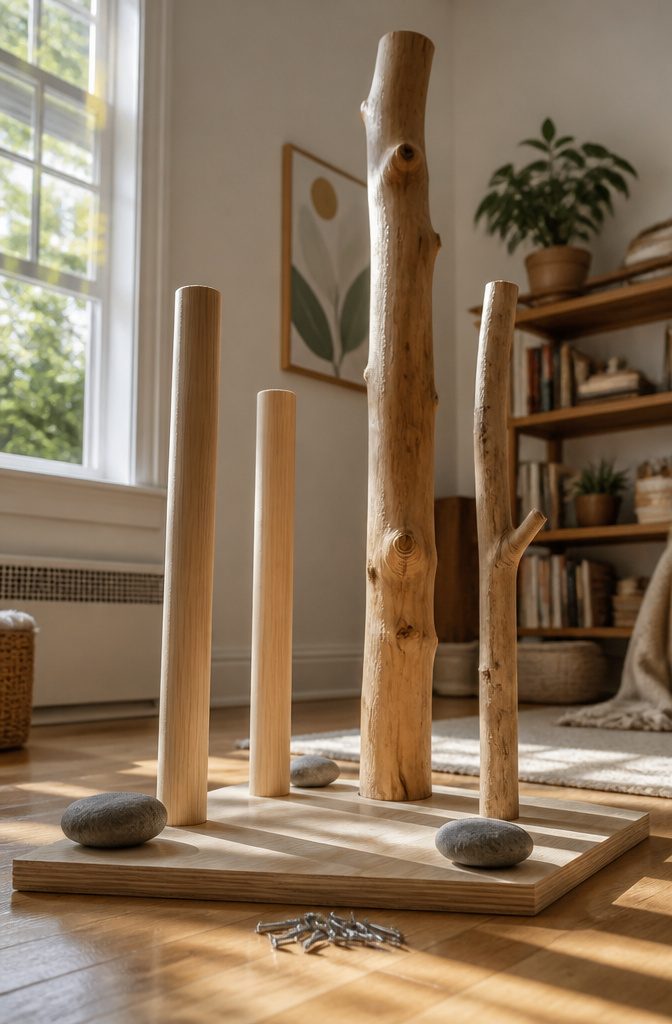
The base needs real weight if you want a cat tree that survives a leap from the top tier.
A big branch around 5.5 feet tall and a smaller one about 3 feet tall will pull hard at the anchor points, so screw selection matters.
I use 2" wood screws minimum, driven through the base and into the end grain of the post or branch.
For a heavier log, bolts with washers spread that load wider and resist the wobble that loosens screws over months of climbing.
Natural branches bring their own stability if you choose thick, green-cut logs. The moisture content keeps them heavy at first, and that mass works in your favor while the tree cures in place.
A base loaded to 30–40 pounds with stepping stones or rocks, as one builder did, keeps even a big jumper from tipping the whole thing.
Balance the tall branch against the short one, heavier side to lighter side, and test the wobble before you add platforms.

Carry from Nature - Pelzin all-natural Sisal rope is the perfect solution, made from sustainably-sourced fibers of the Agave Sisalana plant, this rope is 100% biodegradable and odorless, crafted without the use of any chemicals, oils, or treatments. Its robust construction ensures longevity, providing consistent performance and retaining its integrity over time, reliably lasting over six months under normal usage conditions.

Durable Sisal Rope: Made from wear-resistant sisal material for long-lasting use.

Sisal is a natural fiber rope
4. Create Platforms
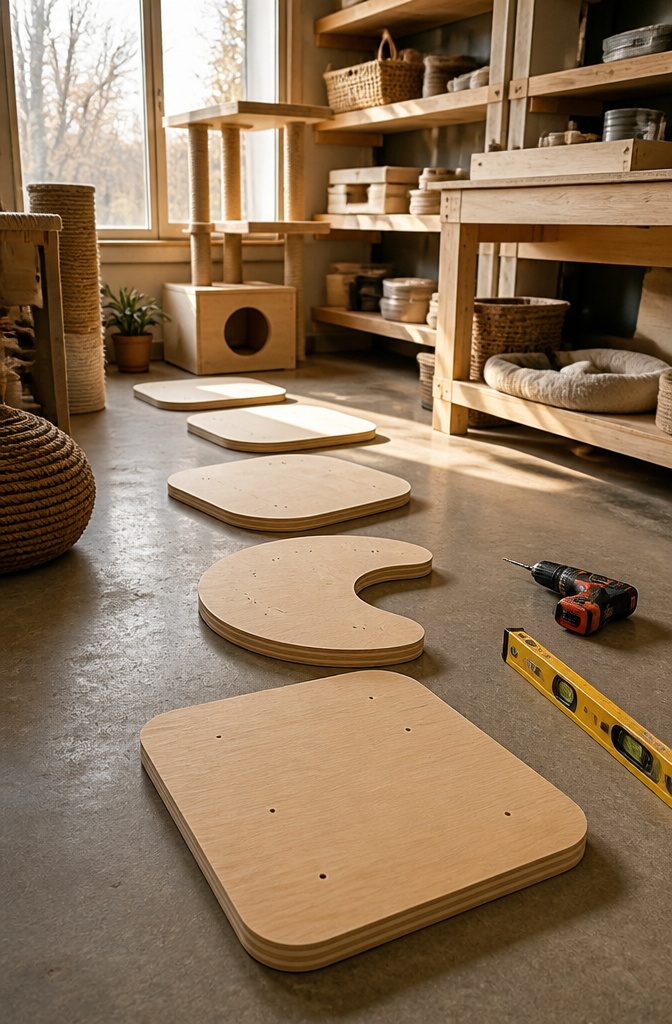
Plywood platforms cut to size are what the cat actually stands on, and their spacing matters more than their shape.
I space beds about 20 inches apart, which leaves enough headroom for an adult cat to stand and turn without the tree turning into a skyscraper.
Anything tighter and the levels start to feel like shelves; anything looser and a senior cat may refuse the jump.
Before any screws go in, I lay the whole layout on the floor.
The goal is a path a cat can move through without backing down a level, which means offsetting platforms so the next one sits within easy reach from the current perch.
A level on the front left should probably step to the back right, not straight up the same pole.
I mark each platform’s height on the vertical supports, check that the cat can trace a continuous route from base to top, and only then start drilling.
Three-inch screws driven up through the platform into the support hide the hardware and hold better than brackets that sit underneath. A level matters here, too; an uneven platform looks handmade in the wrong way and makes the cat uneasy.

DIMENSIONS: Extra large platform measuring 17.3 x 23.6 inches provides ample space for cats to lounge, rest, and observe their surroundings

Extra large platform: The large 22"x15.7" platform can accommodate both a fat cat and a kitten to rest, with enhanced soft cushion, providing your cat with ample space to stretch out and relax comfortably

【REPLACEMENT CAT BED FOR CAT TREE】13.5" in diameter, roomy enough for cat up to 12lbs.
5. Wrap Surfaces with Carpet or Sisal
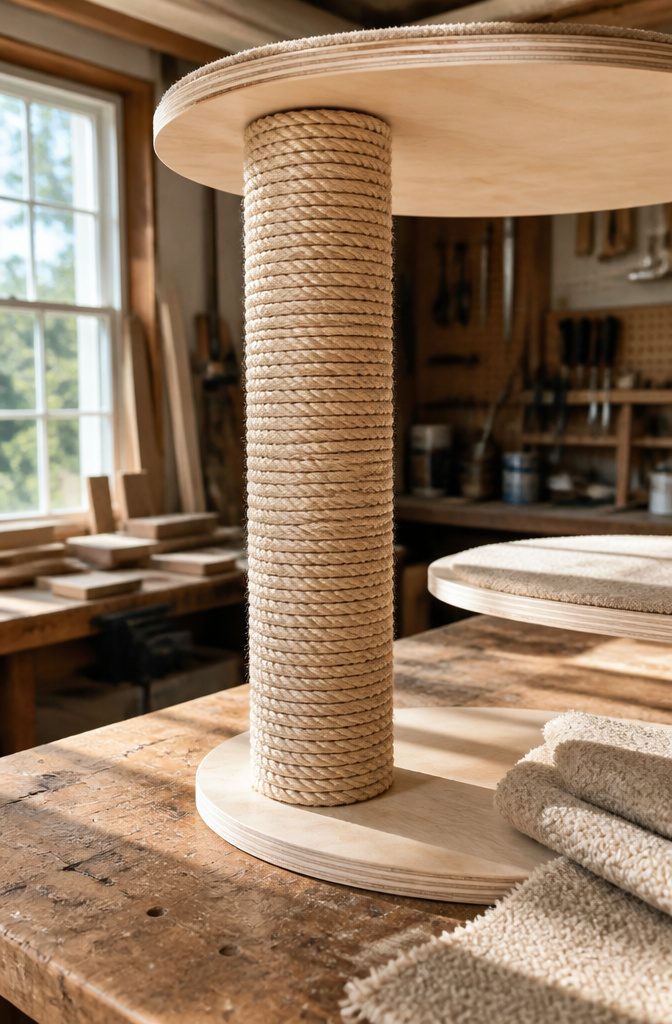
Sisal rope around the posts is what turns a wooden frame into something a cat actually wants to use. 3/8"–1/2" sisal or hemp rope is the right diameter; anything thinner shreds too fast, anything thicker won’t sit flat without gaps.
You’ll need about 50 ft. of ¼" or 3/8" rope total for a standard two-post build, and ordering in bulk from a rope supplier beats craft-store prices by a lot.
A pneumatic stapler saves your hands on this step, though a manual staple gun works if you already own one.
Set the staples shallow so they grip without splitting the rope fibers, or dab construction adhesive underneath and tack just the first and last turns, pulling the staples once the glue cures.
For the platforms, carpet at roughly $5.22 per square yard is enough to cover the sleeping areas without turning the whole tree into a shag monster.
I would keep carpet off the posts entirely; cats scratch rope, they knead carpet, and mixing the two on the same surface just means both wear out faster.
Staple the carpet on the underside of each platform where claws won’t snag the edges, and call the wrapping done.

CAT GRAB STAKE: Keep your cat's game time alive through our cat grabs stake replacement! Replace worn parts or use our 4-piece kit to extend the service life of your current cat wiper bar

【Package Includes】Included 2pcs 15.7" long X 2.37" dia cat scratching post replacement poles, 2pcs 7.87" long X 2.37" dia cat tree post, 6pcs screw, 4pcs threaded bolt, 2pcs wrench

Thickened Wood Base: The ZOMISIA cat scratching post features a 1.2''/3cm thick wooden bottom measuring 15.7'' x 15.7'', reinforced with an additional wooden layer. Its construction provides excellent stability for indoor large cats, ensuring safe and worry-free play and climbing without tipping over
6. Finish and Decorate
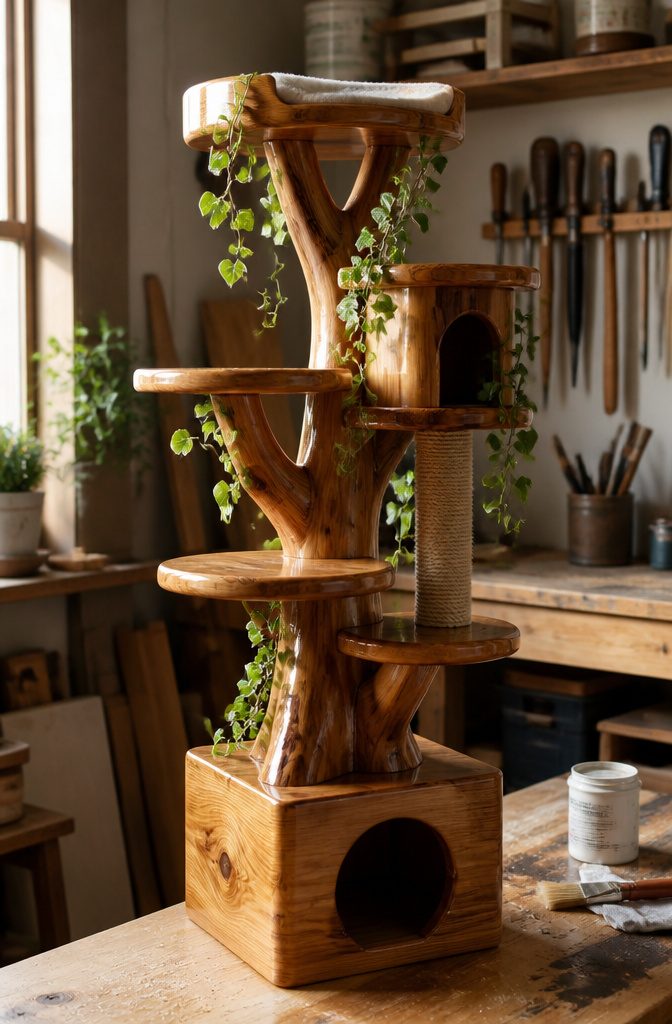
The last step is where a cat tree either looks like plywood in a corner or becomes part of the room. I start with the finish because everything after it sits on top.
For a natural look, two coats of water-based polyurethane in a satin or matte sheen keep the grain visible without the plastic gloss that makes cheap furniture look cheap.
Rust-Oleum Ultimate Polyurethane in Satin is what I reach for; it holds up to claws better than wax alone. If you want to skip synthetic finishes entirely, beeswax and orange oil paste is the non-toxic route.
It needs reapplication every few months, but it smells better than mineral spirits and you will not worry when a cat licks a paw against it.
Sisal turns a 2-inch dowel into a scratcher cats actually use.
Wrap it tight, glue the ends, and place it where the cat already stretches. A 48-inch dowel cut in two gives you two posts; mount them vertical, not horizontal, because cats pull downward.
Faux vines from a craft store like Jo-Ann soften the angles and photograph well. Skip them if your cat eats fake plants; mine ignores them, but a cat that chews will swallow plastic and vomit.
Real plants are worse. The vines are decoration, not enrichment, so treat them as optional.
Toys bolted to the tree last longer than dangling ones a cat carries off. A spring-mounted ball on the middle platform gets more use than anything on the top, where few cats pause long enough to bat at it.

Versatile Replacement: 2pcs in a package. These accessories allow you to customize and expand your existing cat tree tower with additional perches, steps, and platforms.

FUNCTION: This is a soft plush for covering cat stratching post base, ensuring your cat's comfort and safety. It's perfect for all breed cats.

Comfortable Lounging Spot - The semi enclosed cave under the cat tree has a wide view and convenient entry and exit. The lower door cave is a hideaway for sleepyheads to take a nap.
7. Tree Branch Style
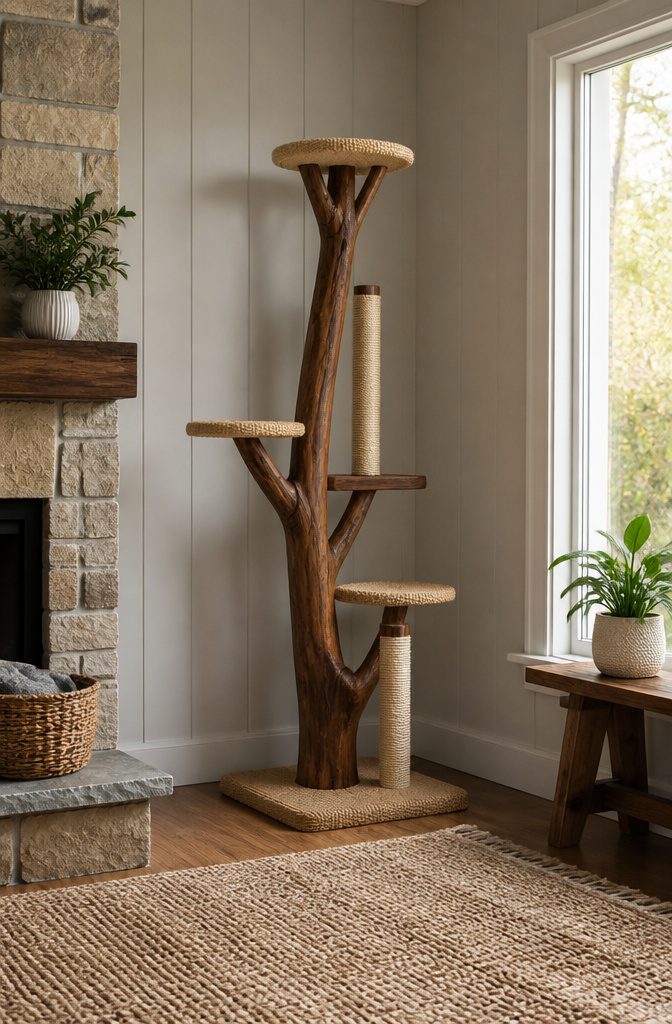
A branch build starts with the hunt, not the hardware store. Hickory and maple hold up to claws and weight better than softer yard finds, and the grain still shows after staining.
My big branch ran 5.5 ft. tall and the smaller one about 3 ft., which gave me a main trunk and an offshoot for a mid-level perch without looking like a manufactured pole with carpet glued on.
Sourcing takes patience.
Storm-fallen wood works if it is solid; skip anything punky or insect-hollowed. I scraped the bark with a paint scraper, then brushed on Minwax Stain in Natural and sealed with Rust-Oleum Ultimate Polyurethane in Satin.
The finish darkened slightly but kept the branch looking like something dragged in from the yard, which was the point.
The real difference from a standard 2×4 build is the irregularity. Every branch has its own angles, so platforms mount where the wood allows, not where a plan dictates.
A 2.5" wood screw bites straight through bark into solid hardwood; soft pine from the lumber aisle would strip out. I added sisal-wrapped dowels cut from a 2" by 48" piece for dedicated scratchers, since the branch itself was too pretty to shred.
One caution: faux vines look right but only if your cat ignores them. Mine leave fake plants alone; a cat who eats them will need the real deal kept out of reach, or nothing at all.

Premium Natural Sisal - FUKUMARU cat scratch post is made of undyed 100% natural sisal that mimics the texture of tree bark, a favorite scratching surface for cats, allowing your cat to indulge in a healthy scratching experience while protecting your furniture!

Spacious Top Retreat:The generously sized 19"X13" top perch features raised edges on three sides, creating a secure and cozy haven for your feline friend. The open front design allows easy access, ensuring your cat can effortlessly climb in and out for a comfortable rest.

Extra large platform: The large 22"x15.7" platform can accommodate both a fat cat and a kitten to rest, with enhanced soft cushion, providing your cat with ample space to stretch out and relax comfortably
8. Traditional Tower Style
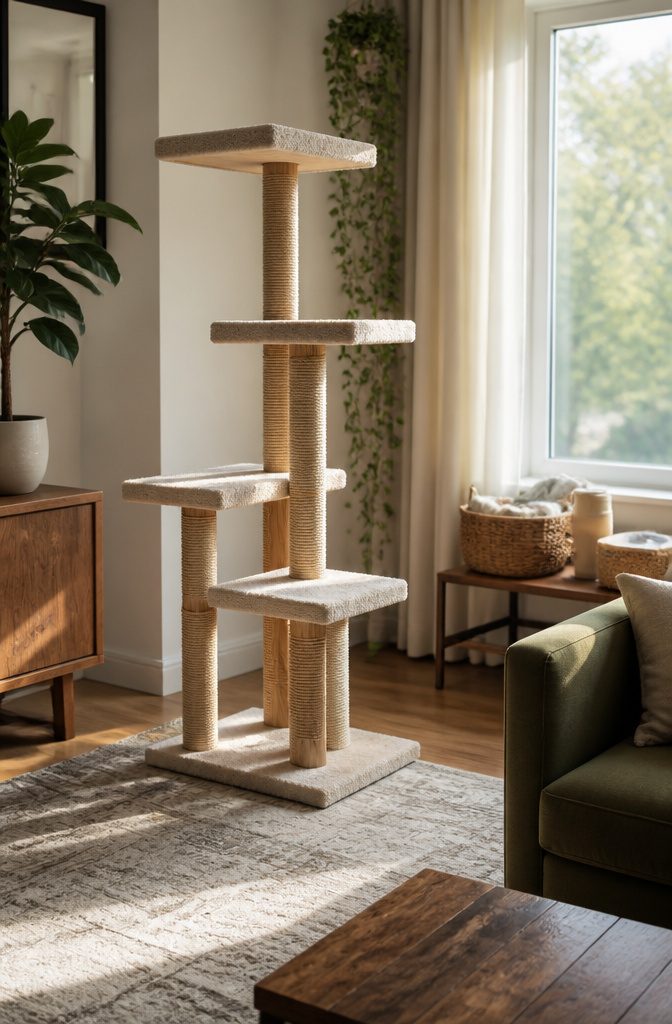
The traditional tower is what most people picture when they hear "cat tree": a vertical stack of platforms rising from a wide base, with sisal-wrapped posts running between levels.
My first build followed this pattern because the design solves two problems at once.
The weight stays low and spread out, which keeps the thing from tipping when an eight-pound cat launches from the floor to the third shelf at full speed.
The posts double as scratching surfaces, so the cat gets vertical stretch marks that satisfy the instinct to climb and claw without shredding your sofa.
This style works in most rooms because it occupies corner space that was probably dead anyway.
A footprint under two feet square leaves walking paths clear while the vertical climb gives the cat territory it can survey from above. The six-stage build produces exactly this structure, which is why it serves as the default.
Platforms at staggered heights let a cat ascend in stages instead of one athletic leap, which matters for older cats or kittens still figuring out their joints.
The carpeted surfaces on top of each level give landing grip; the bare sisal on the posts gives texture to scratch. Nothing in the design is decorative for its own sake, and that is the point.

Authentic Brazilian Sisal: Crafted from 100% premium natural Brazilian sisal, free from harsh oils and chemicals, fully biodegradable, and VOC-free, this rope offers superior durability for all your DIY projects and a safe environment for you and your pets.

Natural Sisal Fiber: Made from natural sisal fiber in a brown color, provides cats with an incredibly appealing scratching texture. Friendly Reminder: Since this sisal rope has been treated with natural plant oils to enhance its softness and strength, it may emit a faint, natural fiber scent when first unboxed. We recommend placing it in a well-ventilated area to air out for 1–2 days to dissipate the odor before use, your cat will love it even more!

Natural and Safe Sisal Rope: Crafted from premium, chemical-free sisal fiber, safe for pets and humans. Perfect for eco-conscious cat owners who prioritize their pet's well-being
9. Simple Budget Build
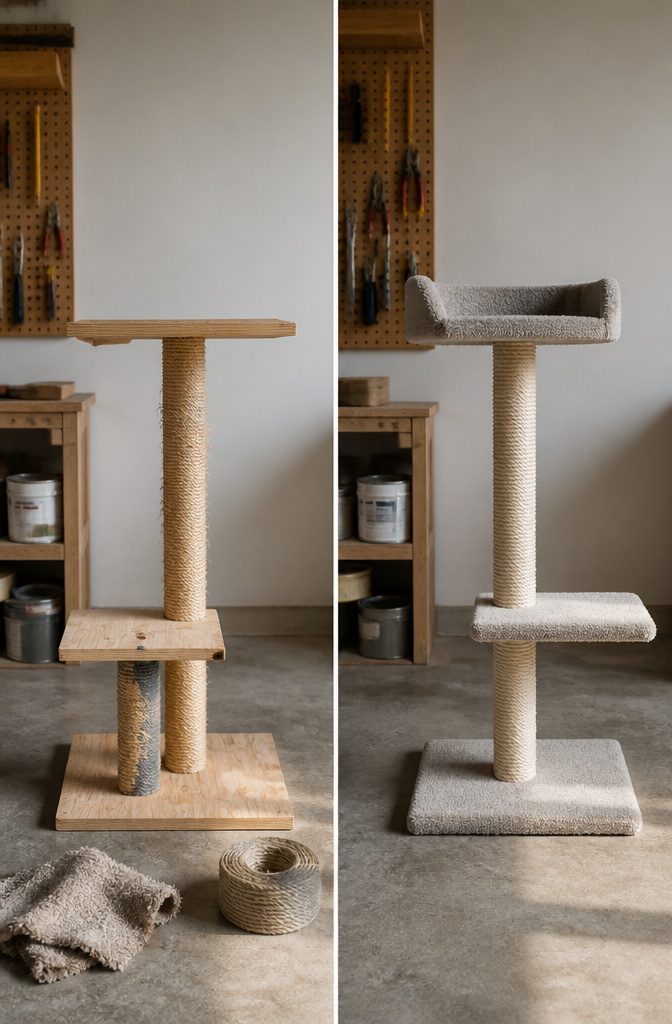
The $40–$75 range is where most first builds land once you strip out the decorative extras.
A 2"x4"x8′ post, half a sheet of plywood or MDF for the base and platforms, and fifty feet of sisal rope will handle the climbing.
Carpet scraps or a single yard of cheap remnant cover what the cat touches.
I spent $75.12 on my own stripped version: $13.14 for base lumber, $7.98 for a wooden dowel, $6.00 stain and $6.47 polyurethane for the branches I foraged, plus $12.99 faux vines and $25.07 in decorative rocks I could have skipped.
The rocks and vines were the first thing to cut.
Liquid Nails ran $3.47. Borrow tools, forage branches from a neighbor’s trim pile, and the core build drops toward that $25 figure another builder hit using scrap wood and leftover carpet.
What stays: a wide, heavy base so the tower doesn’t tip when they launch from the top platform. What goes: curved platforms requiring concrete forms, multiple perches, anything requiring a Kreg jig unless you already own one.
Flat platforms screw straight to the post. The cat does not care about the radius.

Elegant Design, Practical Living: This cat tree is built with modern wooden boards in a finish that seamlessly blends with any home decor. The waterproof surface makes cleaning a breeze. The rest platforms feature removable, soft cushions that are both comfortable and machine-washable
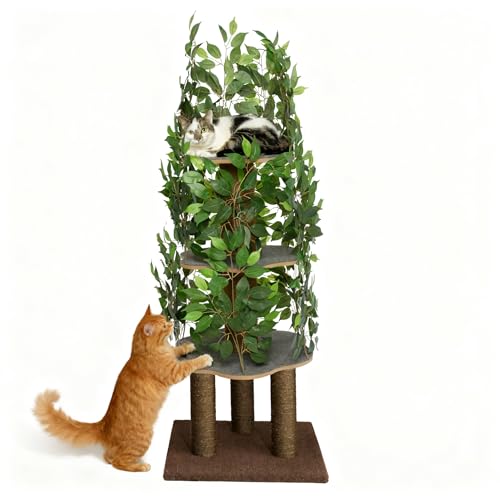
TRIPLE STABILITY FOR SAFE PLAYTIME This cat tree with leaves features a heavy-duty base and five reinforced sisal scratching posts, ensuring reliable stability even for large cats and active climbers. A secure cat scratching post designed for energetic play

Complete Replacement Platform Set: this cat tree replacement parts kit includes 3 wooden perch platforms, each with dual-headed screws for easy installation; Ideal for refreshing worn-out cat towers or expanding climbing space in multi-cat households
10. Repurposed and Custom Builds
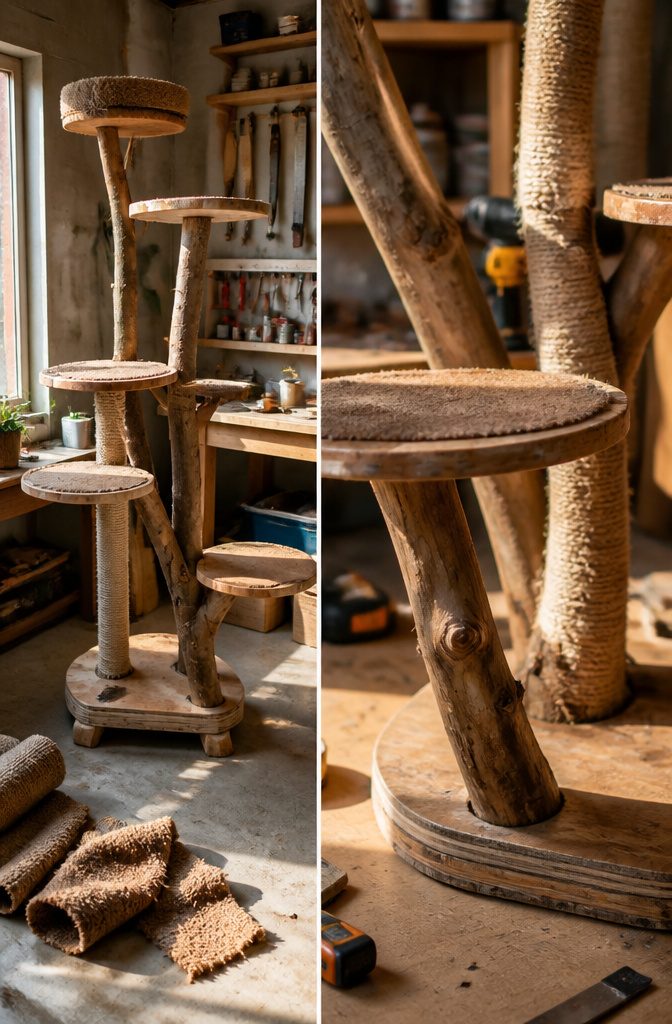
Old cat trees usually hide at least a few parts worth saving. I start by stripping the carpet back with a utility knife and checking whether the plywood platforms have warped or whether the screws have pulled through.
Roped poles are the easiest win; if the sisal is still tight and the core post isn’t cracked, it drops straight into a new build.
Beds are trickier. The 20-inch round or 21-to-22-inch scoop beds from a store-bought tree need to match your cat’s size, not just your color scheme.
A bed that fits a 10-pound cat will leave a 24-pound Maine Coon hanging off the edge, which defeats the point.
Spacing platforms about 20 inches apart works for most cats, though smaller cats manage with less.
When I’m laying out a custom build, I set the actual beds on the branches before drilling anything and watch whether the jump distances feel fair.
For large cats, I have bumped perches up from 16-by-16 to 18-by-18 inches and widened a tunnel opening from 5 to 8 inches. Those numbers came from watching what actually fit, not from guessing.
The one thing I skip is reusing carpet. By the time a tree is ready for teardown, the carpet is usually matted with years of hair and oil.
Stripping it, cleaning the glue residue, and re-stapling fresh carpet costs more in hours than a yard of new low-pile from the hardware store. Save the structure, not the surface.

Product Size:Cat tree replacement post size is 15.7x3.1inches, When you need to replace multiple cat trees at the same time, a 4-pack set is better. Compared to purchasing sisal rope to wrap it ourselves, our product wraps it tighter and saves time,4 root cat scratching post replacement ,cat tree scratch post replacement

【Not only a cat scratching post but also a beautiful decoration】Transform Your Home into a Feline Jungle with Our Forest Cat Scratching Post!Elevate your home decor with this gorgeous 15.75"*15.75"*31.5" High cat scratching post that doubles as a beautiful decoration. With 3 sisal-covered scratching poles, 15 lush leaves, and a carpeted base resembling a tropical forest, your kitty will feel right at home in this jungle oasis.
What the Build Costs
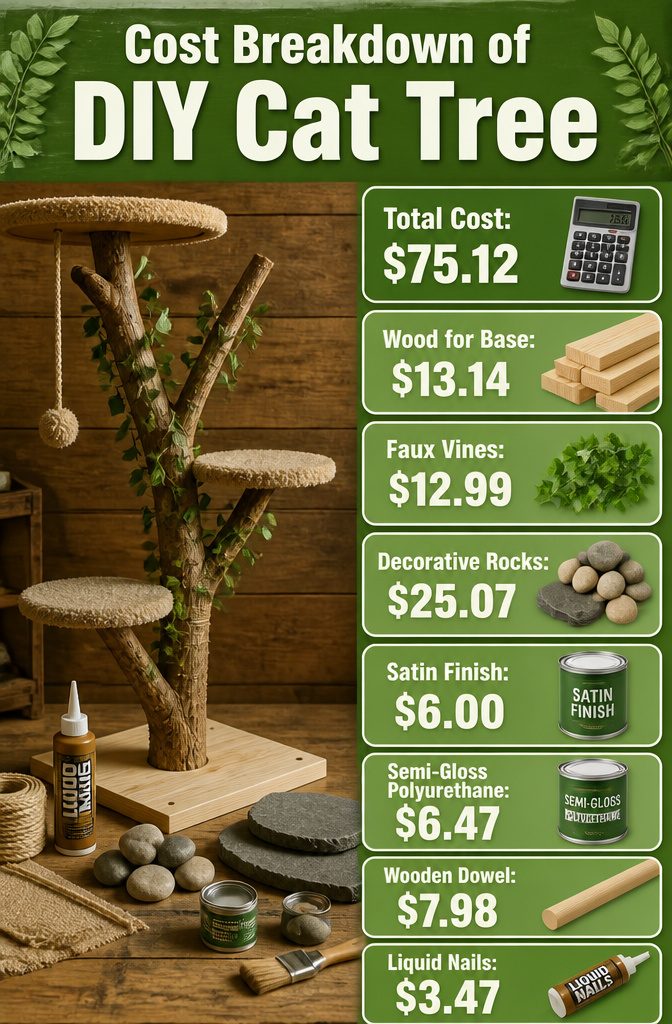
A store-bought cat tree with fake branches can run $800.
The one that convinced me to build instead of buy came in at $75.12 total, and that number includes the satin finish for the branches ($6.00), semi-gloss polyurethane ($6.47), faux vines ($12.99), decorative rocks and stepping stones ($25.07), lumber for the base ($13.14), a wooden dowel ($7.98), and Liquid Nails ($3.47).
Everything else was found, foraged, already owned, or borrowed.
Most DIY cat trees land somewhere between $40 and $75 if you are buying materials new.
The carpet is where the math shifts: at $5.22 per square yard, wrapping a larger platform or multiple posts adds up fast, and you cannot really skip it unless you want shredded upholstery instead.
Coupons help, as they did in that build, but the fixed costs are lumber, adhesive, and whatever keeps the cat from ignoring the thing entirely.
Where you save is labor and the willingness to scavenge. A base from scrap plywood, a branch from the yard after a storm, sisal rope left over from another project: those drop the total toward the $40 end.
Where you spend is wanting it to look like furniture rather than a pet supply afterthought.
The rocks and vines pushed this build toward the higher side, and that is a choice you make or skip depending on whether the cat tree lives in a corner or beside the sofa where guests see it.
Materials Compared
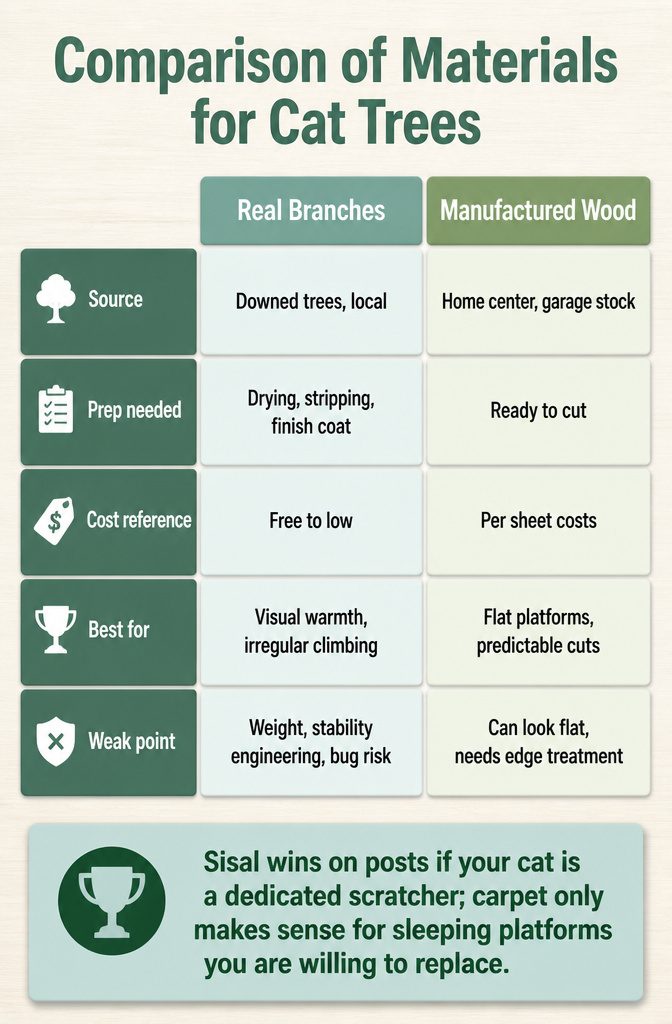
Real branches give a cat tree weight and irregular climbing angles that manufactured wood cannot replicate, but they come with trade-offs.
A branch from a downed tree needs drying, bark stripping, and a finish coat before it ever meets a base. Manufactured options like plywood, particle board, or MDF skip that wait and cut cleanly to any platform shape you sketch.
For the surface touching your floors and walls, conventional finishes sit on top of the material. A beeswax and orange paste finish soaks in instead, which matters if a cat is going to chew or rub against it daily.
Scratching surfaces split cleanly into two camps.
Sisal rope, usually ¼" to ½" diameter, wraps tight around posts and resists shredding longer than fabric. Carpet, especially a low-pile remnant like the 12-foot runs sold by the yard, covers broad areas faster and cheaper.
The catch is that cats often cannot tell your tree’s carpet from your living room’s, and vertical carpet loops pull loose under claws where sisal frays flat.
| Feature | Real Branches | Manufactured Wood | Beeswax/Orange Paste | Conventional Finish | Sisal Rope | Carpet |
|---|---|---|---|---|---|---|
| Source | Downed trees, local | Home center, garage stock | Hardware or craft store | Hardware store | Ropeandcord.com, Michaels, box stores | Home center, by the yard |
| Prep needed | Drying, stripping, finish coat | Ready to cut | Buff in, let cure | Brush or spray, dry time | Wrap and staple | Cut, staple, glue |
| Cost reference | Free to low | Plywood/MDF/particle board per sheet | Small tin, under $10 | Quart or spray can | 50 ft. at $5–$8; bulk cheaper | ~$5.22/sq. yd., ~$20.88 per 12-ft. run |
| Best for | Visual warmth, irregular climbing | Flat platforms, predictable cuts | Cat-safe, repairable surface | Fast coverage, color match | Vertical posts, heavy scratching | Wide platforms, cozy perches |
| Weak point | Weight, stability engineering, bug risk | Can look flat, needs edge treatment | Reapply yearly in heavy use | Chips show, not cat-chew friendly | Gaps between wraps, staple visibility | Confuses cats about which carpet is claw-legal |
Sisal wins on posts if your cat is a dedicated scratcher; carpet only makes sense for sleeping platforms you are willing to replace.
Stability Checks
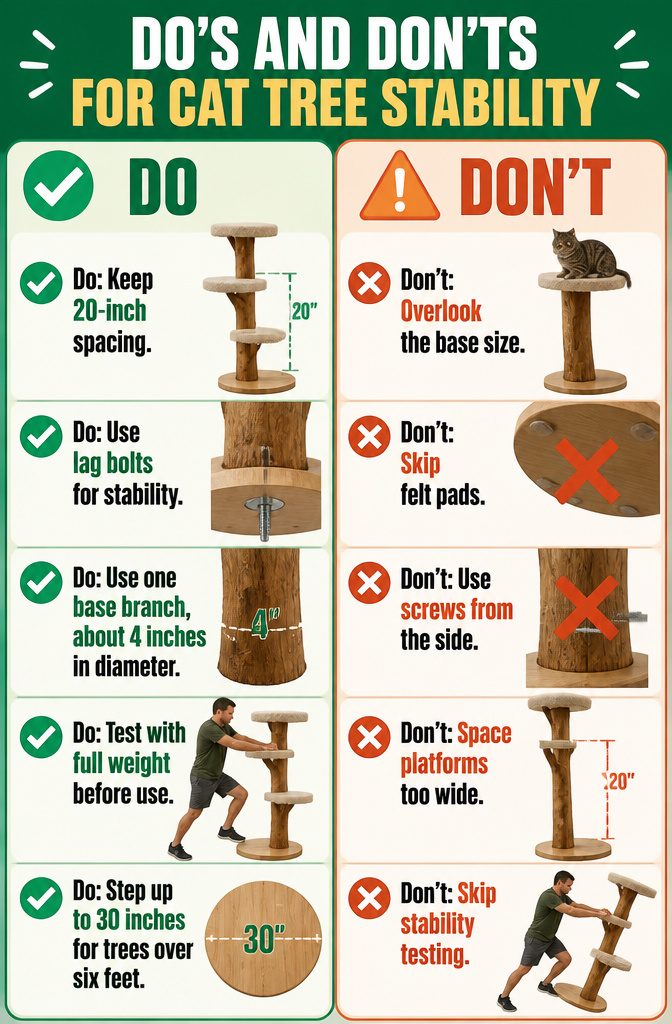
A tall cat tree lives or dies by 20-inch spacing between platforms. Go wider and the trunk acts like a lever; the cat’s weight at the top amplifies every wobble into a tip.
I keep platforms at that interval or tighter for smaller cats, which keeps the center of mass low and the jumps predictable.
The base matters less than people think. A 1-by-24-inch pine round from Home Depot works fine if the branch weight above is balanced, though I step up to 30 inches for anything over six feet.
Felt pads on the bottom protect floors and let you slide the finished tree to test it before the cat does.
What actually stabilizes the structure is the branch itself: one substantial base branch, about 4 inches in diameter, set heavy and dry so its own weight anchors the assembly.
Lag bolts driven up through the base into pre-drilled pilot holes hold better than screws from the side.
I countersink them so they do not scar the floor, then torque one bolt per branch to start, leaving room to rotate the branch until the platform placement feels right.
The real test comes before the cat ever sees it: lean into each platform with your full weight, then push sideways at the top.
If it shifts at the base, add a second branch or a wider round. A tree that passes that test will survive midnight sprints and the occasional 20-pound Savannah at full speed.
Frequently Asked Questions
What materials do I need to build a DIY cat tree?
You will need a 1" x 24" or 1" x 30" pine round or plywood for the base, 4x4s or branches for vertical posts, plywood or pine rounds for platforms, 3/8"–1/2" sisal or hemp rope for scratching surfaces, 2" screws for assembly, and carpet remnants for soft landing areas.
A pneumatic stapler or manual staple gun helps attach the carpet and rope quickly.
How much does it cost to build a DIY cat tree?
Most DIY cat trees cost between $40 and $75 when buying materials new.
One detailed build came to $75.12 including decorative extras like faux vines and rocks, but the core structure can drop toward $25 if you use scrap wood, foraged branches, and leftover carpet. Store-bought alternatives with similar features often run $800 or more.
How do I stabilize a tall cat tree?
Keep platforms spaced about 20 inches apart to prevent the trunk from acting like a lever, and use a base at least 24 inches wide or a 30-inch round for trees over six feet tall.
Lag bolts driven up through the base into pre-drilled pilot holes hold better than side screws, and adding weight to the base with stepping stones or rocks keeps the tree from tipping when cats launch from high perches.
Test the finished build by leaning your full weight on each platform and pushing sideways at the top before letting your cat use it.