A raised bed can run from zero-dollar straw bales that decompose in a season to mortared brick walls that last decades.
Pick the frame by how long you plan to keep the bed in one spot, what the build takes from you, and what you are willing to spend on materials upfront.
Cedar and corrugated metal resist rot longer than untreated lumber, cinder block and stone need no fasteners, and waist-height beds let you work standing instead of kneeling.
1. Brick Raised Beds
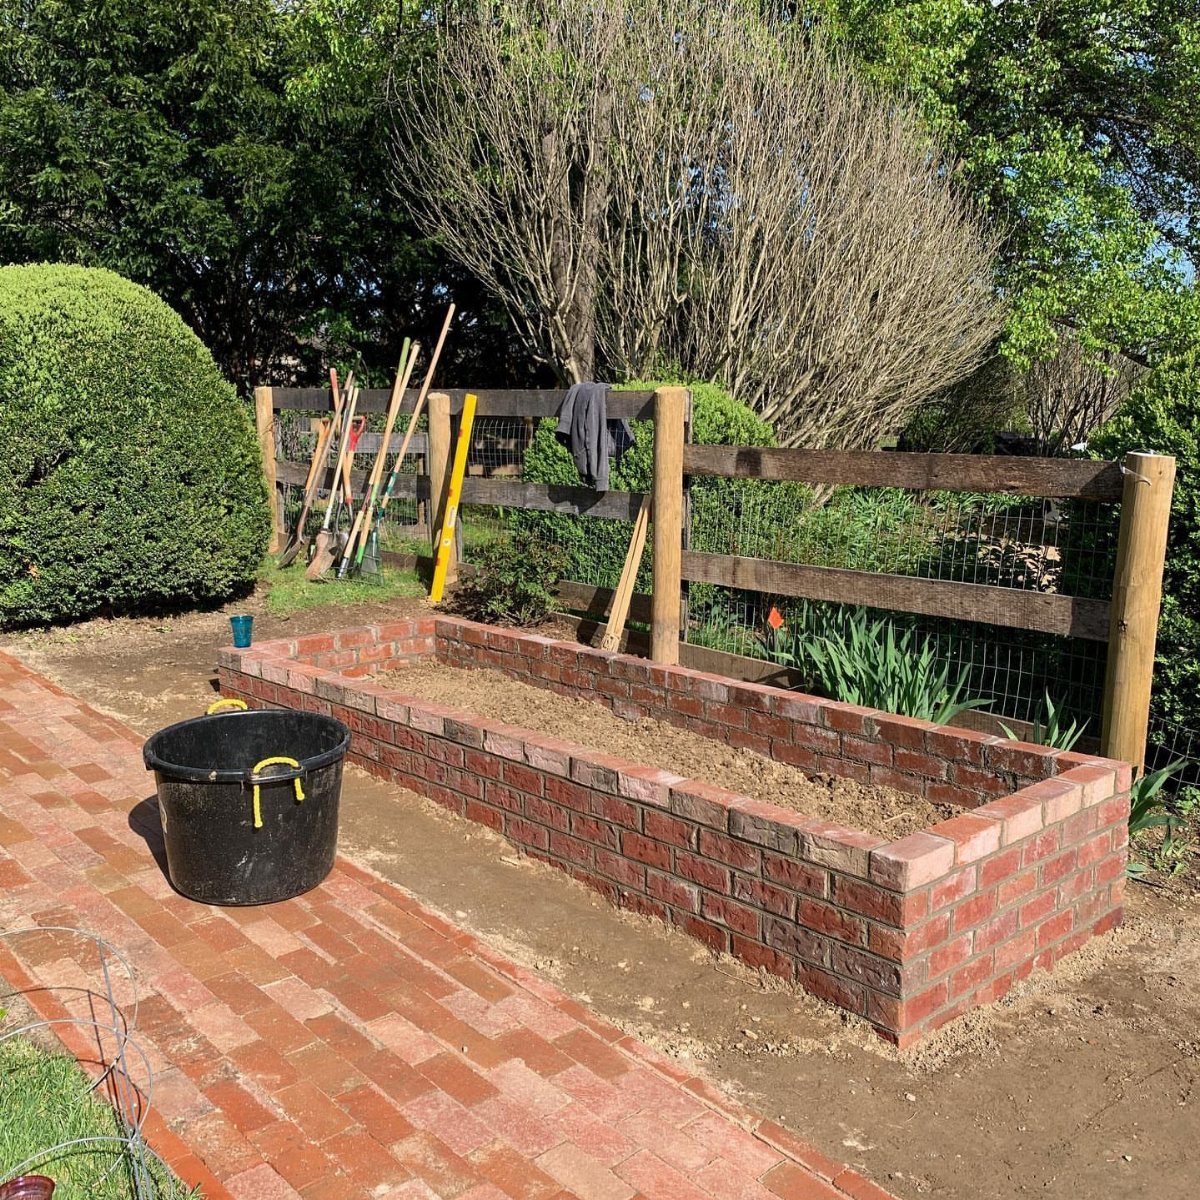
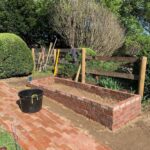
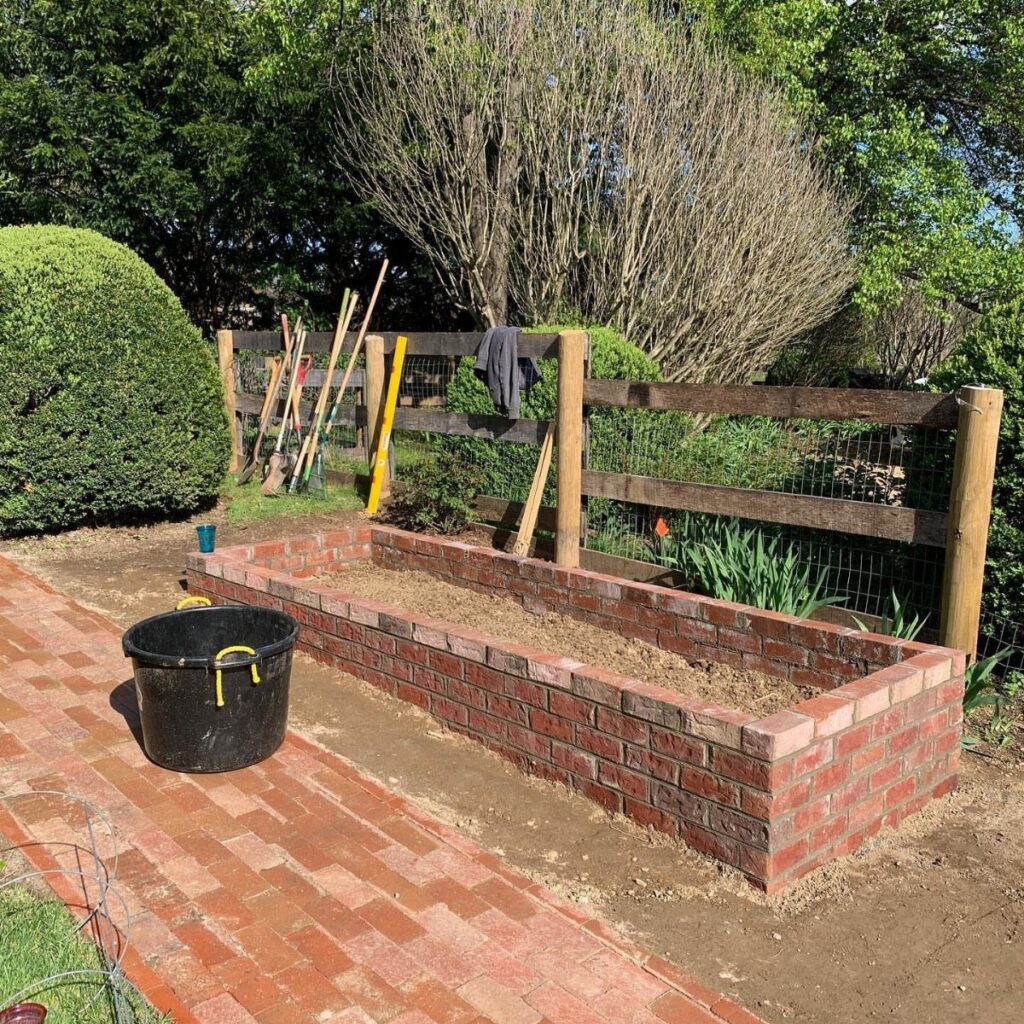
Brick forms a raised bed with built-in permanence and clean edges that hold their line year after year. Mortared bricks stack into walls that contain soil without shifting, and the thermal mass helps buffer temperature swings around roots.
Dry-stacked brick costs less and goes up faster, but the joints shift over time as soil settles and frost heaves.
Mortared beds stay put. Lay a gravel footing below grade to prevent heaving, then build up in running bond with half-inch mortar joints.
Brick costs more than lumber but outlasts it by decades.
2. Cinder Block Beds
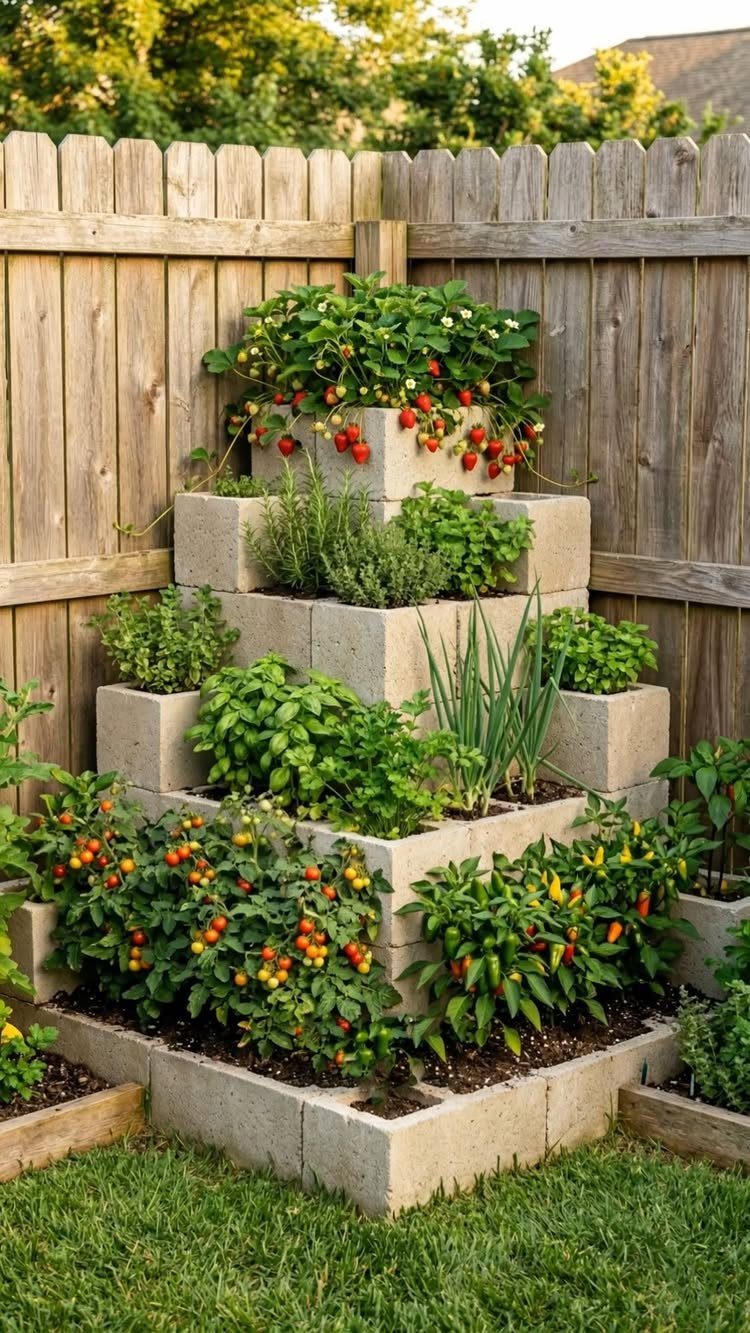
Concrete blocks stack without tools or mortar into beds that go up in an afternoon.
Each block takes effort to move, but once in place they hold soil firmly and the hollow cores let you fill them with compost or plant directly into the cells.
Stacking them dry means you can move or reconfigure the bed later.
For tiered setups, offset each row by half a block to lock the courses together. Blocks absorb and radiate heat, which suits warm-season crops but can stress cool-season greens in full sun.
They cost less than most framing lumber and last indefinitely.
3. Brick or Stone Path
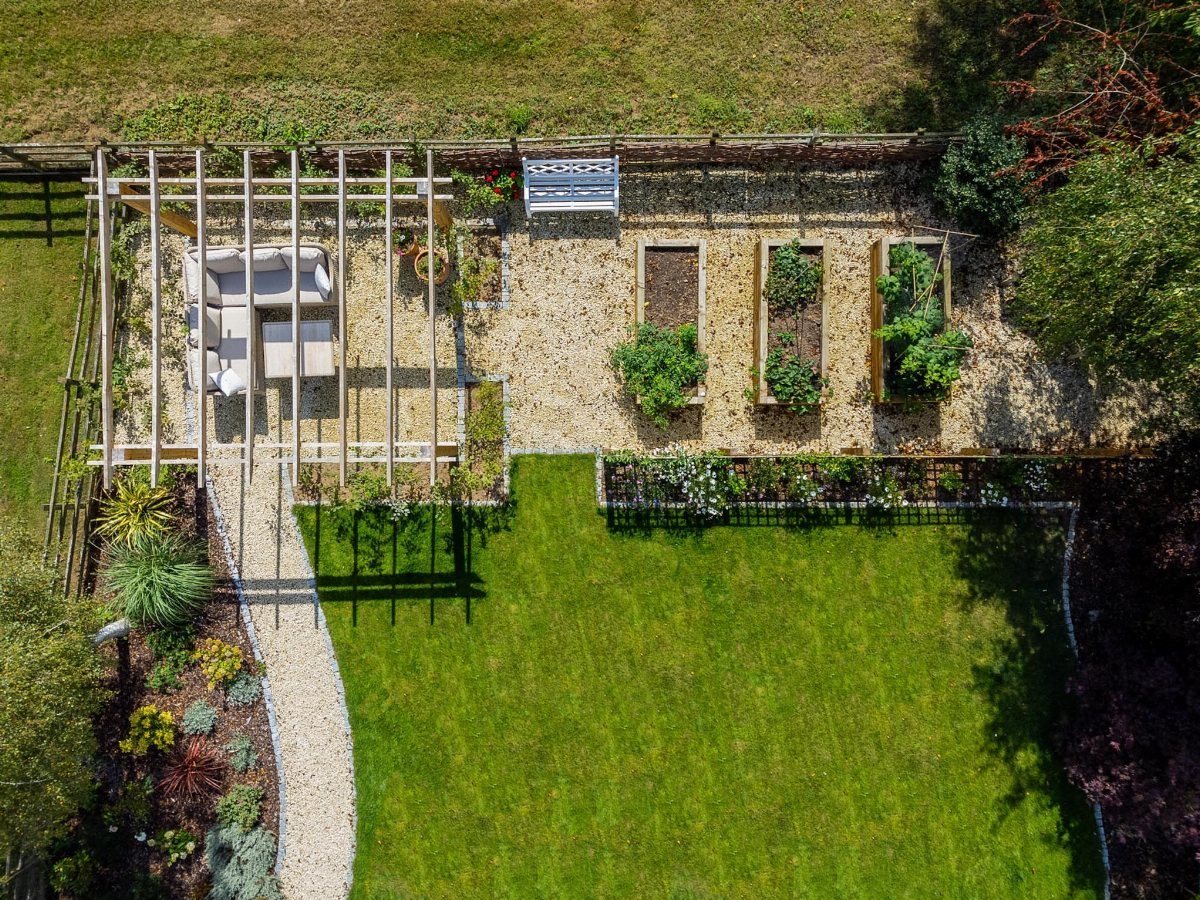
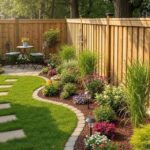
A gravel, brick, or stone path between beds keeps feet out of mud and gives you a stable surface for wheelbarrows and carts. Paths also define the growing area and make the layout readable from a distance.
Gravel drains fast and costs less than pavers, but it shifts underfoot and migrates into beds unless edged. Brick or stone stays flat and firm, though it takes longer to lay and costs more per square foot.
I edge gravel paths with untreated 2x4s or steel to hold the line, and I lay landscape fabric underneath to slow weeds without blocking drainage.
4. Waist-Height Beds
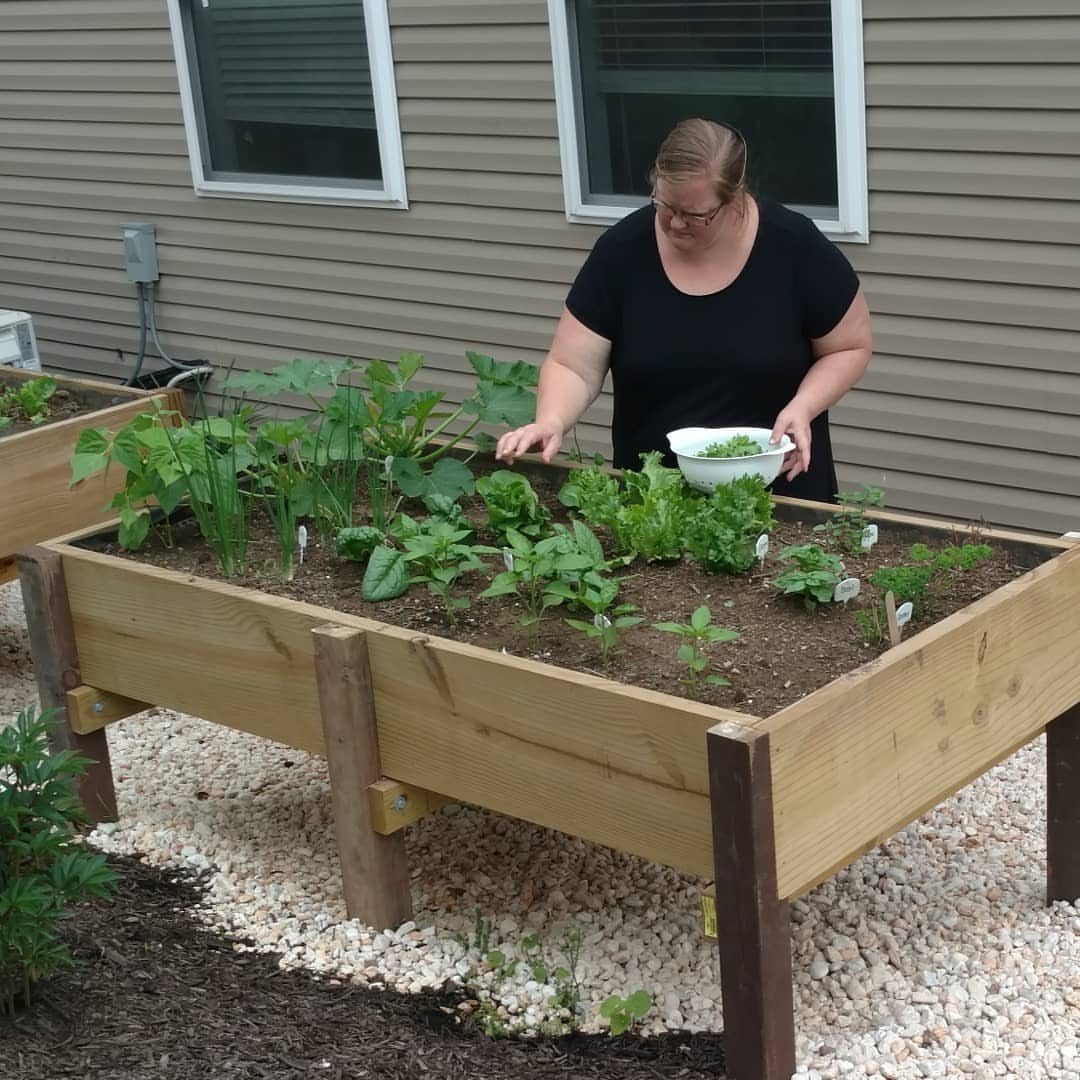
Raising the bed to waist height lets you work standing upright instead of bending or kneeling. That makes weeding, planting, and harvesting faster and easier on joints.
Build a tall frame from 2×6 or 2×8 lumber, brace the corners with posts, and fill it with a mix of compost, topsoil, and coarse material like pine bark to improve drainage in the deep fill.
The extra soil depth supports root crops and gives moisture a buffer during dry spells.
These beds use more lumber and soil than standard heights, so expect higher upfront cost.
5. Corrugated Metal Beds
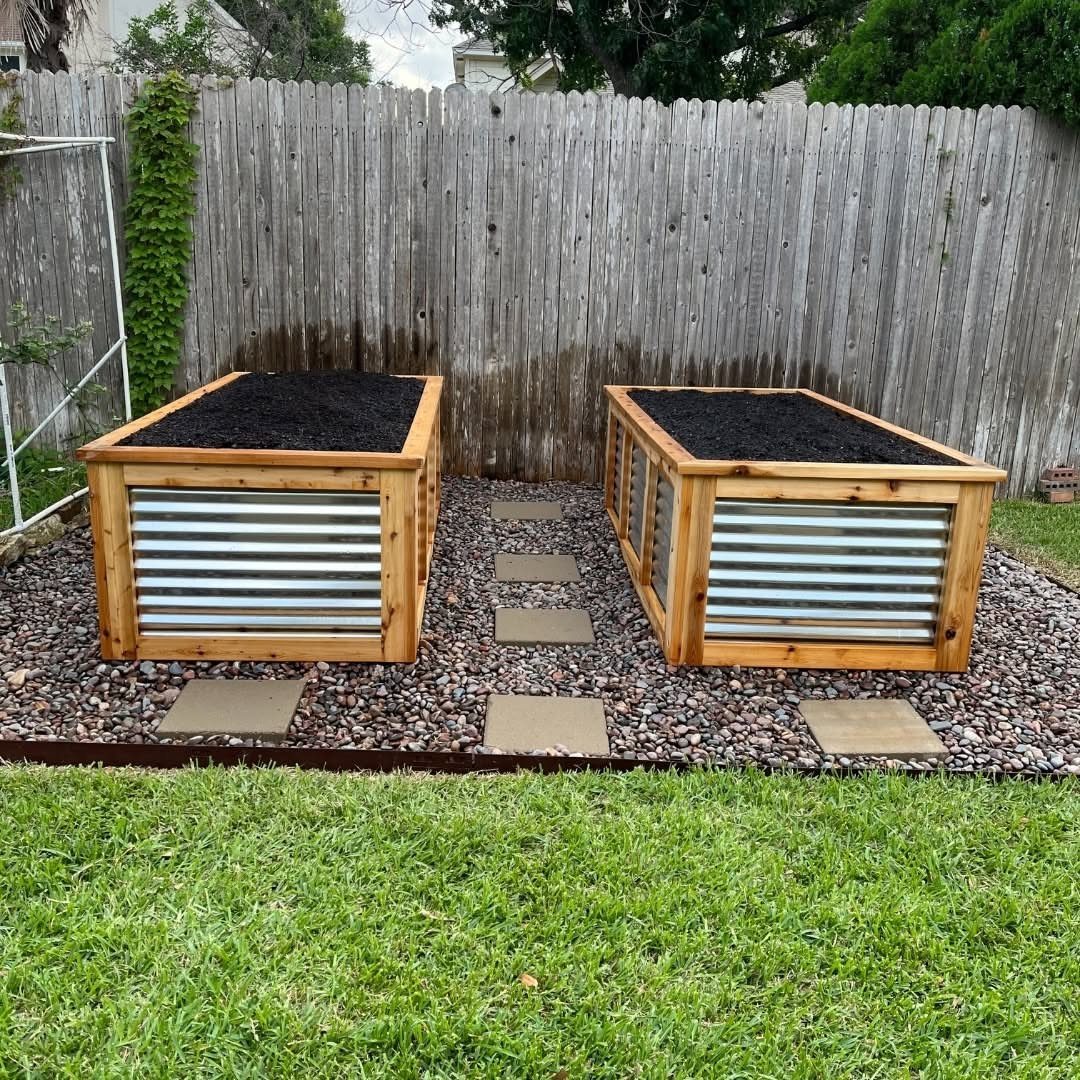
Corrugated roofing panels bolt to a wooden frame to form raised bed walls that resist rot and hold their shape through years of freeze-thaw cycles.
Galvanized or Galvalume steel lasts longer than untreated wood and costs less than cedar or composite.
Cut panels to height with tin snips or a circular saw fitted with a metal blade, then attach them to the inside of a 2×4 frame with self-tapping screws.
You can line the interior with landscape fabric if you want a barrier between soil and metal, though plain steel works fine for food crops.
Metal heats up in sun, so beds in hot climates benefit from partial shade or a mulch layer to insulate roots.
6. Raised Bed Covers Over Hoops
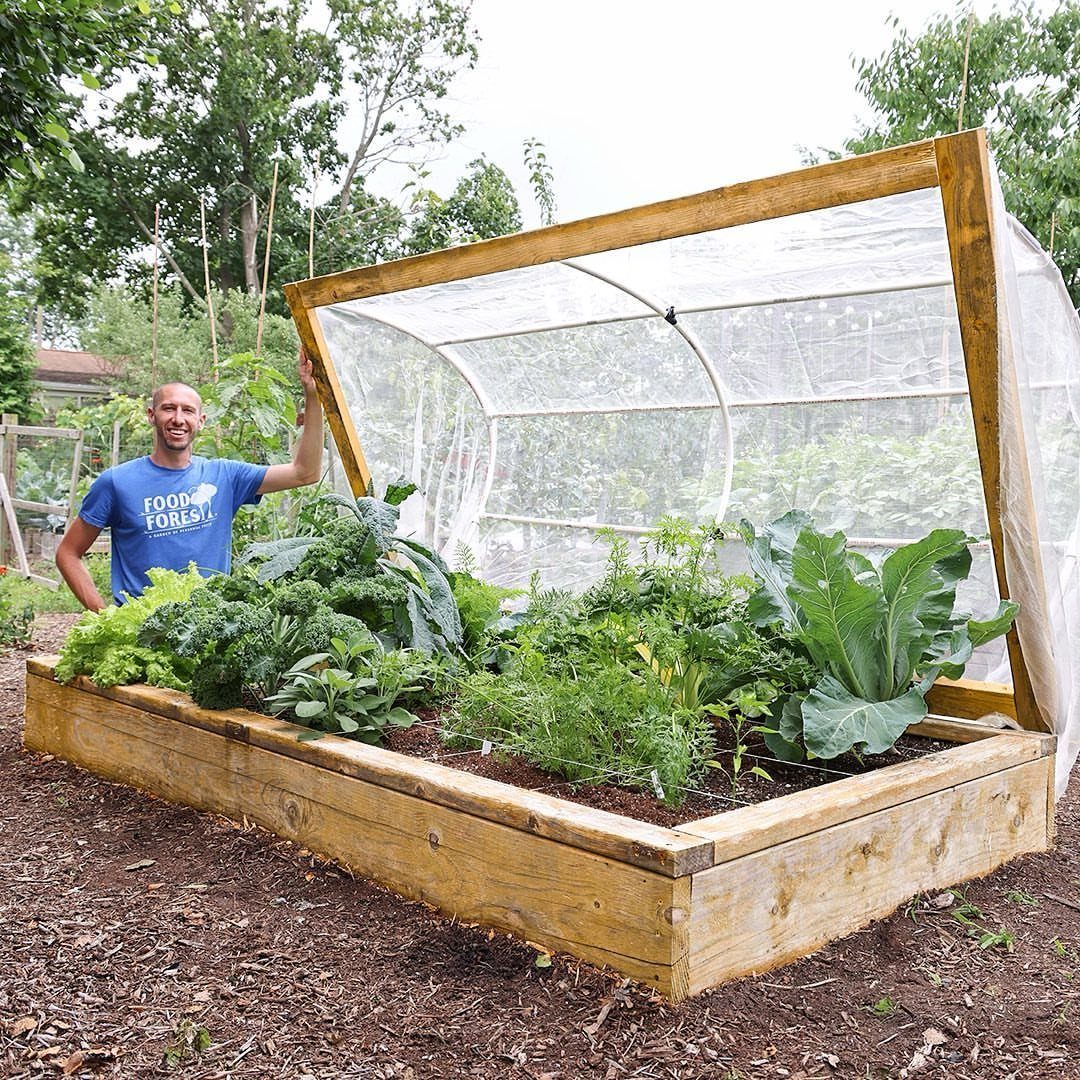
Covering a raised bed with fabric stretched over hoops keeps insects, birds, and small animals out while letting light and water through.
Lightweight row cover protects young plants from frost in spring and fall, and shade cloth cuts heat stress in midsummer.
Drape the fabric over the hoops and anchor it with clips, stakes, or lengths of lumber laid along the base.
Remove covers when plants need pollination or when temperatures stay warm enough that protection is no longer needed.
7. Colorful Planters
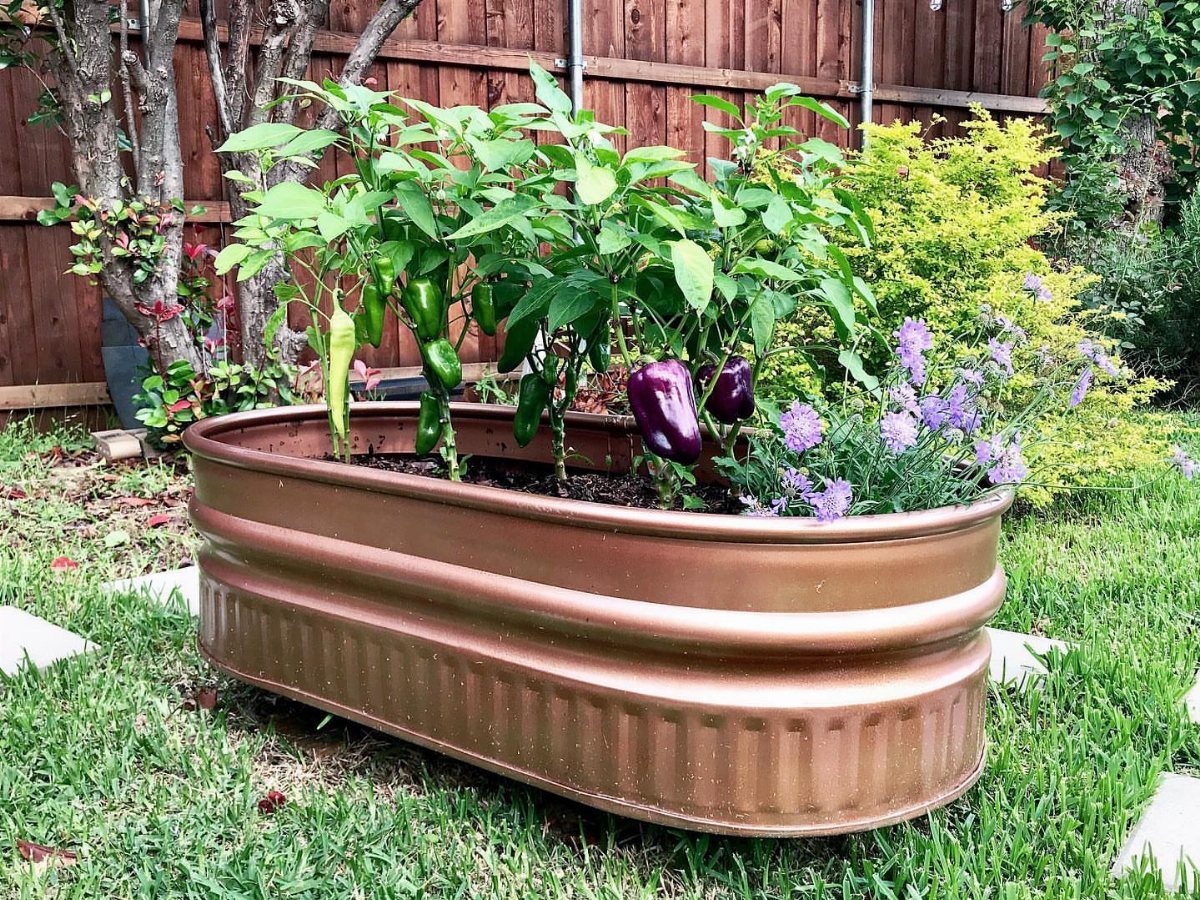
Painting or powder-coating a metal bed adds color that breaks up a row of green and draws attention where you want it.
Copper, terracotta, forest green, and dark charcoal all hold up better visually than bright primary colors, which fade faster under UV.
If you are repainting an existing bed, clean the surface with degreaser, sand off any rust, and prime before applying outdoor metal paint. Powder-coated beds cost more but the finish lasts longer without chipping.
8. Cedar Bed with Legs
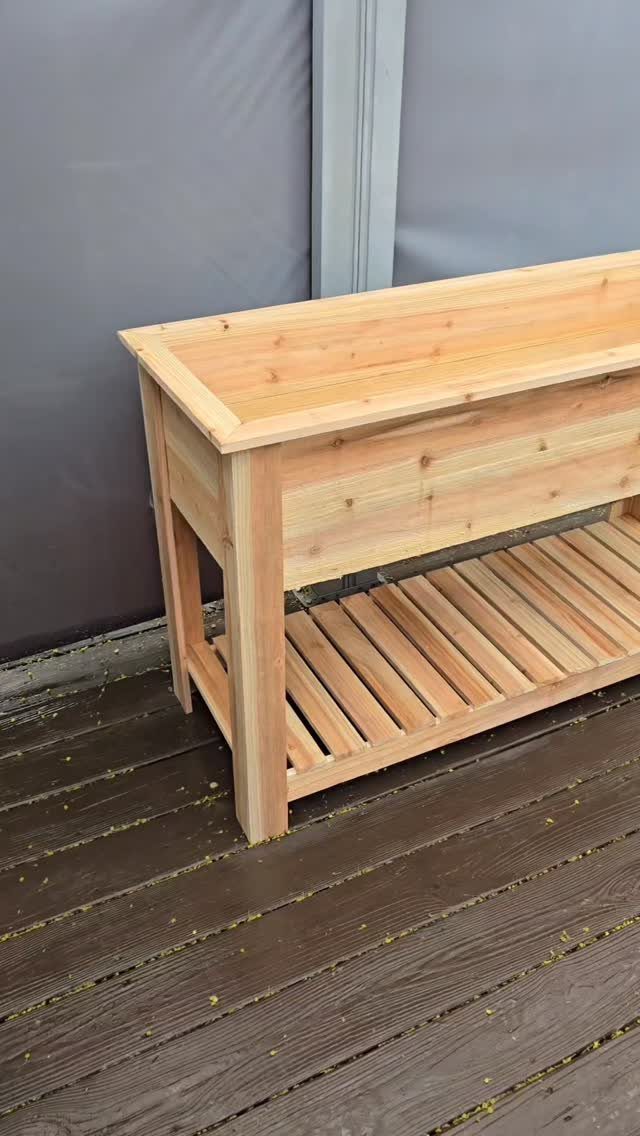
Mounting a cedar bed on legs lifts it off a deck or patio and lets air circulate underneath, which keeps the wood from staying wet and rotting out early.
The height also puts planting and harvest at a comfortable reach without bending.
A lower shelf between the legs holds pots, tools, or bags of soil. Cedar resists rot naturally, so the frame lasts years without treatment, though it weathers to gray unless you seal it with exterior oil once a season.
9. Wooden Raised Beds
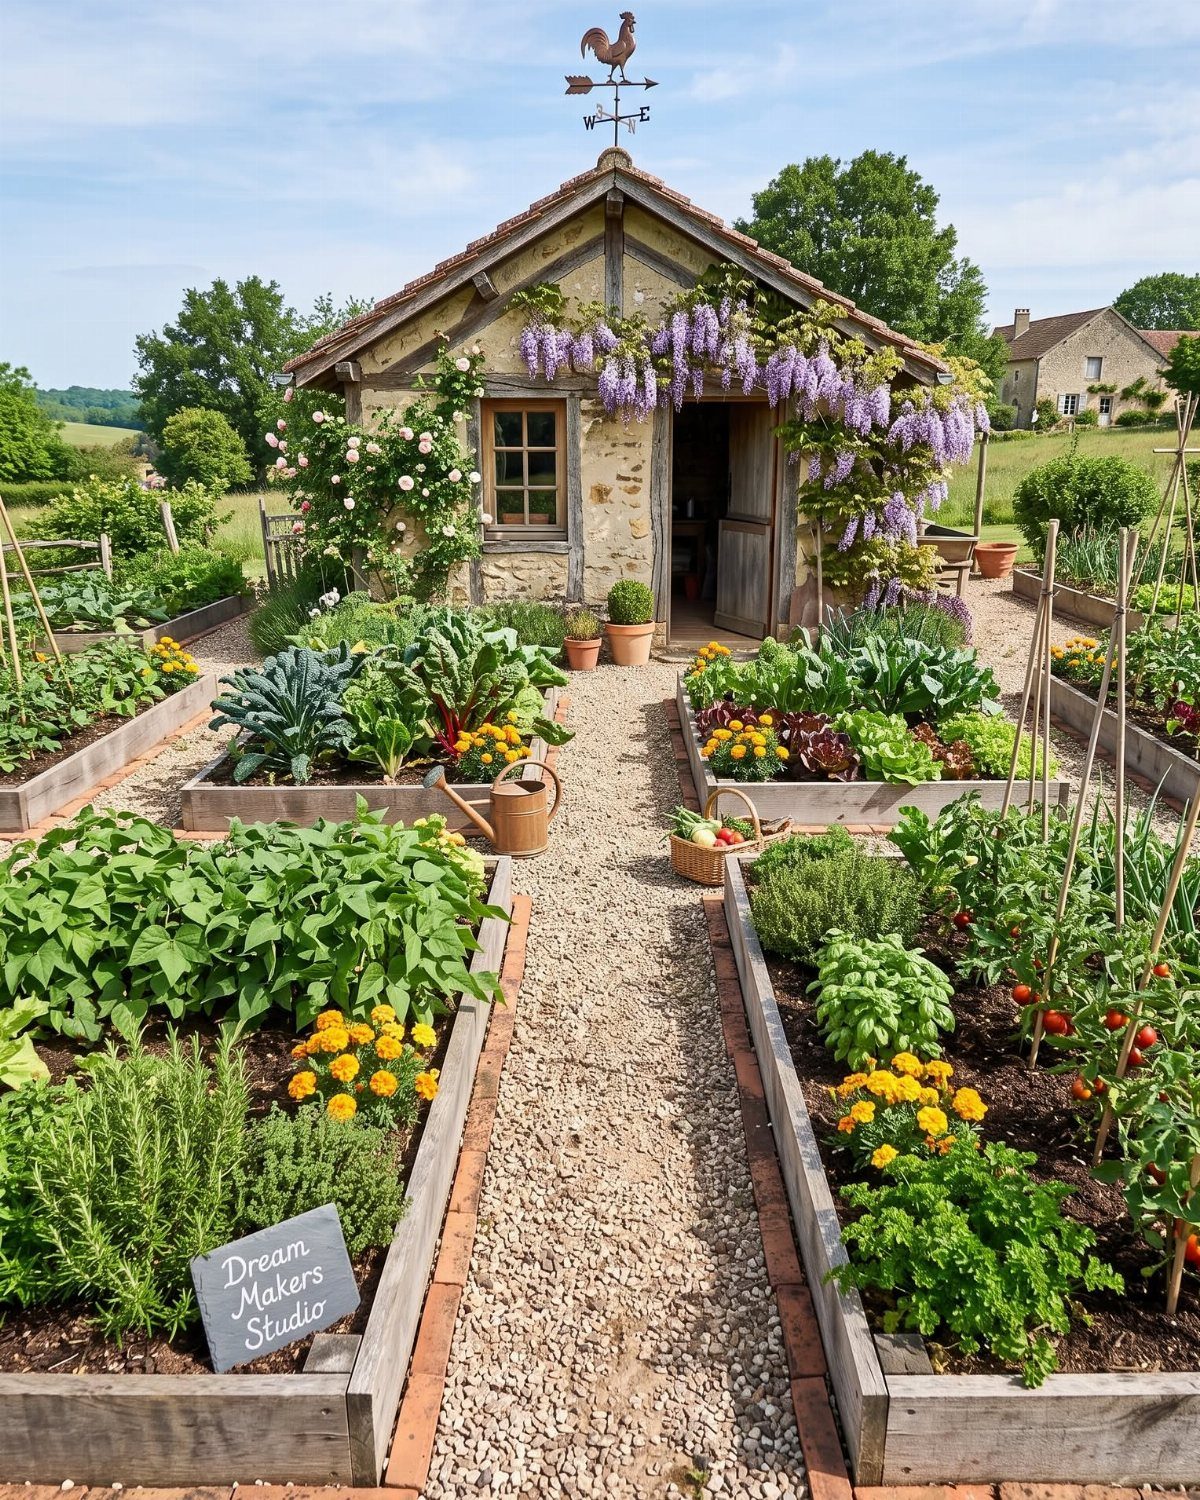
Framing a bed from 2×6 or 2×8 boards gives you full control over size, height, and layout. Use cedar, redwood, or pressure-treated lumber rated for ground contact, and assemble the corners with exterior screws or galvanized brackets.
A single-board-high bed costs less and goes together fast.
Stack two or three boards for deeper soil that holds moisture longer and gives roots more room. Add landscape fabric if you prefer a layer between the soil and the wood itself.
10. Garden Lighting
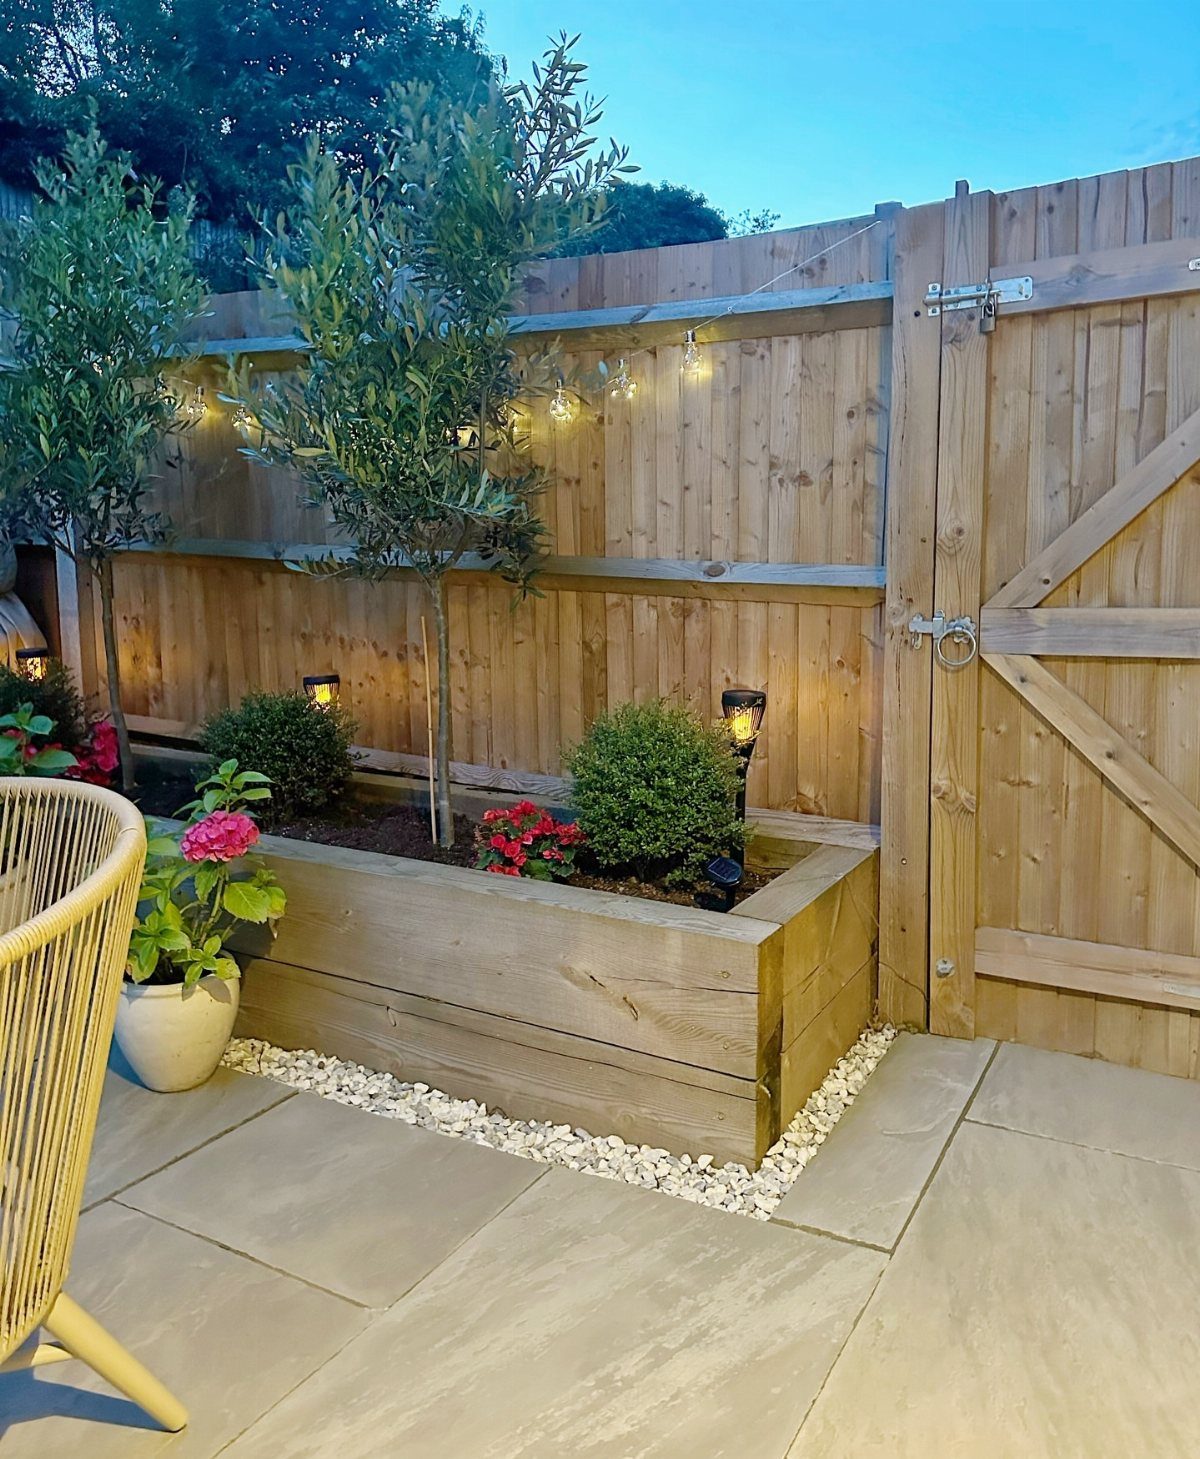
String lights or solar path lamps around the beds let you water, weed, or harvest after dark without dragging out a flashlight. Low-voltage LED strands draw little power and last multiple seasons on a timer.
Run them along the bed’s top rail or hang them from posts nearby. Solar stake lights go in the ground beside the bed and need no wiring.
11. Raised Greenhouse
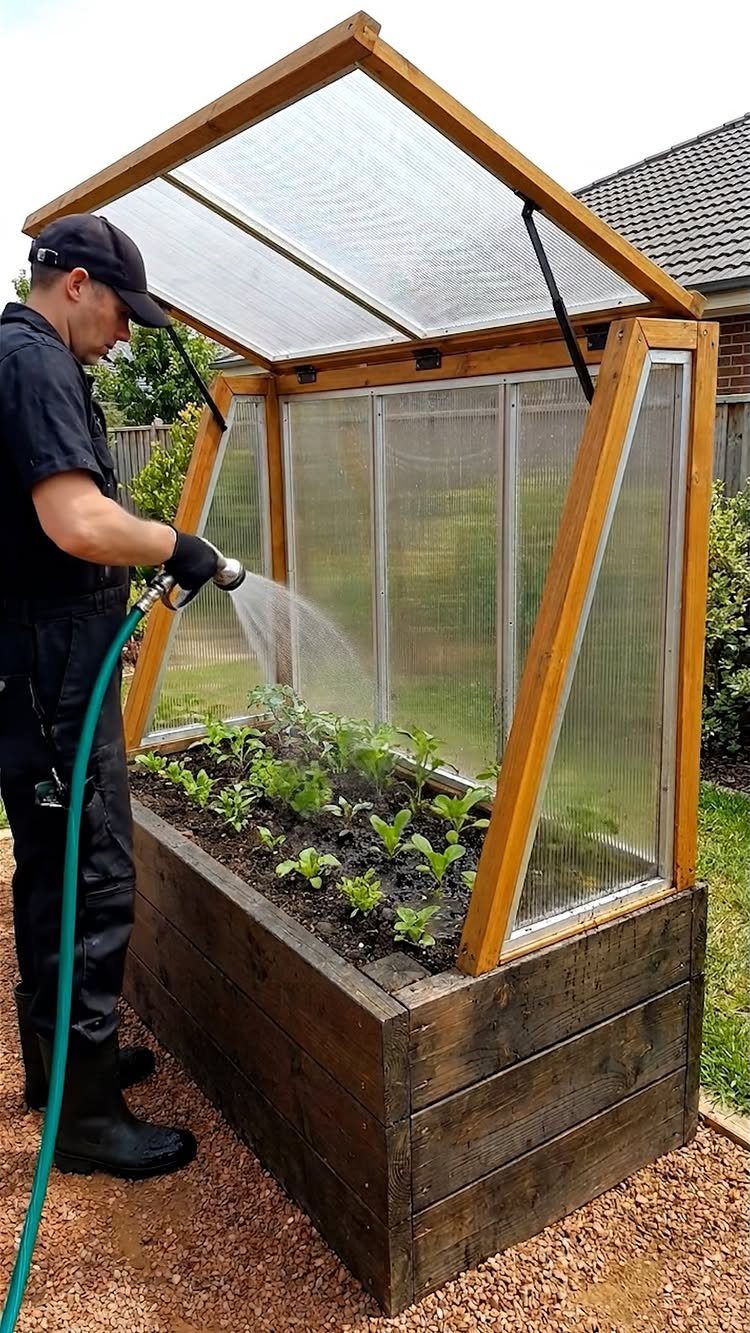
Building a greenhouse frame over a raised bed extends the growing season by several weeks in spring and fall.
The enclosed bed traps heat during the day and holds it through cool nights, which suits warm-season crops like tomatoes, peppers, and cucumbers.
Frame the roof and sides with lumber or PVC pipe, then cover them with polycarbonate panels or greenhouse film. Hinge one side or the roof for ventilation on warm days.
12. Garden Arch
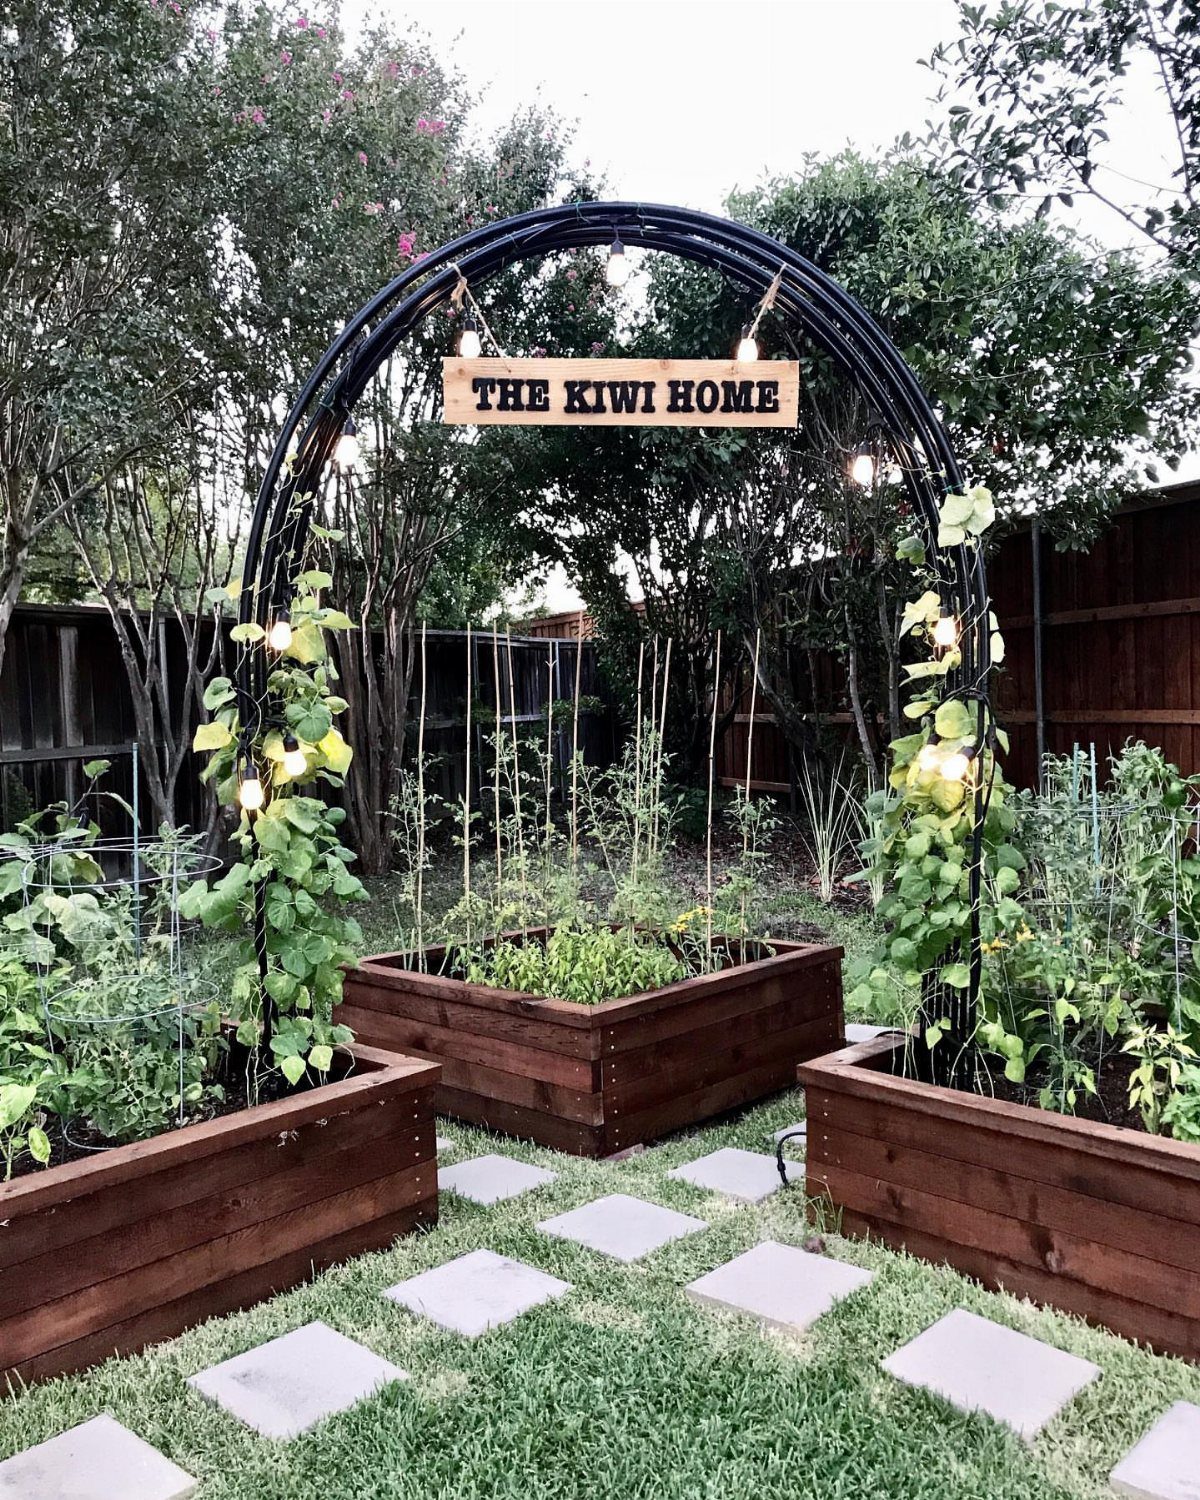
An arch frames the entrance to a raised bed area and gives climbing plants a vertical structure to grow on.
Metal or wooden arches hold their shape through wind and rain, and you can train beans, peas, squash, or flowering vines up both sides.
Anchor the legs in the ground or bolt them to deck posts if the beds sit on hardscape. String lights or a sign on the arch make the space feel intentional and mark the entry clearly.
13. Raised Beds on Casters
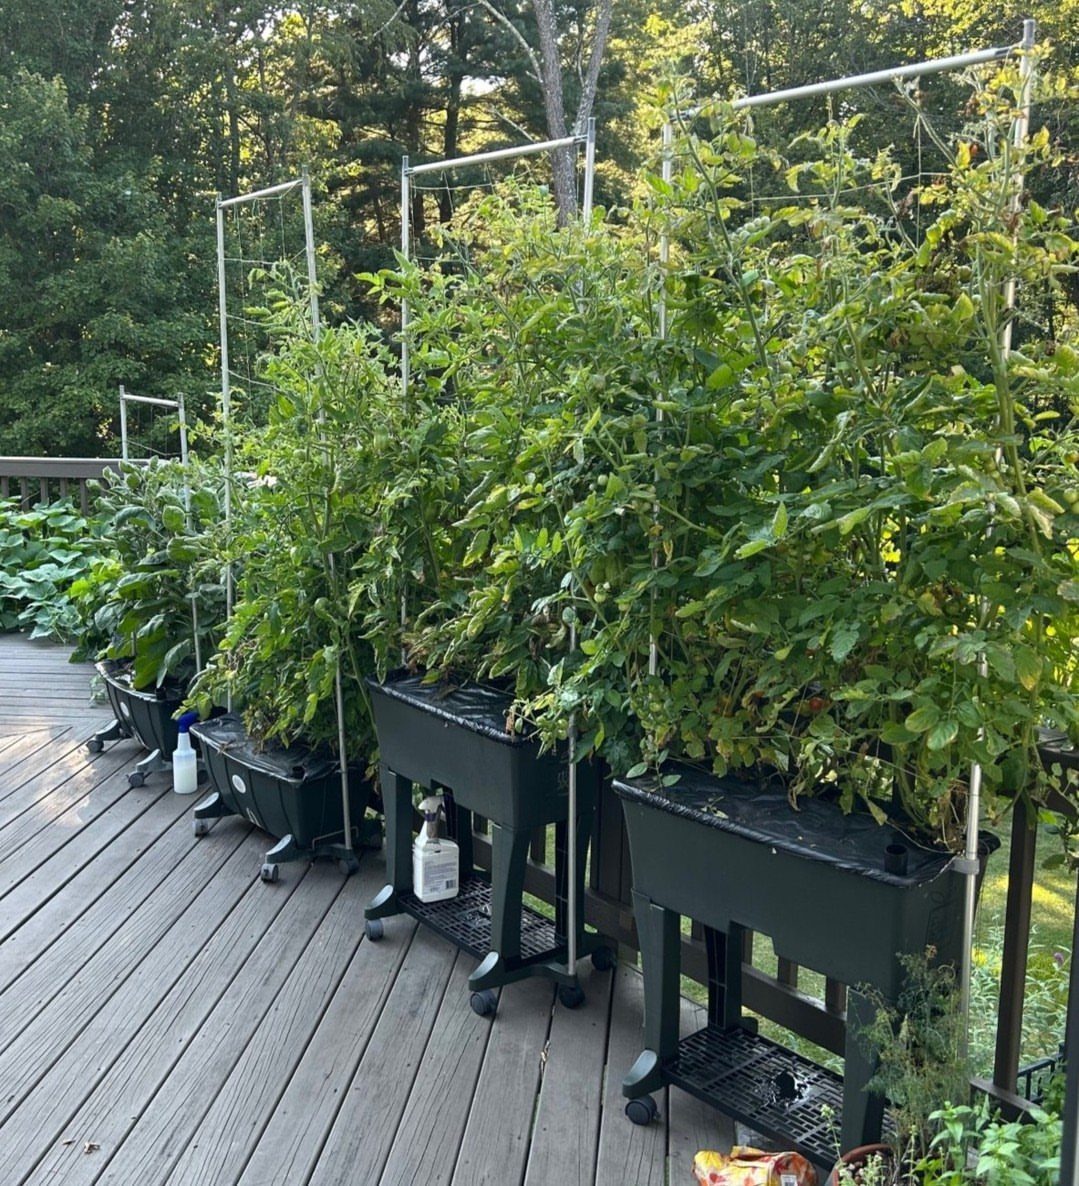
Mounting a bed on wheels lets you roll it to follow sun as the season shifts or move it off the deck when you need the space. Plastic beds keep the weight manageable enough to push without help.
Casters with locks keep the bed from rolling after you move it where you want it. Check that the wheels are rated for outdoor use and that the combined weight of soil, plants, and water stays within their load limit.
Fill the bed with lightweight potting mix instead of garden soil to reduce the total weight.
14. Raised Beds on Slopes
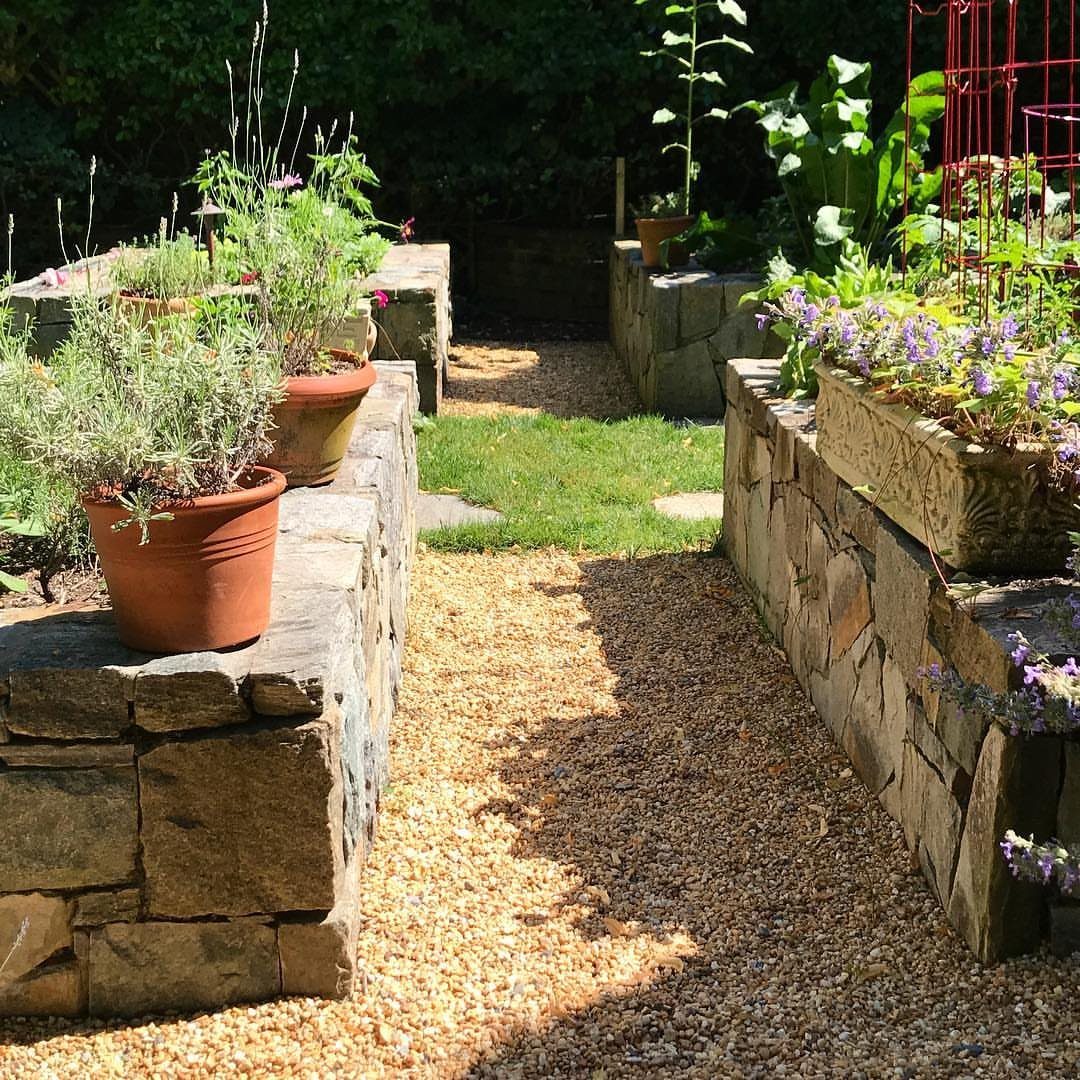
Building masonry beds into a slope creates level planting surfaces where the ground drops away and holds the soil from washing downhill.
Stone or brick retains the grade without shifting, and the terraced layout lets you plant crops that need different drainage or sun exposure at each level.
Set the lowest course below grade so the wall anchors into undisturbed soil. Backfill with gravel behind the wall to improve drainage and reduce pressure from water buildup.
15. Raised Bed with Built-In Bench
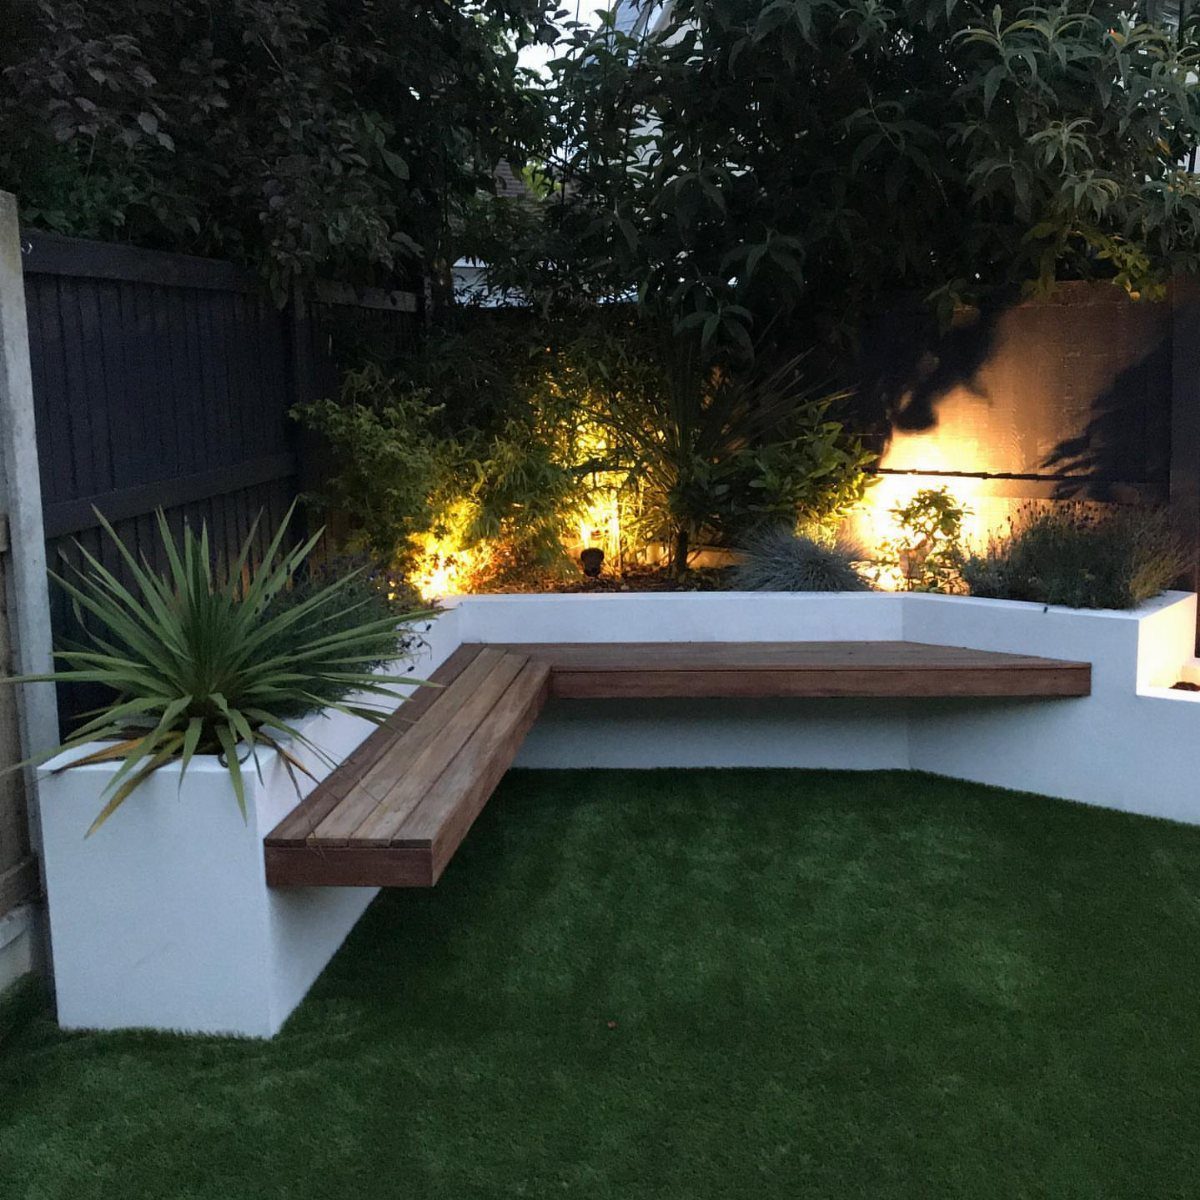
Adding a bench seat to one edge of the bed gives you a place to sit while you weed, thin seedlings, or tie up plants without dragging a chair across the lawn.
An L-shaped layout wraps the bench into the structure and defines the corner of the garden.
Build the bench at a height and depth that let you sit without perching or sliding forward. Mount it to the bed frame with brackets or through-bolts so it stays level under weight.
16. Bamboo Pole Raised Beds
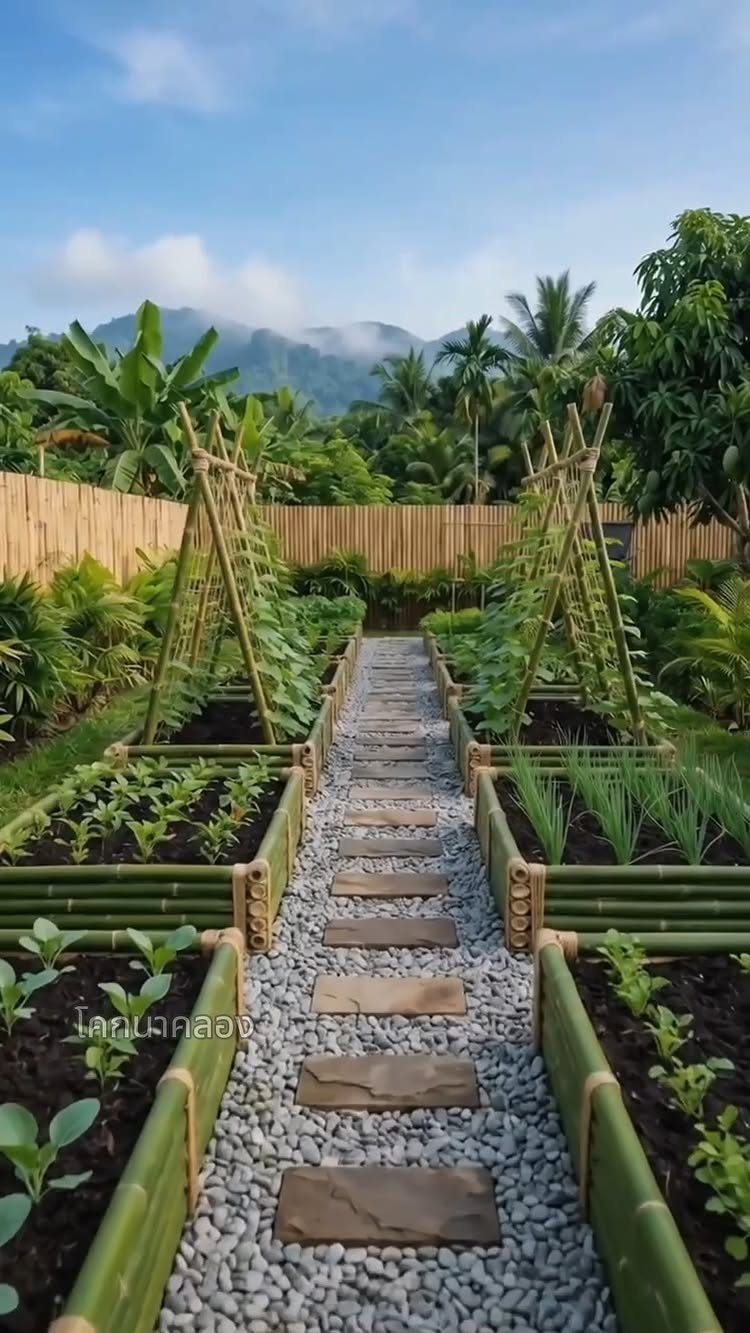
Framing a bed with bamboo poles gives you a lightweight structure that goes together without power tools. Lash the poles at the corners with twine or wire, or drill through and pin them with galvanized nails.
Bamboo lasts several seasons in dry climates but rots faster where it stays wet.
Split poles lie flatter and stack more tightly than whole canes. A gravel or stone path between beds keeps foot traffic off the soil and drains faster than mulch.
17. Fabric Liner Raised Beds
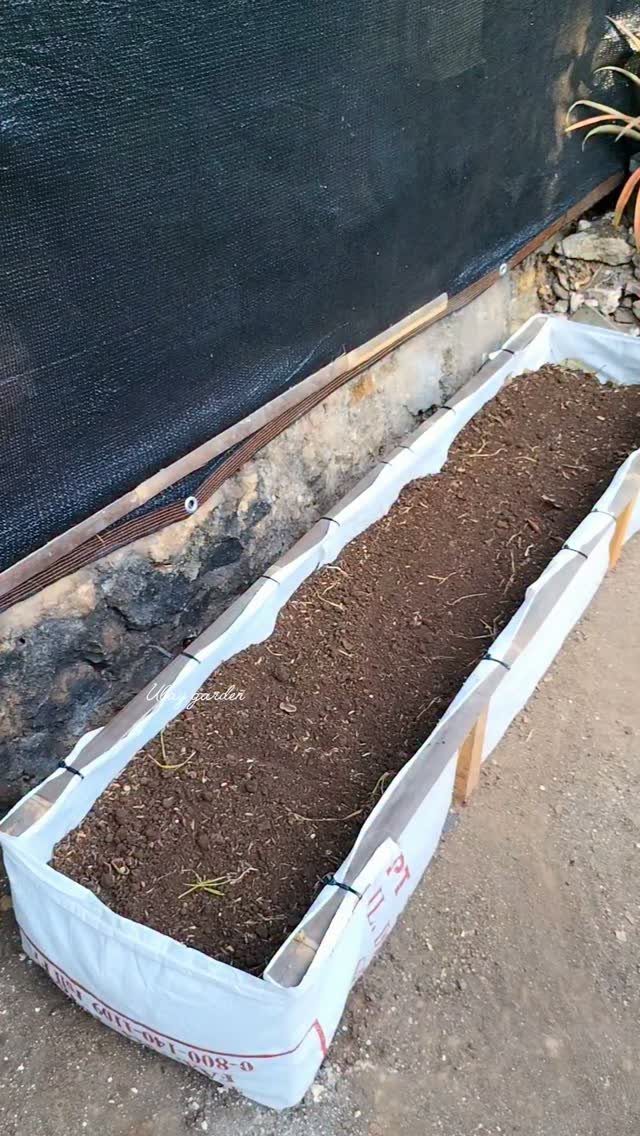
Fabric liners supported by wooden stakes form a flexible bed that drains freely and costs less than rigid framing. The fabric holds soil in place while letting excess water pass through, which prevents root rot in heavy rain.
Drive stakes into the ground at even intervals, then wrap the fabric around the outside and secure it with screws or staples.
Fold the top edge over for a finished look. Fabric beds collapse for storage when the season ends, and you can move them to a new spot without disassembling lumber.
18. Tiered Raised Garden Beds
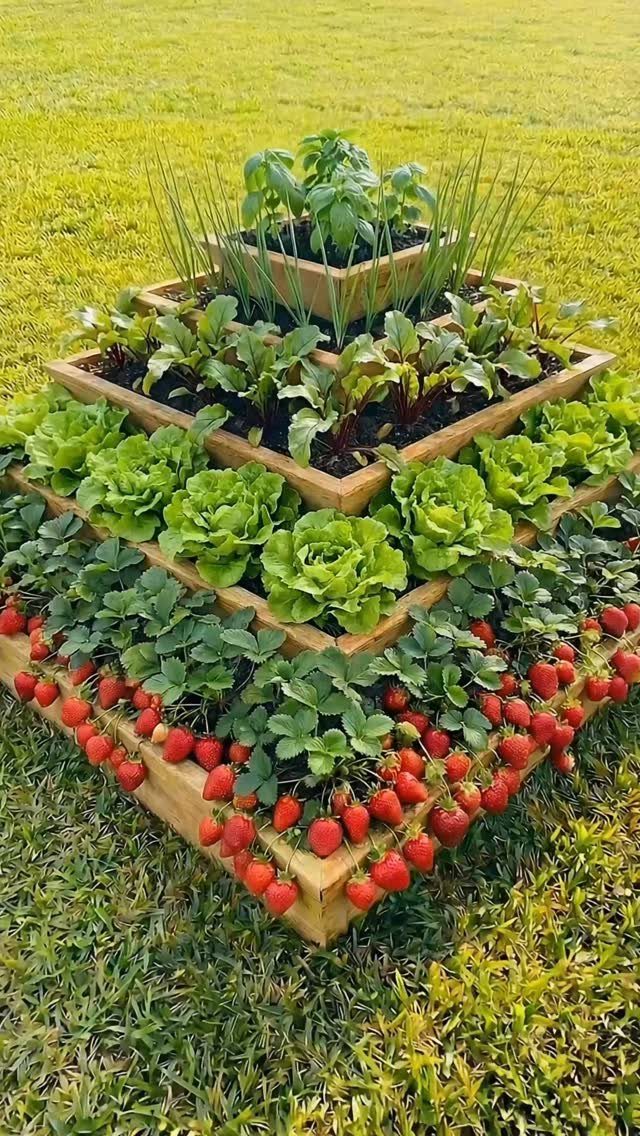
Stacking beds in tiers gives you multiple planting zones in the footprint of one bed and puts each level at a different height for easier reach.
Plant shallow-rooted crops like lettuce and herbs in the upper tiers, and deeper-rooted crops like strawberries below where the soil depth increases.
Build each tier as a separate frame, then stack and secure them with screws or brackets. The upper tiers hold less soil and dry out faster, so they need more frequent watering than the lower level.
Divide and conquer the project with the help of some netting and a pro tactic called square foot gardening. It means dividing your raised garden bed or other container into 1-square-foot segments and planting only one plant in each segment.
19. Stone Raised Garden Beds
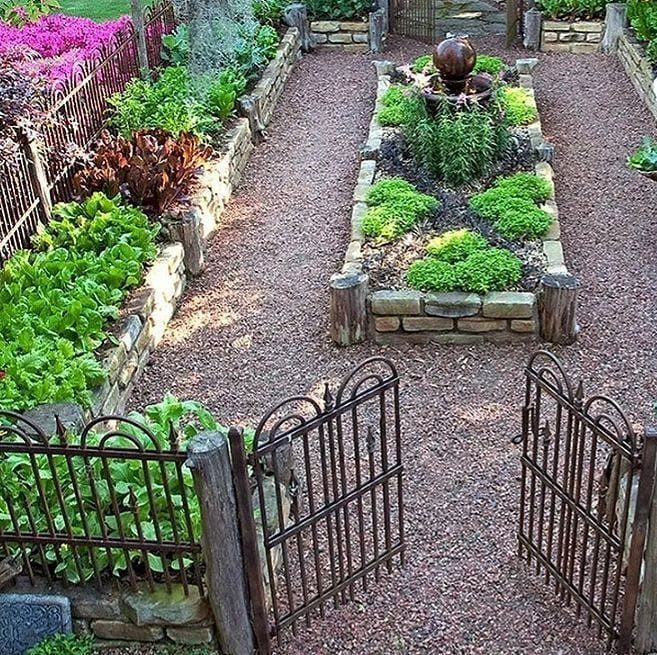
Natural stone walls hold soil in place and last decades without rotting or shifting. Stack flat stones dry or set them with mortar for a permanent border that defines the bed and gives the garden a finished look.
Dry-stacked stone lets water drain through the joints and allows you to adjust the wall later if needed.
Mortared joints lock the structure tight and keep weeds from rooting in the cracks. Irregular fieldstone costs less than cut stone and fits together with more texture.
Stone absorbs heat during the day and releases it slowly at night, which moderates soil temperature swings.
20. Straw Bale Garden Beds
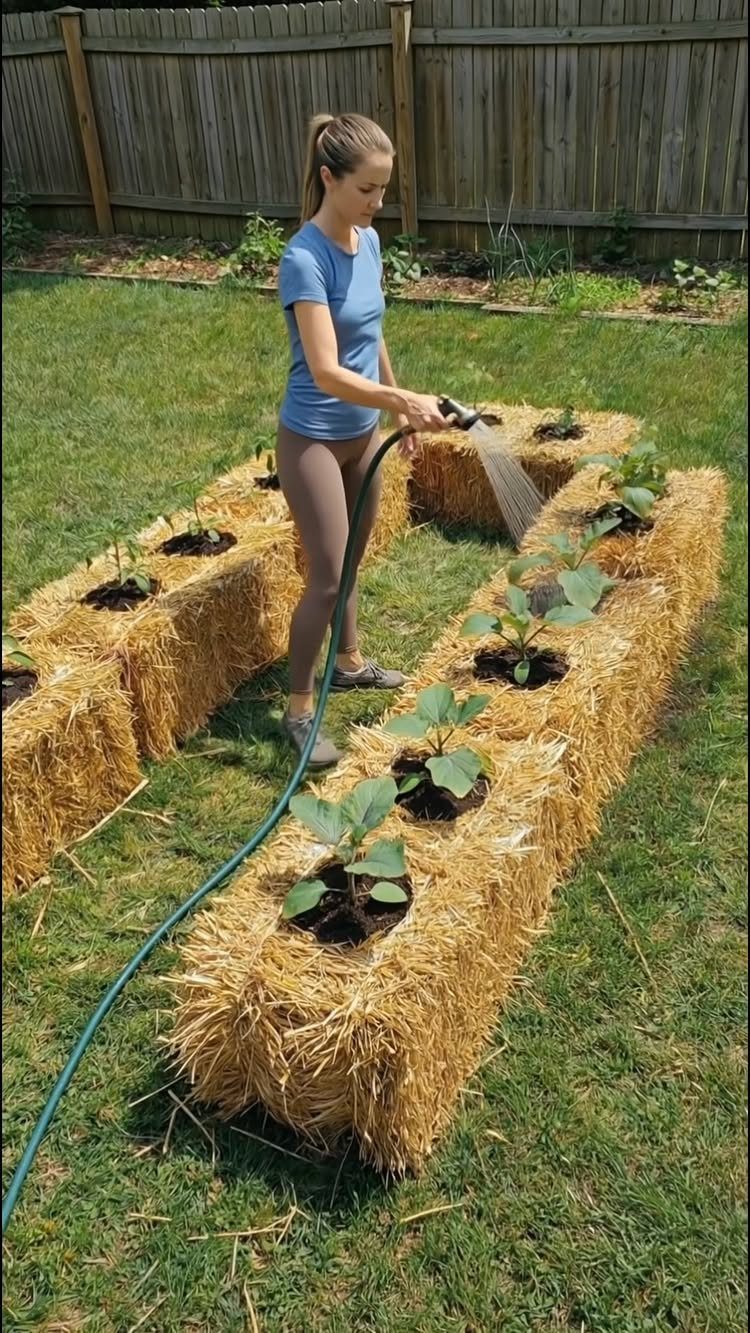
Straw bales set directly on grass or soil become planting beds that decompose over the season and leave compost behind. Each bale holds moisture well once conditioned and gives crops a sterile medium free of weed seeds and soilborne disease.
Condition bales by soaking them daily for a week, then add a nitrogen source like blood meal or lawn fertilizer to start decomposition. Plant seedlings into pockets of compost or potting mix set into the top of each bale.
Bales break down by fall, so plan to replace them each spring.
21. Cold Frame Raised Beds
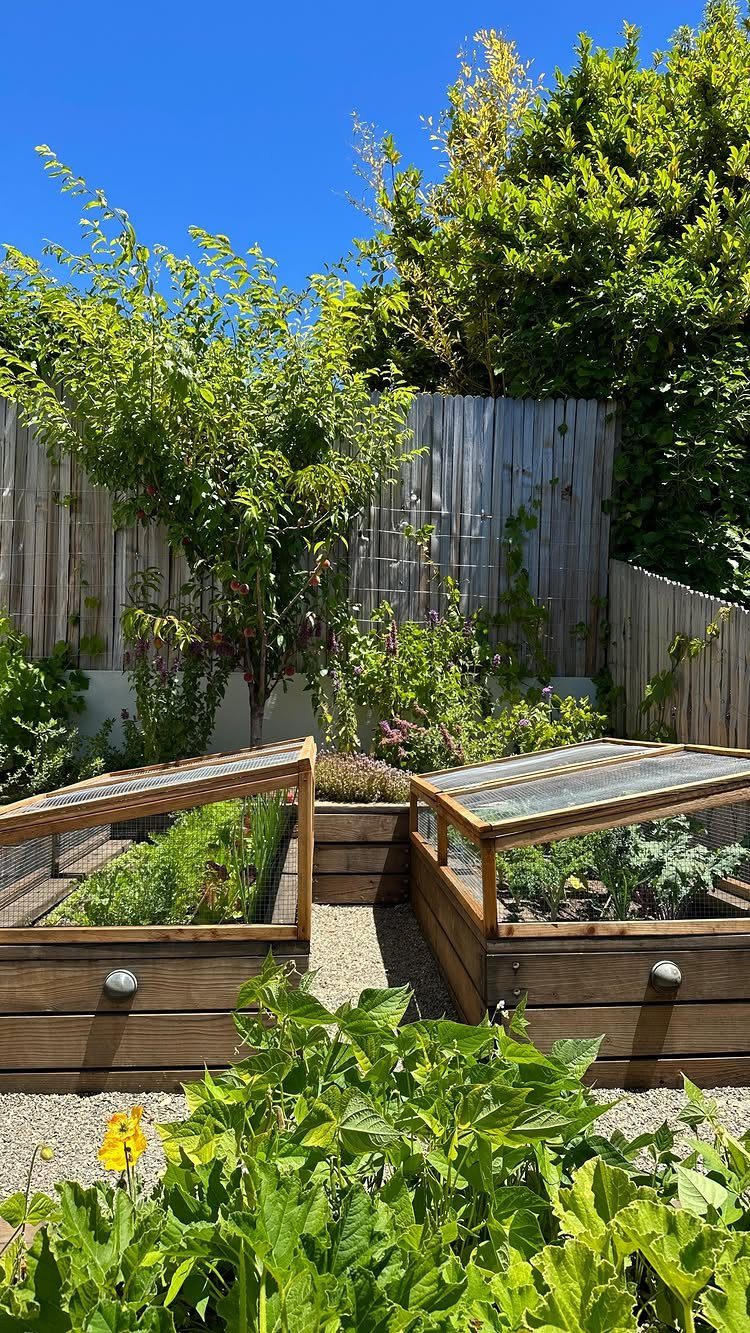
Fitting a raised bed with a hinged glass or polycarbonate lid turns it into a cold frame that holds heat through cool nights and extends the season by weeks on both ends.
The angled lid sheds rain and snow while trapping warmth inside during the day.
Prop the lid open when temperatures climb to prevent overheating.
Glass transmits more light than plastic but weighs more and cracks if dropped. Polycarbonate costs less, insulates better, and survives impacts.
Remove the lid entirely once frost danger passes and plants no longer need protection.
22. Keyhole or Segmented Wheel Bed
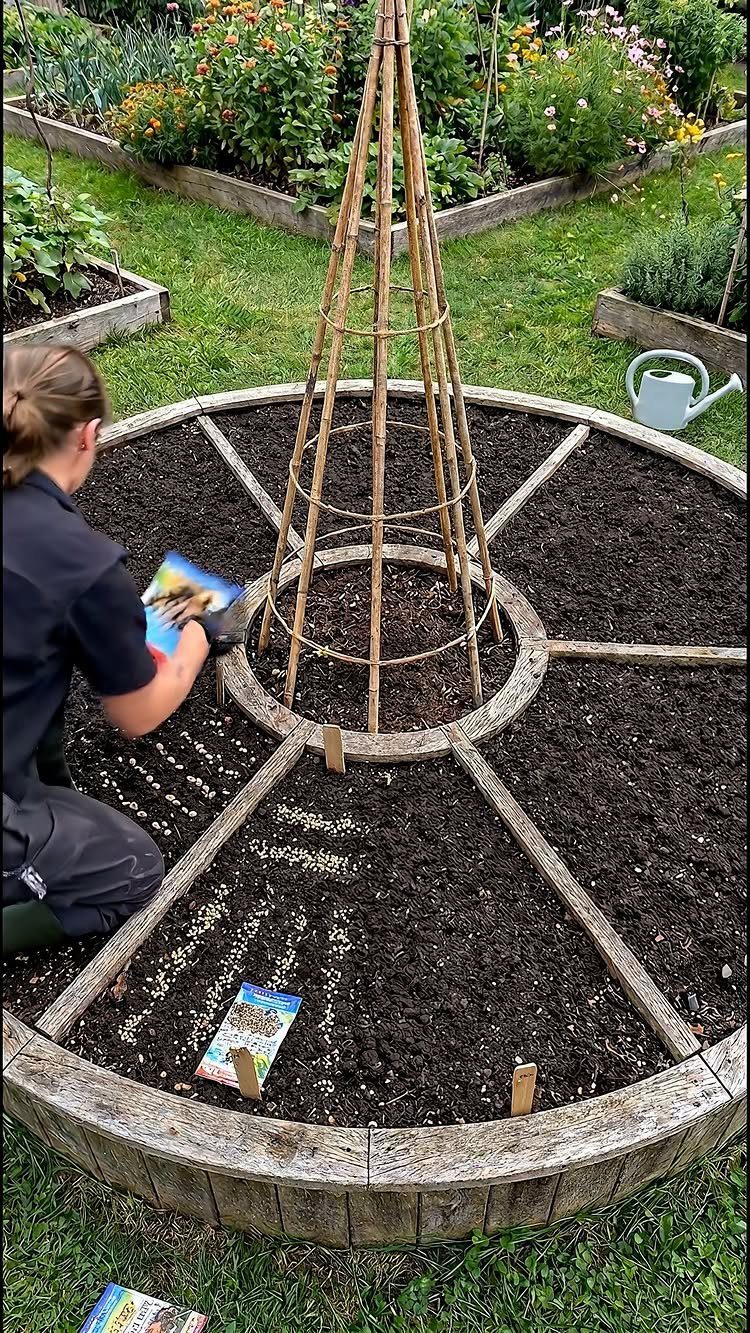
Dividing a circular bed into wedges gives each crop its own section and puts a walking path or compost basket at the center where you can reach all sides without stepping on soil.
The layout works well for herb gardens or companion plantings that benefit from separation.
A central trellis supports climbing beans, peas, or squash and adds height to the bed. Build the circle from curved or straight lumber segments joined at the wedge points, then fill each section with soil.
The radiating layout lets you see rotation zones at a glance and swap crops without sketching a plan.
23. Woven Wattle Raised Beds
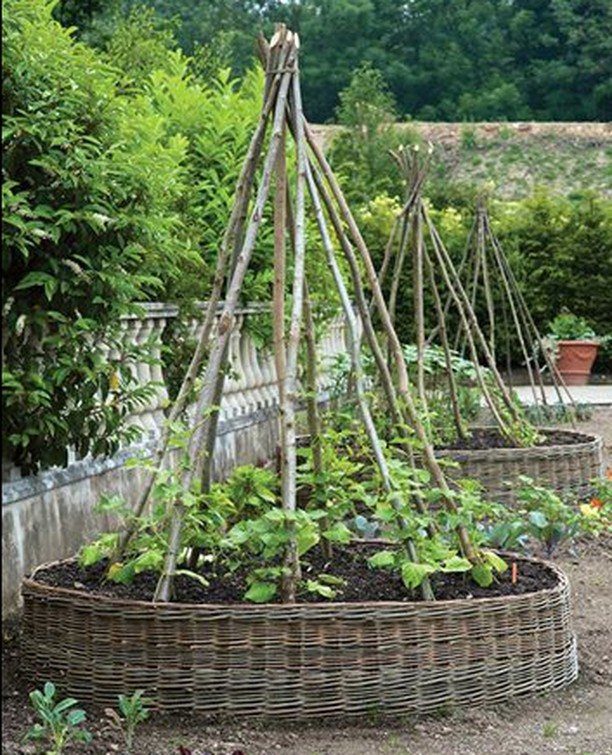
Weaving flexible branches between upright stakes forms a round bed that holds soil without hardware or rigid framing. Willow, hazel, and other pliable shoots work best and last several seasons before decomposing.
Drive stakes into the ground in a circle, then weave branches horizontally through them in an over-under pattern, packing each course tight against the one below.
The woven wall flexes slightly under soil pressure but holds its shape through rain and freeze cycles.
Add a teepee trellis at the center for beans or cucumbers that need vertical support.
24. Log-Walled Raised Beds
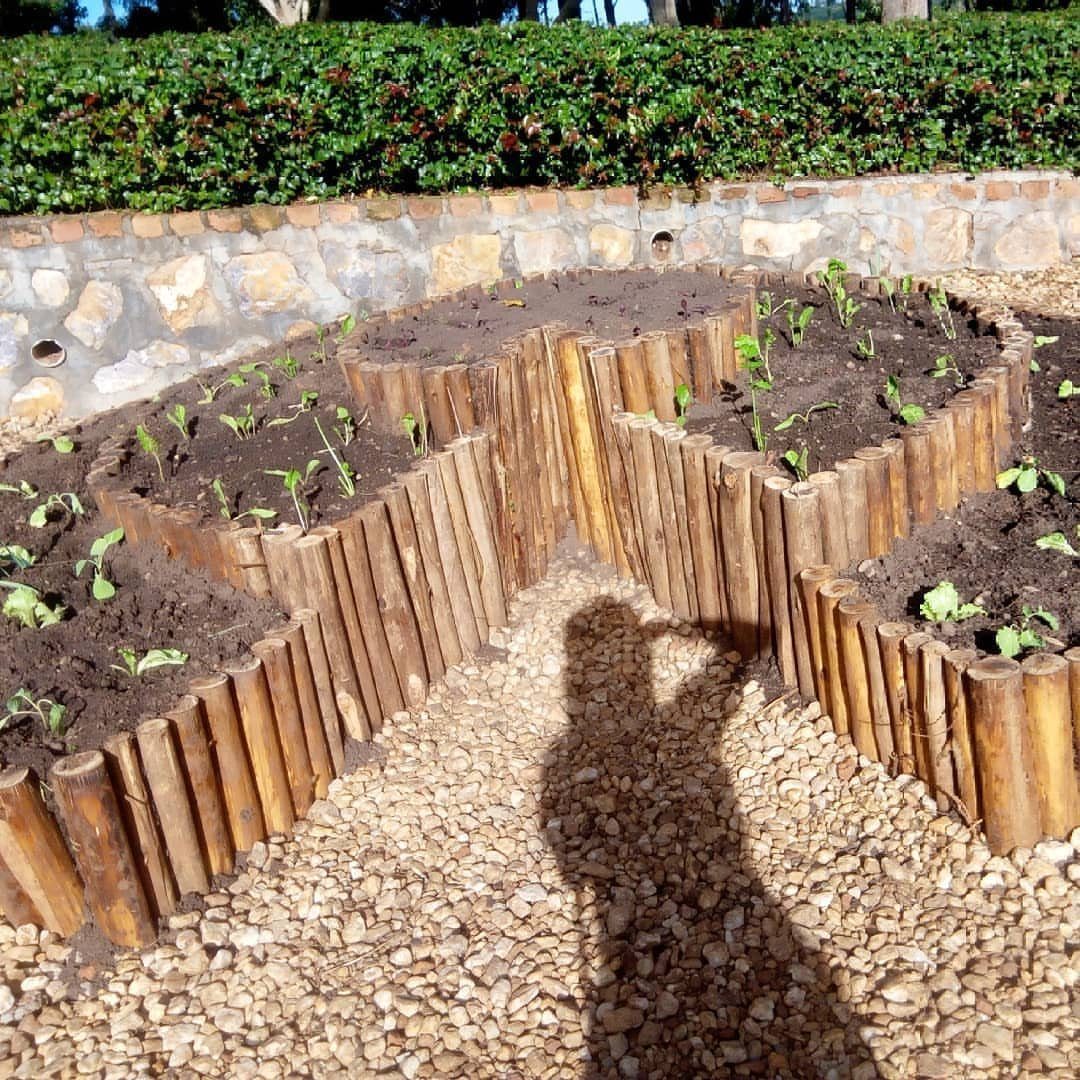
Vertical log walls frame these beds with natural texture and last longer than you’d expect when cedar or locust goes in. Logs notched at the corners lock together without fasteners and hold soil firmly as they season.
Untreated logs rot faster than milled lumber but cost nothing if sourced from your own property. Stack them two or three high for standard bed depth, and backfill any gaps between rounds with soil or gravel to prevent washout.
The rustic look suits cottage gardens and woodland settings better than formal layouts.
25. Trellis Frame Raised Beds
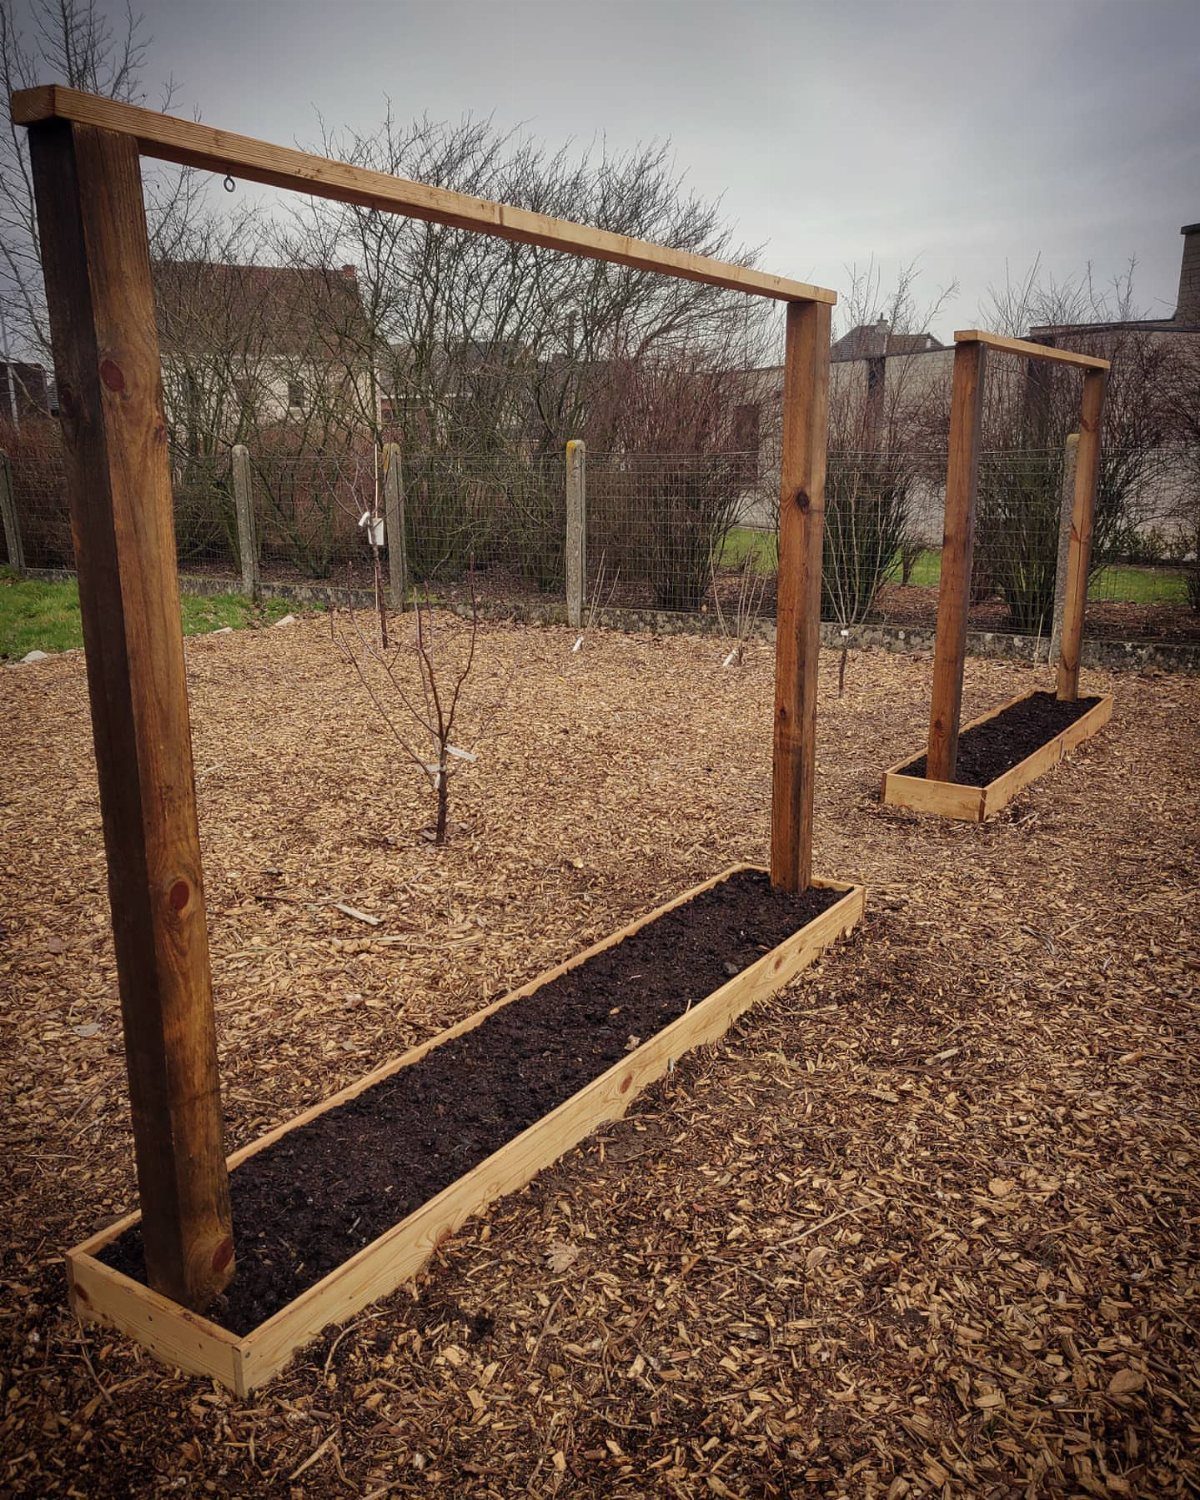
Attaching a tall frame to the back of the bed gives climbing crops a vertical structure without driving separate posts or wiring later.
Build the frame from 2×2 lumber or PVC pipe, then string wire, twine, or netting between the uprights.
Peas, beans, cucumbers, and squash climb readily and free up bed space for other crops below.
A top crossbar stiffens the frame and gives you a place to hang drip lines or shade cloth when heat builds.
Filling Beds and Soil Drainage
Fill a raised bed with a mix of topsoil and compost.
Minnesota Extension puts it at one-half to two-thirds topsoil and one-third to one-half plant-based compost. Loam or sandy loam topsoil works best; avoid soil that is very sandy or heavy in clay.
Too much compost dries out fast and can shed water once it gets bone-dry, so keep it to a third or less of the total volume. Potting soil dries even faster and belongs in containers, not beds.
A cubic yard of topsoil delivered in a truck bed runs cheaper per pound than anything you’ll haul home in bags. Look for mixes labeled "raised bed mix" if you are buying bags.
Manure adds phosphorus. Use it only if a soil test shows you need more.
The height and the loose mix mean water moves through faster, so I add a watering day most weeks compared to an in-ground plot.
Choosing a Bed Location and Size
Place the bed where it gets six to eight hours of sun if you are growing tomatoes, peppers, or eggplants. Some greens tolerate part shade or full shade, so match the light to the crop.
Put the bed near a water source. You will water more often than you would at ground level, and dragging hoses across the yard gets old fast.
Make the bed narrow enough that you can reach the center from either side without stepping in.
A 4-foot width works for most people. Fine Gardening runs 4-by-8-foot beds with 3-foot paths between them, which gives wheelbarrows room to pass and keeps the layout easy to navigate.
Level ground makes building and planting simpler.
Watering and Ongoing Care
I check an inch down with my finger and water whenever that layer feels dry, since the loose soil mix lets moisture slip through quickly. Dry spells mean daily watering.
Drip tubing or a soaker hose laid on the soil surface puts water at the roots without wetting foliage, which cuts down on disease spread.
Overhead sprinklers work but get leaves wet. A watering can is still a solid choice if the bed is small.
Mulch holds moisture in the soil and keeps weeds down. Add extra mulch around the edges in midsummer if water runs off the surface once the soil dries and hardens.
Base fertilizer decisions on a soil test rather than guessing. I chop finished plants and turn them under at season’s end so they break down into next year’s bed.
Frequently Asked Questions
What should I put at the bottom of a raised garden bed?
Hardware cloth or poultry wire at the bottom stops tunneling rodents from entering the bed from below. Landscape fabric or weed barrier along the sides and bottom keeps soil from washing out in heavy rain and slows weeds.
If the bed sits on a patio or other non-soil surface, drill drainage holes so roots never sit in standing water.
What are the downsides of using raised beds?
Raised bed soil dries out faster than ground-level garden soil because it drains more freely and exposes more surface area to sun and wind.
Taller beds need even more frequent watering. Beds also cost more upfront than planting directly in the ground, especially when built from cedar, stone, or metal.
Is it cheaper to build a raised bed or buy one?
Building your own bed from lumber gives you control over size and height, and you can choose less expensive materials like untreated 2×6 boards or corrugated metal panels.
Pre-built cedar beds cost more now than they did a few years ago, but galvanized stock tanks and cattle troughs offer a ready-made alternative that costs less than milled cedar and lasts decades without rotting.
What should you not plant in a raised garden bed?
Melons and sweet corn all send runners or roots far beyond the frame, so they fill a raised bed fast and still want more room than you gave them.
Bush varieties of tomatoes, cucumbers, and beans fit well in beds, but vining types take up room that smaller crops like lettuce, greens, and radishes use more efficiently.