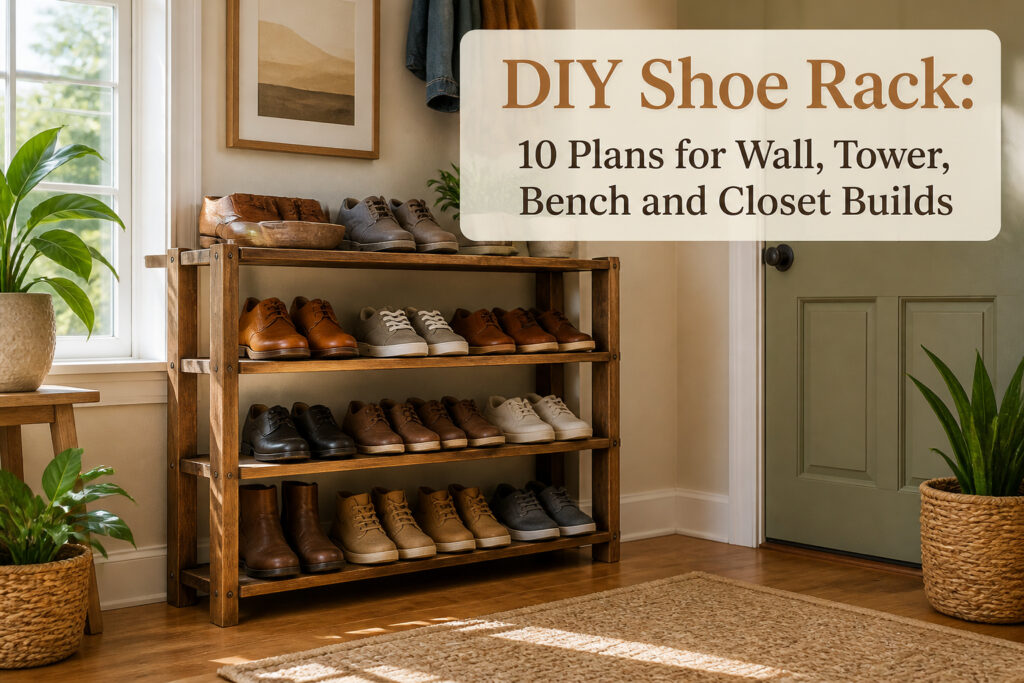
A DIY shoe rack is a piece of furniture you build yourself to store shoes off the floor, and the plans that actually work depend on whether you own the wall you’re drilling into.
Wall-mounted racks from a single 1×3 board cost about six dollars and disappear behind a door swing, but they fail the moment wet boots or wide men’s dress shoes need a home.
The Z tower squeezes into a 14-inch hallway gap yet demands lag screws into studs, not drywall anchors, because an empty rack still tips when a toddler climbs it.
1. One Board Wall Shoe Rack
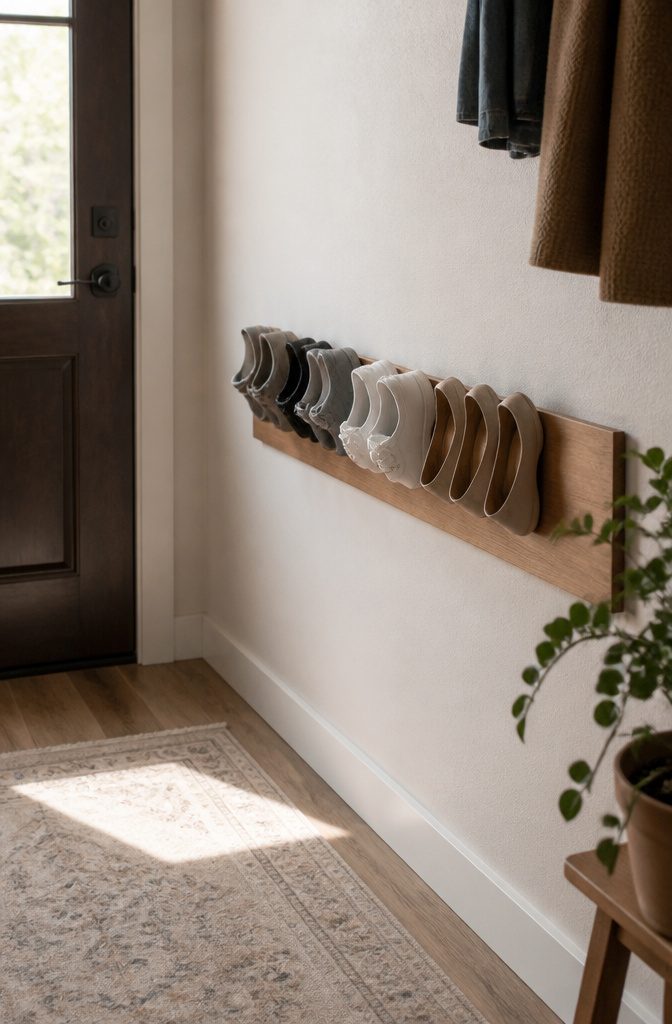
A single 1×3 board, eight feet long, is enough wood to clear an entire row of shoes off a narrow entryway floor.
The trick is keeping the profile slim: the 2.5-inch face of a 1×3 sits almost flush to the wall, so the rack disappears behind the door swing instead of blocking it.
The build is straightforward saw-and-drill work.
Rip the board into angled cleats, screw them to a backer strip, and mount the whole piece to studs. Shoes sit with toes down, heels against the wall, held by gravity and the slight backward tilt.
Everyday sneakers and flats fit this geometry fine; anything with a platform sole or a chunky heel wants to roll forward and needs a deeper bin instead.
What sold me on trying this was the math.
One board, one trip to the lumber aisle, maybe six dollars in material. The finished rack runs about 46 inches wide, enough for four or five pairs depending on how tightly you pack them.
The real limitation is the narrow landing zone: wet boots or wide men’s dress shoes will overhang or slip. This is a fair-weather, low-profile solution, not a catch-all.

Sturdy and Durable: You'll receive two wall-mounted shoe racks, each meticulously crafted from solid pine wood and metal for stability, longevity, and durability, providing you with a safe and reliable shoe storage solution. The pine wood is finished with walnut-colored paint, adding aesthetic appeal and an American-style charm.

【Expandable Wall Mounted Shoe Rack】Tired of tripping over scattered shoes or struggling to find space for your footwear collection? Our 3-Pack wall shoe racks are designed with remarkable flexibility. They can effortlessly stretch from 17.5" to 31", providing ample space to neatly organize up to 24 pairs of adult shoes. Moreover, it comes with four hooks that can be used for hanging clothes, hats, keys and so on. It can make good use of wall and corner space at home to keep your shoes in order.
2. Quick & Easy 2-Tier Shoe Rack
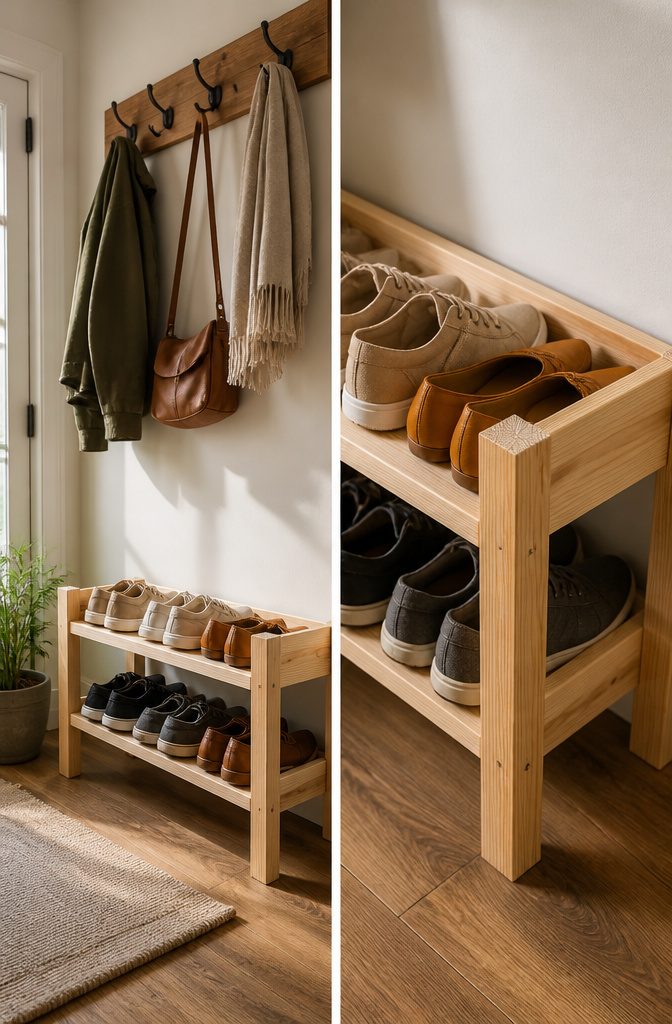
One 2×2 and two 1×3 boards turn into a shoe rack faster than a trip to the big-box store takes.
The 2×2 becomes the uprights and the 1x3s become the two tiers, with the narrower boards sitting inside the frame rather than on top of it so shoes don’t slide off the back.
A saw and a drill are the only tools, and the whole cut list fits on a sticky note.
I built this first when friends were coming over Saturday and my shoes had colonized the entryway floor.
The 2×2 gives the rack enough heft that it doesn’t wobble when you kick off boots, but the 1x3s keep the profile slim enough to tuck beside a door.
The tiers sit recessed about half an inch inside the uprights, which is the detail that keeps pairs from drifting backward into the wall.
Total material runs to roughly the cost of a cheap flat-pack shelf, except this one survives being moved. I have knocked mine over twice and the joints held.
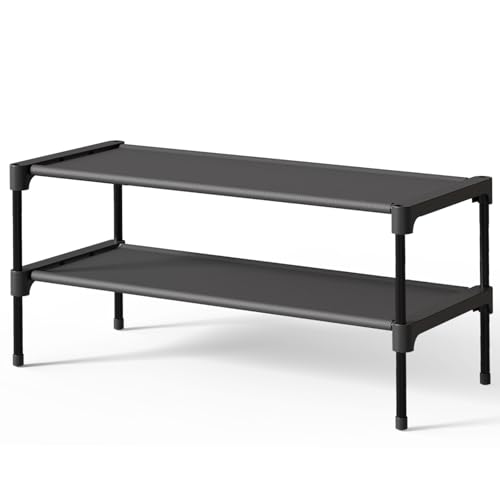
SPACIOUS STORAGE: This shoe rack offers plenty of space to accommodate your everyday footwear, including sneakers, heels, and slippers. It's designed to meet all your storage needs efficiently.

Spacious: This 11.8"D x 24.5"W x 12.2"H shoe rack offers ample storage space for your sneakers, high heels, and slippers. Note: Each tier supports up to 22 lb. To extend its service life, please do not place overly heavy items on it

【Preferred high-quality bamboo】The entryway shoe rack is made of eco-friendly bamboo for an elegant look and very durable. After high temperature carbonization,not easy to crack and deform. Due to the properties of bamboo, bamboo boards are stronger and last longer than wood. In addition, bamboo is a renewable resource and is naturally environmentally friendly.
3. Simple 2×2 Shoe Rack
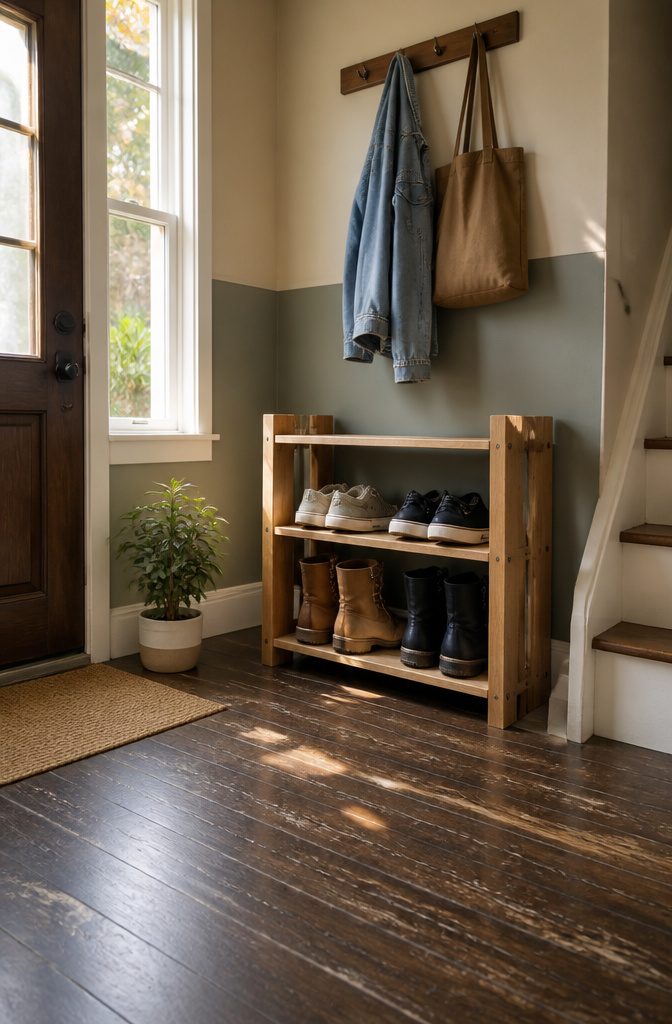
A 2×2 frame is the kind of lumber you can carry home without renting a truck, and it builds into something that fits either side of an entry door or the short wall of a closet without much rethinking.
The trick is deciding how many shelves you actually need before you cut anything.
I built one at two shelves for a narrow closet where boots were the tallest thing stored, then added a third shelf on a later version for an entryway where sneakers and flats outnumbered everything else.
That extra shelf drops the vertical spacing to about 5 inches, which is tight for heels but fine for anything with a low profile.
The frame itself adapts width by adding or subtracting from the horizontal 2×2 runs.
I cut the first one at 28 1/2 inches because that matched the closet floor space I had, but the same joint, pocket holes and 1 1/4 inch screws, scales up or down without changing how it goes together.
What I missed was the baseboard.
I measured floor to ceiling in that closet and cut my vertical legs to fit, then stood the frame in place and it kicked out at the bottom because the baseboard pushed the whole thing forward by half an inch.
Pull the measurement from the wall surface above the baseboard, not from the floor, or the rack leans like a chair with two short legs.

[Holds a Lot] Keep your shoes in order and easy to access with this 11.8"D x 36.2"W x 14.6"H shoe rack. It's spacious enough to fit up to 12 pairs of men's or 15 pairs of women's shoes

【Expandable Design】Adjust the low shoe rack’s length to fit different spaces, ideal for your dorm, narrow small spaces, porch, bedroom, outdoor, hallway, doorway, and beyond. Size: 18.5-33.8”L x 9.3”W x 15.4”H.

4. Stackable Shoe Racks
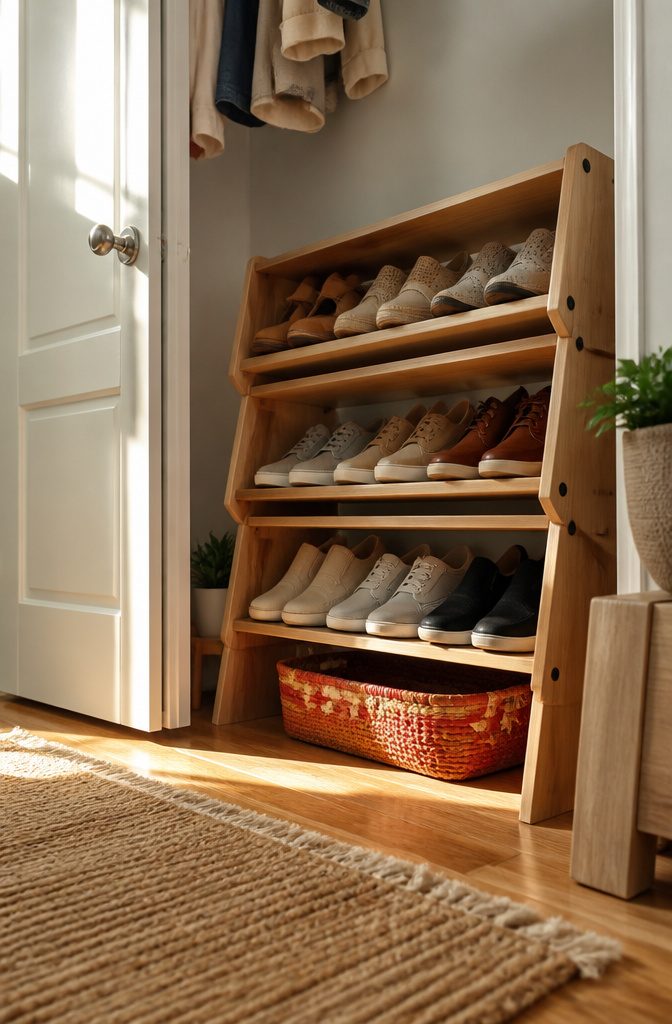
A single stackable module starts at about 18 inches wide, 12 inches deep, and roughly 13 inches tall. That footprint fits one pair of adult sneakers per shelf, or two if you angle them heel-to-toe.
The feet on the base piece are sized to lock into the shelf above, which sounds clever until you realize the fit loosens after a few re-stacks.
I built three modules for my closet and liked the flexibility at first. Shoes came and went, so the height changed with the season.
But stacking three high made the whole column sway when I pulled a pair from the middle. The interlocking feet keep the units from sliding apart, yet they do nothing for lateral stiffness.
Two modules stay solid on their own. Three need a wall anchor or a strap screwed into the top unit and into a stud.
I used a simple L-bracket behind the top shelf, painted to match, and the wobble disappeared. Without that fix, the rack was a gentle push from dumping twelve pairs onto the floor.

【Small shoe rack for narrow space】only an area of L (11.02 inch) x W (10.24 inch) is needed for the shoe rack.

【Small shoe rack for narrow space】only an area of L (11 inch) x W (10.2 inch) is needed for the shoe rack.

【Small shoe rack for narrow space】only an area of L (11 inch) x W (10.2 inch) is needed for the shoe rack.
5. Z Tower Shoe Rack
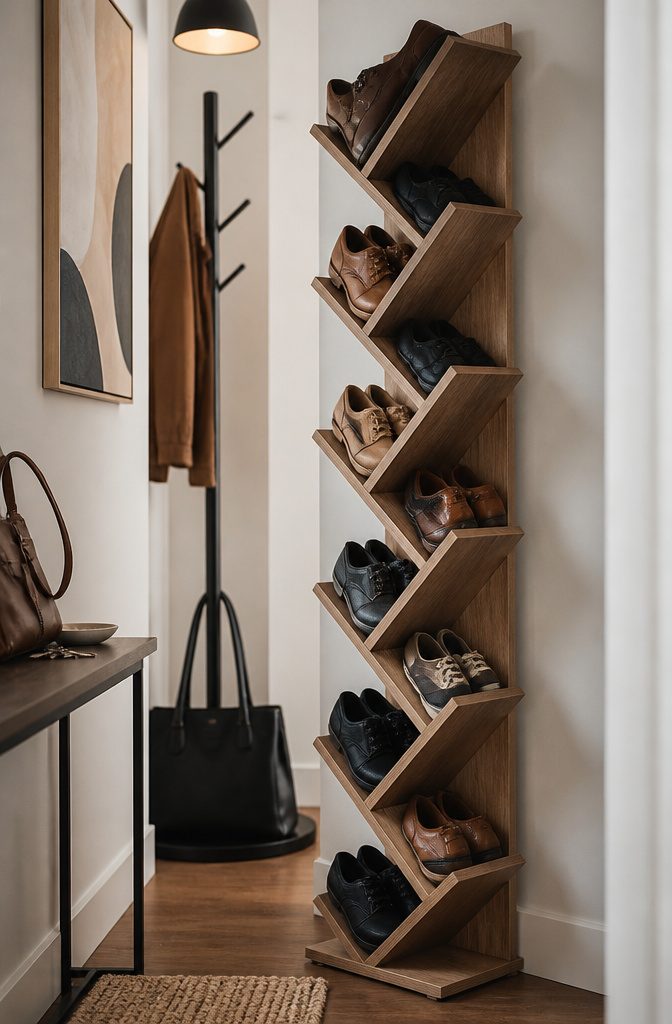
A Z tower shoe rack earns its name from the zigzag profile: shelves run front to back at an angle, creating that characteristic shape when viewed from the side.
The slant matters more than the silhouette. Shoes rest toe-down, heel-up, and the angle keeps them from sliding off even when someone bumps the unit grabbing a coat.
I built mine to fit a 14-inch gap between the door and the hallway wall, about 90 inches tall, which sounds extreme until you pace it out in a narrow entry.
Plywood forms the shelves, boards the frame.
The brackets mount with the angled end against the back wall; I measured up 8 inches from the floor for the first shelf, then spaced the rest 5 inches apart using a scrap spacer block so I never had to pull the tape measure again.
Each shelf gets tacked to its brackets with brad nails through the top to stop any lateral slide.
The mistake came after I thought I was finished. My toddler used the lowest shelf as a ladder step and pulled the whole unit toward him.
It was empty at the time, but the physics do not care. I added L-brackets lag-screwed to wall studs, not drywall anchors, and that second version has survived two years of daily use.
For a renter, a French cleat or heavy-duty command strips rated for the weight might salvage the look without the holes, though I have not tested either long enough to trust them with a full load.


Space-saving design: Our boot rack maximizes your storage space by utilizing wall space, No more wasting floor space to stacking cluttered boots

Large Capacity Shoe Rack: This shoe rack offers spacious, tiered storage, holding 3-4 pairs of shoes per layer, with a 8-tier structure that fulfills family storage needs. It also serves as a display area for bags, flowers, and family photos, keeping the space organized
6. Wall-Mounted Shoe Storage
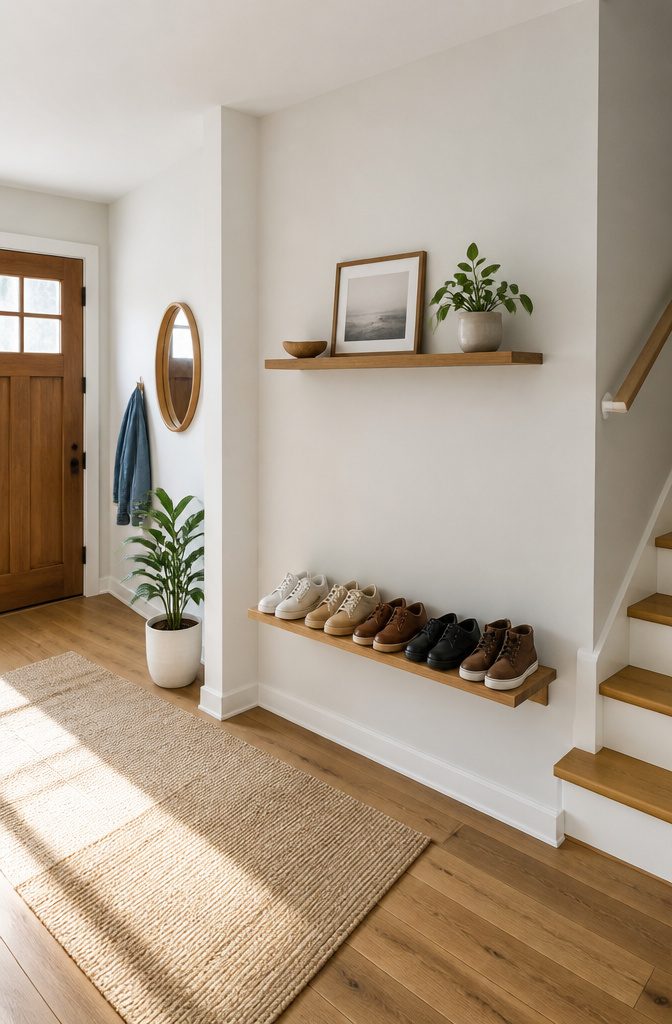
Wall-mounted storage keeps the floor clear for the things that actually need it.
For this build, the front and back boards are 1x4x48 and the main board is 1x3x48, sized to hold six pairs of adult shoes without crowding the wall.
Finding the studs matters more here than with a freestanding piece. I mark them first with painter’s tape so I do not lose the line once the board goes up.
The 1×3 gets pre-drilled because a split at 48 inches would ruin the whole board, and a cracked main board is not something you patch cleanly. Two-and-a-half-inch screws into the studs do the actual holding.
A slim organizer like this one, built from a single 1×3, takes almost no room yet keeps everyday shoes off the floor. The whole project finishes in one afternoon if the cuts are already done.
7. Shoe Storage Console Table
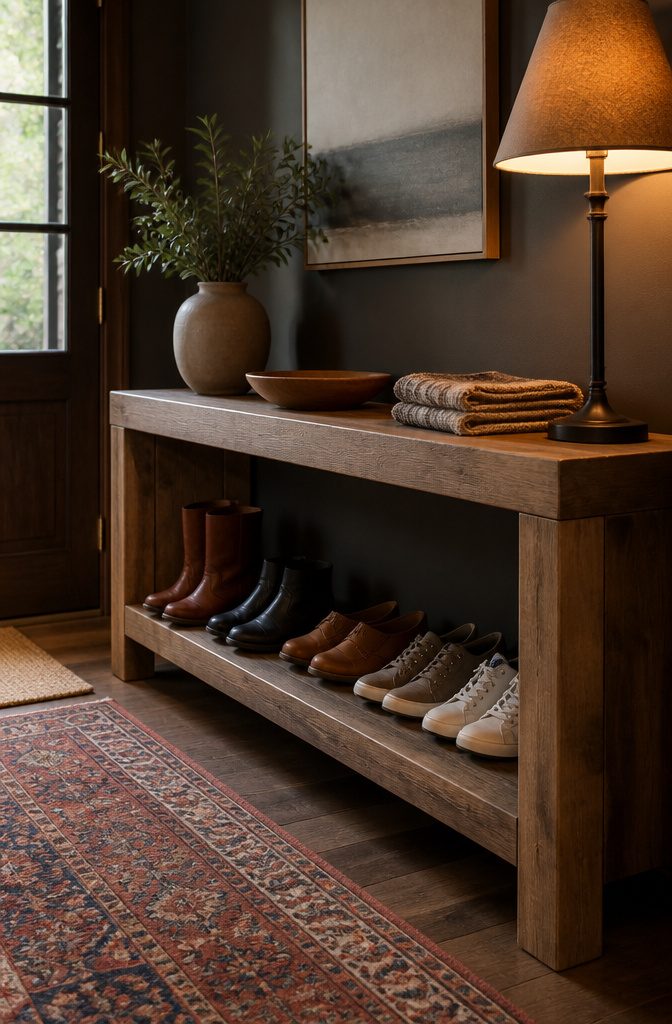
A console table with a lower shelf for shoes solves the awkward gap most back doors create between coming inside and actually putting things down.
The top needs to be deep enough for a mail pile and your elbows when you tie your laces, but the shoe shelf underneath wants a different measurement entirely.
Shoes sit happily on a shelf about 13 inches deep, angled slightly or flat, while the tabletop above can run 15–18 inches without feeling like a dining table in your hallway.
My first attempt stood 36 inches tall, standard desk height, and I bent my back every time I dropped my keys. The second one I built at 30 inches, and suddenly the top felt too low for the mirror above it.
Thirty-three inches is where I landed, and that two-inch swing between versions taught me more than any plan I found online. The proportions matter more than the wood species or the finish.
The shelf itself stays open, no back panel, because wet boots in January need air more than they need hiding.
A lip across the front, just a 1×2, keeps sneakers from sliding out when someone bumps it pulling off a coat.
Mine lives by the back door because the front entry is too narrow for anything deeper than a picture ledge, and the back door is where the mud actually happens.

【High-Quality Bamboo Materials】 We choose bamboo grown in a natural alpine region. The texture is hard, the structure is firm, and the service life is long. After high temperature carbonization, the product is waterproof and not easy to crack and deform.

Organize your shoe collection with this versatile bamboo shoe rack that fits perfectly in your closet or entryway.

Holds approximately 6 to 8 pairs of adult size shoes
8. Shoe Storage Bench
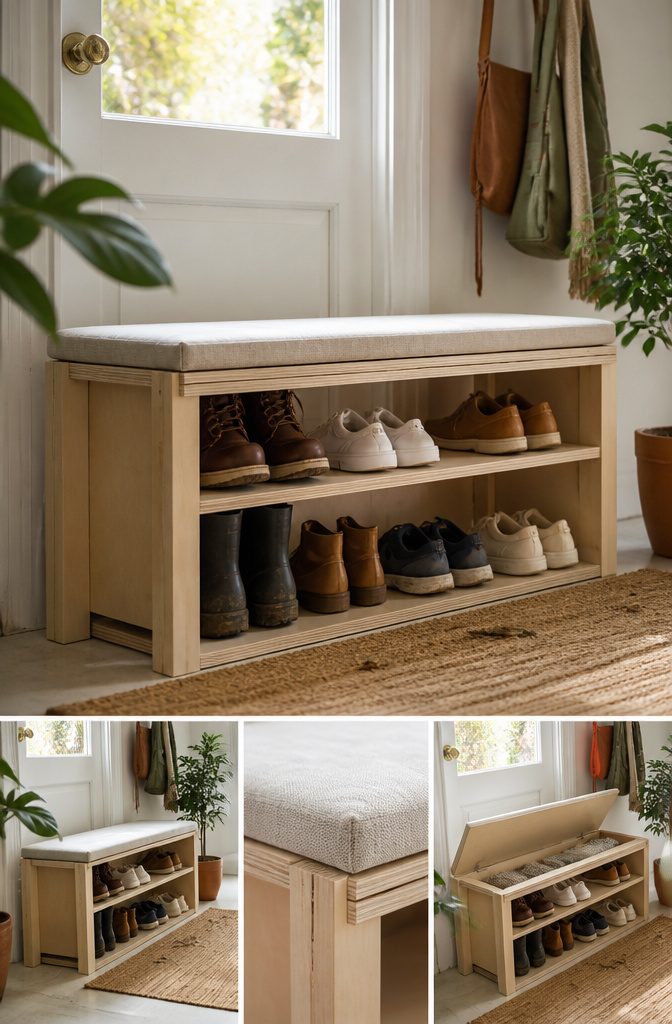
A bench with open shelves underneath turns the spot where you kick off boots into actual storage.
I built mine from 3/4 inch plywood for the box and 2x2s for the legs and stretchers, which kept the whole frame light enough to move through a doorway without dismantling it.
The lower shelf sits high enough that my boots clear the deck by about two inches, a measurement I got wrong the first time and paid for with a second cut.
I finished everything with semi-gloss latex paint, three coats with a foam roller so the surface would wipe clean instead of hold dust like a matte would.
The cushion came later, after I lived with the bare plywood top for a month and realized nobody sits on a hard bench to lace up.
I stapled a four-inch foam pad to a plywood lid that lifts off, which also means I can still get to the middle shelf if I need to.
The 2×2 stretchers in back do the real work of keeping the sides from wobbling; pocket screws hold the shelves, but that back piece is what lets a grown person sit down without the frame racking.

【Expandable Design】Adjust the low shoe rack’s length to fit different spaces, ideal for your dorm, narrow small spaces, porch, bedroom, outdoor, hallway, doorway, and beyond. Size: 18.5-33.8”L x 9.3”W x 15.4”H.

Large Capacity: This shoe rack (11.7"D x 36.1"W x 12.2"H) provides ample storage space, with each tier capable of holding 5 pairs of women’s shoes or 4 pairs of men’s shoes
9. Pallet Shoe Rack
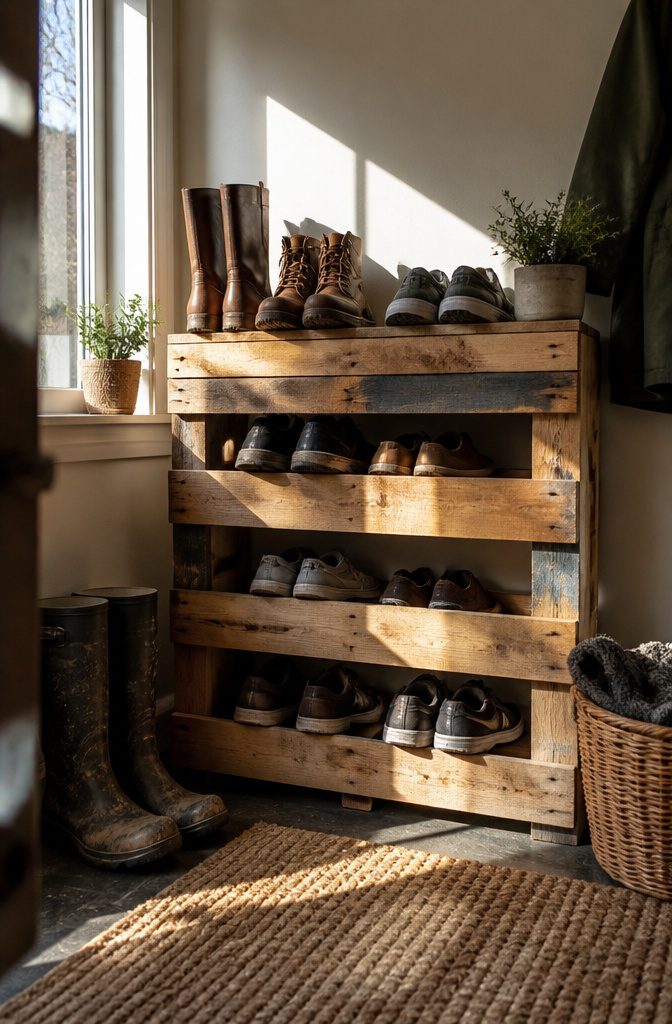
Pallet wood looks rustic until it gives you a splinter the size of a toothpick. The pallets that work for indoor furniture are the ones marked HT for heat-treated, not MB for methyl bromide, and finding them took three stops.
A local tile shop had a stack out back they were glad to lose. Sanding ate up two hours because pallet boards cup and twist, and the disassembly took longer than the actual build.
A crowbar and a hammer pull the nails, but half the boards crack if you rush it. I ended up with enough clean slats for two small wall racks, nothing more.
The finished piece sits in a mudroom now, and the gaps between slats vent wet boots better than a solid shelf would. Renters should skip this one unless they own a sander and have a place to make sawdust.
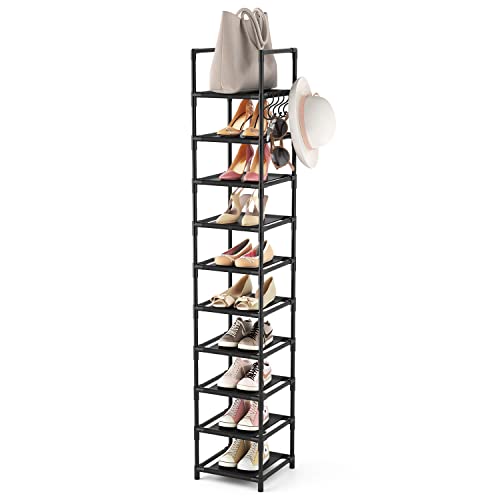
[Space Saving and Large Capacity] Dimensions of vertical shoe rack: 11.5"L x 11.5"W x66.93"H. Closet shoe organizer can store up 10-15 pairs of shoes and boots, the shoe rack organizer weighs 3.5 lbs, easy to move. This is a narrow and tall shoe stand, ideal for small spaces and large storage capacity, becoming an ideal storage solution for any narrow or tiny space, such as closets, entryways, dorms, bedrooms, hallways, corners, garages, etc.

【Space-Saving Vertical Shoe Organizer】This tall narrow shoe rack maximizes vertical space (48.3"H) for small areas like entryways, closets, and dorms. Its slim design (10.2"D x 11"W) fits tight corners, making it a shoe storage solution for small spaces—perfect for apartments and studios.

【Small shoe rack for narrow space】only an area of L (11 inch) x W (10.2 inch) is needed for the shoe rack.
10. Slanted Shoe Shelves for Closet
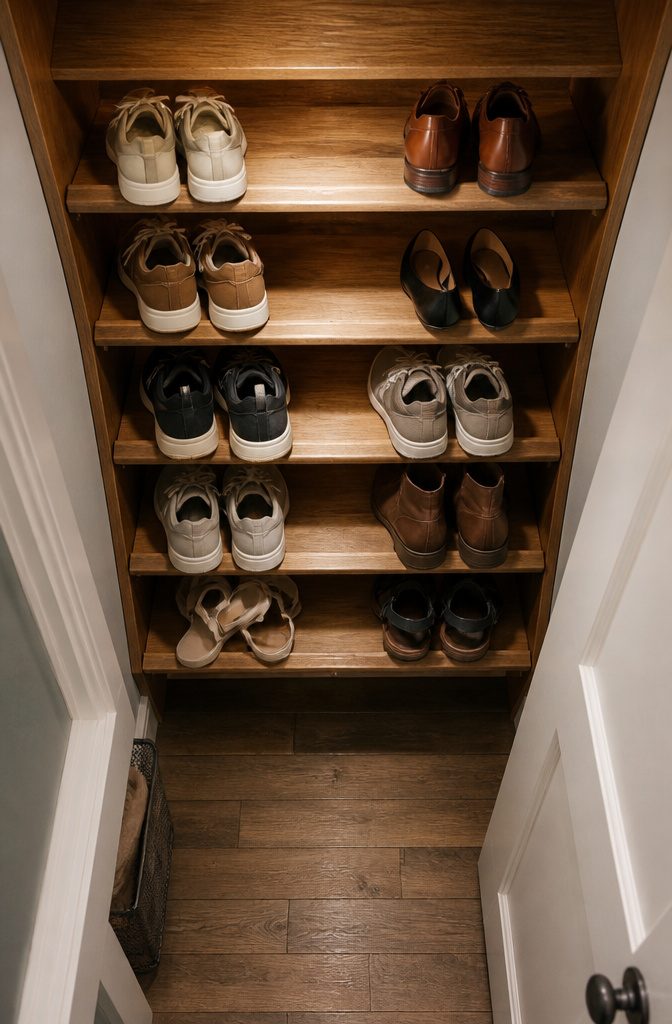
Angled shelves keep shoes visible without eating up closet depth the way flat storage does.
The toe faces out, the heel sits higher, and in a standard reach-in you gain back several inches of floor space. I built mine at roughly 30 degrees after watching pairs slide off anything steeper.
The first version had no lip or block at the back.
A running toddler, a hurried morning, one shoe gone. I added a stop block screwed to the rear edge of each shelf, nothing fancy, just a strip of the same poplar, and that ended the problem.
Flat shelves in that same closet footprint held fewer pairs because each row needed full shoe length plus clearance to pull them free. The slant lets rows sit closer vertically without scuffing, since only the sole contacts the shelf below.

Keep wet footwear organized with this shoe drying rack designed for sneakers, boots and outdoor shoes. The elevated design allows airflow around shoes, helping them dry naturally after rain, outdoor activities, gardening or sports.
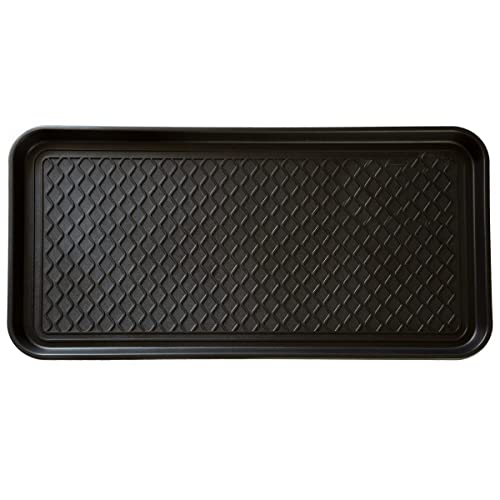
VERSATILE SHOE TRAY - Keep your home clean and tidy with this indoor/outdoor shoe mat. Designed for versatile utility, this boot tray provides space for shoes to dry in your entryway or prevents pet food and water from spreading across your floor.

Maximize Space: Say goodbye to messy piles of tangled footwear. Our tall boot rack organizer is your answer to saving space in your entryway, closet, or garage while keeping up to six pairs of shoes and boots in order.
Materials and Tools
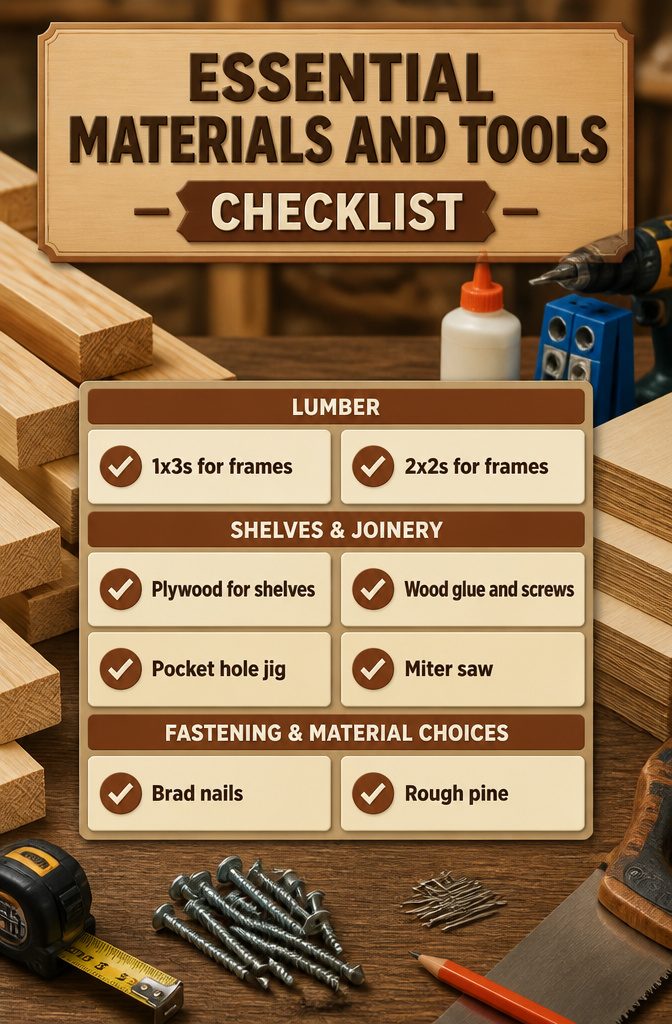
Most of these builds start with stock I grab straight from the home center rack: 1x3s and 2x2s for frames, plywood for shelves, and the screws that match whatever joinery the plan demands.
Pocket hole jigs earn their keep on anything with a face you do not want to see hardware on; I own a basic one and it has outlasted three drills.
- 2x2s and 1x3s are my usual frame lumber; one plan gets away with just one 2×2 and two 1x3s total, which keeps the load light enough to carry out in one arm.
- Plywood shelves cut cleaner on a track saw than a table saw if you are working with prefinished stock; splintering along the visible edge is the thing to avoid.
- Wood glue plus pocket hole screws is the joint I default to; brad nails work for thin lip strips but they do not carry weight alone.
- The Z tower was the one build where I needed a miter saw and did not have one; I borrowed it from a neighbor. Everything else ran off my drill, my jig, and a handsaw in a pinch.
- Rough pine costs less than finished 1x12s, but it takes oil instead of stain; MDF I skip entirely because it swells the moment damp boots sit on it.
Construction Techniques
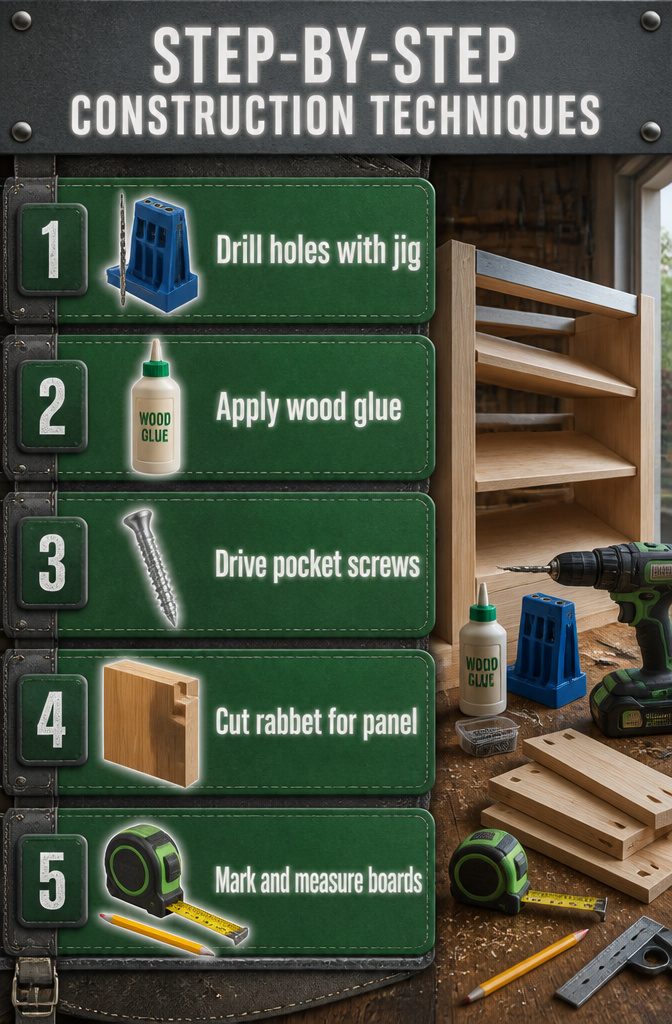
A pocket hole jig is the one tool that shows up in almost every sturdy build, and for good reason.
The angled screws pull joints tight without clamps, which matters when you are working alone in a garage with the door open to the dark.
I drilled three holes per end on the 55" boards for my first tower, then skipped one hole on the last board because I was rushing. That corner wobbled for two years.
Wood glue belongs in every joint, not as a backup plan but as the real strength.
Screws hold until the glue cures; after that, the glue does the work. I run a thin bead on both faces, spread it with a scrap of cardboard, then drive the screws.
The rabbet cut into the back legs of a bench, 1/2" wide and 1/4" deep, gives the plywood back panel a place to land square, and glue in that channel keeps the panel from rattling every time the door slams.
Write every measurement down before you cut. I used to hold numbers in my head while walking to the miter saw.
Then I cut a 2×2 at 28 1/2" when it should have been 50", and the scrap became kindling. Now I mark the board, mark the paper, check both against the tape measure, and only then start the saw.
The 7" front and 9" back spacing for slanted shelves is one I still keep on a scrap of pine hung above the workbench, because the slope that keeps boots from sliding also has to clear the door frame by that 3/4" lip.
Design Variations
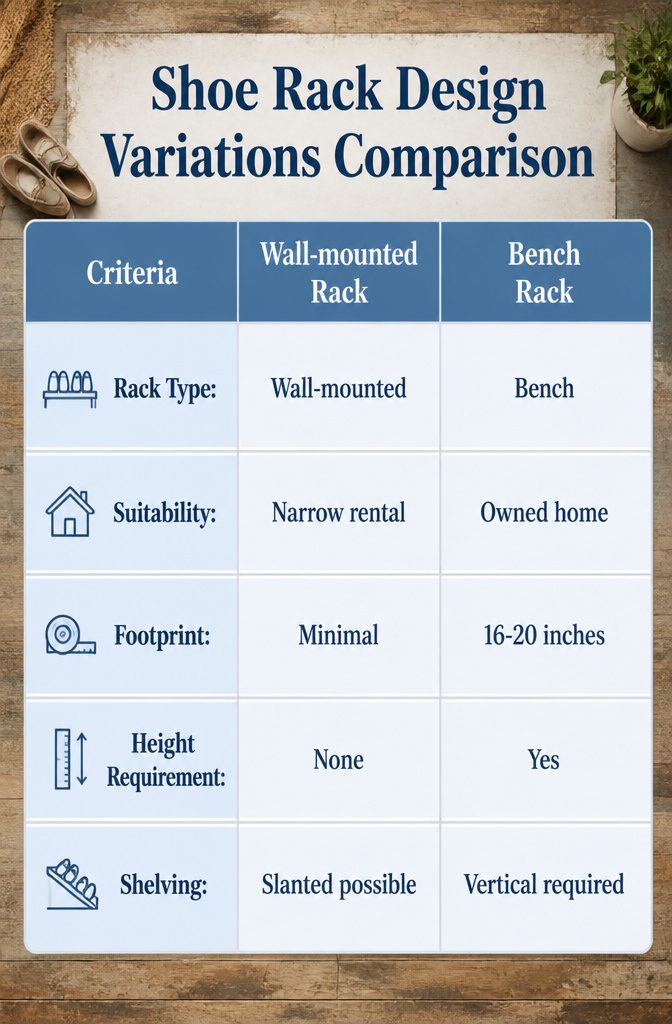
Wall-mounted racks keep pairs vertical and off the floor, which matters in a narrow rental where the door swings within 18 inches of the wall.
The slim bin style at 46 inches wide holds a full row without becoming something you bump on the way out.
In an owned-home closet, that same vertical idea stacks higher but needs depth you probably do not have behind a standard door.
Bench builds add seating, which sounds ideal until you measure. The family bench with shoe storage underneath sits at a height kids can use, but the footprint eats 16 to 20 inches of floor depth plus the overhang for sitting.
My rental entryway was 34 inches wall to door when open. A bench would have trapped anyone wearing the shoes stored beneath it.
Vertical towers fit where benches cannot. They ask for height instead of depth, and most shoes stand on their soles fine.
Boots do not. The slanted shelf closet design I sketched first would have solved that, angling each pair so shaft height became shelf spacing instead of tower height.
I abandoned it when I realized the slant needed 14 inches of depth per row, more than my closet return offered. The flat vertical rack went up instead, and the boots stay seasonal in a bin.
Customization and Finishing
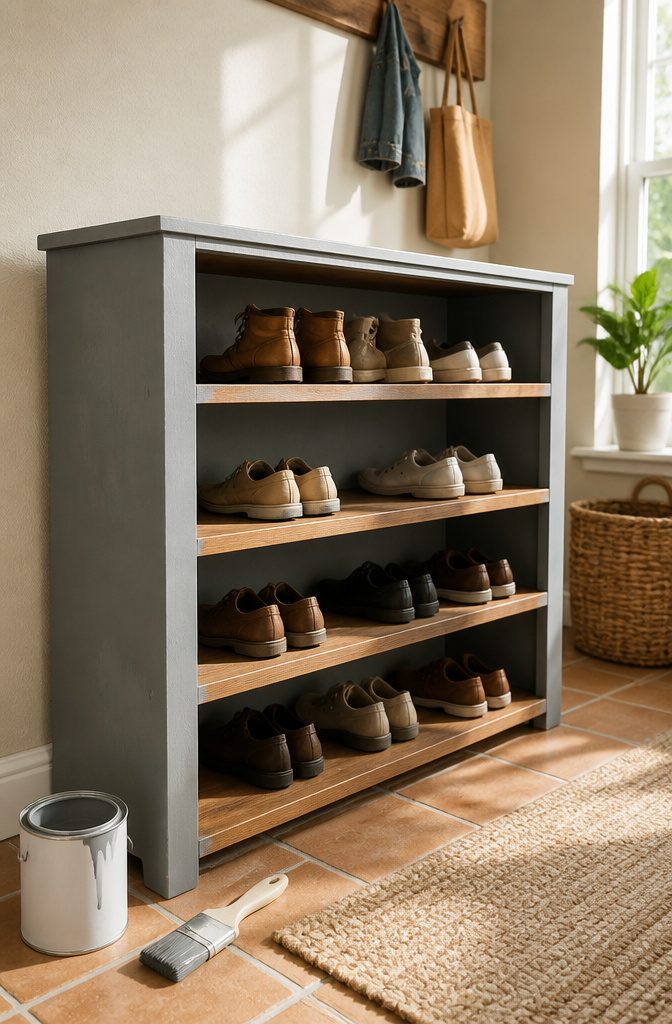
Shelf height and end board length need to match the shoes actually going on them, not some default plan.
For adult shoes size 9 and up, 12-inch end boards keep heels and toes from hanging into the next slot; size 8 and below, 10 inches is enough and saves a few inches of wall or floor space.
I cut mine to the smaller spec first and watched my partner’s boots flatten the front lip against the board below.
Wood sealing comes down to two honest options. Tung oil gives a warm, hand-rubbed look and goes on with a rag in thin coats, but it needs curing time and offers almost no spill protection.
Polycrylic dries fast, stays clear, and wipes clean after muddy sneakers. I started with tung oil on a bench rack because I loved the amber tone against pine.
Then coffee went across the seat one morning, and the ring sank in before I could blot it. Polycrylic would have bought me the thirty seconds I didn’t have.
I sanded back to bare wood, switched to paint, and have not looked back. Paint hides the grain but hides the accidents too, and for a piece that lives by the door, that trade was worth it.
Frequently Asked Questions
What materials do I need to build a DIY shoe rack?
Most builds need 1x3s and 2x2s for frames, plywood for shelves, screws, and wood glue.
A pocket hole jig helps hide hardware, and a drill drives the joinery. Rough pine costs less than finished boards but takes oil instead of stain; skip MDF since damp boots swell it.
How do I secure my shoe rack to the wall?
Drive 2 1/2-inch screws into wall studs, not drywall alone. For stackable units three high, add an L-bracket behind the top shelf and screw it to a stud.
Z towers need lag screws into studs; renters might try a French cleat or heavy-duty command strips, though those have not been tested long-term under full load.
What are the best dimensions for a shoe rack?
A single 1×3 board builds a 46-inch wall rack for four or five pairs. Console table height lands best at 33 inches, with a 13-inch shoe shelf and 15–18-inch top.
Size 9 and up needs 12-inch end boards; size 8 and below fits 10 inches. Slanted shelves work at about 30 degrees with 7-inch front and 9-inch back spacing.