A raised flower bed can cost almost nothing if you’re stacking salvaged brick dry, or considerably more if you’re buying corten steel panels cut to size.
The choice comes down to where you’re building it: fence lines and tree bases need narrow beds that fit the footprint, slopes need terraced walls that hold the grade, and patios or decks need beds on legs that sit above the surface without damaging it.
Cinder blocks stack without fastening and give you hollow cores to plant along the top edge, while corrugated metal and corten steel heat up faster in spring and suit early flowers that need a head start.
1. Mailbox Garden Bed
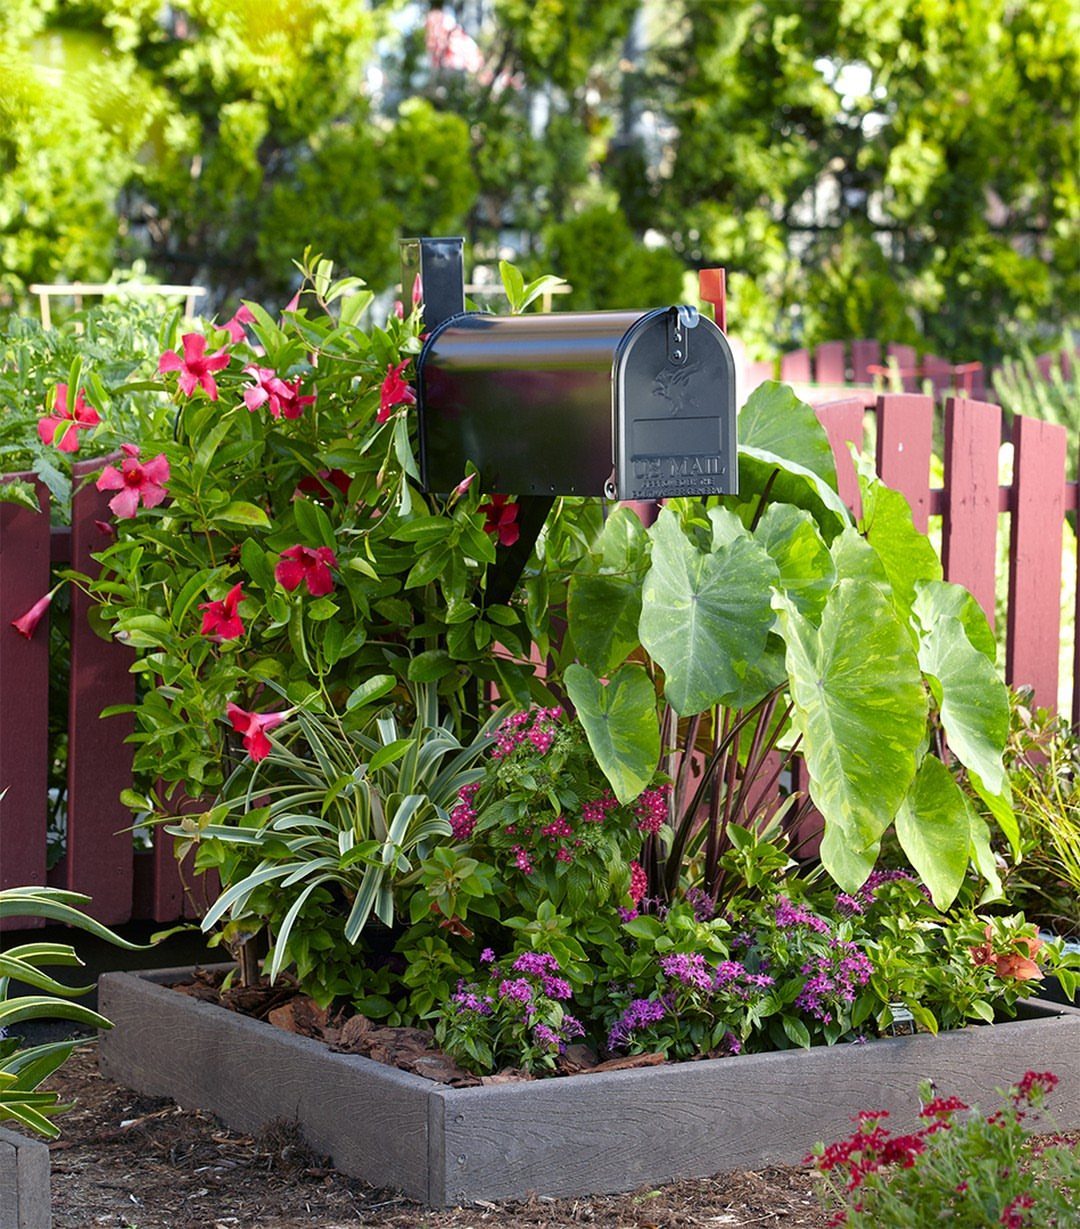
A raised bed around a curbside mailbox turns a small patch into a greeting for anyone coming to your door.
It works best when the bed is wide enough to let the mailbox sit in the middle, giving a foot or more of planting space on each side.
Build it from pressure-treated 2x6s or composite decking boards, which hold up better than cedar if your irrigation runs over.
Plant short to medium flowers that won’t hide the mailbox numbers.
2. Fence-line Flower Bed
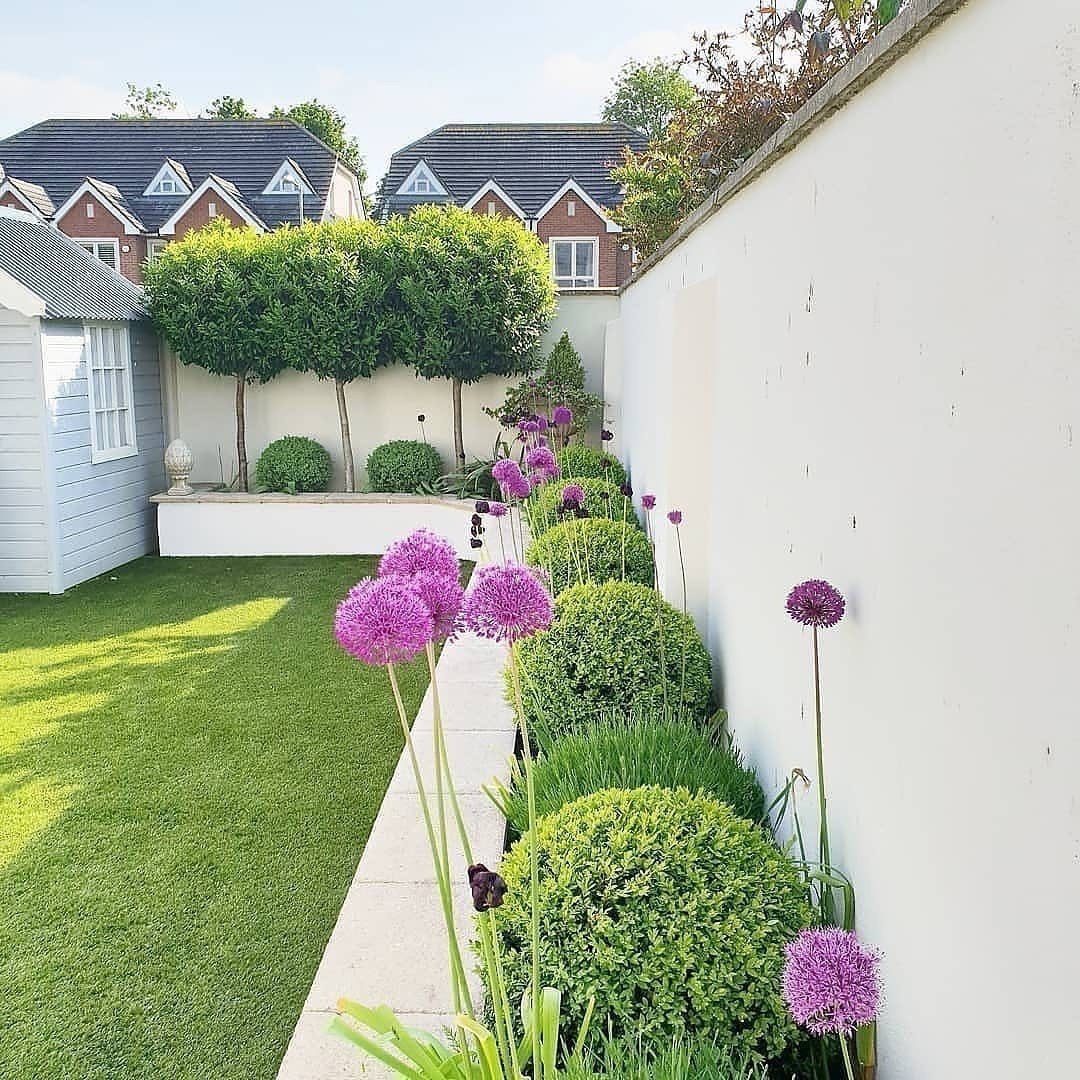
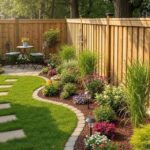
Running a raised bed along a fence line gives you a narrow planting strip that doesn’t eat into lawn or patio space.
It’s one of the best ways to add flowers when the yard is tight or when you want a border that doesn’t need mowing around.
Stone, brick or stacked pavers work well here because they can follow the fence line in a straight run or gentle curve.
Keep the width narrow enough that you can reach across to deadhead or weed from one side.
3. Fence-post Corners
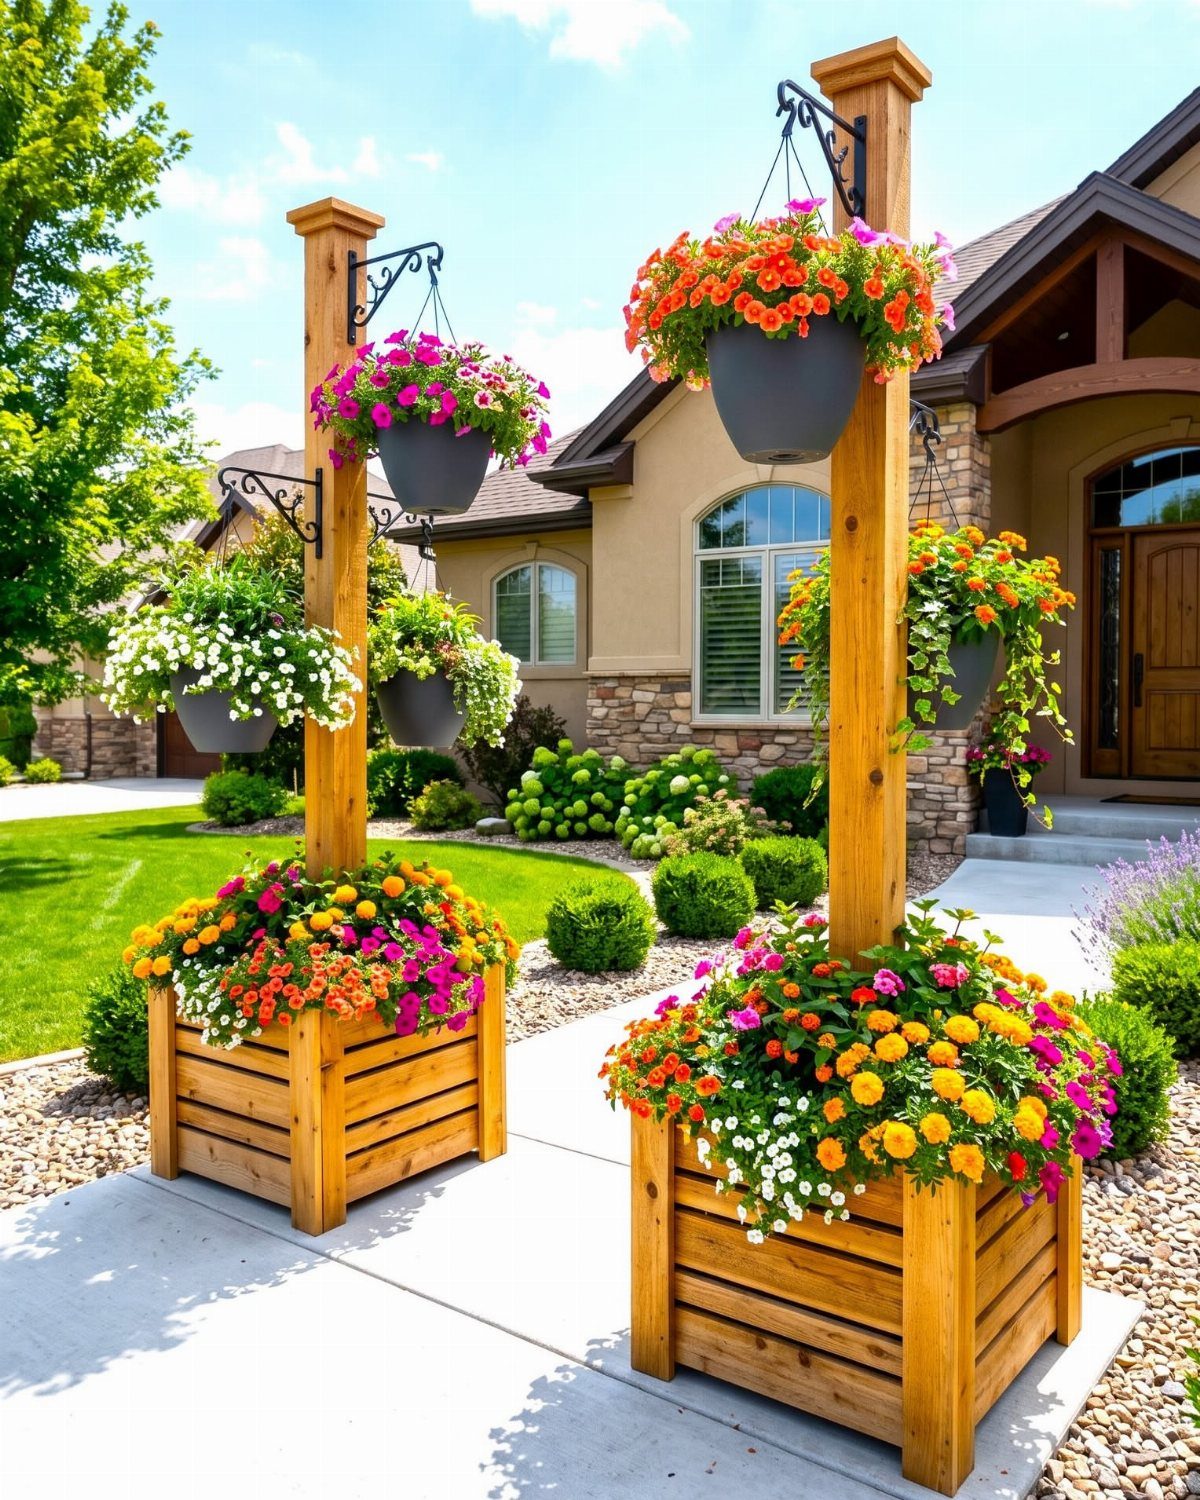
Tall fence posts at the corners of a raised bed give you a place to hang baskets or train vines without adding a separate trellis.
Sink each post deep enough into the soil or concrete it in place if the bed sits on a hard surface. Use 4×4 cedar or treated pine, and attach the bed boards to the posts with exterior screws.
Hang baskets from screw-in hooks rated for outdoor use.
4. Step-over Apple Edging
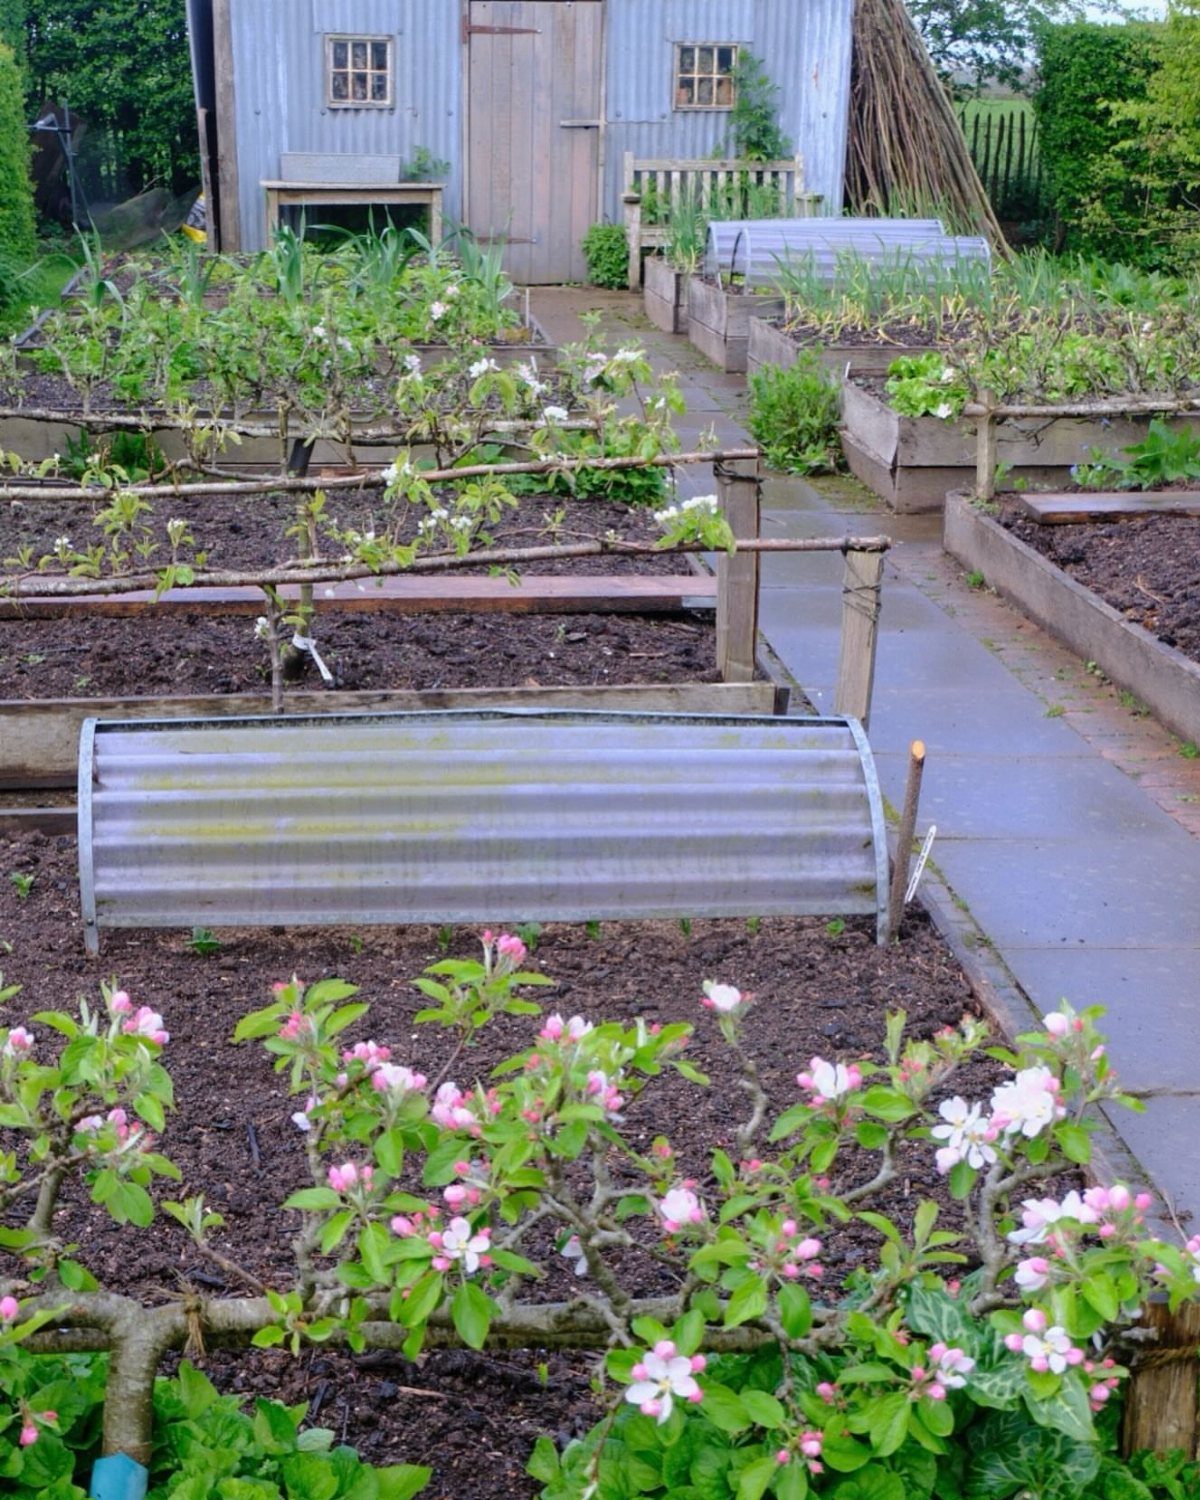
Step-over apple trees are trained to grow as low, horizontal borders that you can literally step over while walking between beds.
They fruit along the horizontal branches and stay low, so they edge a bed without blocking the view or taking up vertical space.
You’ll need whip trees, which are young, unbranched saplings. Bend each trunk at an angle and tie it to a low wire or stake to establish the horizontal form.
It takes a few years of summer pruning to keep the shape tight and encourage fruiting spurs along the main stem.
This is a long-term border, not a quick weekend project.
5. Wooden Raised Bed
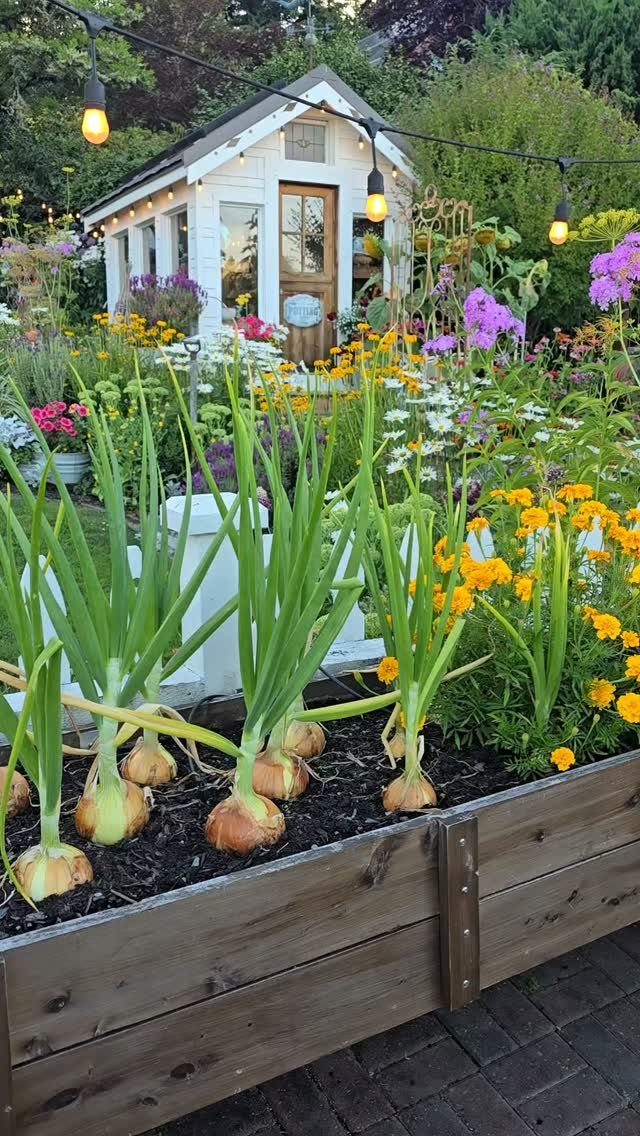
A wooden raised bed gives you full control over size, height and shape, which is hard to beat if you’re working around an existing shed, path or slope.
You can build it from pressure-treated lumber, cedar or composite boards, and adjust the height to match your back or your soil depth.
Screw the boards to the posts from the inside so the fasteners don’t show.
Line the inside with landscape fabric if you’re filling it over grass or bare ground.
6. Flower Bed with Pots
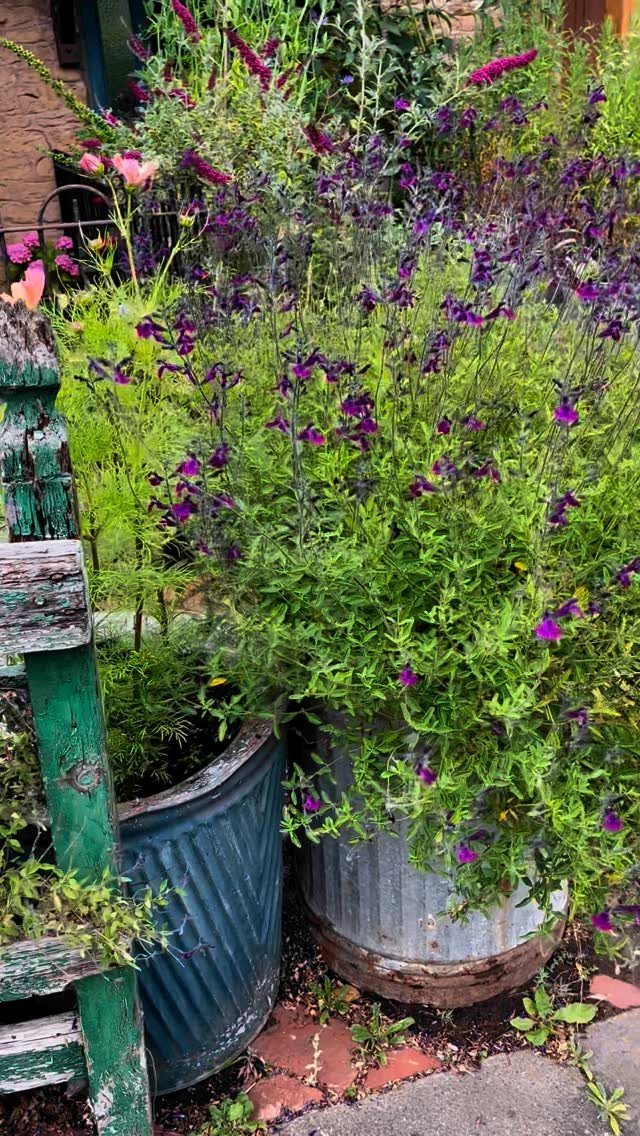
Grouping large pots together mimics the look of a raised bed without building one, and you can move or replant individual containers as the season changes.
It works best when the pots vary in size or material but share a color family or planting theme.
Fill each with its own potting mix and drainage, and water them separately since containers dry out faster than in-ground beds.
This setup gives you the flexibility of pots with the visual weight of a bed.
7. Vertical Flower Bed
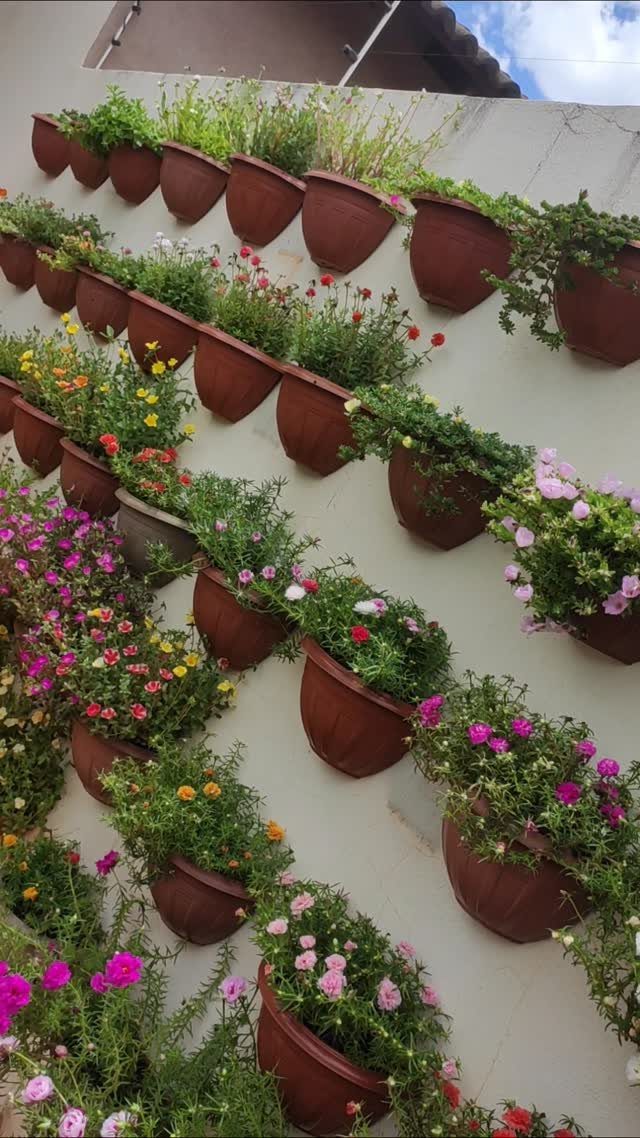
Mounting pots in rows on a wall or fence lets you grow flowers where there’s no ground to dig.
It works when the footprint is spoken for but the vertical surface is open, and it puts the blooms closer to eye level.
Attach each pot securely to a stud or use wall anchors rated for the filled weight. Drill drainage holes if the pots don’t have them, and check that runoff won’t stain the wall below.
Water more often than you would an in-ground bed, since containers dry out faster.
8. Cinder Block Bed
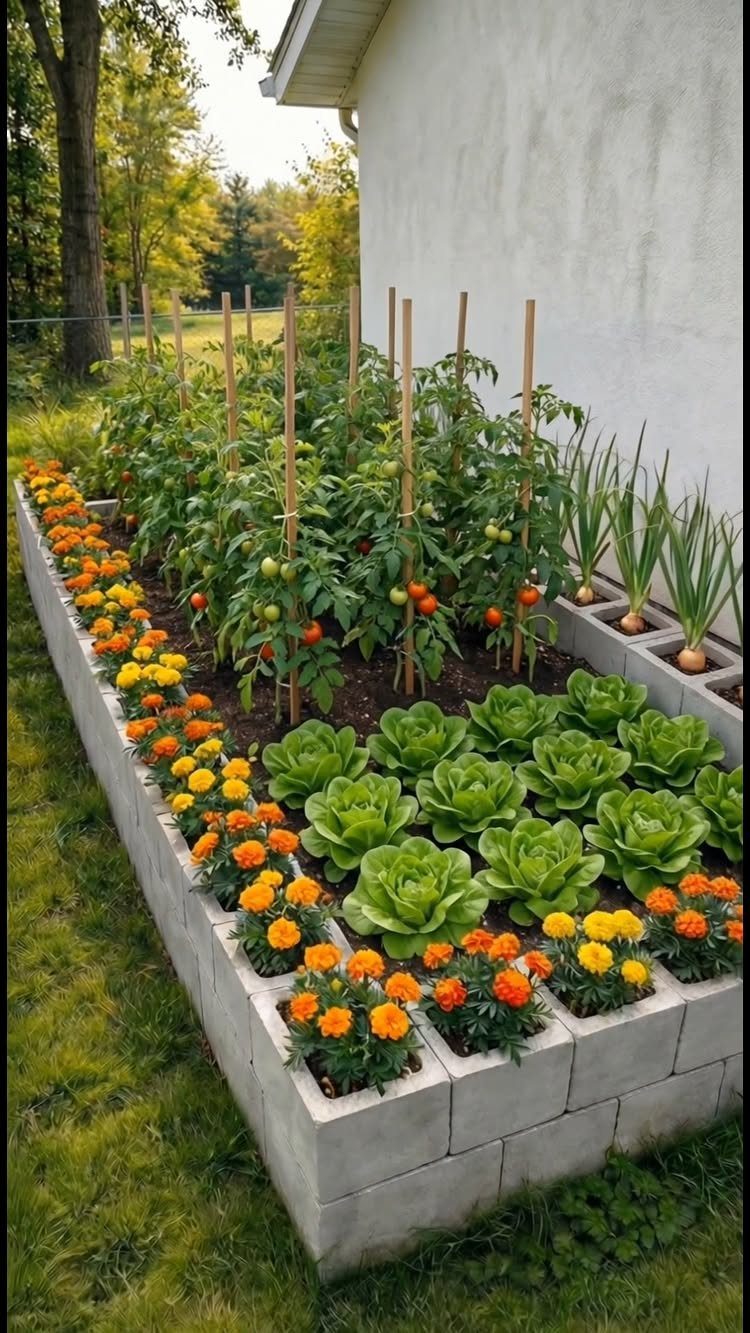
Stacking cinder blocks gives you a quick raised bed with no cutting or fastening.
The blocks lock together by their own weight, and you can fill the hollow cores with soil to plant herbs or trailing flowers along the top edge.
Set the first course level on tamped soil or gravel, then stack the next rows in a running bond so the joints don’t line up.
Fill the bed with native soil mixed with compost if the existing ground is clay or sand.
This bed doesn’t rot, but it does weigh enough that moving it later means rebuilding from scratch.
9. Brick Raised Bed
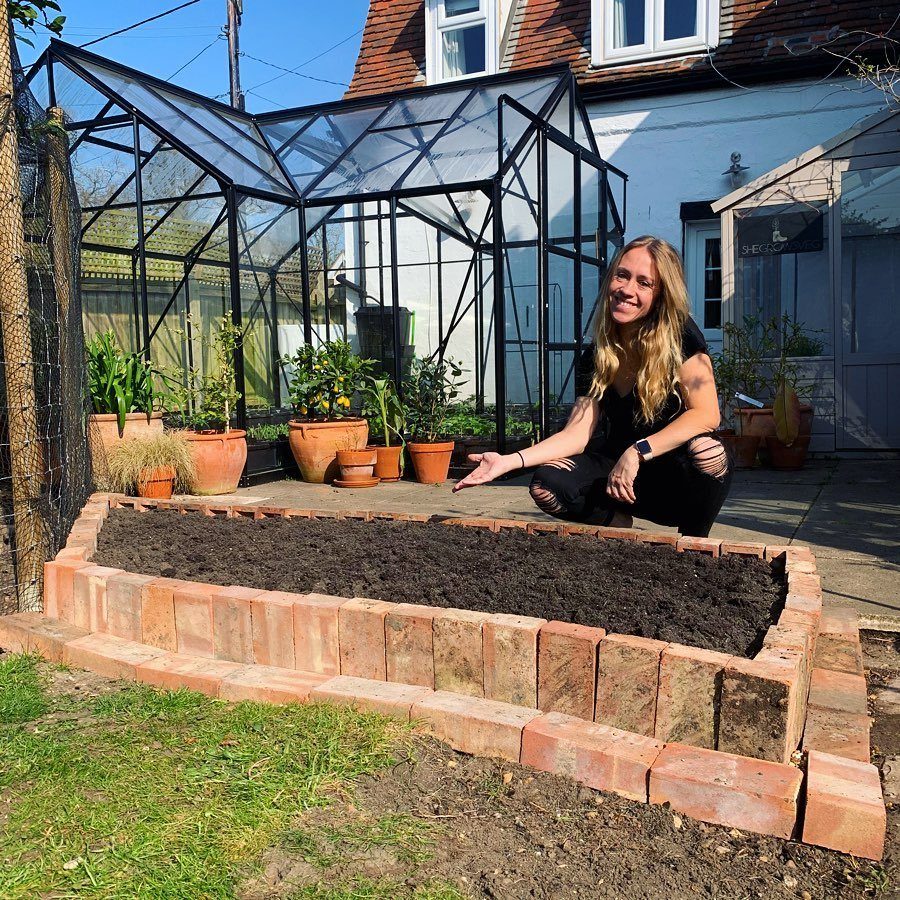
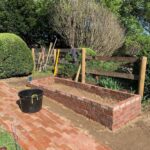
Brick gives you a bed that matches an existing path, patio or house foundation, and it holds up for decades without refinishing. Lay the bricks dry-stacked for a low border, or mortar them if the bed is taller than 2 courses.
A running bond, where each brick overlaps the joint below, keeps the wall stable without rebar. Use a level as you go, and backfill with soil once the mortar has cured.
Plan for drainage through the joints if you’re mortaring, or leave the bottom course without mortar so water can escape.
10. Terraced Flower Bed
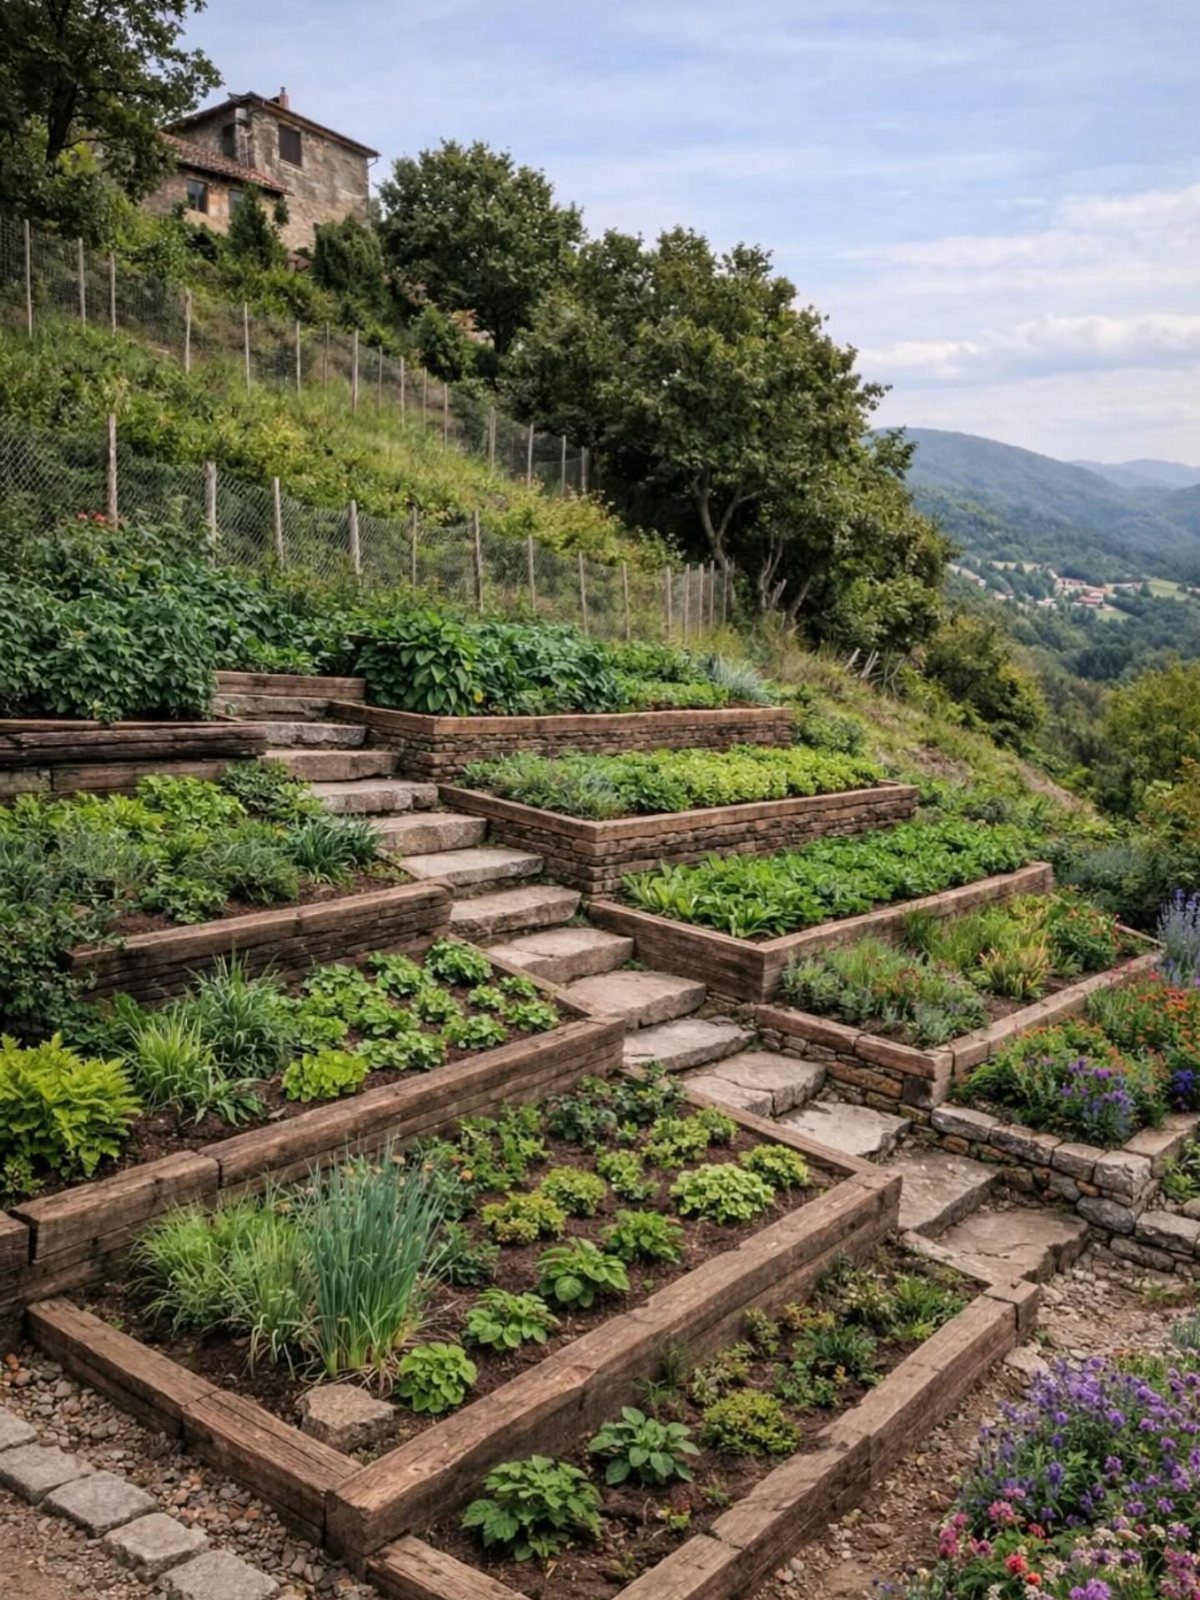
Cutting a slope into level steps gives you multiple planting areas where a single bed would slide or pool water.
Each terrace sits behind a retaining wall, which can be stone, timber or block, and the steps between them double as access for weeding and deadheading.
Dig each terrace level into the slope, then build the wall along the front edge.
Backfill with gravel for drainage before adding soil. Stake or pin the bottom row if the slope is steep or the soil is loose.
This setup takes more time and material than a single bed, but it’s the only way to hold a steep grade and keep the soil where you put it.
11. Raised Bed with Grid
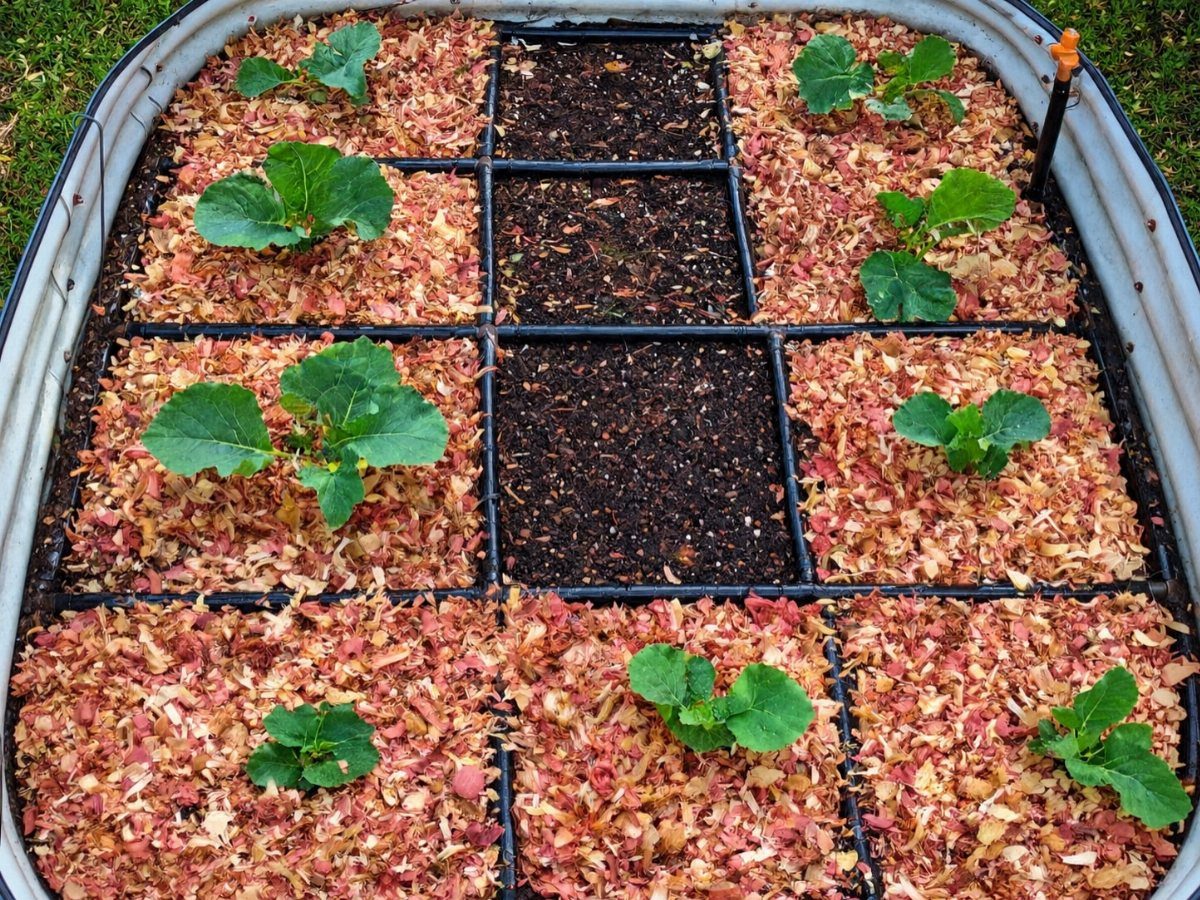
Dividing a bed into grid squares lets you plant in blocks instead of rows, which fits more into the same space and makes crop rotation easier to track.
Each square gets one type of plant, and you can see at a glance what needs water or thinning.
Mark the grid with string tied to nails along the frame, or use a plastic grid that sits on the soil. A 12-inch square is the standard, but you can adjust it to match the spacing your flowers need.
This method keeps you from overplanting and shows exactly where each variety goes.
Children love seeing plants grow, and a raised bed enables even the smallest kids to reach the planting area and experiment with growing their favourite flowers.
12. Unique Bed Edging
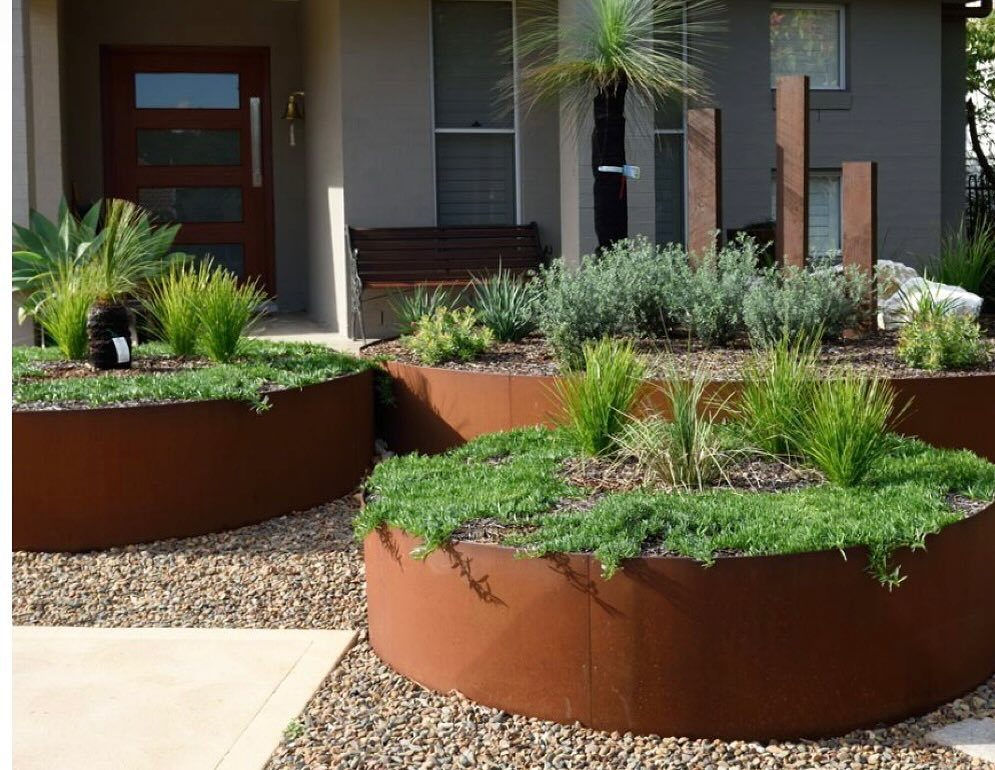
Shaping the bed into a curve, circle or oval sets it apart from the straight rectangles that fill most yards.
Metal edging bends easily and holds a clean line, and materials like corten or galvanized steel develop a patina that softens as it ages.
Stake the edging along the inside of the curve, and overlap the ends by a few inches if you’re working with strips.
Fill the bed with a mix that drains well, since curved beds often sit above grade and dry out faster than in-ground plantings.
A distinct shape gives the bed its own presence, even when the flowers are out of season.
13. Tree-base Flower Bed
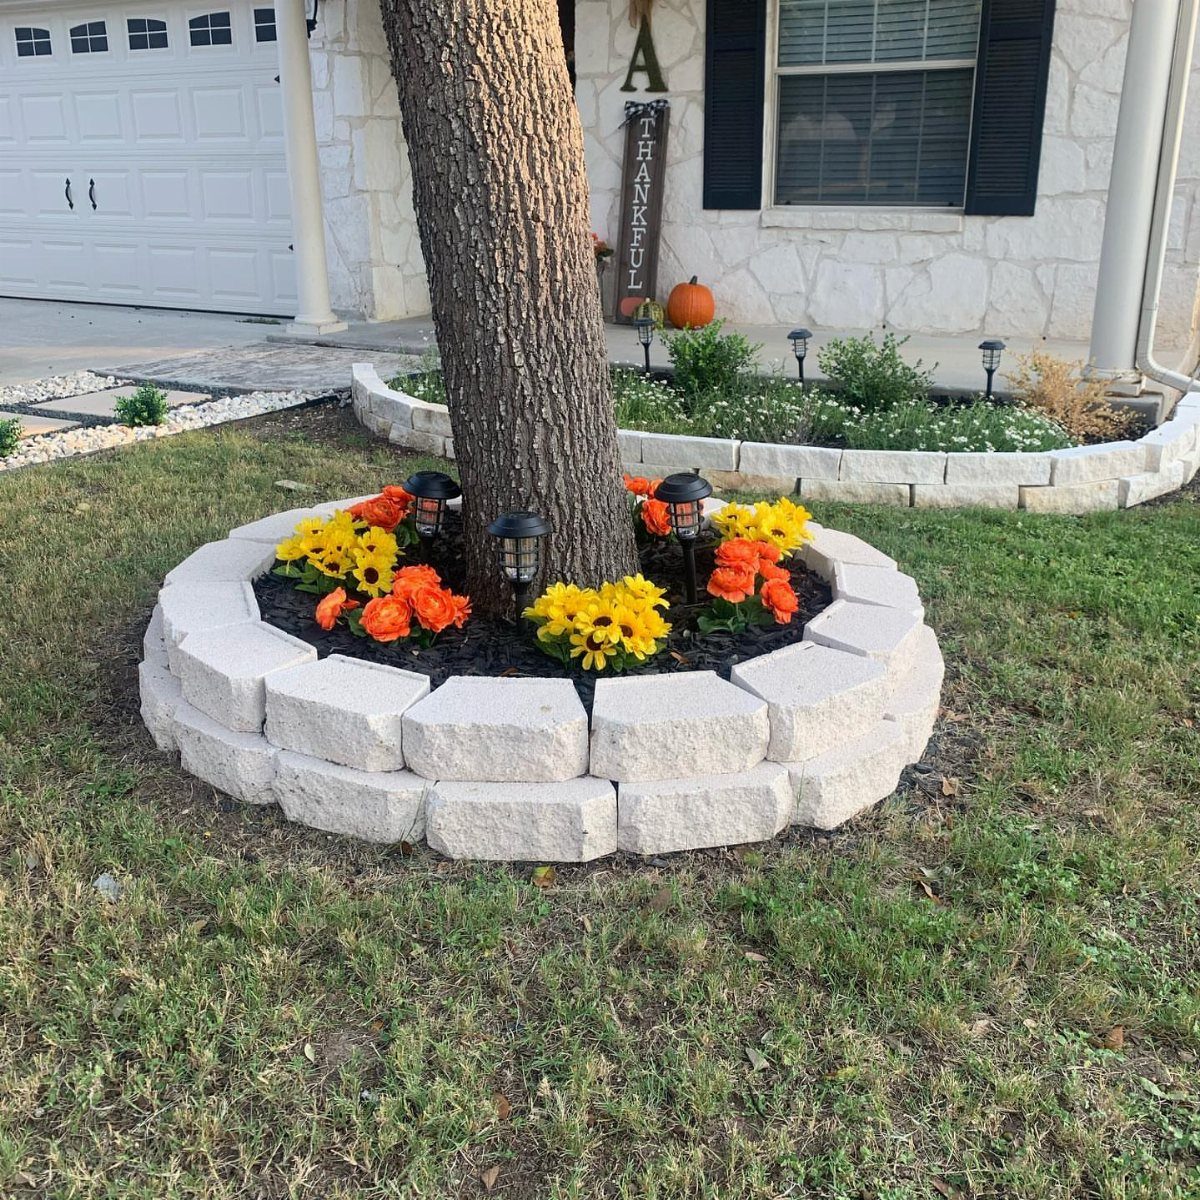
Building a ring around the base of a tree lets you plant flowers in a spot that would otherwise stay bare or covered in mulch.
Set the bed far enough from the trunk that soil can’t stay damp against the bark, and pick edging that holds its place when roots push outward.
Stone blocks or brick stack easily and follow a circle without cutting. Fill the ring with a mix that drains well, since tree roots pull most of the water from the surrounding soil.
Plant shallow-rooted annuals or perennials that tolerate some shade.
14. // Unique Shaped Flower Beds
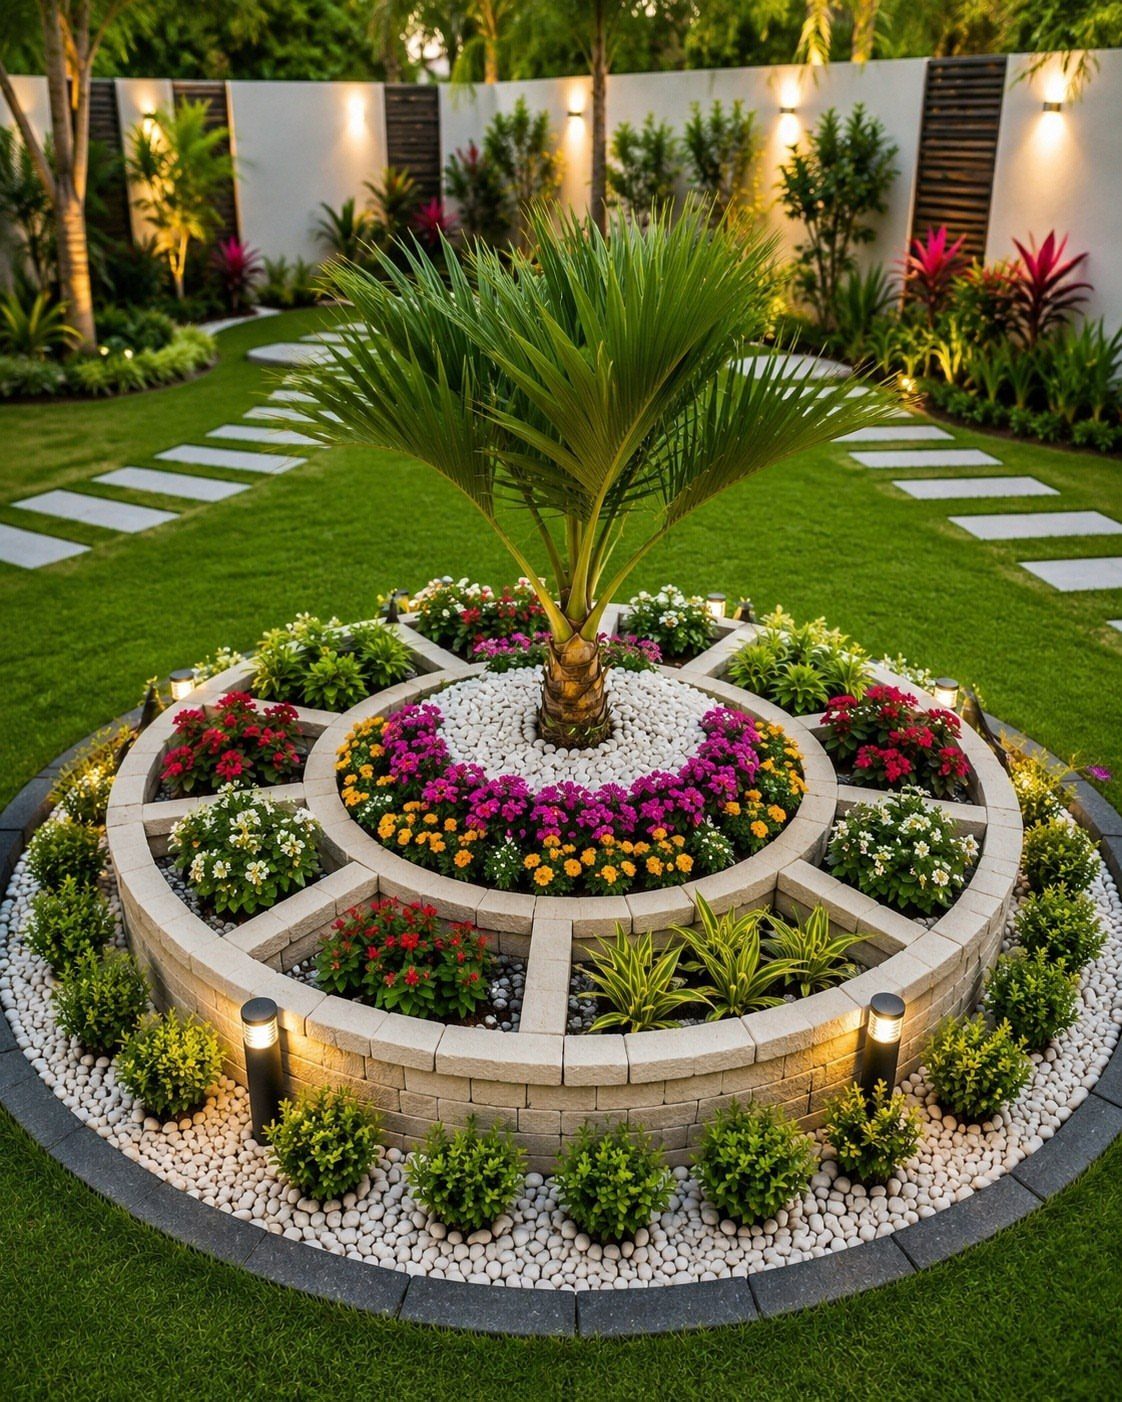
A bed shaped into a circle, star or freeform curve stands out more than a rectangle, and it lets you follow the lines of a tree, path or existing bed without forcing a grid onto the space.
Metal edging bends to any shape and holds the line without stakes showing. Mark the shape with a garden hose first, then dig the edge and set the material.
This works best when the bed is large enough that the shape reads clearly from a few feet back.
15. Raised Bed on Legs
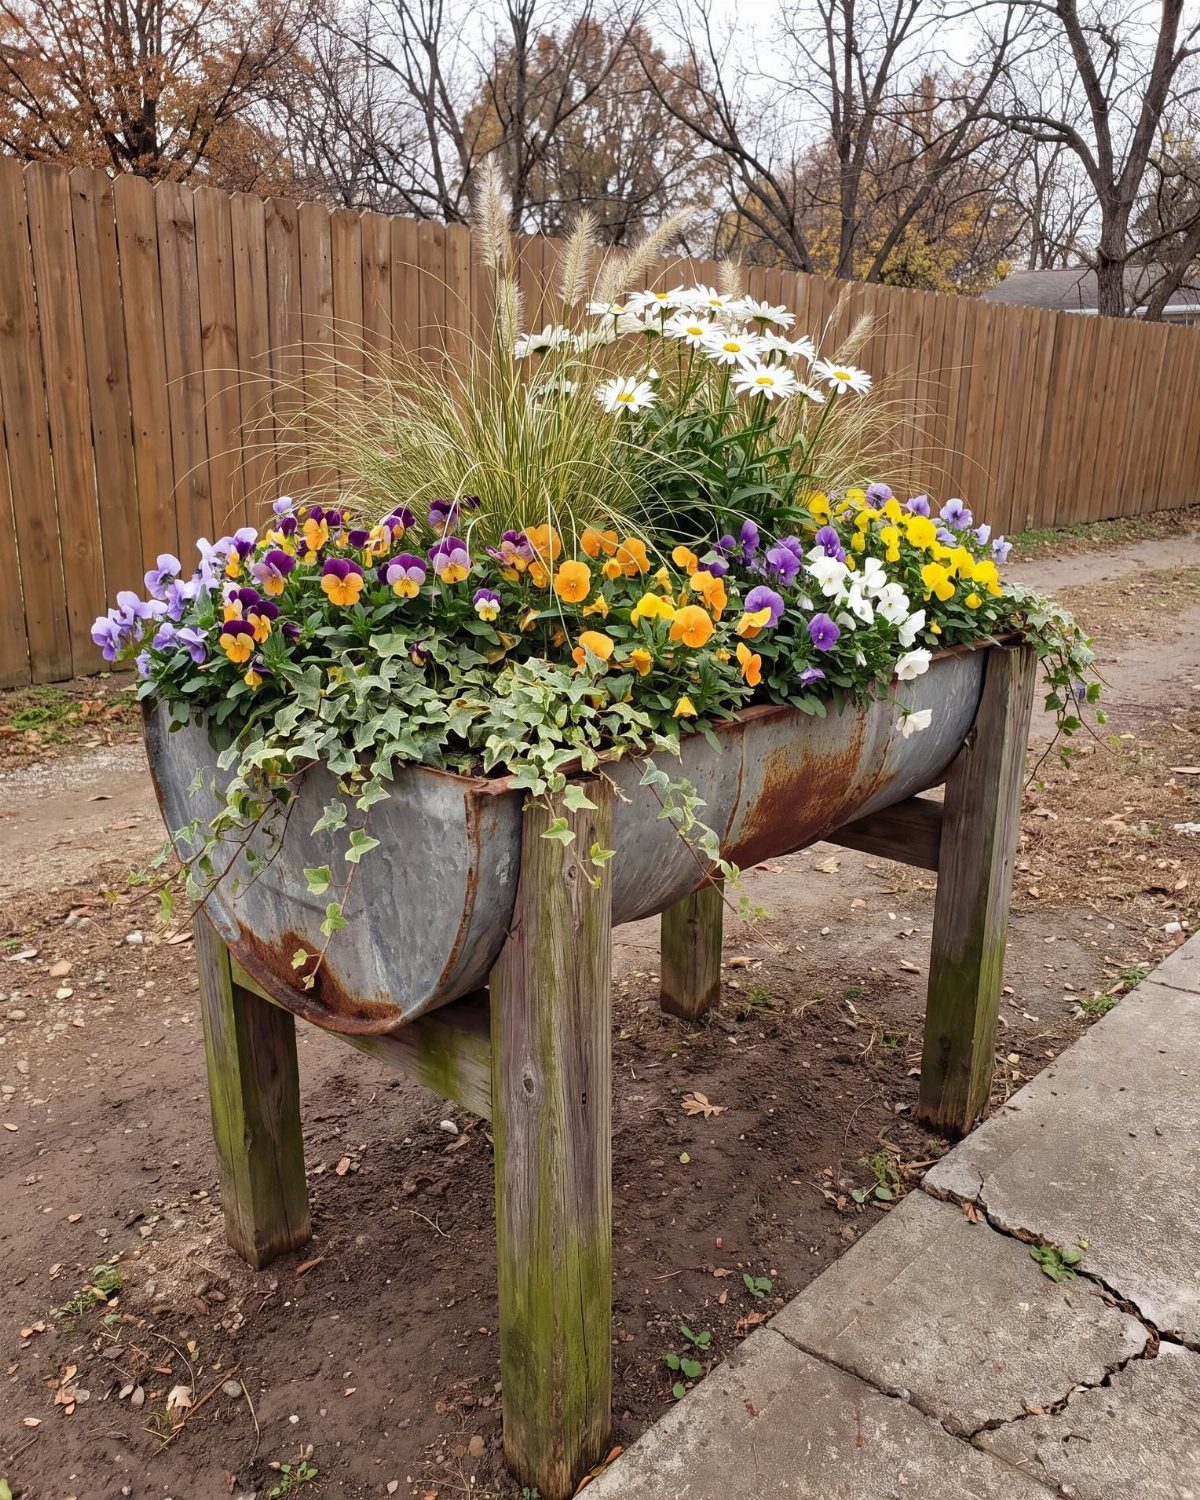
Raising a bed on legs brings the flowers up to waist height, which saves your back and puts blooms closer to eye level.
It works when the ground is too hard to dig, or when you want the bed on a patio or deck without setting it directly on the surface.
Build the frame from treated lumber or use a galvanized trough, and attach legs tall enough that you can deadhead without bending. Punch holes in the base if it didn’t come with them.
16. Galvanized Stock Tank
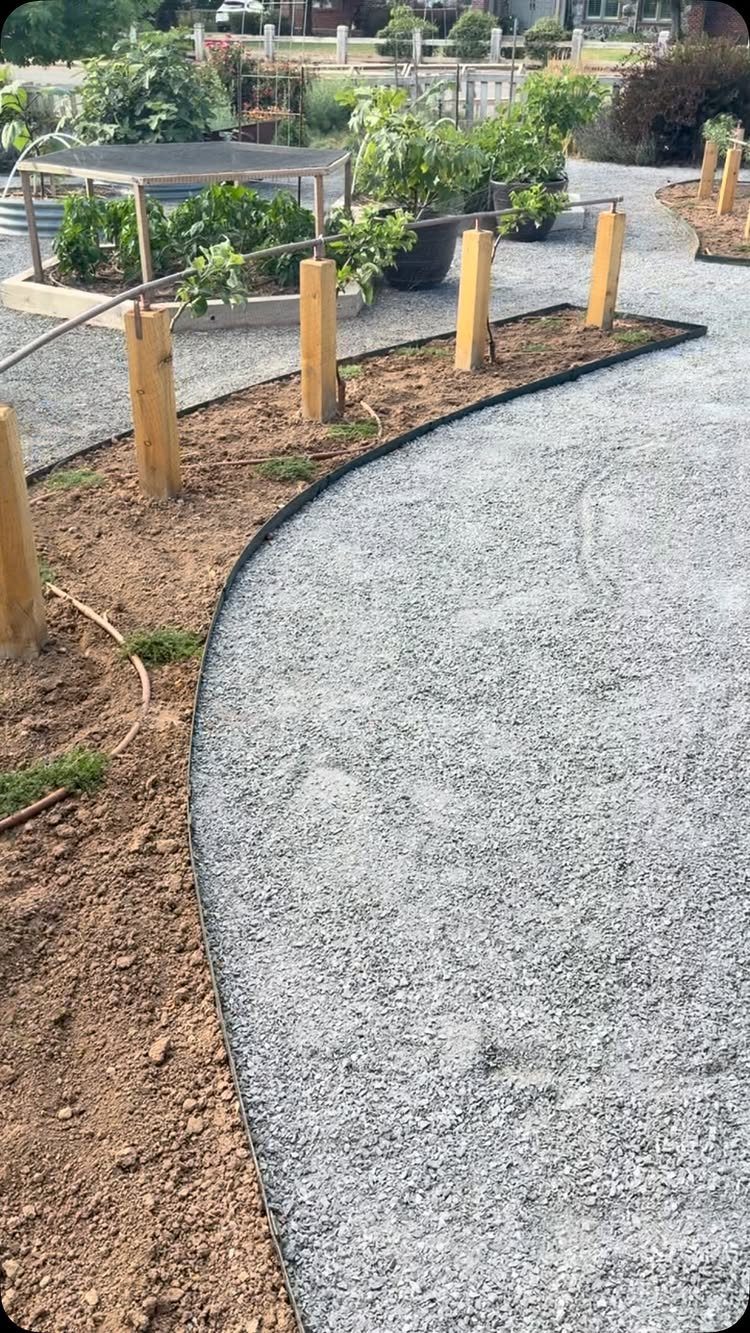
A galvanized stock tank gives you a ready-made planter with a wide footprint and high sides, and it lasts for years without rusting through. Punch drainage holes across the bottom before you add soil.
Set the tank on level ground or gravel so water can escape underneath. Fill it with a mix of native soil and compost, or use bagged potting mix if you’re planting directly into it without an in-ground connection.
The depth suits flowers with deeper roots, and the metal holds its shape even when the soil is wet.
17. Corrugated Metal Bed
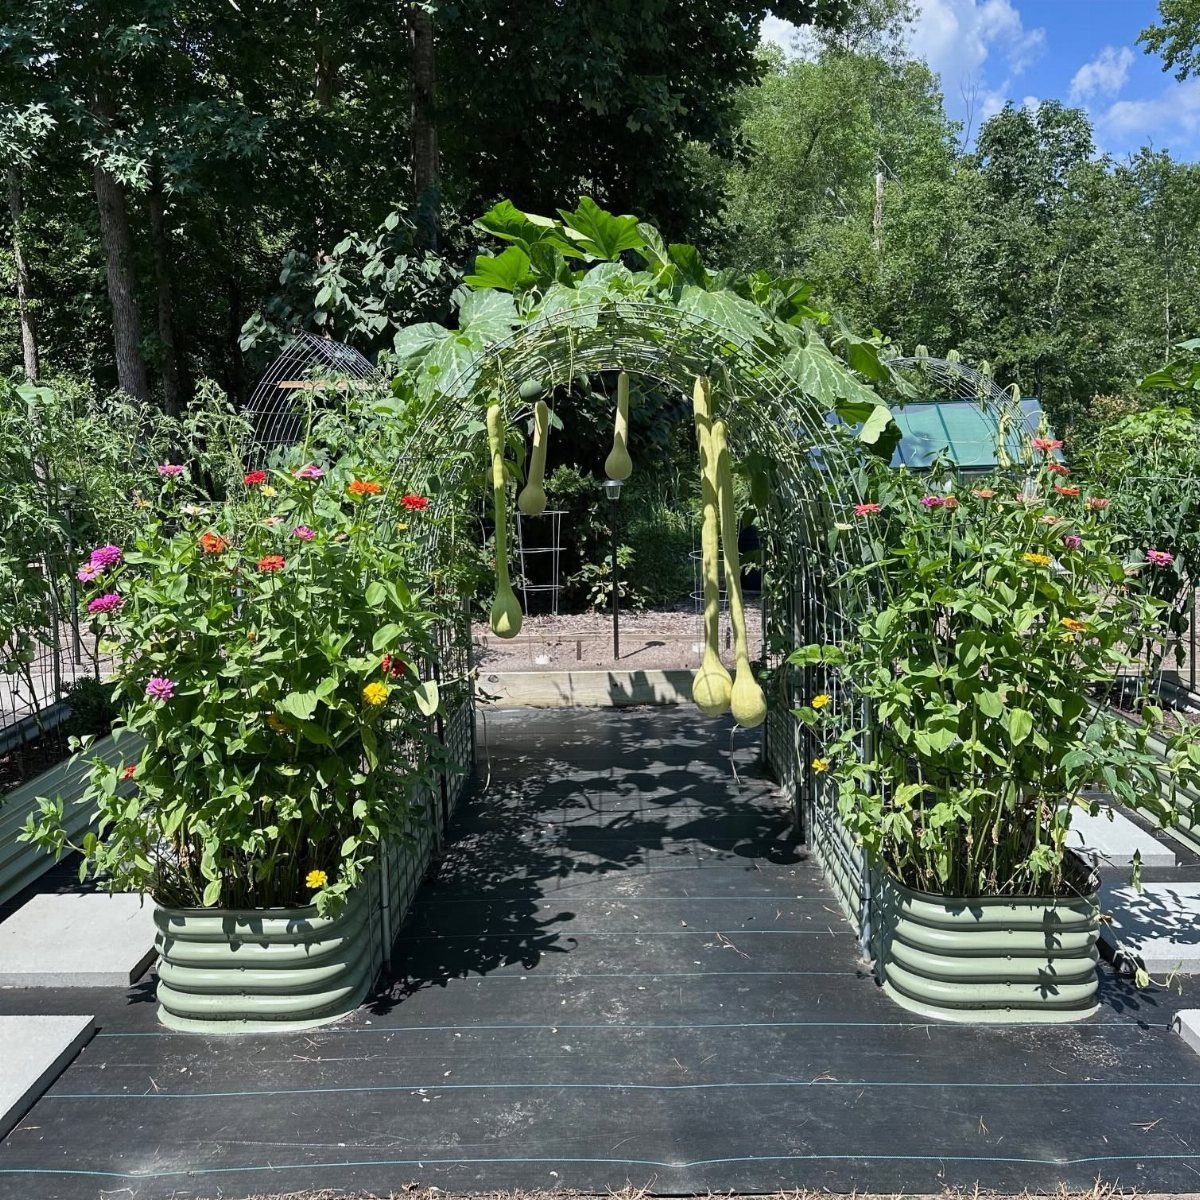
Corrugated metal panels give you a bed with visible texture and a finish that weathers to a soft rust or stays galvanized depending on the material.
Cut the panels to the height you want, then attach them to corner posts with sheet metal screws.
Set the bed on level ground and line the inside with landscape fabric if the soil underneath is poor. The ridges in the metal add stiffness, so you can go taller without doubling up the material.
This bed heats up faster in spring, which suits early flowers but can dry out the soil by midsummer.
18. Corten Steel Raised Bed
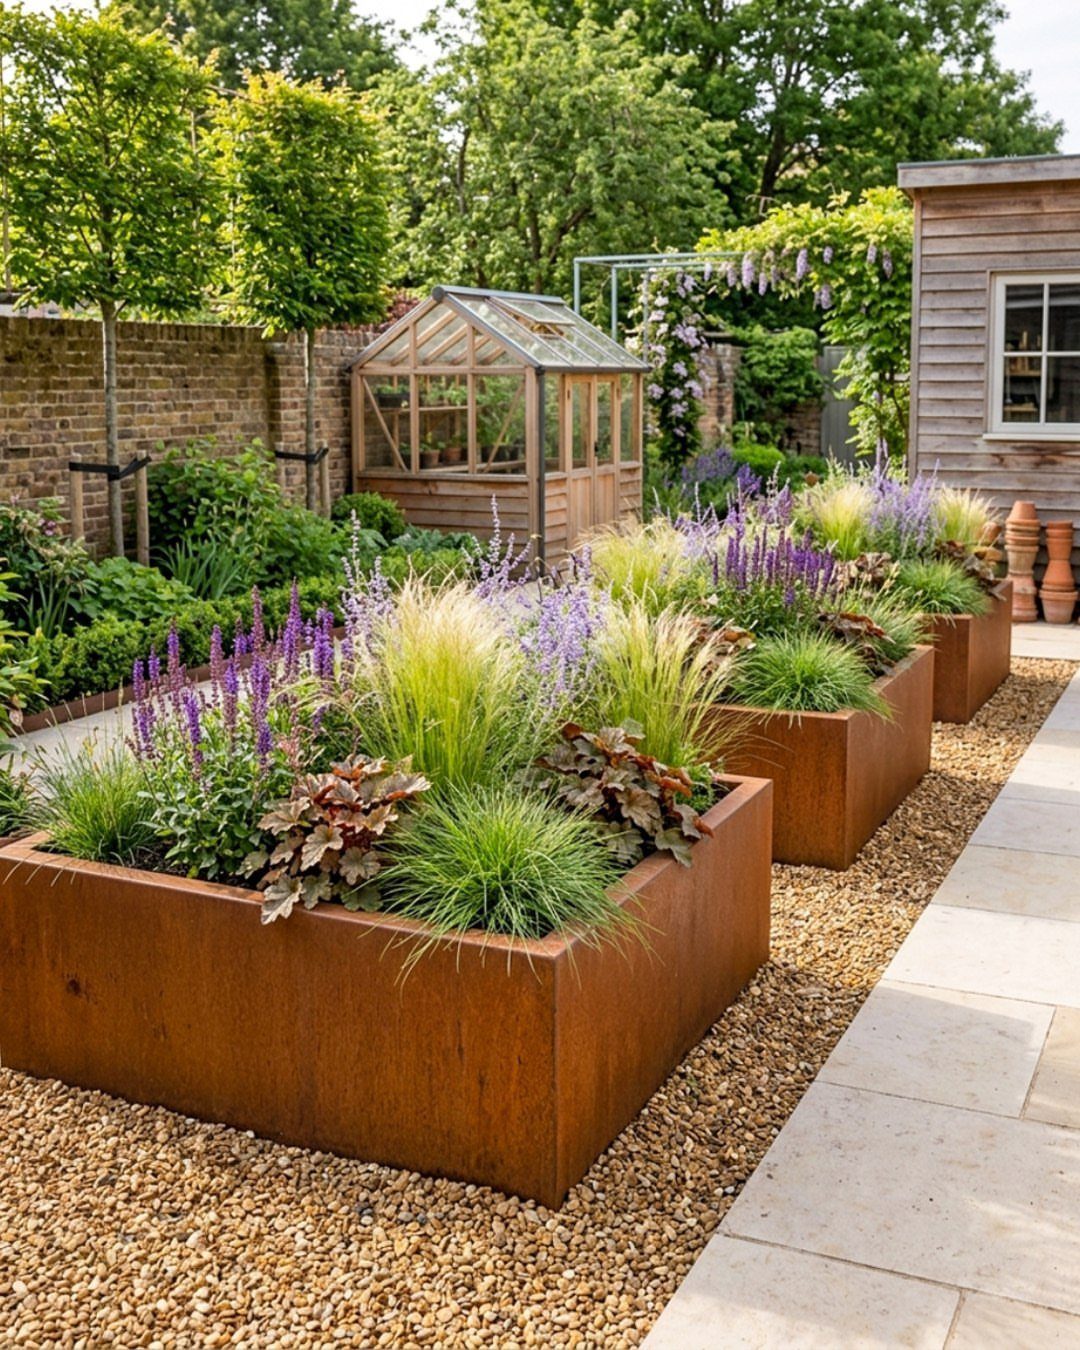
Corten steel develops a stable rust finish that stops deepening after a few months, and the color shifts from bright orange to a muted brown as it ages.
The finish protects the metal underneath, so the bed doesn’t need paint or sealer.
Order the panels pre-cut to size, or have a metal supplier cut them before delivery. Bolt the corners together with stainless steel hardware, which won’t stain the metal or corrode.
Expect the bed to stain the gravel or pavement underneath it for the first season as the rust washes off.
19. Black Metal Raised Bed
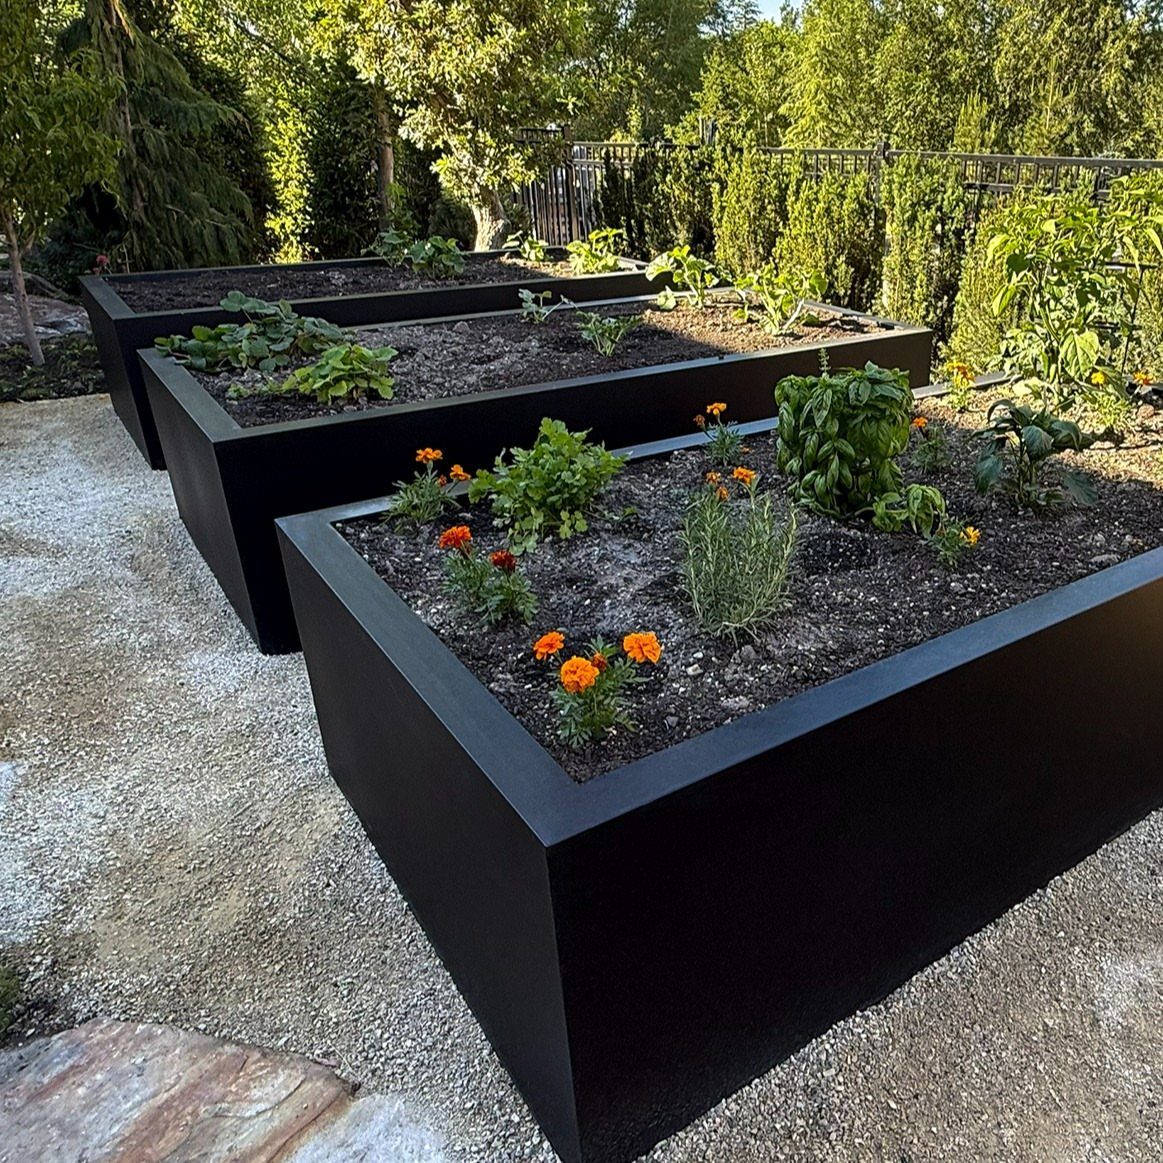
Bolt the panels at the corners or buy kits that slot together without tools.
Set the beds on gravel or pavers if you want a clean look underneath, or drop them straight onto grass where the base cuts the light.
The metal won’t rot, but it will show every fingerprint and water spot until the first rain.
20. Concrete Raised Bed
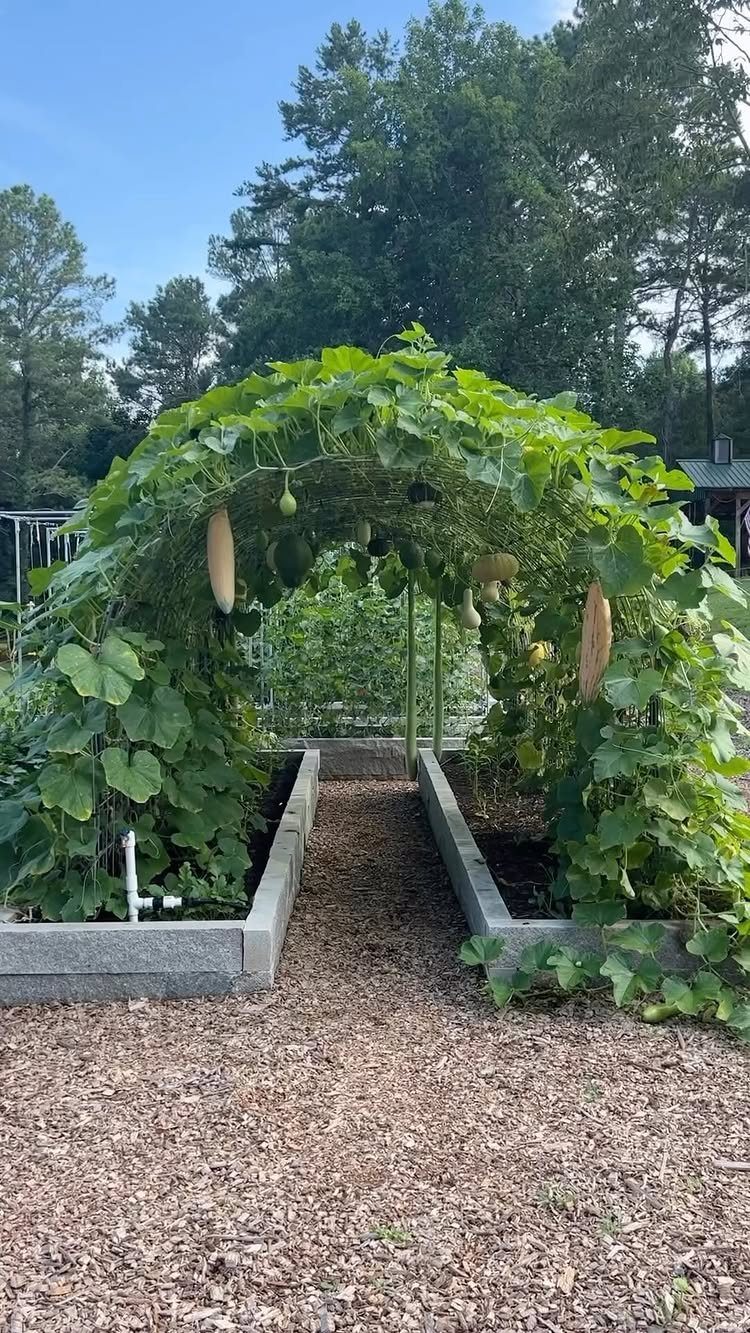
Pouring concrete into forms gives you a bed with weight and permanence that suits a slope or a spot where wood would rot out in a few years.
You can cast it in place or use concrete blocks stacked and filled, and the mass holds moisture in the soil longer than metal or wood.
Reinforce taller walls with rebar set into the footer before you pour. Let the concrete cure for a week before filling the bed.
The arch overhead is a separate frame, built from wood or metal and anchored outside the bed.
21. Vertical Log Raised Bed
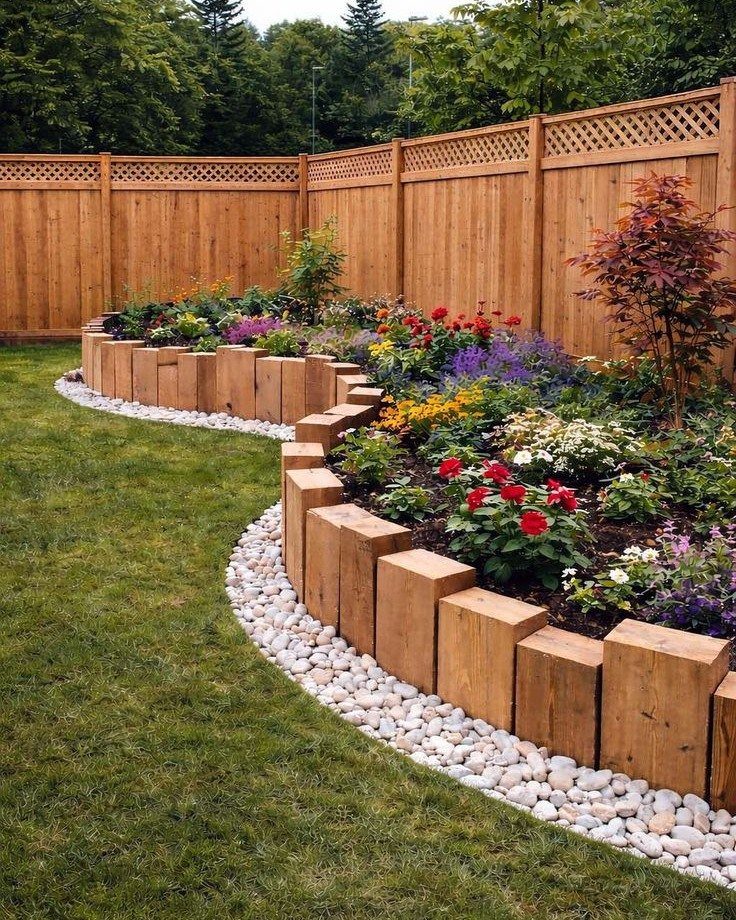
Setting logs vertically instead of stacking them flat gives you a scalloped edge that follows a curve without cutting angles.
Sink each log a few inches into the ground so it stands without tipping, and butt them tight enough that soil won’t wash through.
Use treated posts or a rot-resistant species if the bed sits in full sun and stays damp. The gravel border outside the logs keeps mud off the grass and defines the bed line.
This takes more posts than a horizontal stack, but the curve holds without corner bracing.
22. Stacked Natural Stone Bed
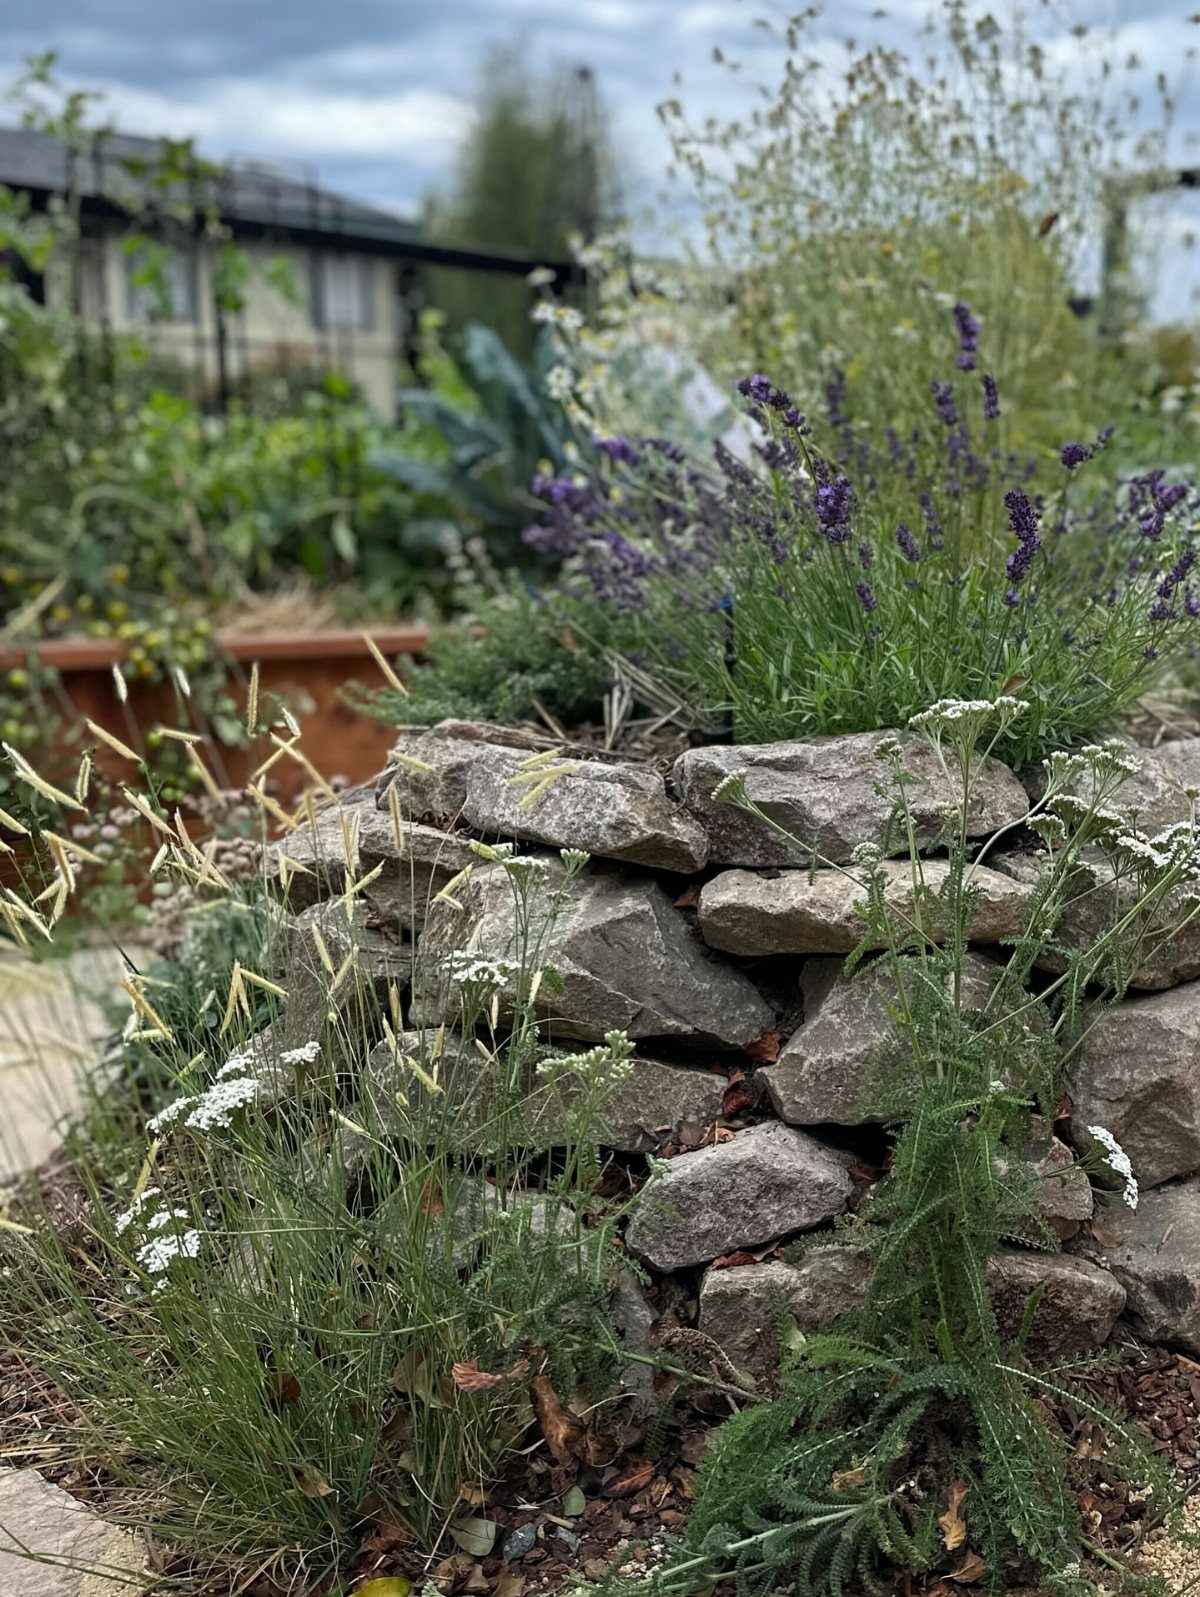
Stacking stone without mortar lets you adjust the height and curve as you go, and the gaps between stones let water drain without pooling against the plants.
Pick flat stones that sit stable, and set the largest ones on the bottom course.
Tilt each stone slightly back into the soil so the weight holds it in place.
Lavender and grasses tolerate the drier conditions that come with good drainage, which is what this bed gives you.
23. Horizontal Log Raised Bed
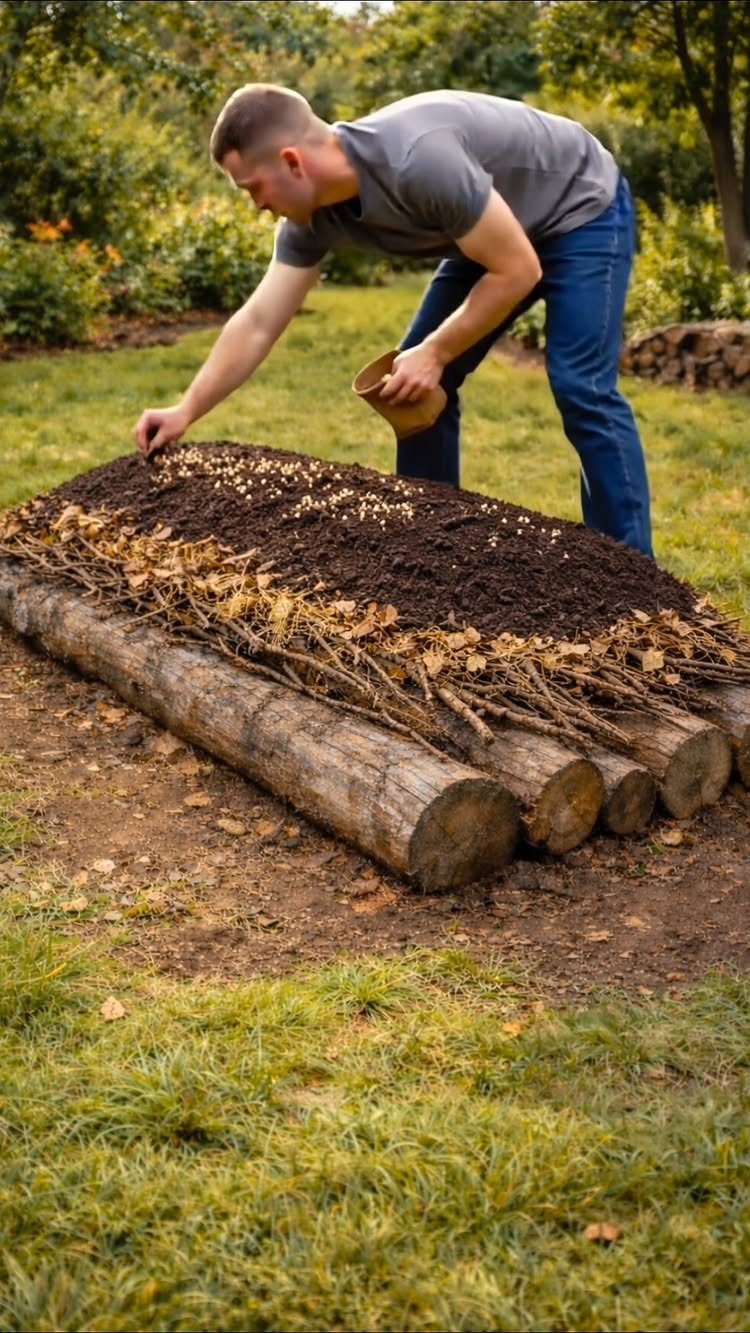
Large logs stacked flat give you a bed with heft and a rough finish that suits a cottage or woodland garden. Notch the ends where they cross at the corners, or spike them together with rebar driven through both logs.
The logs will soften and break down over time, which adds organic matter to the soil but means you’ll eventually rebuild the bed. Use logs thick enough that they stay stable when the soil is wet and heavy.
This bed sits directly on the ground, so it works best where drainage is already decent.
Prepare Soil and Maintain Beds
Mix around 50% topsoil, 30% compost and 20% organic matter such as straw, shredded leaves or finely ground wood chips. The organic layer breaks down slowly and feeds beneficial organisms in the soil, which in turn feed the plants.
Spread mulch over the surface to hold moisture and slow weed growth. Water when the top inch of soil feels dry, checking more often during hot stretches.
Check your sun exposure before planting.
Most flowering plants need at least 6 hours of direct sun, though some tolerate partial shade. Match your plant choices to what your bed actually gets.
Pick varieties that bloom at different times if you want color through multiple seasons. Early spring bulbs, summer annuals and fall perennials keep the bed filled without replanting everything at once.
Plan Bed Size and Placement
Keep beds narrow enough that you can reach the center without stepping on the soil. A 4-foot width lets you work from both sides, and 3-foot paths between beds give a wheelbarrow room to pass.
The height of a raised flower bed matters more when the bed runs east to west and the sun moves across it during the day.
Plan the layout before you build.
Beds can run in rows along a patio, form a grid or follow a curved path. The arrangement matters less than keeping each bed accessible from at least one side.
Avoid planting crops that spread far beyond the bed. Winter squash vines and giant pumpkins take more space than a raised bed offers, and corn pollinates better in large blocks than in a single box.
Choose Safe, Suitable Materials
Pick materials that won’t leach chemicals into the soil.
Cedar and hemlock resist rot naturally and last around 8 to 10 years without treatment. Other rot-resistant species work too.
Use boards at least 2 inches thick so they hold their shape when the bed is full and wet. Thinner material bows outward over time.
Steel and galvanized metal outlast lumber by years, though you’ll need to punch a few holes in the base for water to drain. Without drainage, water pools and roots rot.
Stone and brick don’t rot or rust, and they don’t need drainage holes since water moves through the gaps. Stacked dry, they adjust easily if the ground shifts.
Frequently Asked Questions
What do you put in the bottom of a raised garden bed?
Line the bottom with landscape fabric to keep soil from washing out and block weeds, then add hardware cloth if gophers or other burrowing animals are a problem in your area.
Beds with solid bottoms need drainage holes punched before you fill them. Fabric and hardware cloth together give you both drainage and protection without adding weight or cost.
What flowers grow best in raised beds?
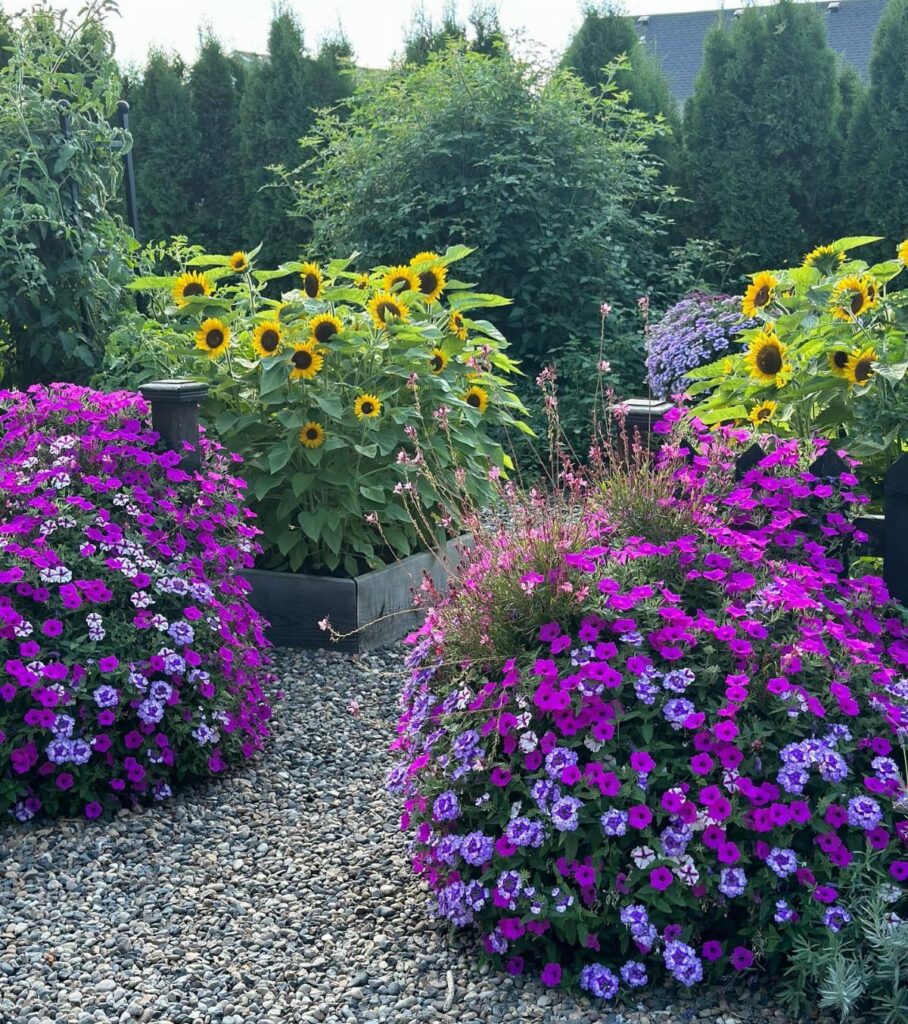
Annuals such as zinnias, marigolds, sunflowers, dahlias and nasturtiums grow well in raised beds because the improved drainage and warmer soil give them a stronger start.
Most flowering plants put out their best show when they get 6 hours or more of full sun each day. Shallow-rooted perennials work if the bed is deep enough to accommodate their roots through winter.
What not to plant in raised beds?
Skip sprawling crops like winter squash and giant pumpkins, since the vines run farther than the bed can hold.
Mint spreads too aggressively and will take over the whole box unless you plant it in its own container. Corn needs a large block to pollinate well, and trees or shrubs send roots beyond what a raised bed can support.
What is the layout of a raised bed flower garden?
Place taller plants at the back or north side so they don’t shade shorter ones, then mid-height varieties in the center and low or trailing flowers along the front edge.
Arrange multiple beds with 3-foot paths between them so a wheelbarrow can pass.
How tall should raised beds be?
A bed 12 inches tall or more gives deep-rooted plants room and lets you avoid bending as much, while beds on legs bring flowers to waist height if back pain or mobility matters.
Shallow beds under 6 inches work only for annuals or plants with very shallow roots. Height affects how fast the soil warms in spring and how often you’ll need to water.
What is the best soil for raised beds?
I fill my beds with roughly half topsoil, a third compost and a fifth organic material like shredded leaves or fine wood chips.
That organic fraction feeds the microbes and fungi that keep roots healthy and nutrients available. This ratio drains well without drying out too fast and gives you a base that holds its structure through multiple seasons.