Most of these ideas cost almost nothing because the materials are free: pallets, tires, tin cans, pinecones, broken tile and seeds saved from plants you already own.
Your space decides the pick: a renter with no flowerbed can grow herbs in 3 mason jars on a ledge, while a yard has room for a compost bin, garden paths and mosaic stepping stones.
1. Pallet Planters
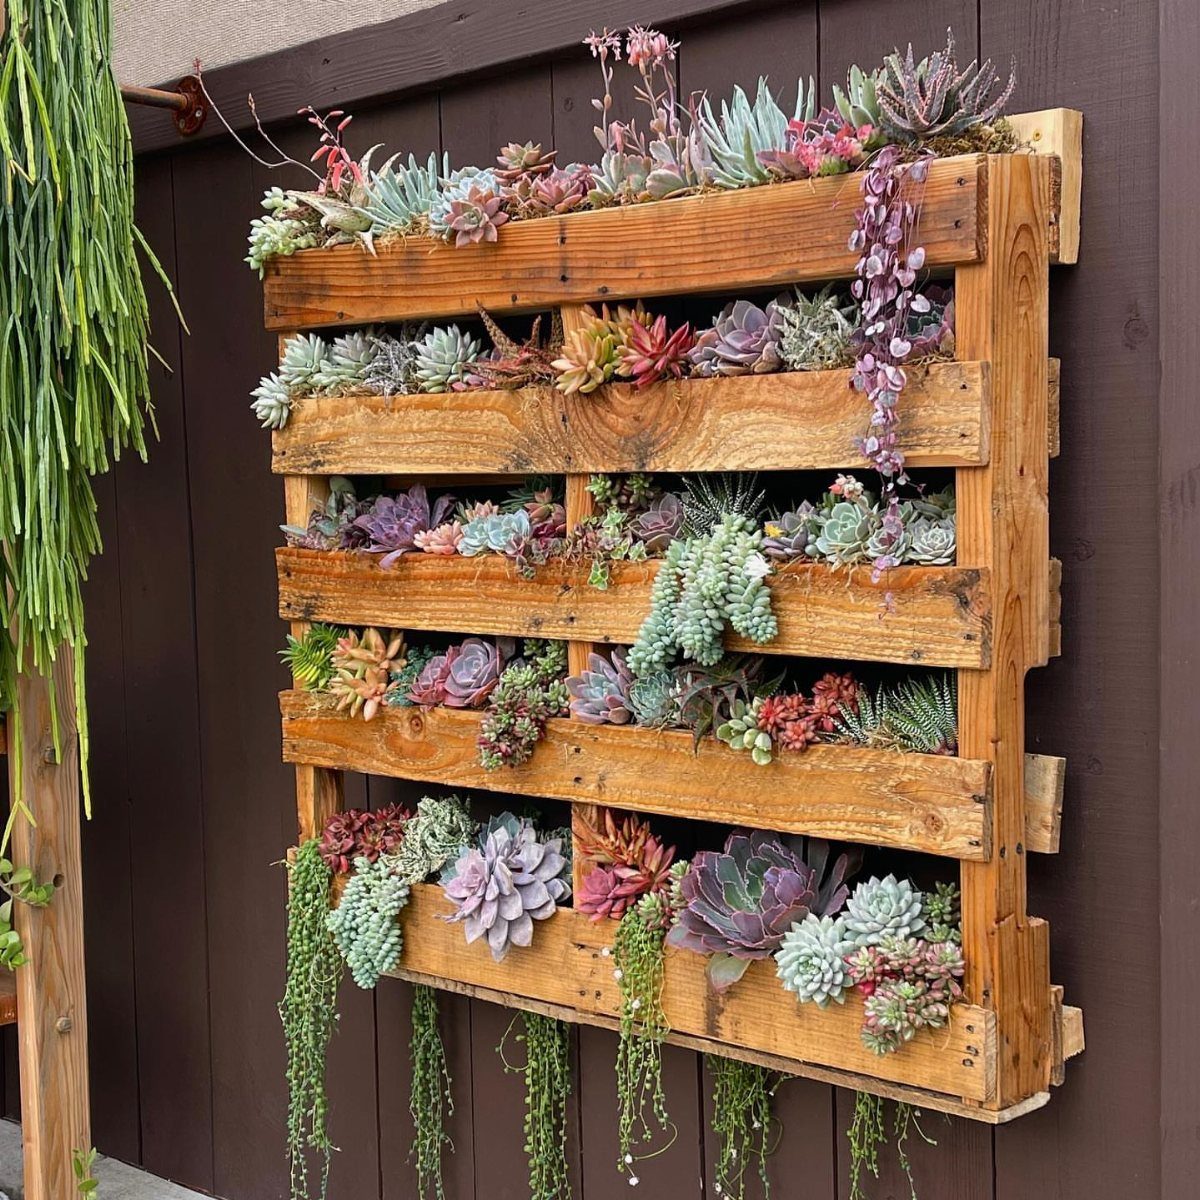
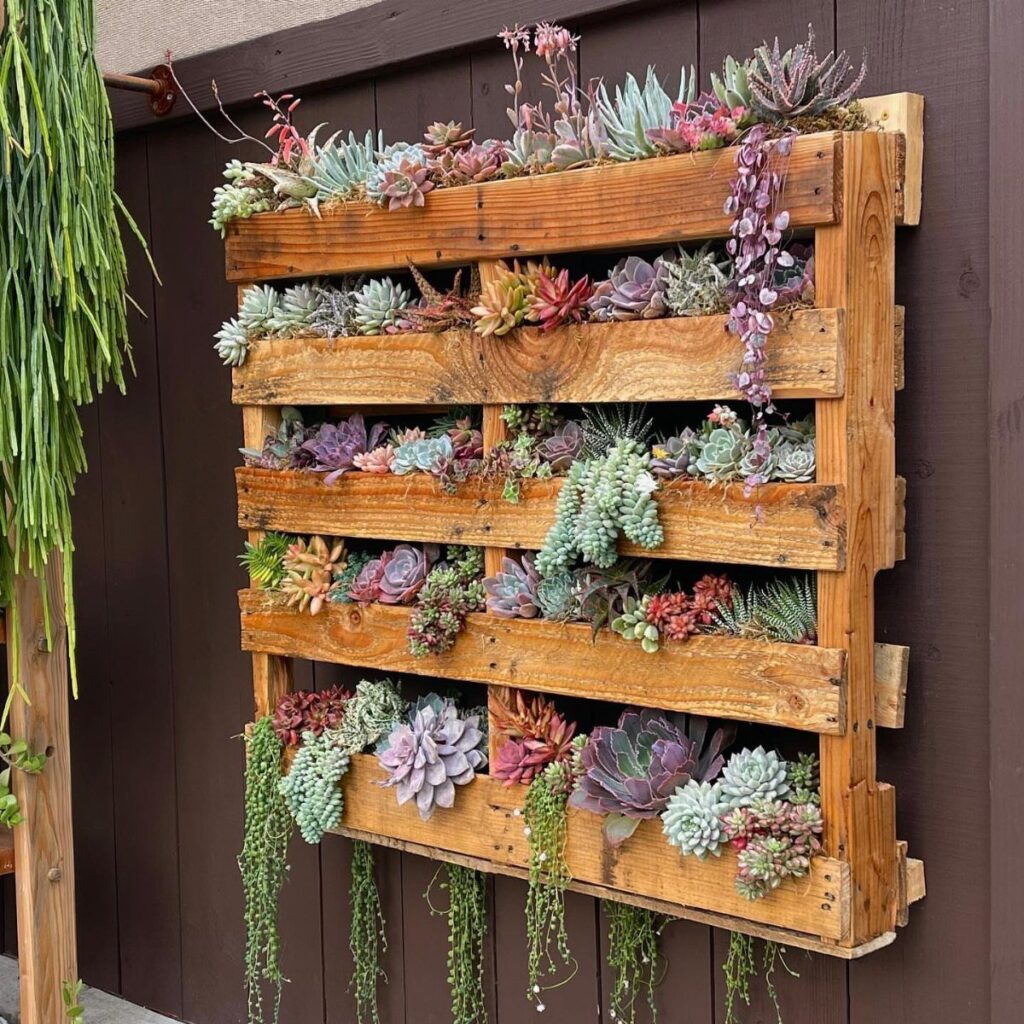
A pallet stood on its end and fitted with plants turns a blank wall into a living panel for close to nothing. The slats already form the pockets, so succulents tucked into the gaps need very little extra work.
Lean it against a wall or fix it to one. Staple landscape fabric across the back and base before adding soil, or the soil will leak out between the boards.
Pallets are often free from stores that would otherwise toss them. I’d choose one with the boards intact, since loose slats make planting a chore.
2. Bird Baths
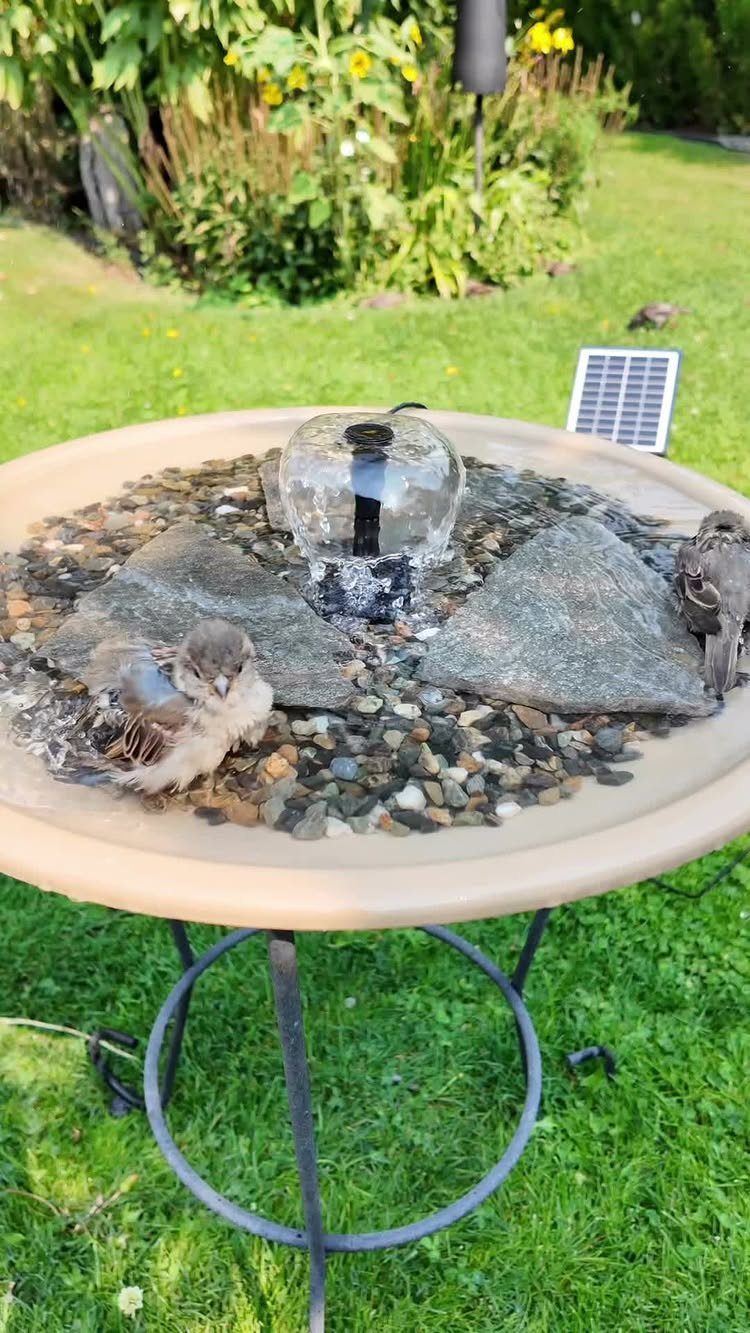
A shallow dish, a layer of pebbles and a small solar fountain make a bird bath that costs very little. Any wide, low container works, including an old table top with a rim, as long as the water stays shallow.
Pebbles and rocks give birds footing and a place to perch. The solar fountain keeps the surface moving, and it needs no outlet or cord.
Set it on open lawn where birds can see around them. Refill it often and rinse the dish so the water stays clean.
3. Potted Plant Walls
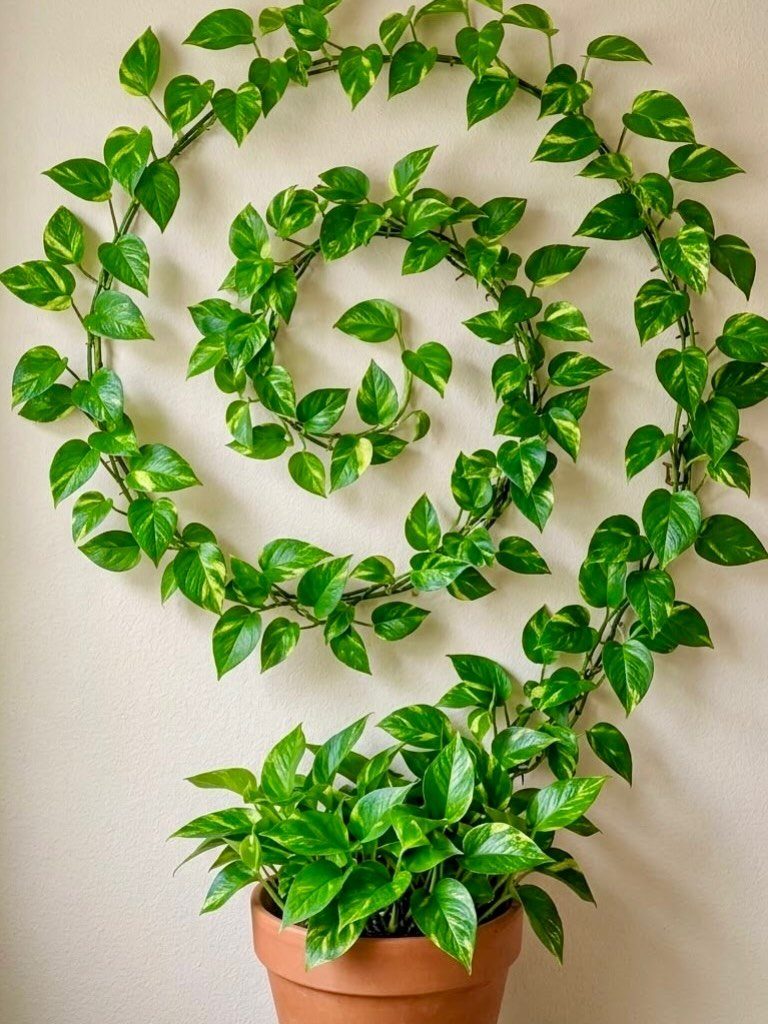
Pothos is one of the cheapest plants to train upward, and a spiral shape gives its vines a deliberate look against a plain wall.
Anchor the vines with small clips or hooks along the path you want, and keep them in line as they grow.
The same idea works outdoors on a fence, a branch or a pole, which suits renters with no flowerbeds. Hang or stand the pots along the structure and let the trailing plants climb.
A terracotta pot is a budget-friendly choice and looks good with green foliage.
4. Tire Planters
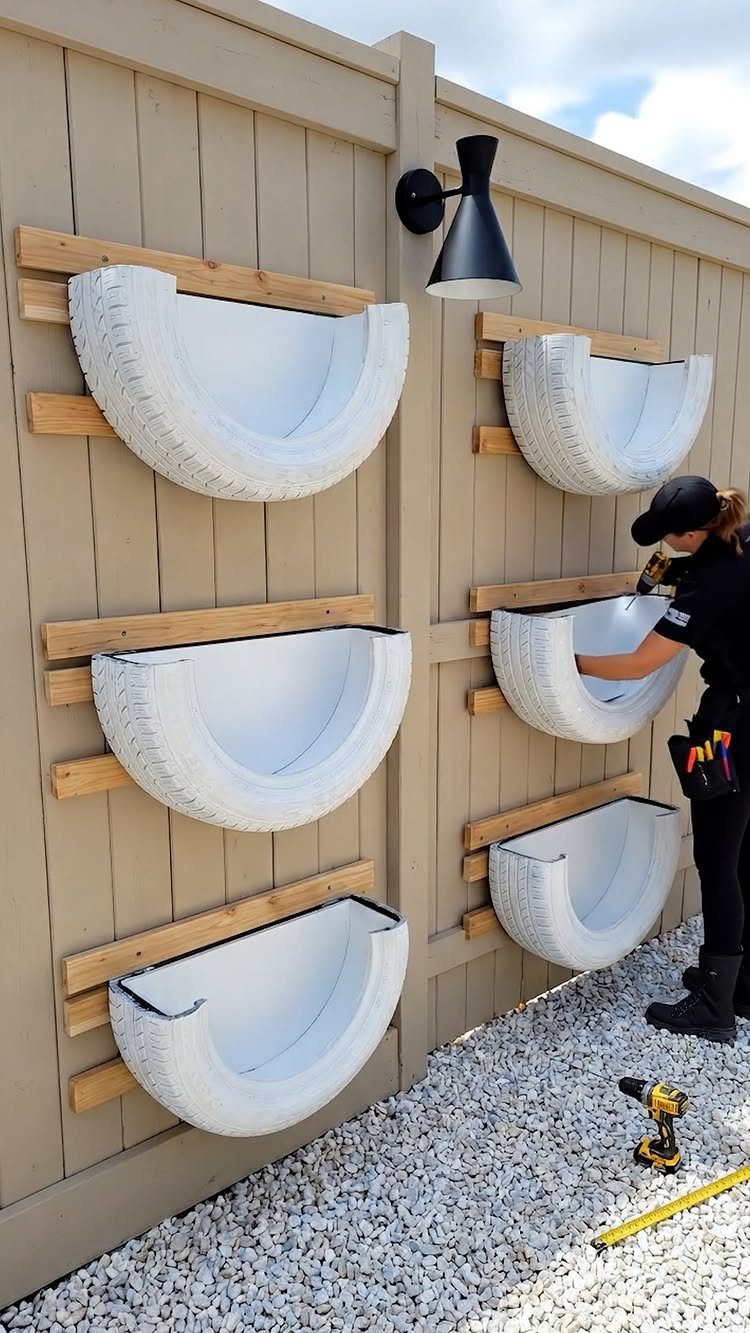
Cutting a tire in half gives you 2 planters, and mounting them on a fence keeps them off the ground where space is tight.
A drill and a tape measure are the main tools, so measure the spacing first and mark each screw spot.
White paint on the rubber lifts a plain wooden fence and tames the heavy black of the tire.
Use a spray paint made for plastic or a masonry primer first, since regular paint tends to flake off flexible rubber. I’d space them evenly, since a crooked row is the first thing people notice.
Drill drainage holes before filling with soil. Used tires are often free from tire shops.
5. Bird Houses
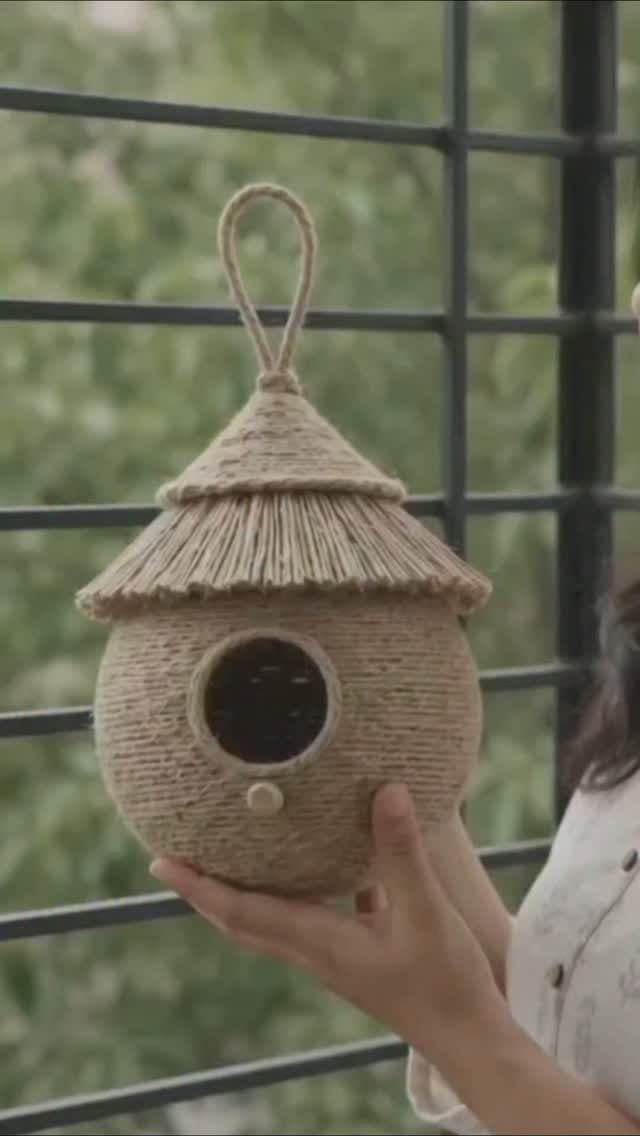
A woven straw house like this one is light enough to hang from a hook or a fence, which makes it a fit for balconies as well as gardens.
The maker describes it as handmade from jute, a cheap fiber you can buy as twine.
The conical roof sheds some rain, though natural fibers will wear faster than wood. Hang it in a sheltered spot, away from strong sun and wind.
For a first project, wrapping twine around a simple frame is easy enough to do with kids.
6. Barrel Planters
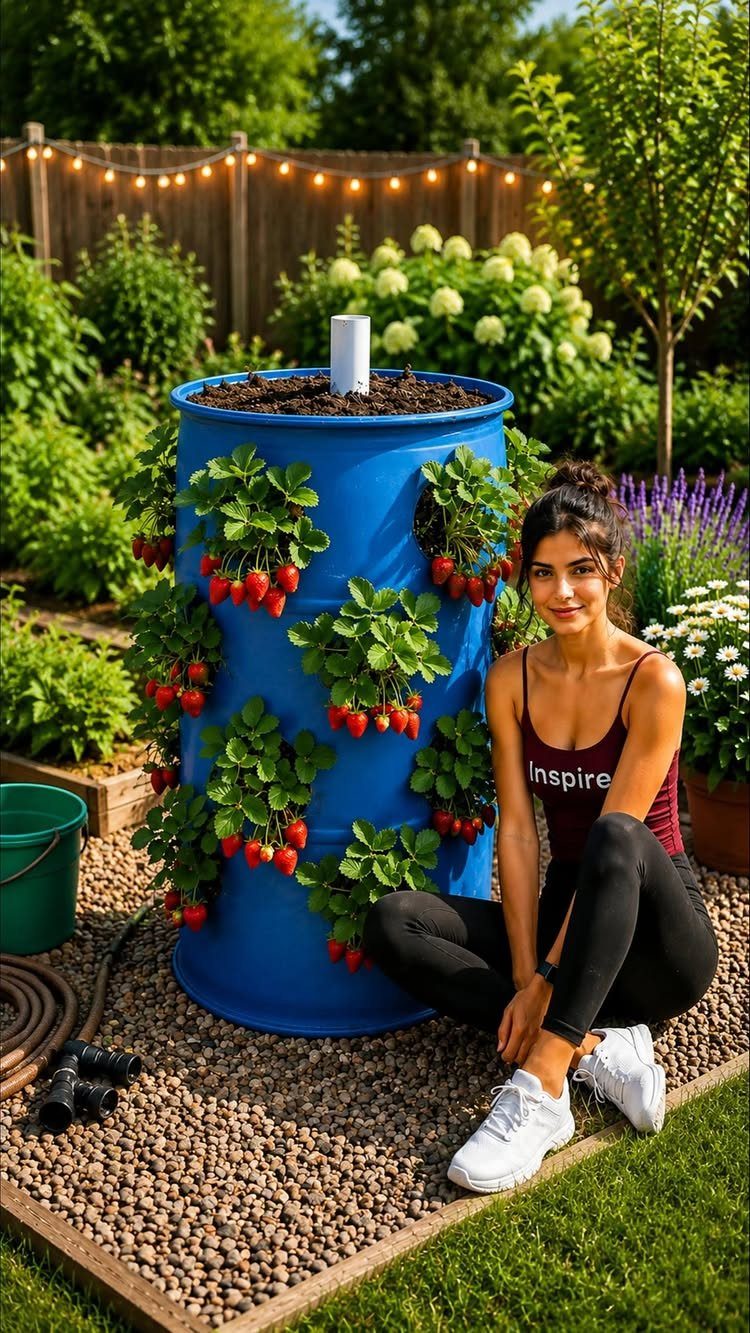
Strawberries suit a barrel because the plants stay compact and the fruit sits up where you can reach it. A painted barrel, like the blue one here, adds color to a patio or backyard corner.
Drill drainage holes in the bottom before filling, or the roots will sit in water. Flowers and herbs grow just as well in the same setup, so pick whatever you’d actually eat or enjoy looking at.
A barrel holds a lot of soil, so fill it where it will stay, since moving it later is hard.
7. Compost Bin
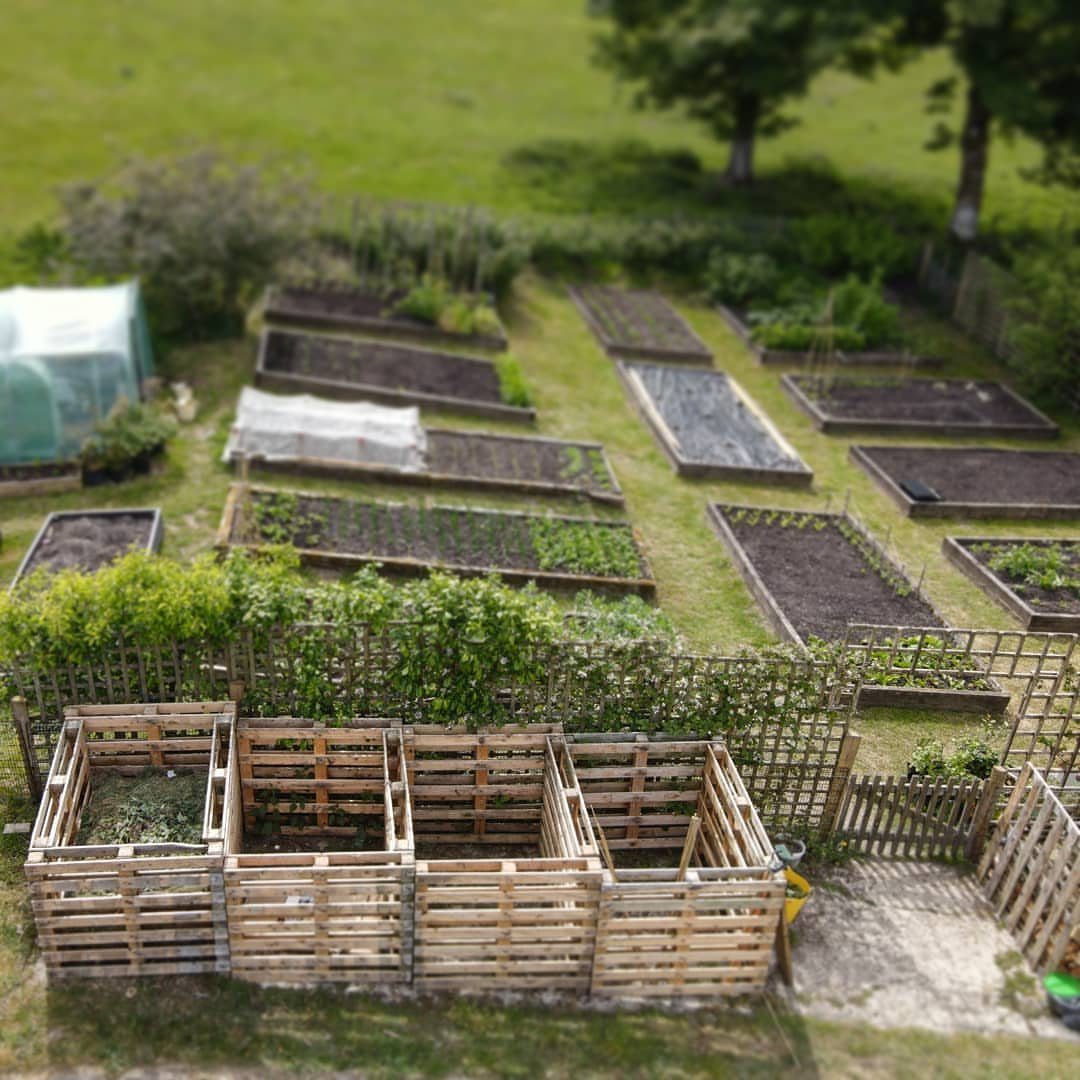
A four-bin compost setup turns kitchen scraps and yard waste into free soil, and slatted wooden sides let air reach the pile. Each bin holds a different stage, so one fills while another sits and breaks down.
Pallet boards or scrap lumber can build the slatted sides for little money. Leave gaps between the slats, and put the row near your raised beds so finished compost has a short trip.
I’d build all the bins the same size so moving a pile over is easy.
8. Tin Can Planters
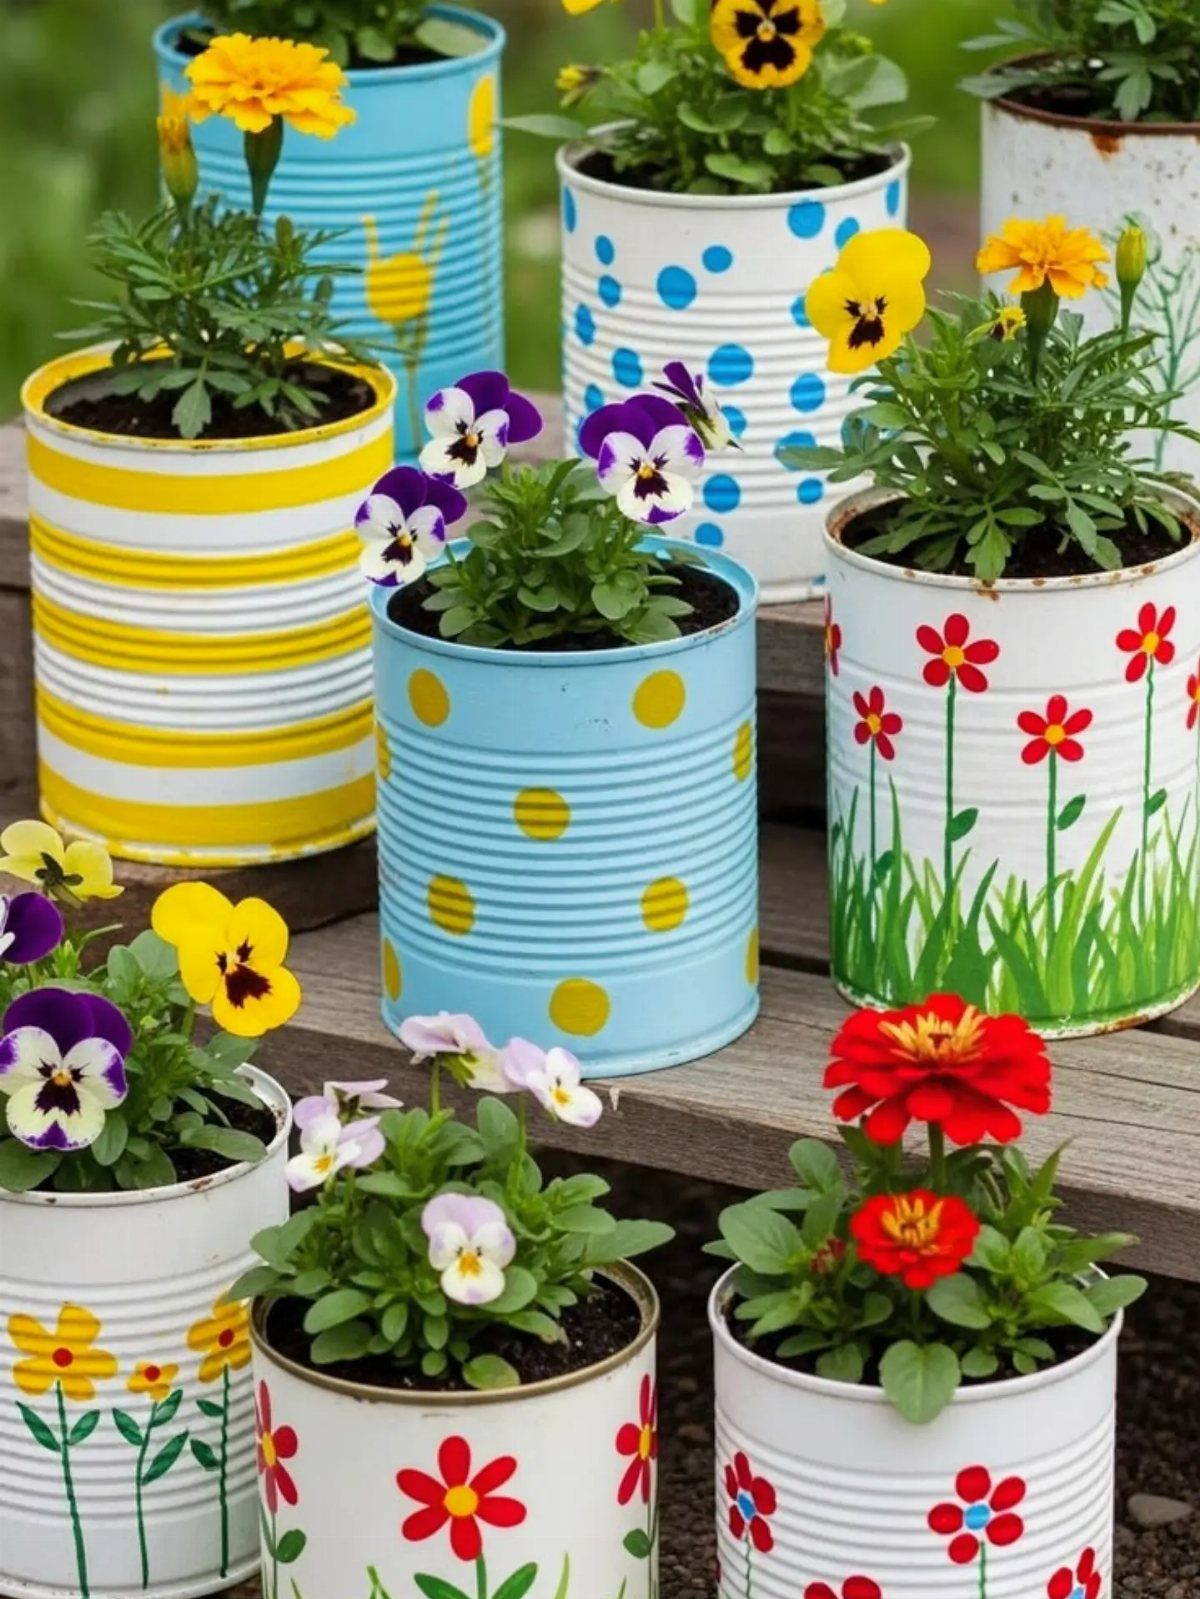
Empty food or coffee tins make small planters, and a coat of paint hides the labels. Bright colors suit cheap, fast-growing flowers, and a row of cans on a deck or ledge fills a small space without any flowerbed.
Punch a few holes in the bottom of each can with a hammer and nail before planting, or water will pool and rot the roots. Rinse the cans well and sand any sharp rim.
Use outdoor paint so the color lasts. Cans cost nothing if you save them from the recycling bin, and kids can paint and plant them with very little help.
9. Wigwam Climbers
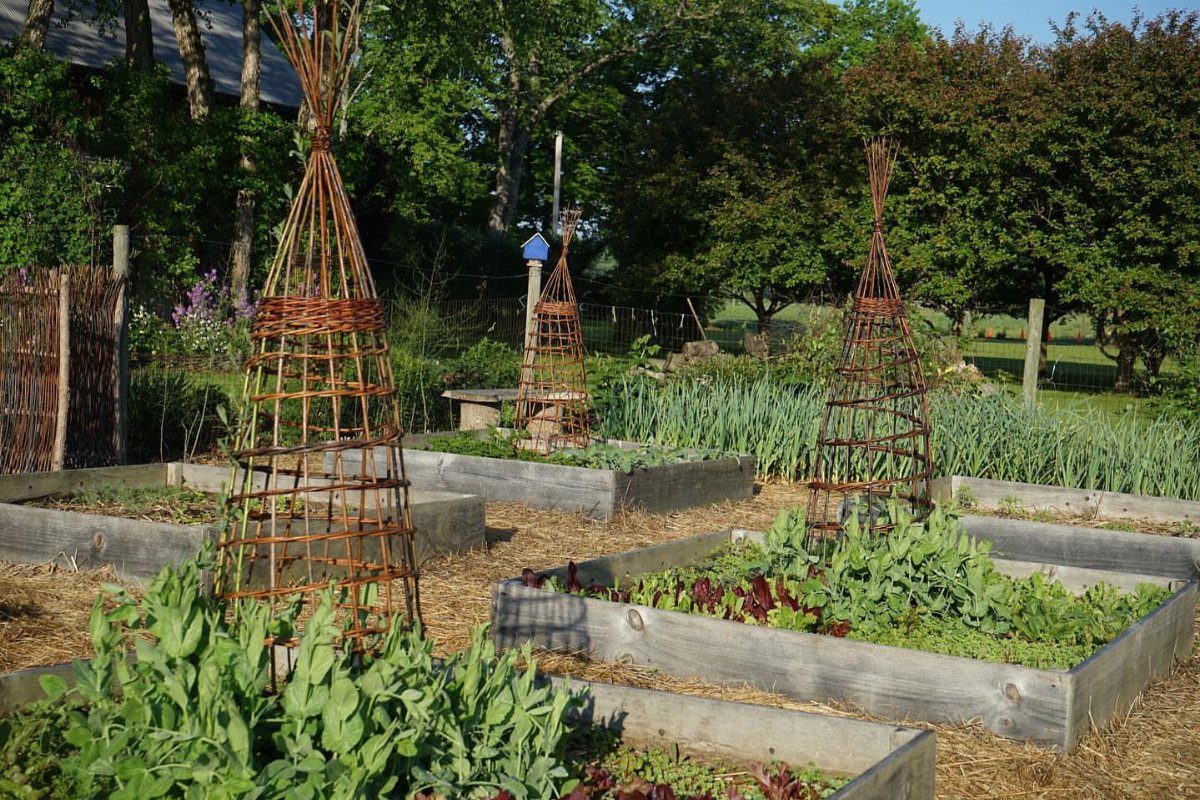
Woven branch wigwams give climbing plants something to grab, and they look good even before the vines fill in.
Push long, flexible branches into the soil in a circle, then pull them together and tie them at the top to make the cone shape.
Bind the top tightly with twine, then weave thinner stems around the frame for extra grip. Branches pruned from your own yard cost nothing.
Push each leg deep into the bed so wind can’t tip it. I’d plant beans or peas at the base of each leg.
10. Bee Hotels
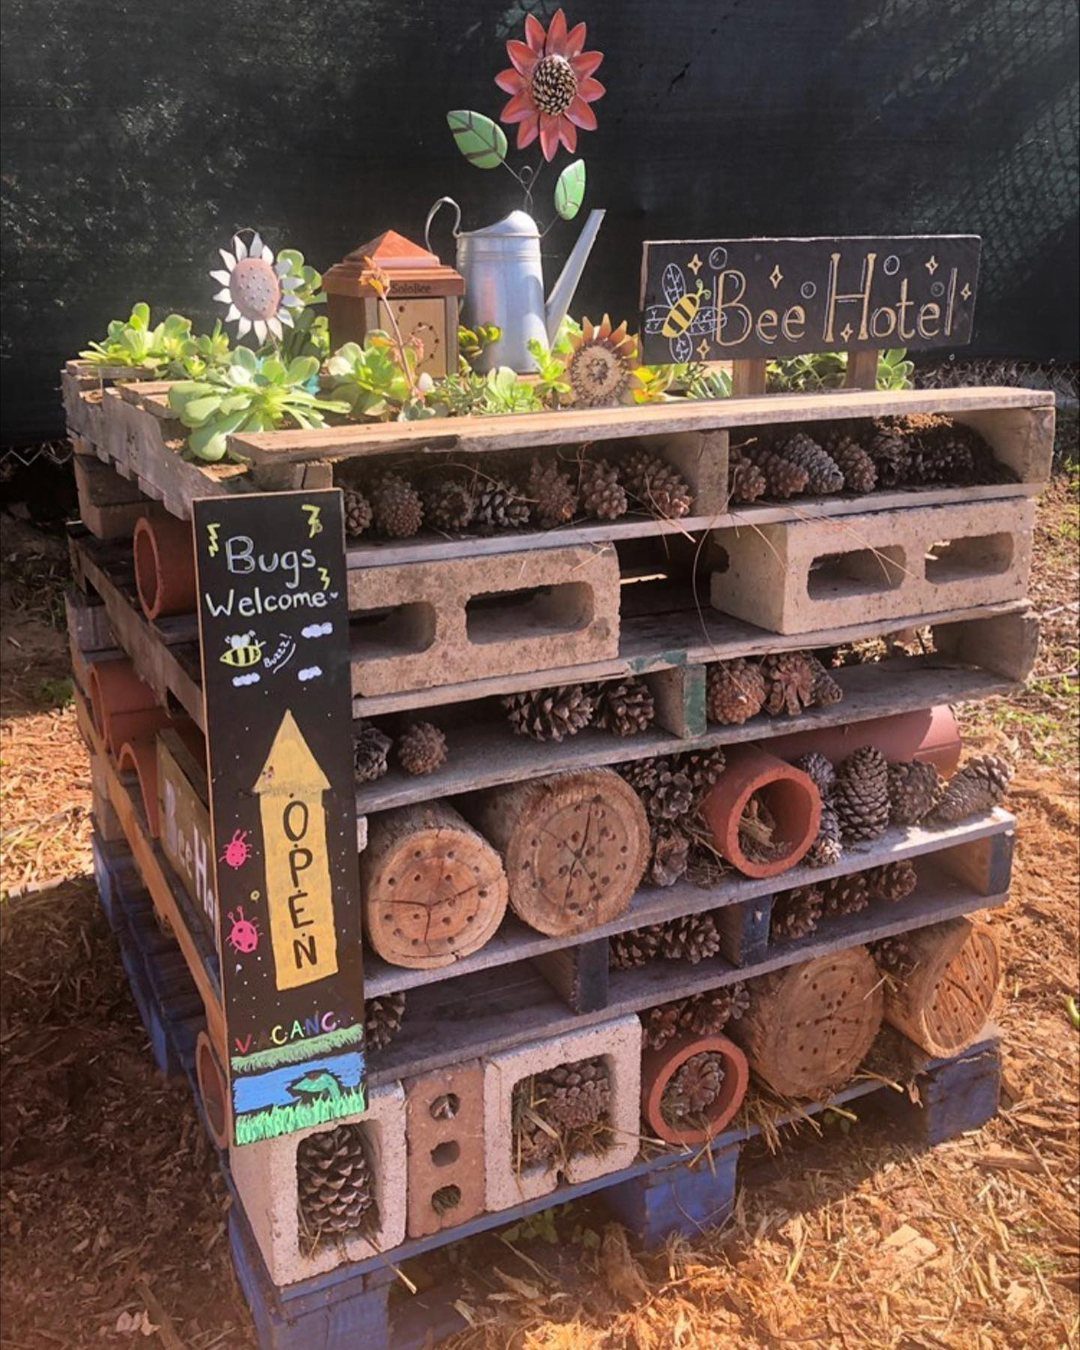
Stacked pallets, pinecones and hollow logs make a bee hotel, and solitary bees nest in the small gaps and tubes. Hollow stems and drilled logs add more nesting spots, and pallets are often free.
Stack the pallets where they will stay, then pack the openings tightly so nothing shifts. Pick a spot on open ground with some sun.
A sign is optional, though I like one, since it tells guests what the pile is. Bees move in slowly, so give it time.
Position your bee hotel in a dry, sheltered spot in full sun, about 1.5m high.
11. Garden Paths
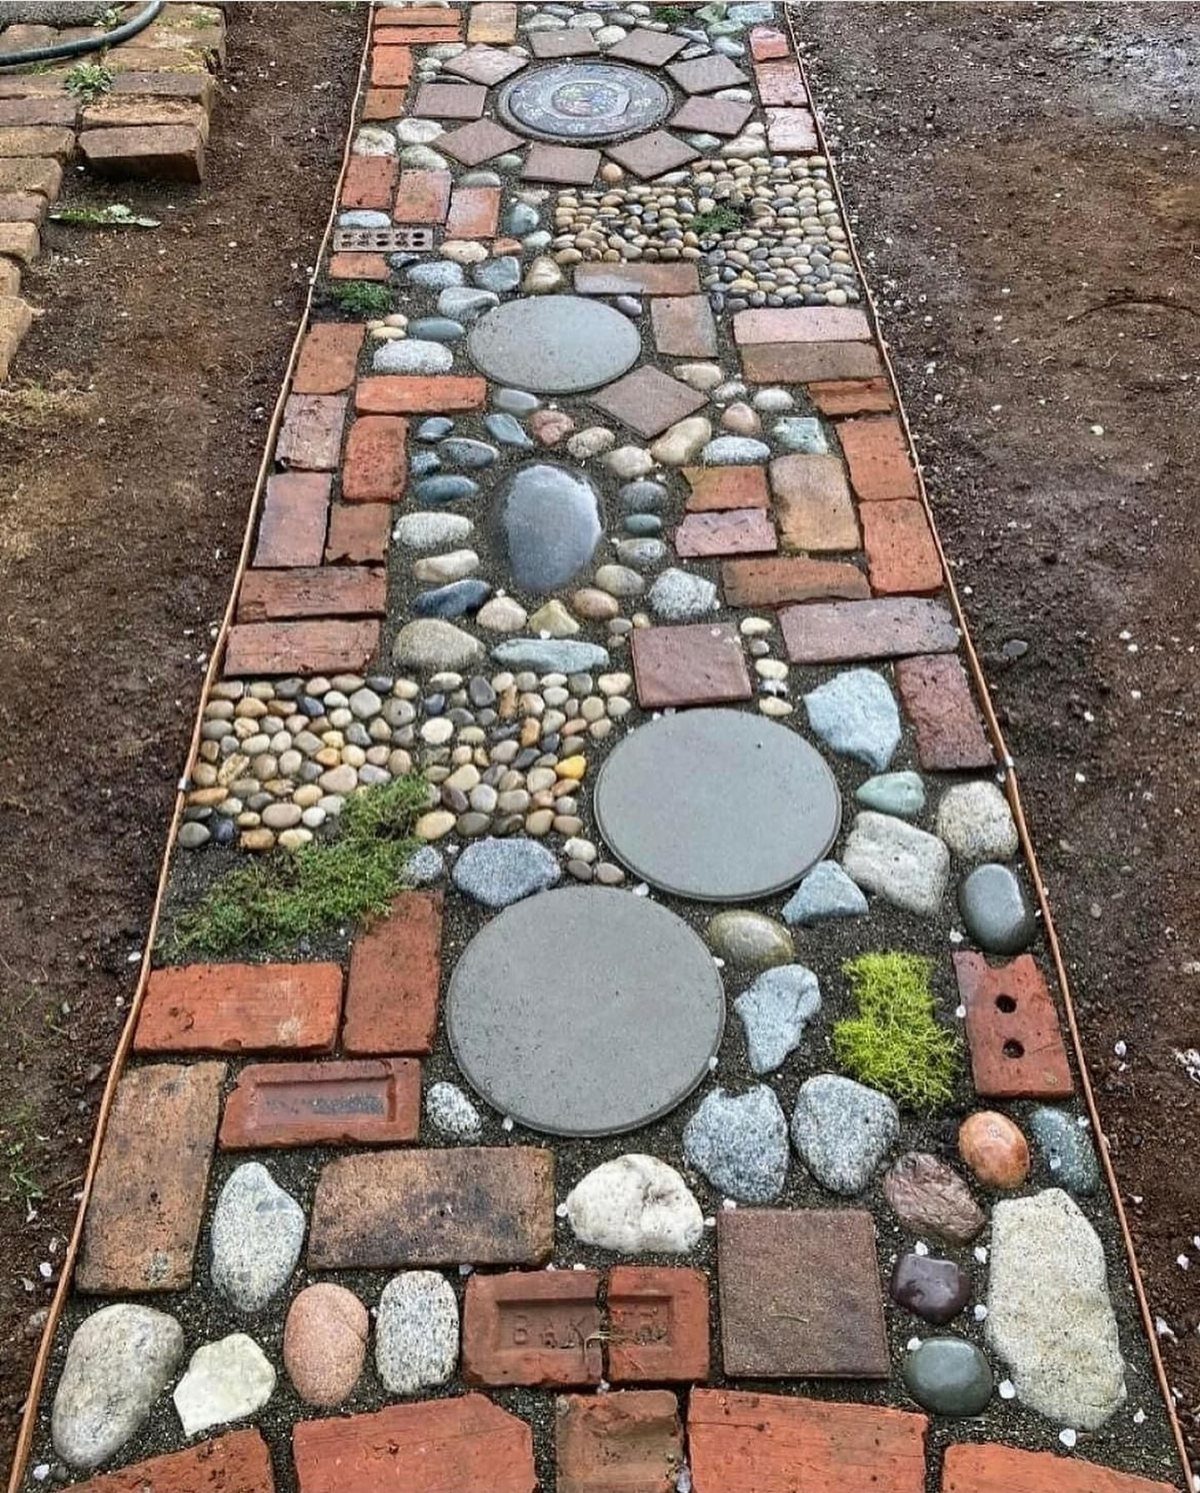
Reclaimed bricks, flat stones and a scatter of small pebbles make a path for almost nothing, and mixing the materials hides the fact that nothing matches. Salvaged brick is often sold cheap or given away.
Lay out the pieces on the ground first, then set the large ones and fill the gaps with pebbles. Press each piece firmly into the dirt so it sits level and doesn’t rock underfoot.
I’d pick the mixed look over a uniform one: it forgives uneven supplies and odd leftover amounts.
12. Painted Garden Fences
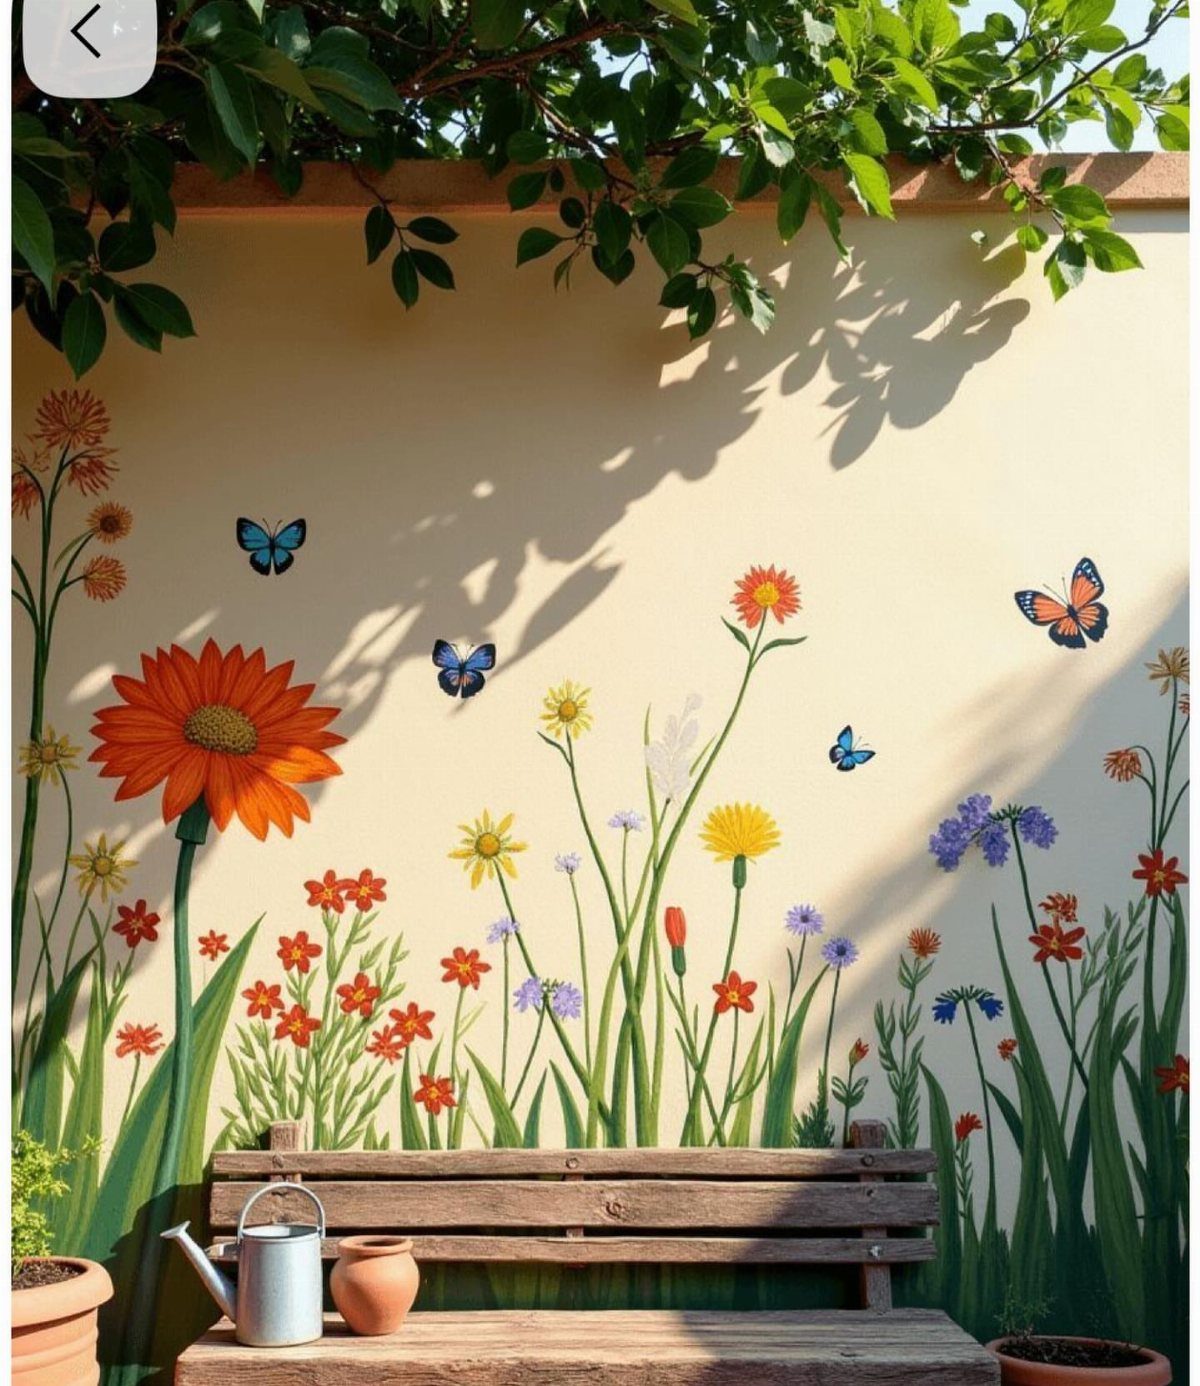
Outdoor paint is the cheapest way to refresh a tired fence or wall, and a cream base makes a good backdrop for painted flowers and butterflies.
One can of base color and a few small sample pots cover the whole job.
Clean the surface first so the paint holds, then paint the base coat and let it dry fully. Add the flowers freehand or with a stencil, and keep the shapes simple if you’re a beginner.
Use paint made for outdoor use, or the colors will fade and peel.
13. Mosaic Stepping Stones
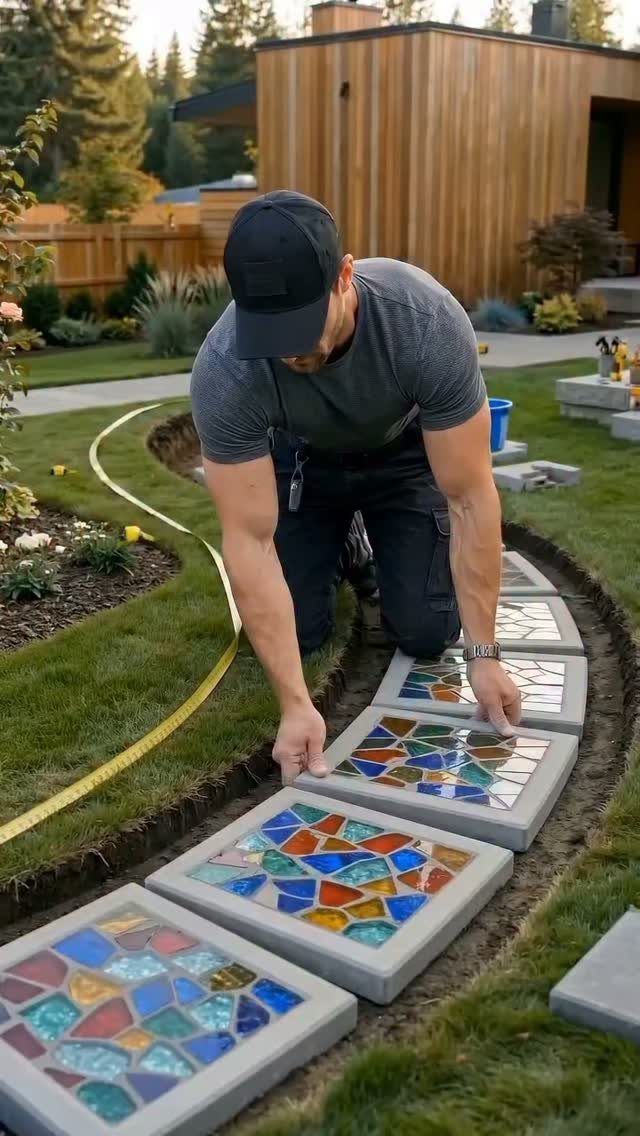
Broken tiles pressed into wet concrete make stepping stones that turn leftover scraps into a path. Mixed colors suit a curved route across a lawn, and no 2 stones need to match.
Lay the tile pieces out on a flat surface first, then press them in while the concrete is still soft. Tile shards are often free from a renovation or sold cheap as odd lots.
I’d wear gloves when handling the broken edges. Make each stone in a mold so the shapes stay uniform and the path sits level.
14. Mason Jar Herb Garden
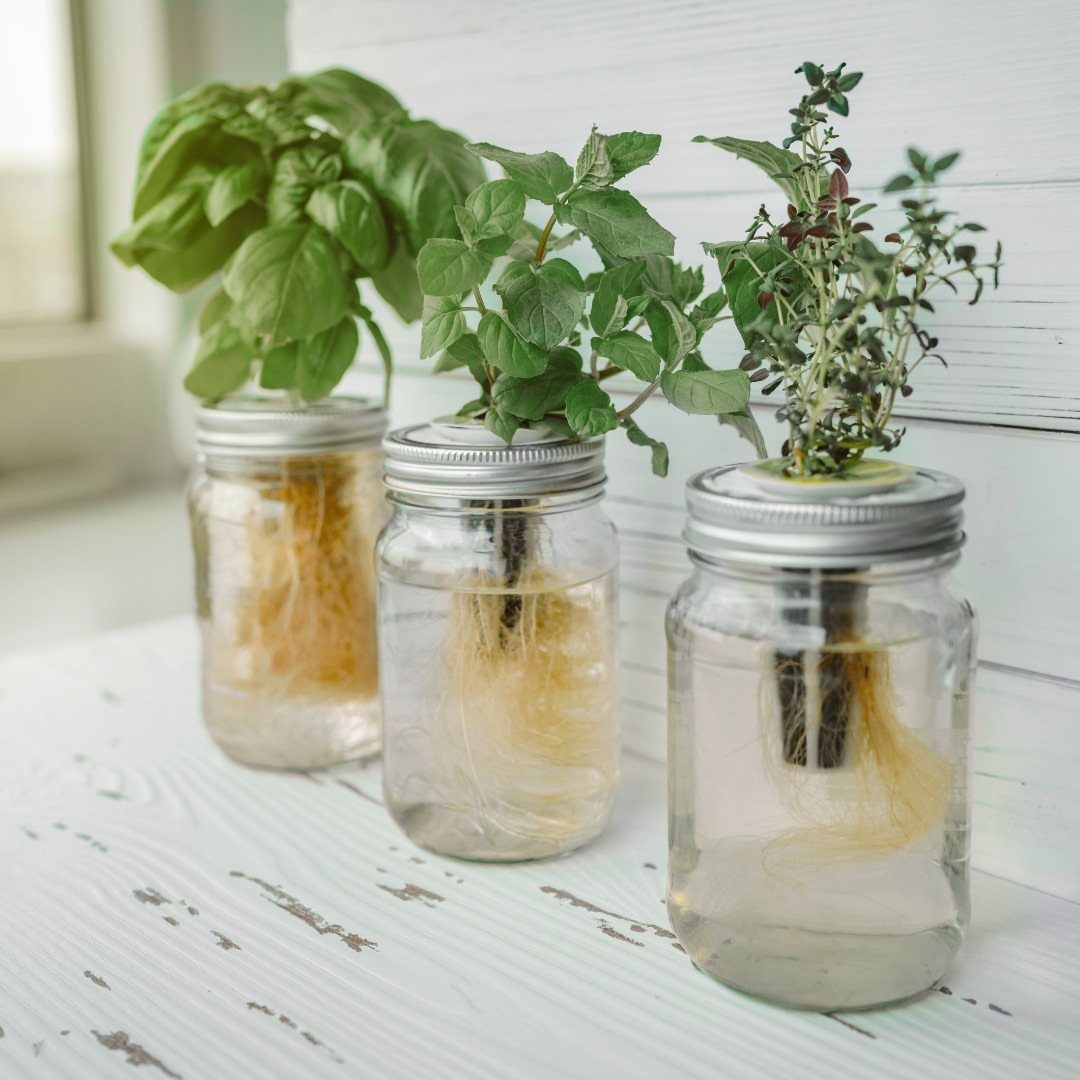
Herbs with roots already forming will grow in a mason jar of plain water, which makes this one of the cheapest herb gardens you can set up.
3 jars in a row on a ledge or a table fill a spot with no soil and no flowerbed.
Keep the water topped up so the roots stay covered. Rinse the jars now and then, since stale water turns cloudy.
I’d start with cuttings from herbs you already use. Silver lids add a tidy look, though the plants need an opening to grow through.
15. Collect Seeds
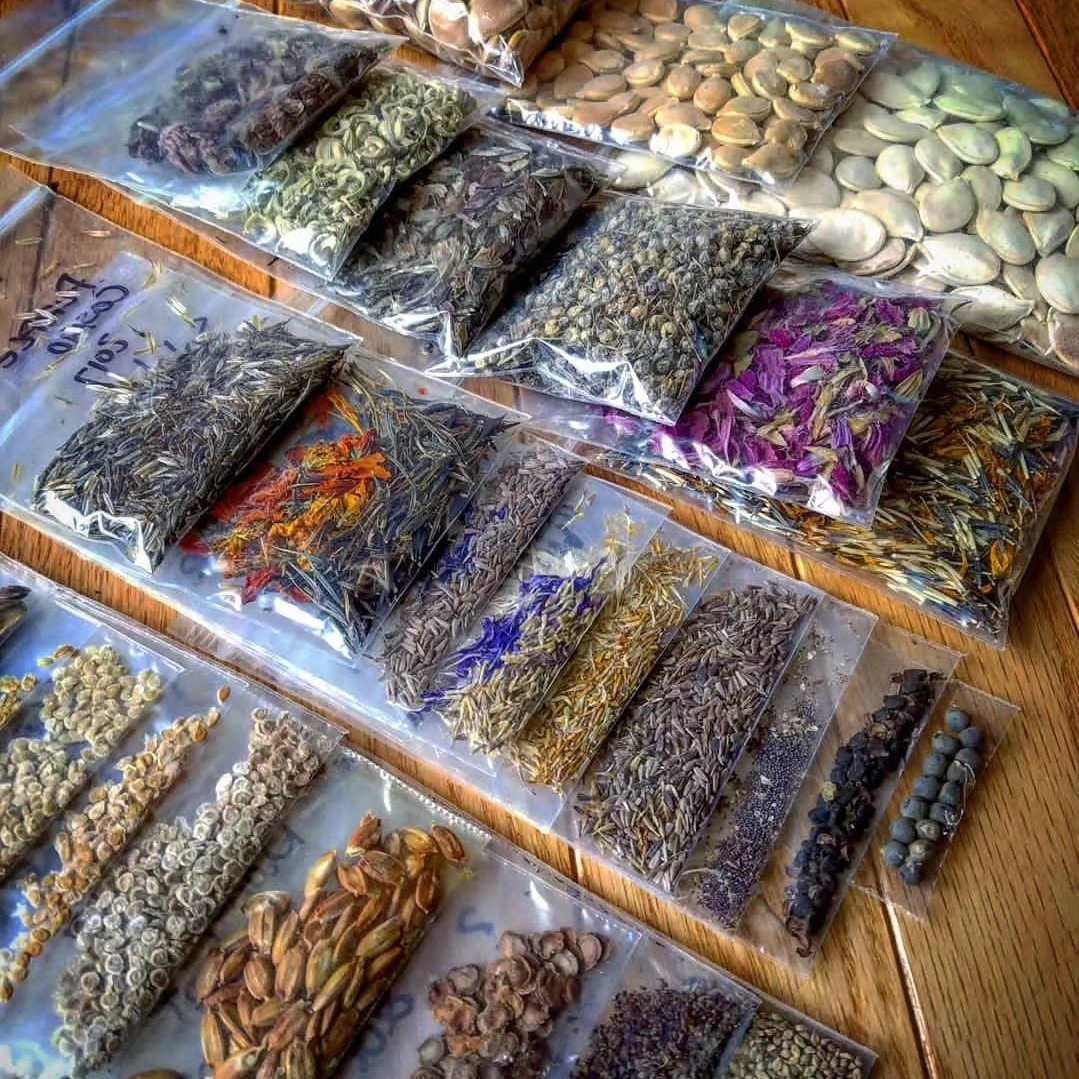
Seeds from plants you already own cost nothing, and a drawer of small zip-top bags turns one season’s flowers into next year’s garden. Let the seed heads dry on the plant, then collect them into clear bags.
Write the plant name and the date on each bag, as the handwritten notes here do. Unlabeled seeds look alike, and you will not remember which is which by spring.
Store the bags somewhere dry so the seeds don’t mold. Swapping spare seeds with a neighbor stretches the savings further.
16. Repurpose and Upcycle
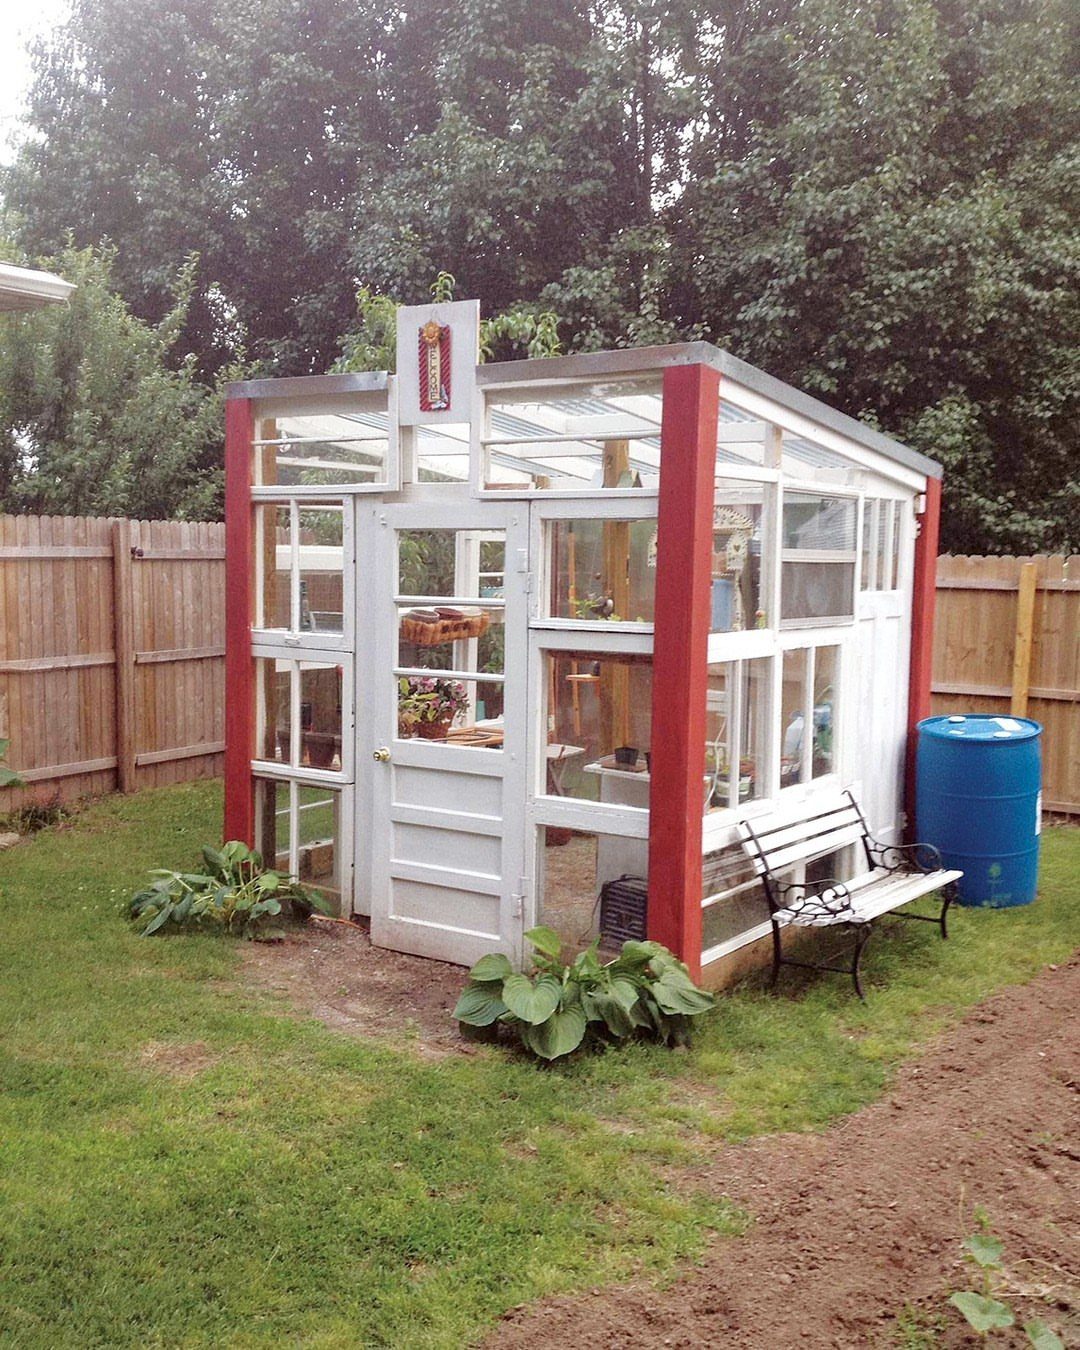
Old window frames, a salvaged door and a few beams can become a small greenhouse for a fraction of what a kit costs.
Plants are cheap; it is planters, pavers and arbors that push a garden budget into 4 figures, so reused hardscape is where saving counts.
Look for windows of matching size, since they make the walls easy to assemble. Check each frame for rot before you build.
I’d paint the frames in one trim color, as the red beams do here, so mismatched parts read as a plan.
17. Miniature Fairy Garden
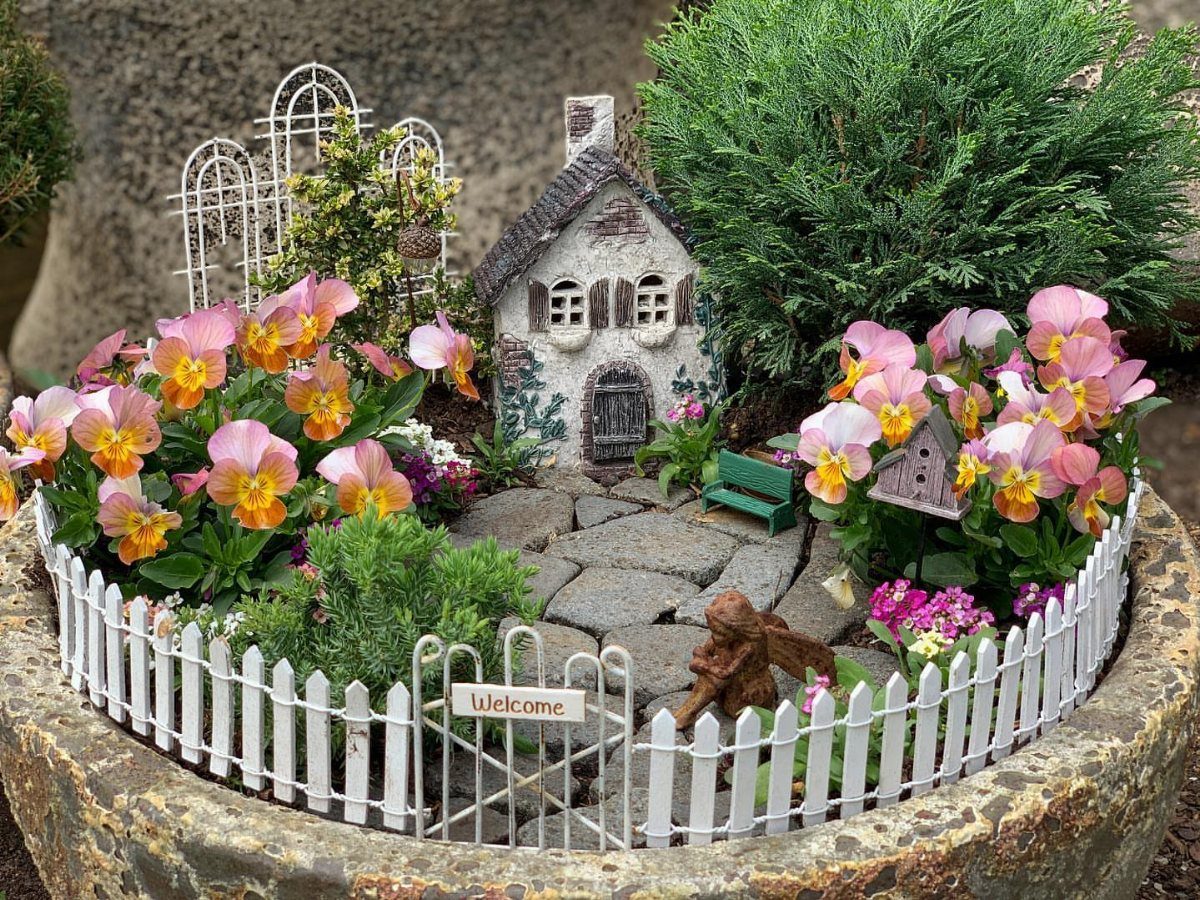
A chipped pot, a spare tray or a forgotten corner of the yard can hold a whole tiny village.
Start with a base of soil, then add a small house, a bench and a picket fence, with cheap flowers such as pansies for color.
Keep the scale consistent so the pieces look like they belong together. A tiny "Welcome" sign adds charm for very little money.
Kids can choose and place the pieces themselves, which makes this an easy afternoon project. I’d plant in a pot with drainage holes.
18. DIY Hanging Gutter Stand
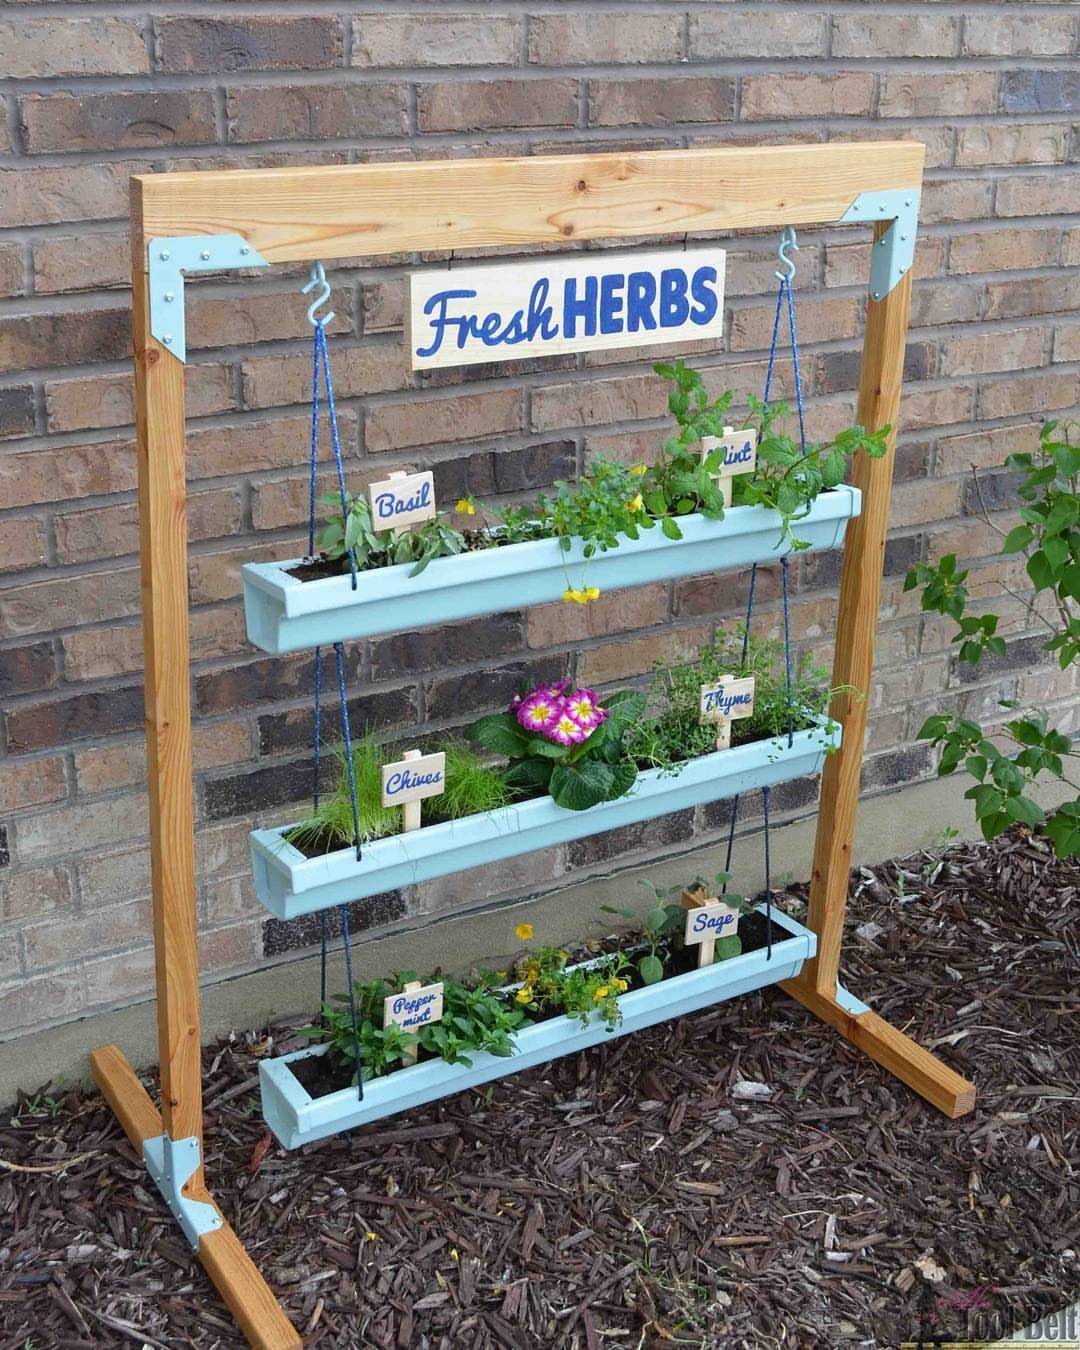
Gutter sections hung from a wooden A-frame make a herb garden that moves with you. Shallow gutters suit herbs like basil, mint, chives, thyme and sage, and the frame lets you shift the whole stand to follow the sun.
A single coat of one color, like a soft light blue, ties mismatched gutter sections together, and small plant labels in each run keep the herbs easy to tell apart. Drill small drainage holes along the bottom of each gutter.
I’d keep mint in its own gutter, since it spreads fast. Set the stand on mulch or a flat surface so it stays steady.
19. Garden Lanterns
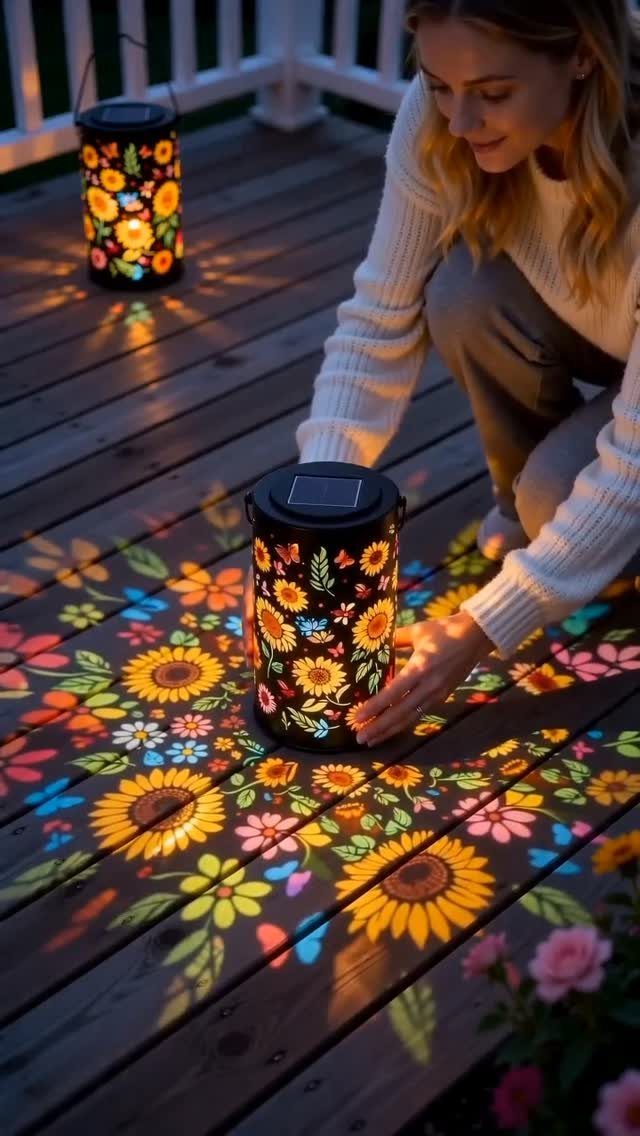
A solar lantern with a cut-out pattern throws sunflower shapes across a deck once the sun goes down, and it needs no outlet, cord or candle.
Set one near the seating and a second a few feet away so the patterns overlap.
Place solar lanterns where they catch full sun during the day, or they will glow weakly at night.
If you prefer real candlelight, a jar or tin with a candle inside is the cheaper route, and I’d keep those away from dry leaves and wood railings.
20. Pinecone Bird Feeders
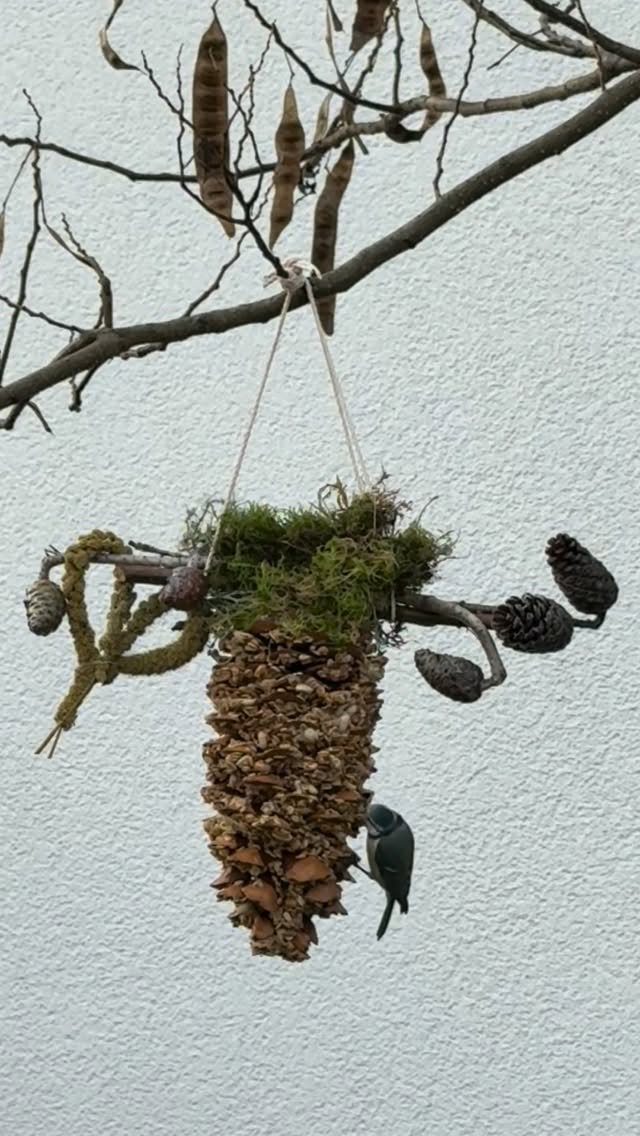
Peanut butter works as the glue here: spread it over a pinecone, roll the cone in birdseed, and the seed sticks in the gaps between the scales.
Loop a piece of twine around the top of the pinecone, knot it, and hang the feeder from a sturdy branch where you can see it from a window.
A pinecone from your own yard costs nothing, so the only spend is a jar of peanut butter and a bag of seed.
Hang it where you can see it from a window, and make a few at once, since a coated cone empties quickly.
Kids can do every step, and it gets messy, so I’d work outside.
Free Supplies and Materials
Free mulch and compost are easier to find than most people expect.
Call local tree trimming crews, because many would rather dump a load of wood chips in your driveway than pay to haul it off, and plenty of cities also give away mulch or compost for free at municipal sites.
Call ahead and ask what the load size is, since a truck dump can be bigger than a small yard needs.
Free listings, barter sections, flea markets, garage sales, community groups and neighbors are the next places to check for supplies. Recycling centers and community groups sometimes pass along half-used cans of paint, which is plenty for small outdoor projects.
If you pick up pallets, check the stamps first.
Pass on any pallet stamped MB or SF, since those were treated with chemicals you don’t want near a vegetable bed, and leave blue ones alone too, because they belong to a pallet-rental pool and aren’t yours to take.
Wash whatever you bring home before planting.
Choose Plants for Conditions
Pick plants for the spot you have, not the spot on the plant tag you wish you had. Check your local climate and how many hours of sun the space gets, then buy flowers that match both.
Cheap plants turn up in more places than most people look: grocery store racks, roadside stands, farmers markets and the clearance corner at a garden center. Look each one over for pests and disease before it goes in the cart.
A perennial marked down at the end of the season often looks ragged above the soil, but if the roots are healthy it will grow back fine in spring.
If you miss that window, repot them in fresh potting mix, park them somewhere out of heavy rain such as beside the house wall, and plant them out next spring.
Marked-down houseplants are worth a look too, since many bounce back with a little care.
Frequently Asked Questions
What are some easy garden ideas for beginners?
Tin can planters, pinecone bird feeders and a mason jar herb garden are the easiest starts. Cans only need a few nail holes in the bottom and a coat of outdoor paint.
Herb cuttings with roots already forming grow in plain water with no soil. Pinecone feeders take peanut butter, birdseed and twine, and kids can do every step.
What are some cheap and easy DIY landscaping ideas?
Garden paths, painted fences and mosaic stepping stones cost the least. A path of reclaimed bricks, flat stones and pebbles uses mismatched leftovers, and a can of outdoor paint refreshes a tired fence.
For a path on pocket change, press chunks of broken tile into a wet concrete round and let it cure. Free wood chips from tree trimming crews can cover the beds.
Where to find pallets?
Ask at stores that break down their pallets, then check free listings, community groups and neighbors. Check the stamp before you take one.
What to add to your DIY compost bin?
Balance wet, nitrogen-rich greens such as produce scraps and fresh grass clippings against dry, carbon-heavy browns like fallen leaves and torn cardboard. Keep out meat, dairy, oily foods and pet waste.
Don’t have any pots to hand?
Reuse what you already have or can get free. Empty food and coffee tins work once you punch drainage holes and paint them, and a tire cut in half makes 2 planters.
A barrel or a chipped pot also works, as long as it has drainage holes. Asking around for old containers costs nothing too.