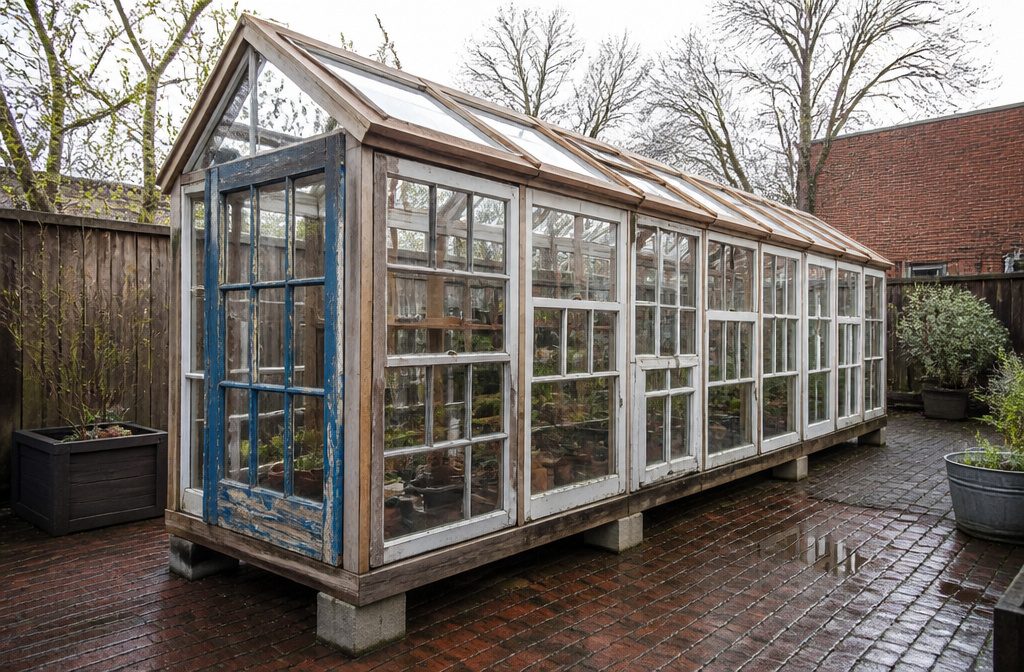
A greenhouse built from salvaged windows uses old sash as the walls, set in a 2-by-4 frame on posts or cinderblocks.
The condition is width: keep every window 32 inches or narrower, and match the ones facing each other across the span, or the rafters won’t line up. One 16 by 10 foot build ran $2,500.
Plan Around Your Windows
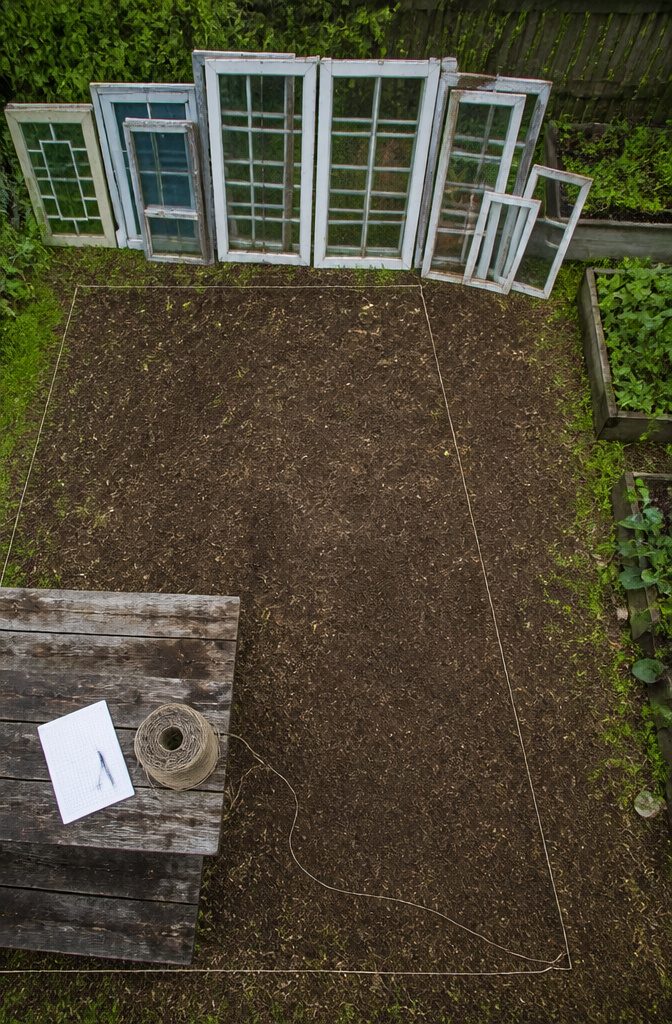
Gather the windows before you draw anything, because their sizes set the wall spacing and the height.
Windows 32 inches wide or narrower keep the wall-rafter assemblies from spreading too far apart, and a set of matching sizes makes the build far easier. Windows facing each other across the greenhouse need to be nearly the same width.
Then sketch the walls on graph paper using your actual glass, and test the footprint against the yard.
A 20 by 14 foot first draft shrank to 16 by 10 feet once the site was marked out, and the door moved to the gable end so tables could line the long north side. Stake the outline before you commit.
Lay Out the Windows
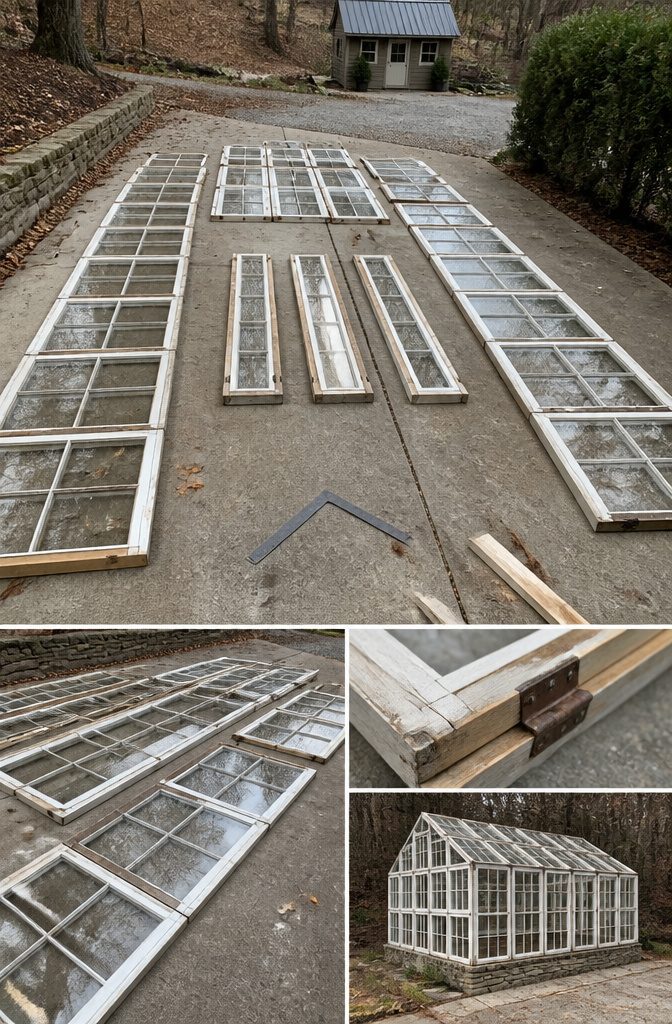
Lay the two side walls out first, flat on the ground or a driveway, before you cut a single board. Leave 2 inches between each column of windows, which covers the 2-by-4 rafter plus ½ inch of wiggle room.
Keep every window 32 inches wide or narrower, and match the widths of the windows directly opposite each other closely, because the rafters have to line up across the span.
A collection of twenty sections from one house makes this easy.
The largest in one build measured about 23 by 36 inches, and sash windows were taken apart and turned on their sides to stand tall and narrow. Save the mismatched antiques for the end walls, where nothing has to line up.
A small version needs far less: 4 windows below and 2 hinged above, so one side opens for air.
Set the Foundation and Frame
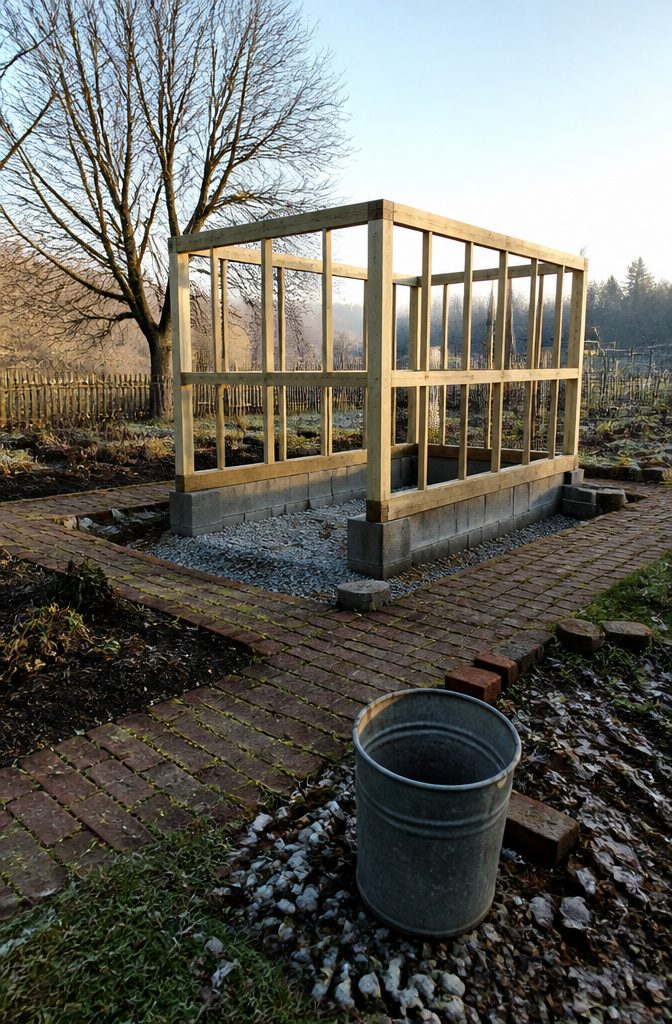
Footings come down to two camps.
Posts set in concrete and left to cure overnight give a pole-building frame that goes up fast, with treated 2-by-4s run around the base and again about 40 inches up to stiffen the walls and give the windows something to sit on.
Cinderblocks stacked in a 4-foot hole and topped with gravel take more digging, but they can be adjusted if the structure shifts, which poured concrete cannot.
For a freestanding greenhouse I’d pick the blocks. Check local codes first.
Frame the base with 4-by-6 beams, then set 4-by-4 corner posts braced at the bottom.
Screw the studs in loosely, since they will move to fit your sash. A foundation 8 feet wide suits a rafter-style frame.
Build the Roof and Close the Walls
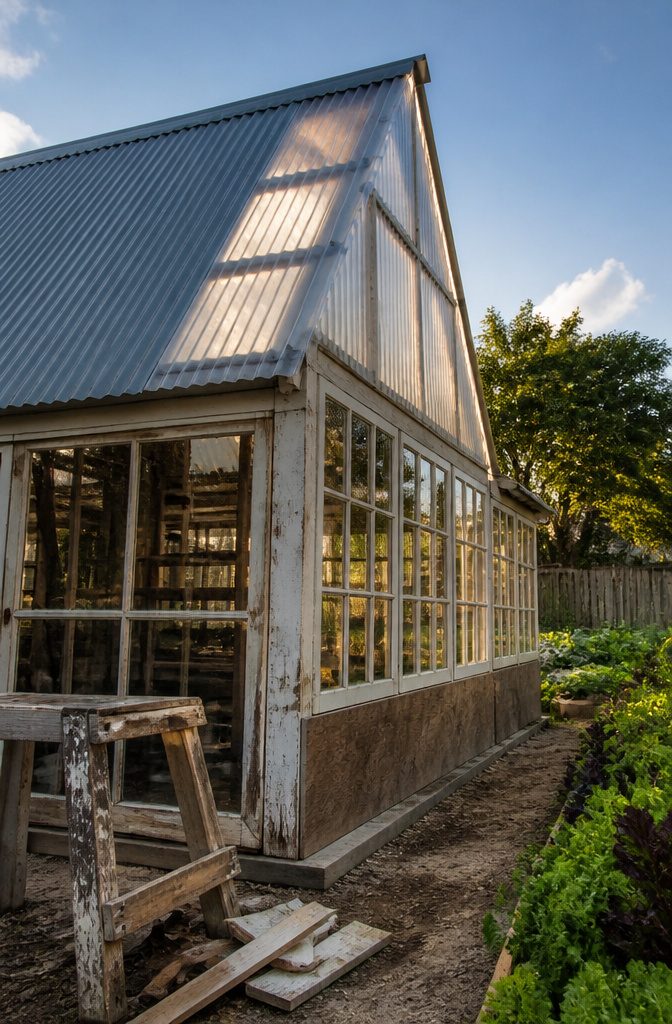
Build the roof frame on the ground first, so you can paint every piece, take it apart and raise it in sections.
Rafters are the hardest part of the whole project, and if you’re unsure of your cuts, hiring that step out is money well spent.
Space the purlins no more than 2 feet apart, then lay the roof panels and finish with a ridge cap. Corrugated polycarbonate from Home Depot lets light through like greenhouse plastic but holds up far better.
If you also want a potting shed, cover one-third of the roof in clear panels and the other two-thirds in corrugated tin.
Close the walls with battens, plywood knee-wall panels, flashing and end walls, and seal every seam with caulk.
Fit Windows for Ventilation
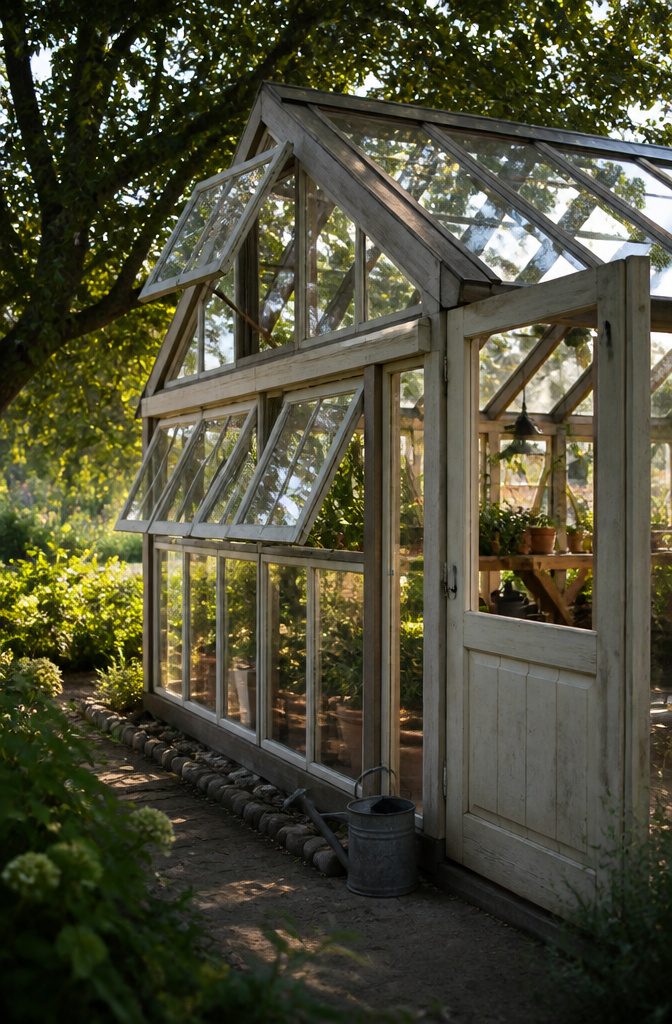
Hinge side windows along the top so they swing outward. Build the top rail from 2x4s, then screw scrap-wood stops to the inside of the frame so a closed sash seats against them instead of dropping through.
The windows won’t be airtight, and for a plant house that’s fine; measure carefully only if you want a tighter seal.
On the gable ends, put one operable sash as high as it will fit, near the peak, where the hottest air collects.
Prop it open with a stick or hook, and fill the leftover triangle with fixed glass. A Dutch door on the entry end adds a second vent on hot days.
Louvers with automatic openers cost $100 each plus $100 per opener, so two vents run $400. Old sash costs almost nothing but needs you home to open it.
Finish and Use the Greenhouse
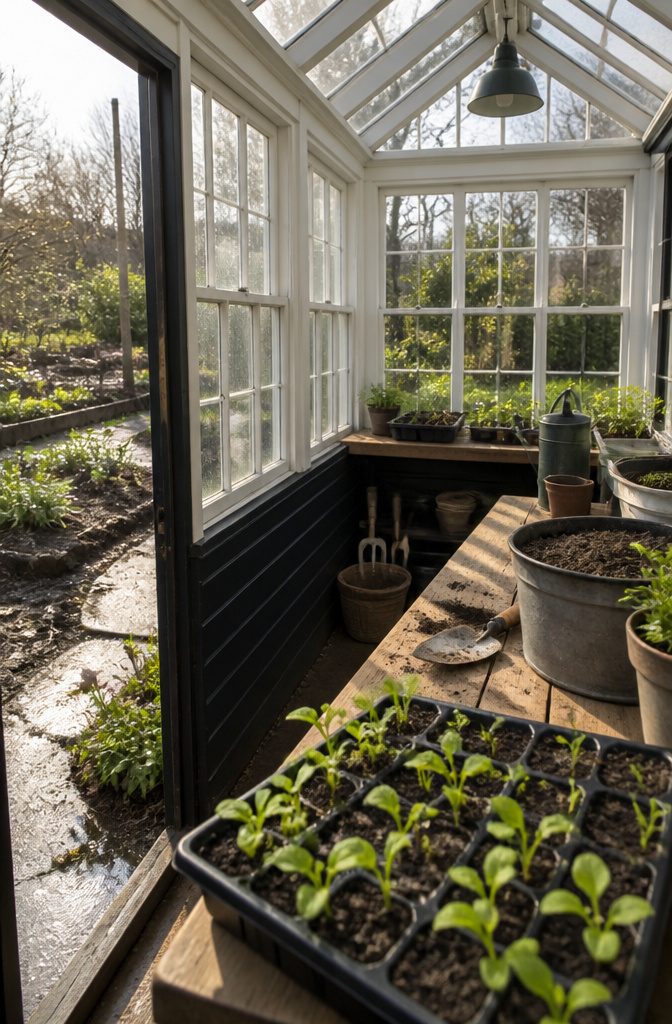
Paint the lumber before it is cut and assembled. Set the roof rafters, posts and the 1 x 4 and 2 x 4 boards on sawhorses and coat them there, because brushing into a finished frame’s joints is slow and leaves bare wood.
Building the roof on the ground, painting it, then taking it apart and lifting it into place works for the same reason.
Reglaze the old sash the same way. Scrape out the old glazing and press in new before the windows go in, since doing it on a bench beats doing it overhead.
For the look, old sash above horizontal siding painted black gives a 16 x 10 foot build a clean base line. Inside, add shelves for seed trays and tools, plus a potting surface with a container for soil.
Where to Find Old Windows
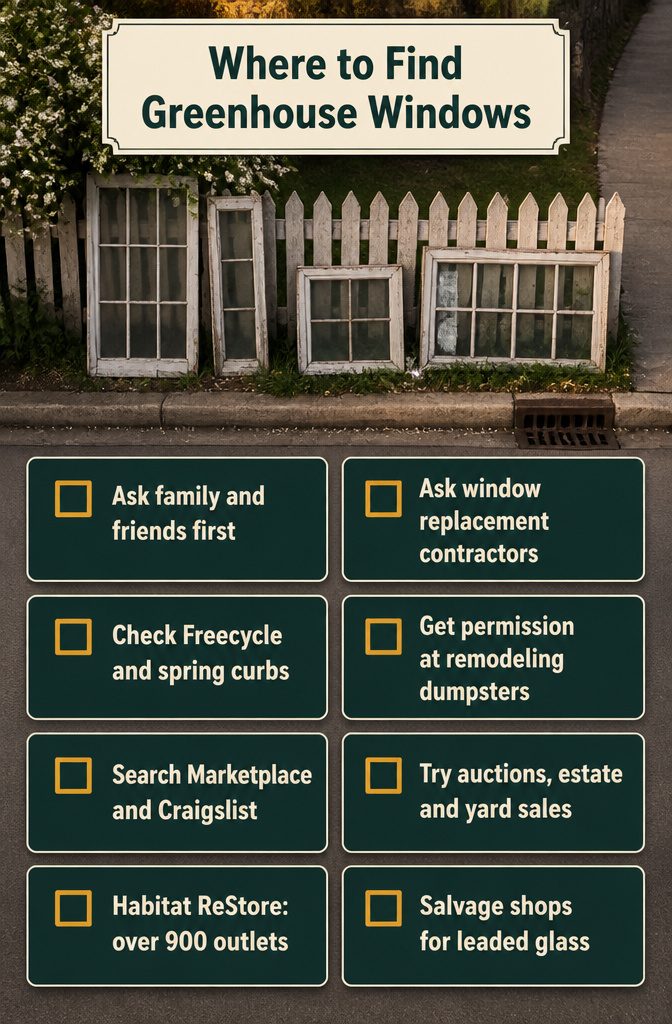
Start with the free channels, then work toward the paid ones:
- Family and friends: Tell people you want a small greenhouse. Anyone upgrading their own windows may hand them over.
- Freecycle and older-neighborhood curbs: Join a local Freecycle group. In older neighborhoods, check front lawns the night before trash pickup, especially in spring.
- Window and replacement contractors: They often have a lot of windows in the same size, style and color.
- Remodeling dumpsters: Ask permission before diving in.
- Facebook Marketplace and Craigslist: Both list cheap windows, storm windows and French doors.
- Auctions, estate sales and yard sales: Good for windows plus leftover lumber.
- Habitat for Humanity ReStore: Over 900 outlets.
- Architectural salvage: Pricier, but it’s where a stained- or leaded-glass centerpiece turns up.
As Mother Earth News puts it:
Window and replacement-window contractors. Often contracted to do whole-house window replacements, they can be a good source for obtaining a lot of windows that are all the same size, style, and color.
Matching sizes make the framing far simpler, so I’d call contractors first.
Floor Choice and Drainage
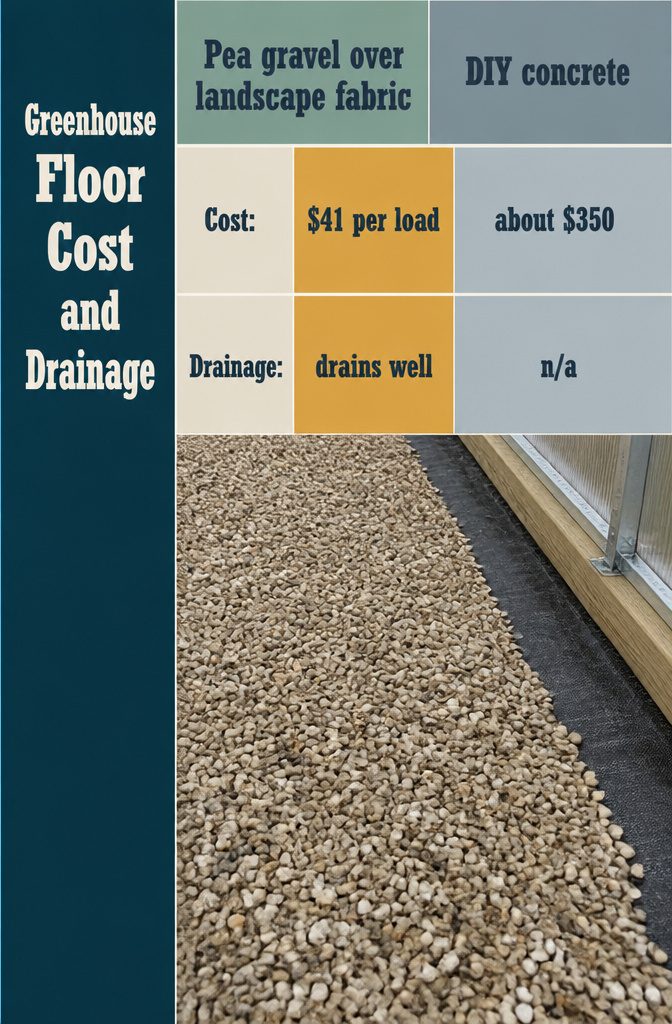
Pea gravel wins the floor, and the price gap is the reason.
DIY concrete ran about $350 and treated wood came to over $400, while one load of pea gravel from a landscape supply store was $41. Gravel also drains, so water from watering and wet boots has somewhere to go.
Lay landscape fabric under the gravel as the base layer. Here is how the three compare:
| Option | Cost | Drainage |
|---|---|---|
| DIY concrete | About $350 | n/a |
| Treated wood | Over $400 | n/a |
| Pea gravel over landscape fabric | $41 per load | Drains well |
I’d skip concrete and wood unless you need a perfectly flat surface. A $41 load of pea gravel over fabric costs a fraction of either and handles water better.
Cost and Code Checks
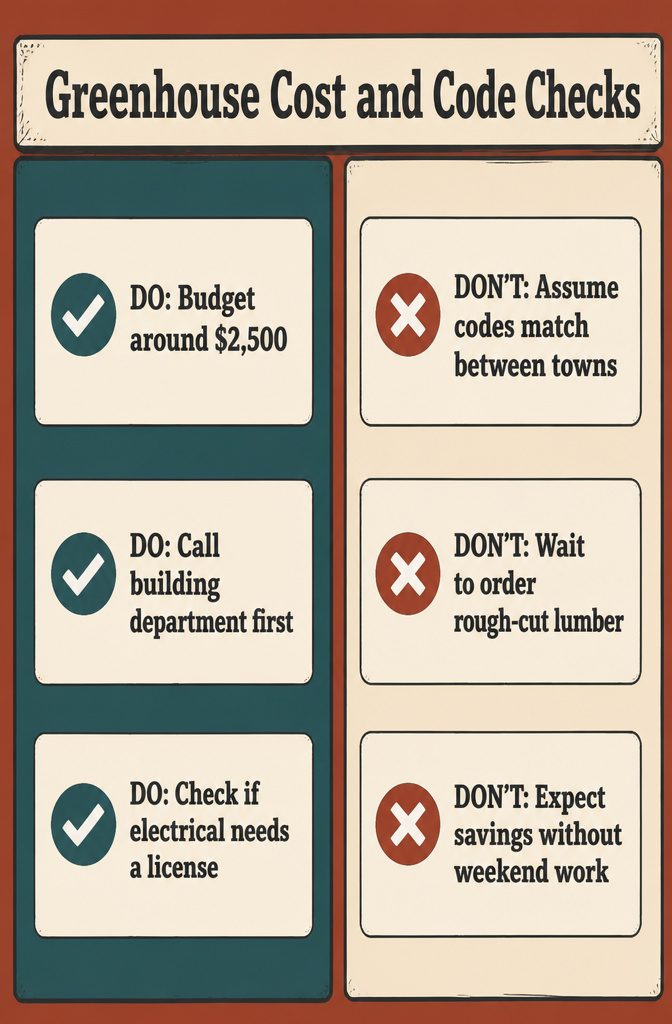
Salvaged windows are cheap, but the savings come out of your weekends.
One build that used new framing lumber and other supplies still totaled $2,500, and the builders called it "a ton of sweat." Your number will shift with lumber prices and with the size of the structure.
Call your local building department before you buy anything.
Urban areas with code enforcement offices are the likeliest to care about a footing method, and one that passes in one town may be refused in the next. Some of the work, such as electrical, may need a licensed hand.
Rough-cut lumber from a sawmill runs cheaper than planed boards at a big-box store. A custom order can take weeks or months in busy season, so I’d place it before the windows are even cleaned.
Frequently Asked Questions
Where can I find old windows for a greenhouse?
Start with the free sources: family and friends, Freecycle, curbs in older neighborhoods the night before trash pickup, and window replacement contractors.
Contractors often have many windows in the same size, style and color, which makes framing simpler. Facebook Marketplace, Craigslist, estate sales, Habitat for Humanity ReStore and architectural salvage cover the paid options.
How much does it cost to build a greenhouse with old windows?
One build with new framing lumber and other supplies came to $2,500, plus a lot of labor.
Your total will shift with lumber prices and the size of the structure. Salvaged windows are cheap, but the savings come out of your time.
Is it cheaper to build or buy a greenhouse?
Building from salvaged windows is usually cheaper in cash, but it costs more labor.
One $2,500 build still took what its builders called "a ton of sweat." Free windows and a gravel floor push the price down further.
How do you make a greenhouse with glass windows?
Gather the windows first, then draw plans around their sizes. Lay out the side walls flat, keeping windows 32 inches wide or narrower, and build a frame on posts or cinderblocks.
Add a roof with purlins no more than 2 feet apart, then hinge some windows for ventilation and seal every seam with caulk.