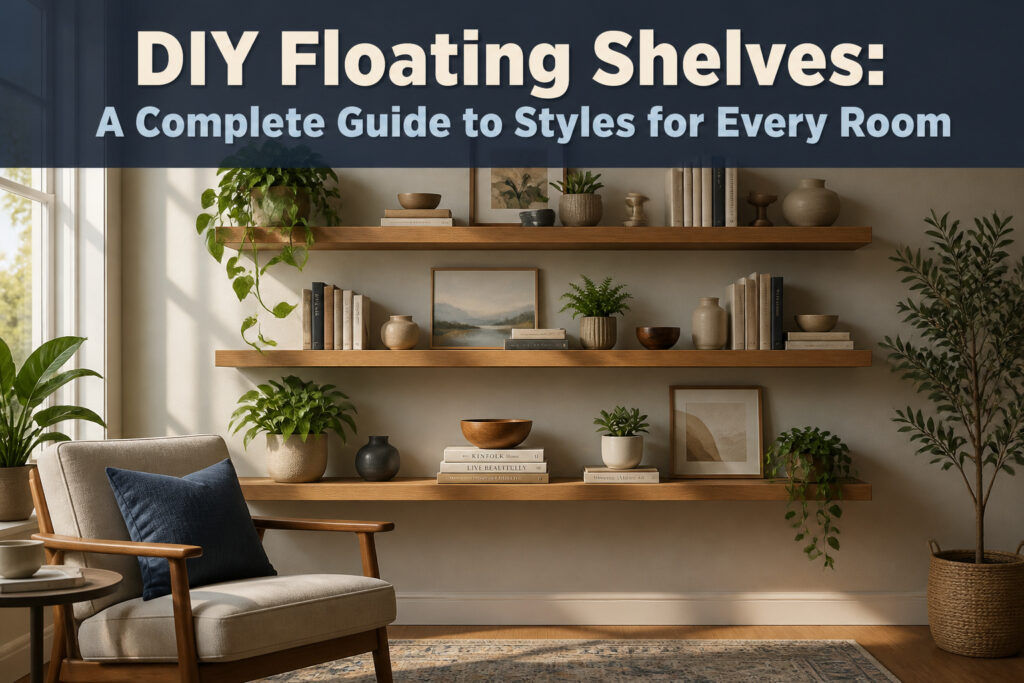
A floating shelf hides its bracket inside the board itself so the shelf appears to hover against the wall. The catch is that the bracket, not the wood, does the real work, and drywall anchors alone will fail the first time someone leans on it. A 1¼-inch minimum thickness for solid wood leaves enough material around the hidden rods without splitting, and 3-inch screws driven into studs are what separate a shelf that holds books from one that rips free.
What Floating Shelves Actually Are
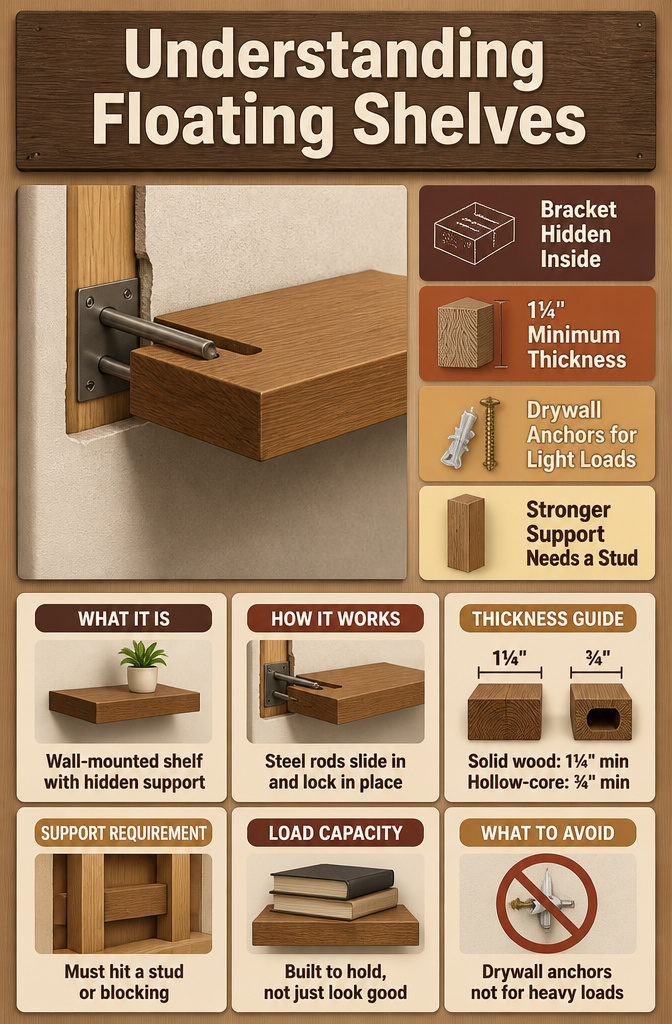
A floating shelf is a wall-mounted shelf with the bracket hidden inside the shelf itself, not visible underneath or behind it. The steel rods of the bracket slide into holes drilled into the back of the shelf board, so once it is pushed flush to the wall, the shelf appears to hover with no supports showing.
The bracket you choose, the thickness of your wood, and how you anchor it to the wall are what separate a shelf that holds a stack of books from one that sags after a month. Most solid wood floating shelves need to be at least 1¼ inches thick to cover the bracket and still have material left for strength. Hollow-core shelves can go thinner, down to ¾ inch, because the bracket sits inside the cavity. Either way, the bracket does the actual work; the wood is mostly the face it wears.
Drywall anchors alone are only good for very light decorative loads. For anything you actually plan to set on the shelf, the bracket needs to hit a stud or blocking behind the wall. The clean look is the payoff, but the hidden hardware is what makes it possible.

✓ HIGH-QUALITY METAL MATERIALS: Our shelf support is made of thick and heavy duty iron materials.Features a thick black matte surface coating that delivers enhanced water resistance and effective anti‑rust performance for long‑term daily use.

𝐌𝐨𝐝𝐞𝐫𝐧 𝐚𝐧𝐝 𝐕𝐞𝐫𝐬𝐚𝐭𝐢𝐥𝐞 𝐒𝐭𝐲𝐥𝐞: The hidden bracket design gives a clean, floating look that works beautifully as home decor wall shelves in modern, farmhouse, rustic, or industrial decor styles. Adds warmth and style without overwhelming your space for bedroom decorations, farmhouse living room decor, office wall decor, nursery, entryway, kitchen, and more
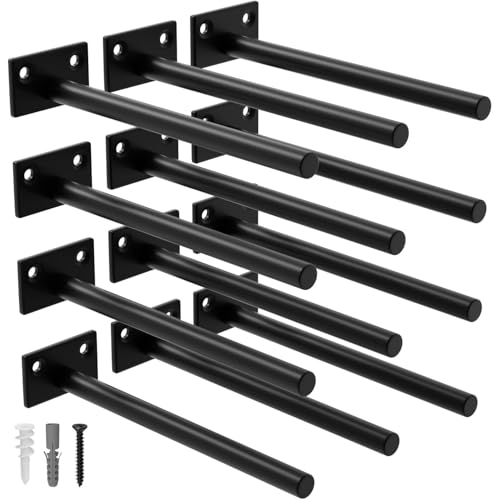
Superior Quality: Our floating shelf bracket is expertly crafted from premium steel, ensuring exceptional durability and an impressive weight capacity of 110lbs
1. Gather Materials and Tools
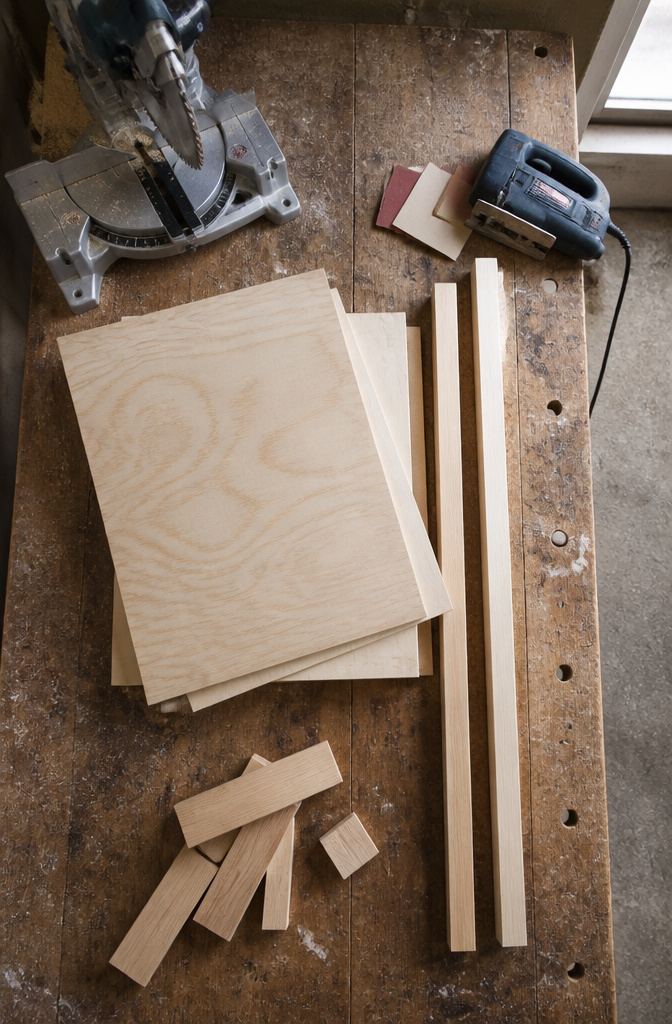
½ inch plywood and select pine boards are the usual starting point for a basic floating shelf, and most home centers will cut them to length if you ask. A 1×3 board and a 2×2, each about four feet long, plus a quarter sheet of plywood, will get you one simple shelf with scraps left over. Check your scrap pile first; this is the kind of project that eats leftovers.
A miter saw speeds through the crosscuts, though a jigsaw and a square work fine if that is what you have. You will also want a drill, a stud finder, and a level. Sandpaper at 120 grit and 220 grit handles the prep, and wood glue plus brad nails or pocket-hole screws hold the frame together. For the wall, 3-inch wood screws driven into studs carry the load. Stain or paint and a clear topcoat finish it. Clamps help but are not mandatory; a rubber mallet and painter’s tape make assembly cleaner.

Superior Quality: Our floating shelf bracket is expertly crafted from premium steel, ensuring exceptional durability and an impressive weight capacity of 110lbs

Superior Quality: Our floating shelf bracket is expertly crafted from premium steel, ensuring exceptional durability and an impressive weight capacity of 110lbs.

Heavy duty design - Our shelves will hold as much as 80 lbs when mounted to a stud or brickwall because our brackets are made of solid steel and welded components and includes quality screws and anchors
2. Measure and Cut the Wood
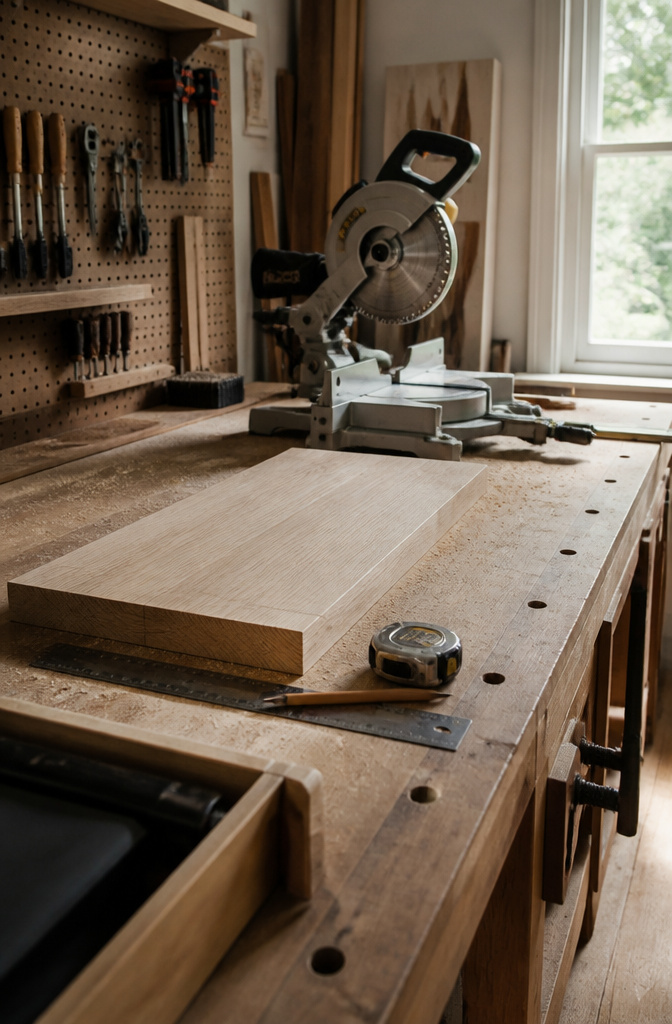
Ten inches is the depth most people end up with for a standard floating shelf, and it is what I would start from unless a specific spot demands something else. The wood itself needs to run thicker than you might first think. A solid shelf meant to carry real weight has to be at least 1¼ inches thick so the bracket rods can bore deep enough without chewing through the last bit of material. That same thickness also keeps the shelf from looking like a shim against the wall.
A miter saw handles these cuts cleanly. For the hollow box-style builds, the frame can be thinner because the rods slide into a built cavity rather than a drilled hole, so ¾-inch stock works there. The tradeoff is straightforward: solid wood and hidden brackets give you a slab that looks like it grew from the drywall, but you pay for it in board footage and blade time.

Suitable for wood stud spacing of 16", 18" or 24". NOTE: The shelves can only be installed separately for 24" studs. Can NOT be mounted to metal wall.

Rounded Edges & Fully Coated: Crostice accessories shelf designed with rounded edges and a fully coated surface for safe usage; ideal for homes with children or pets; thickened metal plate construction enhances longevity; protected by US Design Patent

Heavy duty design - Our shelves will hold as much as 120 lbs when mounted to a stud or brickwall because our brackets are made of solid steel and welded components and includes quality screws and anchors
3. Build the Shelf Frame
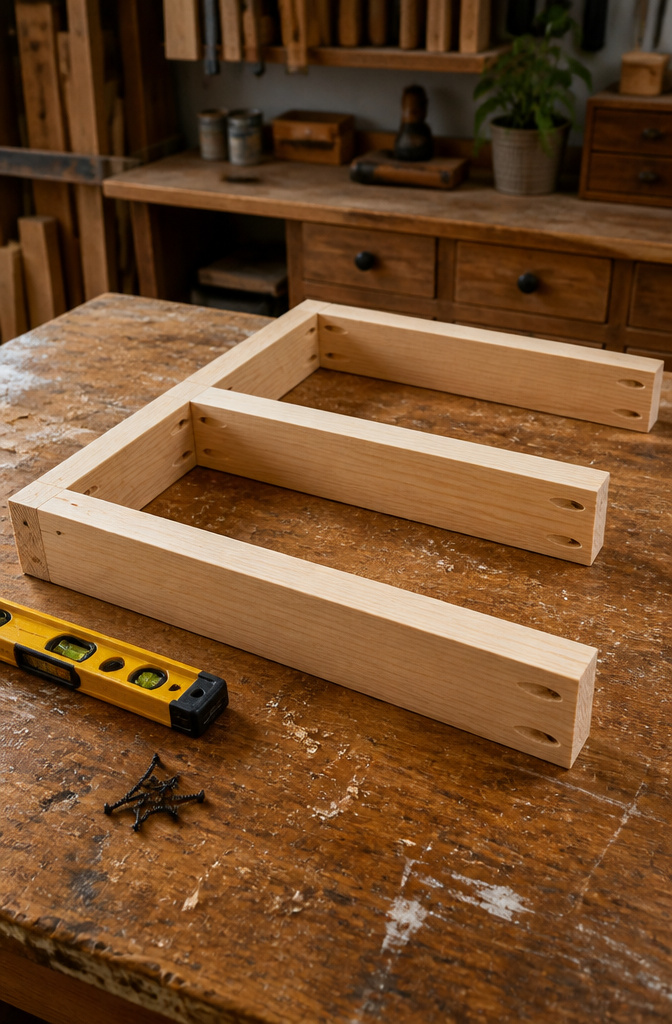
The internal frame is what takes the load, so the joints matter more than the outer box. I built mine from 2x2s in an E shape: one long back piece cut slightly under the inside opening of the shelf box, with shorter support blocks pocket-holed into it. Pocket holes and 1¼-inch Kreg screws with wood glue at each joint give you a clamp-tight fit that does not shift once the box slides on.
Spacing the supports takes a little planning. On a 34-inch shelf, three center supports with roughly 7 inches between them handles books or small plants fine. The critical thing is checking your stud layout before you drill: a support block sitting where a stud needs to go turns installation into a headache. The front support piece has to line up flush to the edges, so clamp it before driving a 2-inch screw through pre-drilled holes.
For wall-mounted brackets made from 1x2s, the same pocket-hole logic applies. Set the jig to ¾-inch depth, drill one hole per end, and glue-clamp each arm to the backboard. The frame then mounts to studs with 3-inch wood screws, crossing at least two studs and leveled before the box ever touches it. A couple screws through the back top of the shelf box into the frame keeps the whole thing from sliding forward once loaded.

Reclaimed Elm Wood Shelves: Marsmiles' wood floating shelves for wall are handcrafted from reclaimed elm wood (FSC-Certified), showcasing the natural beauty of wood knots, grain, and texture for a touch of character in your room decor

𝐌𝐨𝐝𝐞𝐫𝐧 & 𝐌𝐢𝐧𝐢𝐦𝐚𝐥𝐢𝐬𝐭 𝐒𝐭𝐲𝐥𝐞 - Featuring clean lines and a rustic brown finish, these wall-mounted shelves bring warm farmhouse charm and modern style to any space. Perfect as shelves for room decoration, book shelves display, and rustic farmhouse wall decor — they elevate your bathroom wall art vibe, bedroom aesthetic, living room style, kitchen organization, office setup, and laundry room storage all in one versatile design

𝐌𝐨𝐝𝐞𝐫𝐧 & 𝐌𝐢𝐧𝐢𝐦𝐚𝐥𝐢𝐬𝐭 𝐒𝐭𝐲𝐥𝐞 - Featuring clean lines and a warm walnut-like finish, these small floating shelves bring mid-century modern and natural wood charm to any space. Perfect as shelves for room decoration, book shelves display, and rustic wood wall decor — they elevate your bathroom wall art vibe, bedroom aesthetic, living room style, kitchen organization, office setup, and laundry room storage all in one versatile design
4. Sand and Finish the Surface
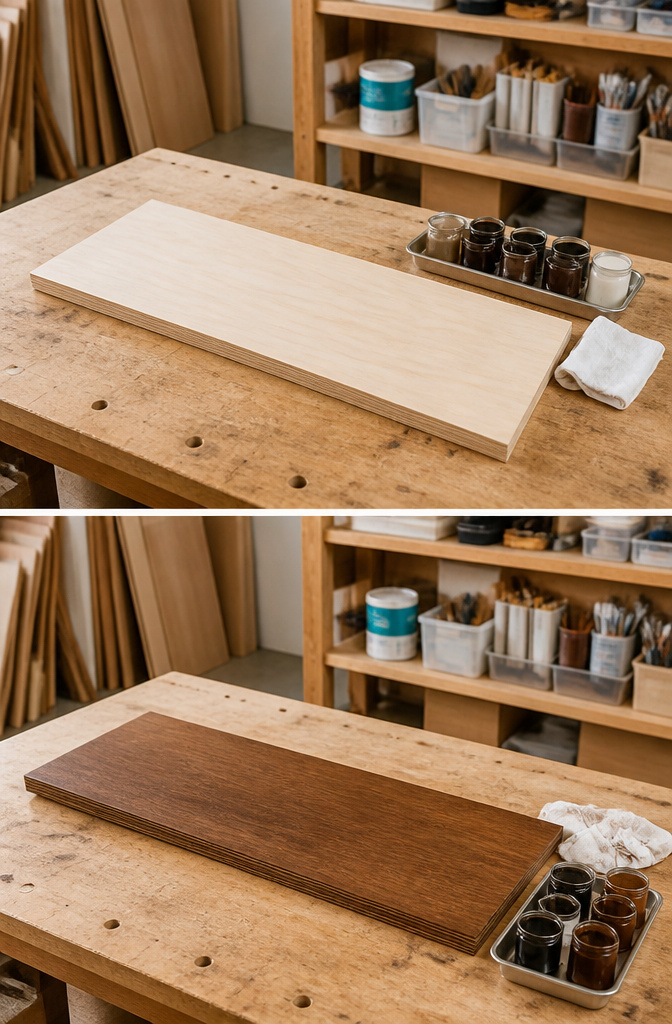
Sanding starts lower than most people expect. The plywood pieces, 39.5 inches by 11 inches for the main boards and 39.5 by 2.5 inches for the front trim, need 120-grit first, then work up to 220-grit over several passes. The higher number means smoother, not rougher, and skipping straight to the fine paper just polishes the rough spots without removing them.
A tack cloth comes next, wiping away every speck before stain or paint touches the surface. Dust left behind becomes texture you did not plan. For stain, a rag works faster than a brush and pushes the color into the grain evenly. The rag then dries completely before it goes anywhere near a garbage can. Wet stain rags have started enough shop fires that this step earns its own sentence.
The finish depends on what lives on the shelf. Minwax Simply White stain reads as paint-adjacent but lets the grain whisper through. Varathane provincial mixed 2:1 with antique white, topped with a pre-stain conditioner first, gives a warmer, older look. For paint-level coverage, a custom blend can pull red-orange tones out of cheaper wood like alder, matching it closer to white oak floors. Polycrylic goes on in thin coats, matte sheen, stirred never shaken. One coat, sand, two more coats, then a final 220-grit pass and another tack-cloth wipe. The surface is ready when it feels like glass and leaves nothing on your fingers.
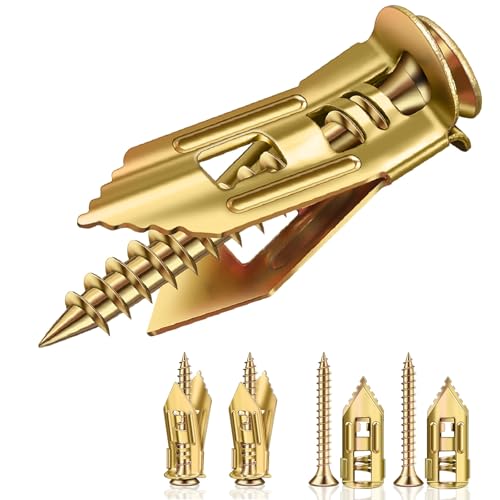
ONE KIT, ONE SIZE, DONE – NO MORE GUESSWORK These 1⅜" self drilling drywall anchors are perfect for floating shelves, mirrors, curtain rods, framed art, coat hooks, and bathroom organizers. One practical size for everyday apartment and home projects

The bracket has a 1.5" backplate and is designed for use with boards 2" thick or more. NOTE: The board thickness we refer to is the actual (not nominal) size.

【Create Modern Floating Shelves Your Way】Stop settling for fixed-size shelves. Build custom floating shelves that perfectly match your space, style and budget using the wood you choose. Whether creating modern, minimalist or Scandinavian interiors, enjoy complete design freedom at a lower cost than custom shelving. The compact hidden design also makes it ideal for floating box shelves, floating cubes, floating nightstands and creative DIY furniture.
5. Install the Bracket to the Wall
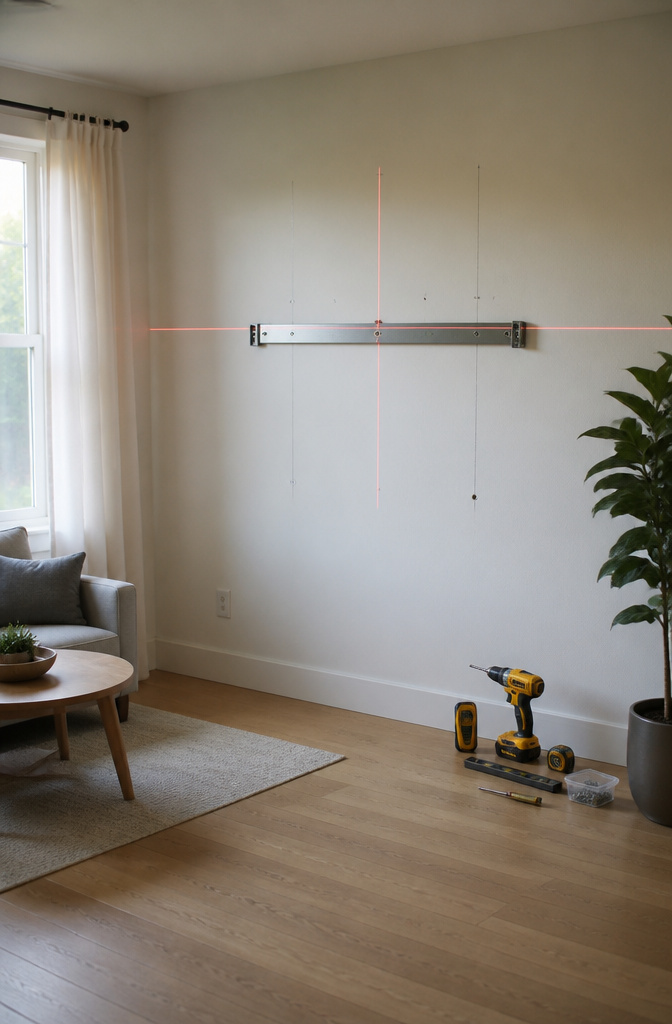
Wall studs sit 16 inches apart in most homes, sometimes 24. A shelf needs to span at least two of them to carry anything beyond a picture frame. I once watched a friend skip the stud finder and guess; the bracket ripped clean out the first time his kid leaned on it.
Bracket capacity runs from 20 lbs to 1,500 lbs, but that top number only happens when every screw bites solid wood, not drywall anchor fluff. For a kitchen load, dishes and all, metal brackets into multiple studs with wood glue at every joint is the safer bet. Toggle bolts can work in a pinch, one source used them for heavy dishes and they held, but studs are the recommendation that matters.
Eye level lands around 4–5 feet from the floor for shelves you reach daily. Two levels help here: a longer one for the back bracket edge, a smaller torpedo level checked perpendicular so the shelf doesn’t tilt forward or back. Drill through the bracket with 3-inch wood screws straight into the stud, then brad nails on either side of each screw if the bracket has room for them. The shelf itself slides on last; a mallet and a scrap block protect the face from dings. A couple screws through the top rear into the bracket keep the whole box from sliding off someday when someone bumps it loading dishes.

Well-designed Floating Shelves: Our white floating shelves for wall are made of MDF Laminate. These wall shelves can organize daily sundries to tidy your space, display your art pieces on the wall to decorate your home, and make it full of aesthetic flare.

The bracket has a 1" backplate and is designed for use with boards 1.5" thick or more.NOTE: The board thickness we refer to is the actual (not nominal) size.

VERSATILE FLOATING SHELVES: Make full use of your empty walls to create storage space for decorations and household items. Mount the wall shelves above a desk, fireplace, entryway, vanity, or between windows to add functionality.
6. Attach the Shelf and Finish
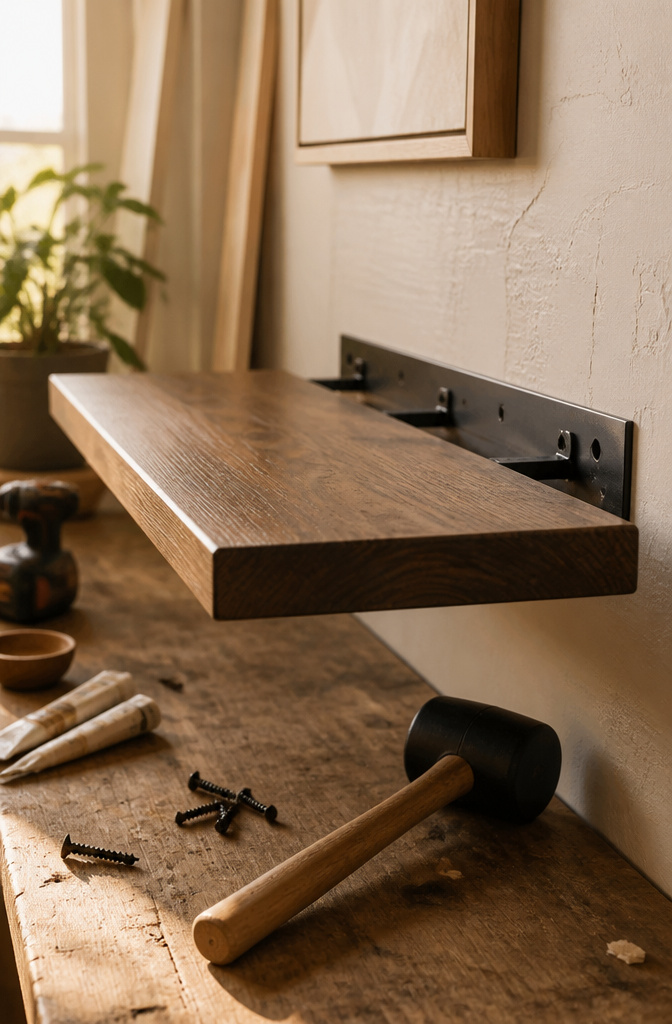
Sliding the shelf onto the bracket takes more force than you expect, and the wood will bruise if you tap it bare. A scrap block and a rubber mallet let you knock it home without leaving a dent. Two screws through the least visible side lock the shelf to the bracket so it cannot slide off, a step worth the extra minute if you live anywhere with small kids or earthquakes.
For a box-style shelf, the shell simply drops over the frame and butts against the wall. A couple screws through the back top corner, hidden from view, keep it from walking forward when you load it.
Edge banding or a ripped 1×3 strip closes the front of a hollow build and gives it the heft of solid lumber. Stain it with the same batch you used for the faces, attach it with finish nails, and the holes disappear. The shelf now reads as one thick board rather than a box you built in an afternoon.
Before you set anything on it, press down hard at the front edge and watch for wobble. A level check on the bracket does not guarantee the shelf itself sits flat, especially if your wall bows. Fix it now, or every book you own will slide to the low corner by Tuesday.

HEAVY DUTY FLOATING SHELF BRACKET - This solid steel wall mount system contains one bracket that is 12 inches long. We recommend using this bracket for shelves 12 inches to 18 inches long, allowing you to hang shelves within that range without compromising the decorative theme or aesthetics of your home decor.

Amazing Illusion - Gain practical storage space while maintaining a beautiful and elegant modern look. Once installed, these concealed shelf brackets are completely hidden from view, creating the illusion of a floating shelf.

Rod Length: 10” | Diameter: 1/2”, Backplate Width:2” | Tall: 1-1/2”. Perfect for shelves 11"-14" deep and 1 -3/4 to 2-1/2 inch thick
7. Basic Wood and Bracket Shelves
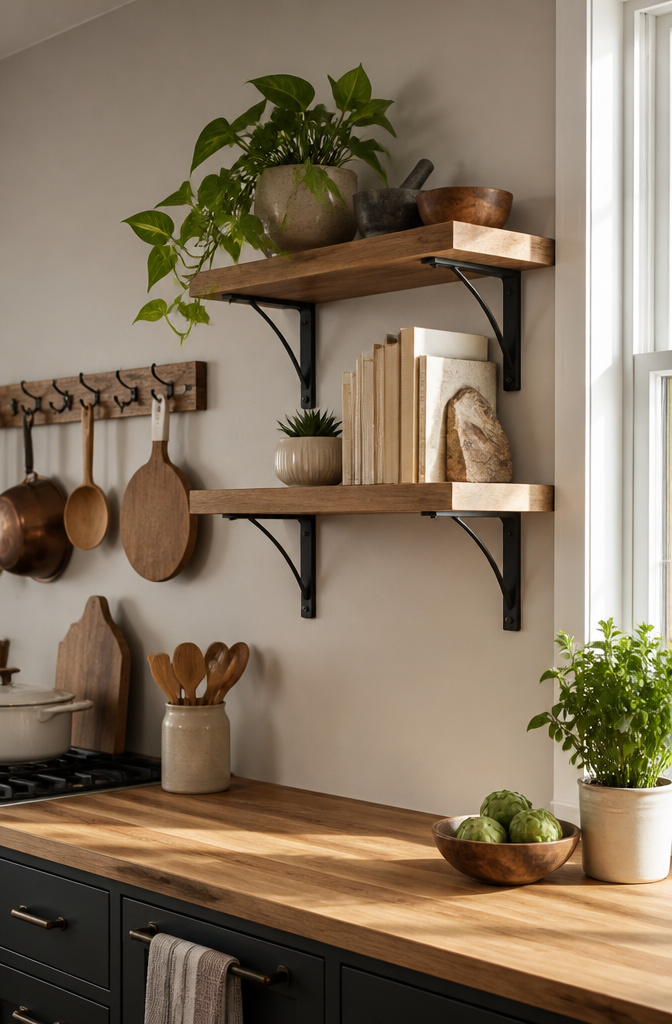
Visible brackets are the fastest way to get a shelf on the wall, and for a lot of spaces that is enough. A simple board, two L-brackets, and screws into studs will hold cookbooks, plants, or a bathroom caddy without the fuss of hidden hardware. The brackets themselves become part of the look, which is why black iron pairs well with stained pine and white powder-coated steel fades against painted drywall.
The tradeoff is exactly what you see: the bracket profile breaks the clean line that makes floating shelves appealing in the first place. In a narrow hallway or above a desk where you face the wall, those vertical supports read as clutter. The shelf also sits slightly out from the wall by the bracket thickness, so small items can slip behind or the gap collects dust.
Weight capacity stays modest unless you step up to heavy-duty brackets and more of them. The sources mention at least a 2 inch screw into the stud as the minimum for security, which tells you the weak point is the wall connection, not the bracket itself. For a renter who wants storage this weekend and does not mind the industrial look, this style makes sense. For someone aiming at the seamless floating effect, visible brackets are a stopping point on the way to something else.

【 Size 】 22 inch bracket with 6-inch rod, designed to support shelves ranging from 6.25 inches to 10 inches deep. The wood has a thickness of 1.2-4 inches and a length ranging from 22 inches to 37 inches. (Excluding wooden boards)
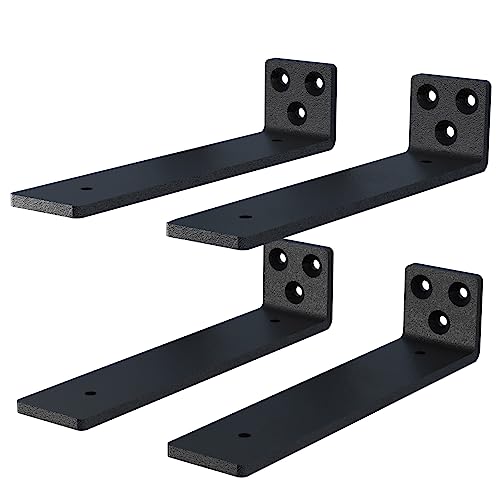
Measuring 12 x 1-1/2 inches, these brackets perfectly work with a traditional 12 to 14-inch deep shelves board (Orders do not include boards)
8. Hidden Bracket Shelves
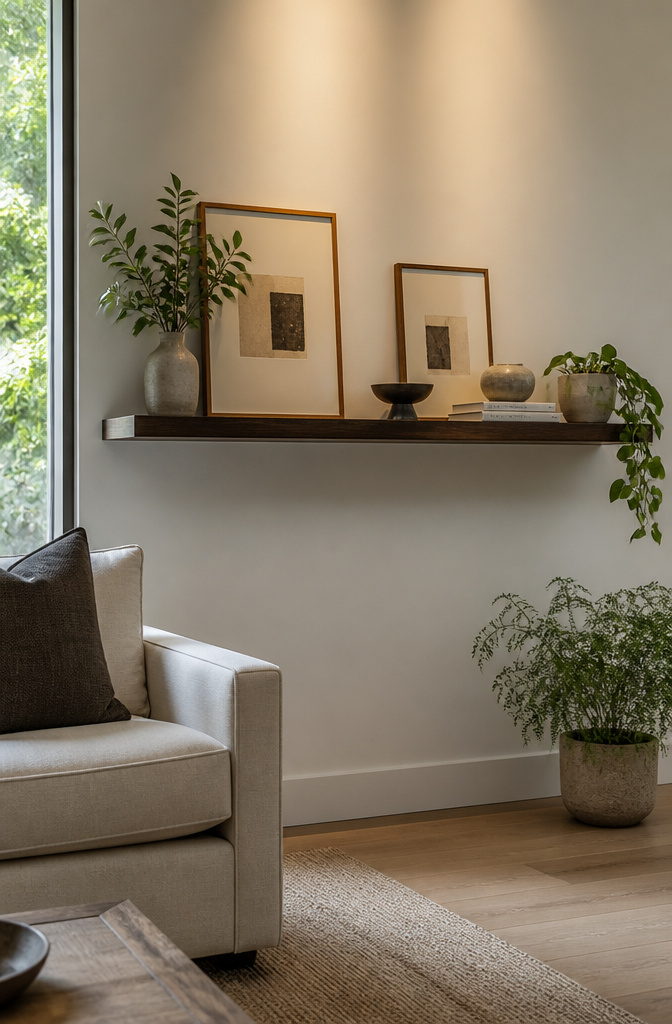
Hidden bracket shelves are the version most people picture when they hear "floating shelf," and the difference from basic L-bracket builds comes down to what disappears. The steel bracket itself, typically an Aksel-style rod system, mounts directly to the wall and slides entirely inside a hollow or bored-out shelf. Once the shelf seats flush against the wall, no hardware is visible from any angle. That clean edge is what earns the extra construction time.
Solid wood shelves need to be at least 1¼ inches thick to accommodate the rods without splitting, though hollow-core versions can run thinner, from ¾ inch up to 3 inches. The bracket hardware does the actual weight bearing, and ratings swing wildly, from about 20 pounds on big-box versions to 1,500 pounds on engineered mantel brackets. For most rooms, standard 10-inch depth works; kitchens can take 10–12 inches, while bathrooms usually want 5–8 inches.
The payoff comes in spaces where the shelf itself is the point. A seamless row of books or a single displayed object reads differently when nothing interrupts the line beneath it. The trade is setup time: locating studs or installing blocking, drilling dead-straight holes, and building the shelf box to close clean around the bracket rods. One misaligned bore and the shelf rocks or gaps. I think the effort makes sense for living rooms or entries where the shelf is at eye level and the visual quiet is worth the Saturday spent on alignment.

Coordinated Shelf Light Set: This 6 piece set pairs 3 wood floating shelves with 3 warm white USB light strips, bringing storage and accent lighting together in one coordinated wall setup. Each shelf measures 15.7 x 5.9 x 1 inch / 39.9 x 15.0 x 2.5 cm for practical everyday display
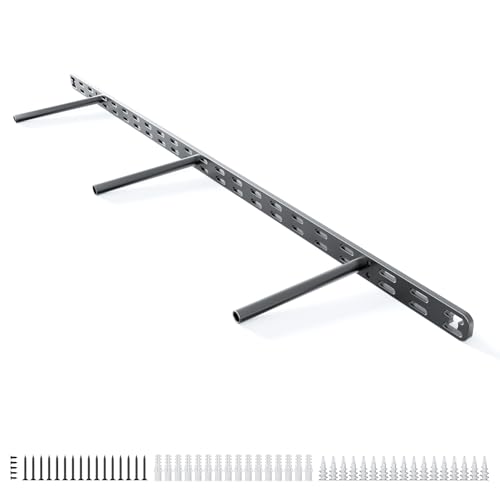
P.S.:The backplate of this floating shelf bracket is 1 inches, suitable for wood boards with a thickness of 1.5 to 2 inches. Please confirm the size before purchasing (Note: shelf is not included).
9. Box-Style Hollow Shelves
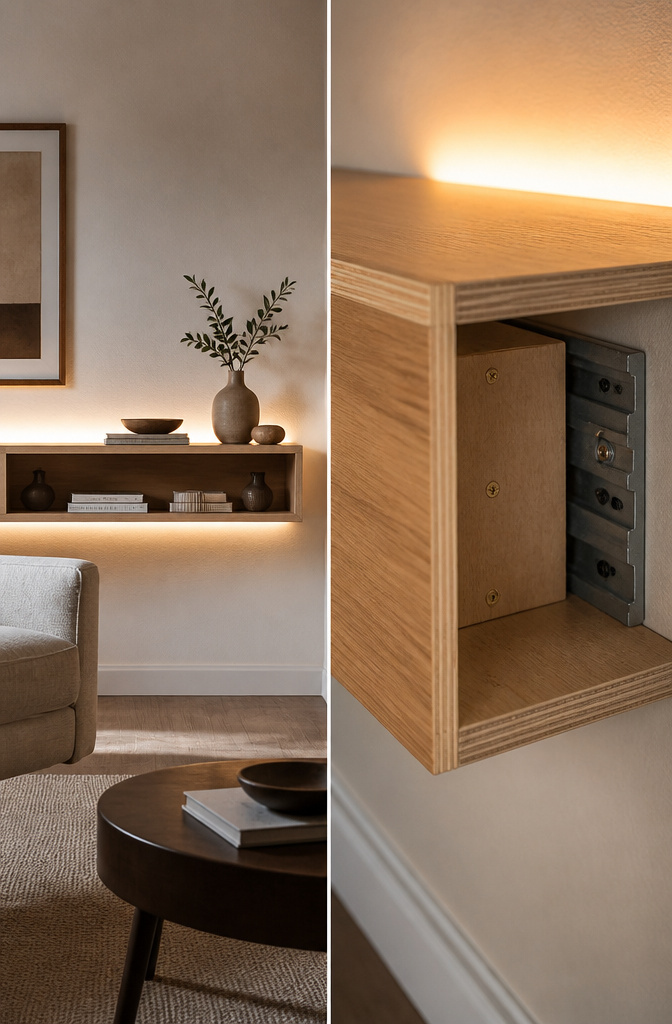
A box-style hollow shelf is the cleanest way to hide every bracket and screw from sight. The shelf itself becomes a simple five-sided box, open at the back, that slips over a wooden frame or metal bracket already mounted to the wall.
I built mine from ½″ plywood for the top and bottom, cut about 1½″ shorter and ¾″ narrower than the finished shelf size so the front and side pieces would wrap around cleanly. The front face and short sides can be 1x solid wood, which gives you a chance to miter just those two short corners at 45 degrees instead of wrestling with bevels on every edge. Sources that try the full wraparound miter on plywood tend to spend more time filling gaps than hanging shelves.
The box slides on, the open back meets the wall, and the hardware lives entirely inside. For extra support mid-span, a couple of scrap 1″ blocks drilled to accept the bracket arms keep the plywood from sagging under books. Plywood edges stay hidden, solid wood faces the room, and the whole thing reads as a thick, seamless slab.

[T-Shape Adjustable Design]: These 6-inch shelf brackets feature an industry-leading T-shape mechanism that allows for ±5mm left-right shift. This precise adjustment compensates for uneven walls or wood panel inaccuracies, ensuring a perfectly aligned and hassle-free installation for your floating shelves

The bracket has a 1.5" backplate and is designed for use with boards 2" thick or more. NOTE: The board thickness we refer to is the actual (not nominal) size.

The bracket has a 1.5" backplate and is designed for use with boards 2" thick or more. NOTE: The board thickness we refer to is the actual (not nominal) size.
10. Custom Built-In Shelves
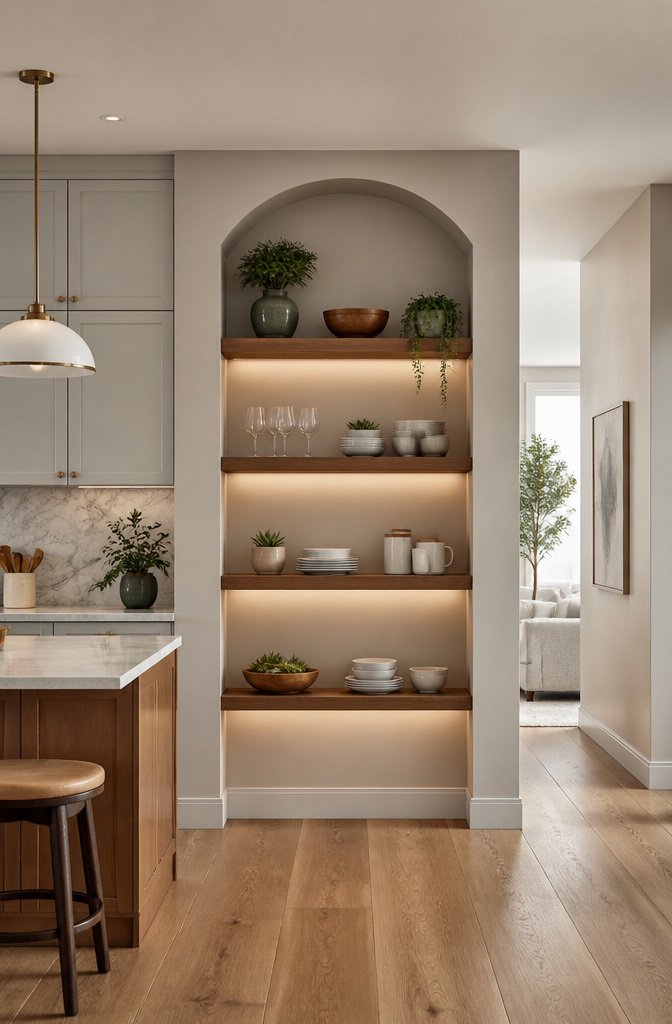
Custom built-ins are where floating shelves stop being weekend projects and start solving the geometry your house handed you. An alcove above a toilet measured wall-to-wall at 39.5 inches wide, with an 11-inch depth and 2.5-inch height, fits only because someone planned for that exact awkwardness.
Standard brackets surface-mounted through drywall work until the shelf gets deep. At 11 inches loaded with weight, the leverage starts crushing drywall and sagging over time. The stronger move is stripping a thin strip of drywall away entirely so brackets lock directly to studs. A laser level keeps the cut straight, and covering anything below saves you from the dust avalanche.
Corners and wrap-arounds add another layer. A pantry shelf that wraps one whole wall needs the same stripped-back framing, plus LED lighting tucked under the lower shelf if you want to actually see what you stored. The measurement work multiplies, but so does the usable space you were otherwise ignoring.
These builds demand more planning and a messier install than a single straight shelf. The trade is storage in spots where no off-the-shelf solution would ever fit.
Weight Capacity and Bracket Choice
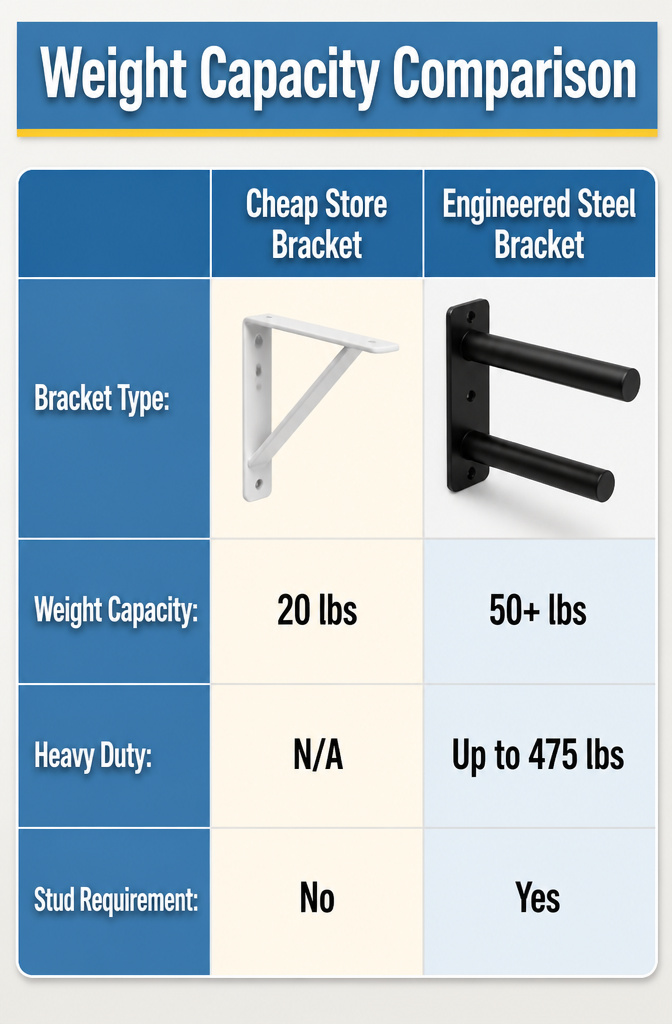
A cheap floating shelf with stamped hardware from the big-box store gives out at 20 pounds or less. That is not a guess; it is the point where the thin metal folds or pulls free. The engineered steel brackets that serious shelf makers use, the ones with half-inch rods that slide into the wall plate, start at 50 pounds per rod and climb from there.
The Aksel light-duty bracket rates 250 pounds for a two-rod shelf, enough for books or a small kitchen load. Medium duty hits 325, heavy duty 400, and the extra-duty line reaches 475 pounds on a fully anchored build. Mantel brackets go higher: 1,000 to 1,500 pounds, but that assumes you are hitting studs or solid blocking on every mount point. The all-steel Tromso system, which has no rods at all, scales by length and a 48-inch shelf carries roughly 360 pounds.
What actually limits you is not the bracket alone. It is whether you are anchored to a stud. Drywall toggles can work, and some makers have used them for kitchen dishes with success, but the manufacturer ratings assume wood framing. Shelf depth matters too: a 14-inch deep shelf puts more torque on the bracket than an 8-inch one at the same weight. Rod count rises with length, from two rods on a 36-inch shelf up to five rods past six feet. Check the spec sheet for your exact bracket model; the numbers above are ranges from one maker’s line, and another brand’s "heavy duty" may land somewhere else entirely.
Wood Types and Thickness
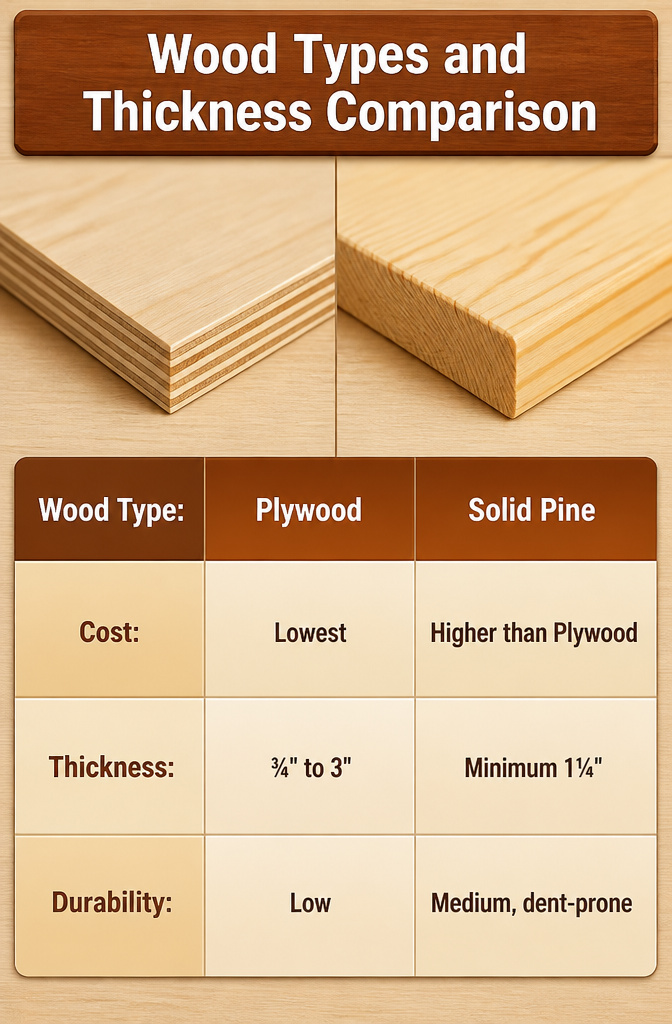
Plywood is the cheapest way to get started, though the edge banding shows if you skip it. Solid pine costs a little more and takes paint well, but the softness means dents from books or dishes add up fast. That is why oak or maple gets the nod for shelves that see daily use; the grain hides small scuffs, and the density keeps the bracket rods from wallowing out over time.
Thickness matters more than most first builds assume. Solid wood needs at least 1¼ inches to leave enough material around the hidden rod channels without splitting. Engineered builds and hollow-core box frames slide their brackets into a built cavity instead, so they can run thinner, anywhere from ¾ inch up to 3 inches depending on the bracket you pair with them. A thicker shelf looks more substantial above a sofa or fireplace, but the real limit is the bracket rating, not the wood itself.
Finding Studs and Getting Level
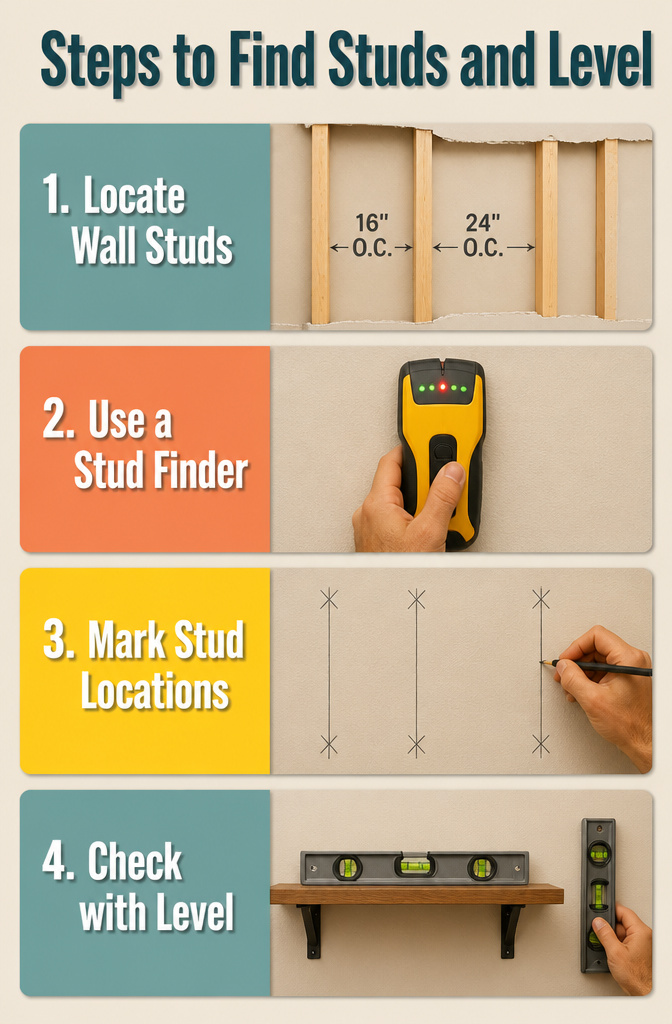
Wall studs sit 16 or 24 inches apart in most houses, and a floating shelf needs to cross at least two of them to hold anything heavier than a few picture frames. I learned this the hard way watching a shelf sag after I anchored it to drywall alone, so now I find the studs first and plan the shelf length around them. A 30-inch shelf will usually hit two studs at 16 inches on center; at 24 inches, you need at least 25 inches of board to get that same double bite.
A stud finder saves the guesswork, though a magnetic finder works too by locating the screws already in your drywall. Mark every stud behind the planned shelf line, then hold the bracket or frame against the wall and check with a level. Two levels are better than one: a longer level for the back rail and a shorter one pressed perpendicular to catch any twist. Screws need to go into the center of the stud, not the edge, so take the extra minute to mark left and right boundaries and aim for the middle.
Cheaper boards come slightly warped, and even a level bracket will look off if the shelf itself bows. U-shaped straps or a few screws through the top into the bracket from behind pull the shelf flat and keep it from sliding forward. The whole job takes longer than ten minutes, but level and stud-solid beats fast and crooked every time.
Frequently Asked Questions
How much weight can floating shelves hold?
Anywhere from 20 pounds on cheap big-box shelves up to 1,500 pounds on engineered mantel brackets, depending entirely on the bracket rating and whether every screw bites into solid wood framing. The bracket does the real work; drywall anchors alone will fail long before the hardware itself gives out.
What is the best wood for floating shelves?
Oak or maple for shelves that see daily use, since the density resists dents and the grain hides small scuffs. Pine works fine for paint-grade builds but dents easily, while plywood is cheapest though edges need covering.
Do floating shelves need to be attached to studs?
Yes, for anything beyond very light decorative loads. Drywall anchors alone are not enough; the bracket needs to hit a stud or solid blocking behind the wall to carry real weight. Toggle bolts can work in a pinch for moderate loads, but studs are the safe recommendation.
How deep should floating shelves be?
Ten inches is the standard starting point for most rooms. Kitchens can take 10–12 inches to fit standard dinner plates, while bathrooms usually work better at 5–8 inches. Depth adds torque on the bracket, so the deeper you go, the more important stud anchoring becomes.
What tools do I need to build floating shelves?
A drill, stud finder, level, and saw handle the core work; a miter saw speeds through cuts but a jigsaw works too. You will also want sandpaper at 120 and 220 grit, wood glue, clamps or a rubber mallet, and a tack cloth before finishing.