Where the garden will live decides which of these ideas is yours: a fence points to the Fence Line Fairy Village, a bare patio to a Wheelbarrow Garden or Mushroom Pedestal, a sunny sill to a Teacup or Succulent Fairy Garden, and a yard with a fallen log or tree to the Hollow Log or Tree Trunk Fairy Home.
Costs run from a dollar or two for a Hand-Painted Sign to a full Brick Planter Fairy Village, and the cheapest versions use things already in your garage, like the cracked pot that becomes a Broken Pot Garden.
Pick the spot first, then the container.
1. Miniature Pond
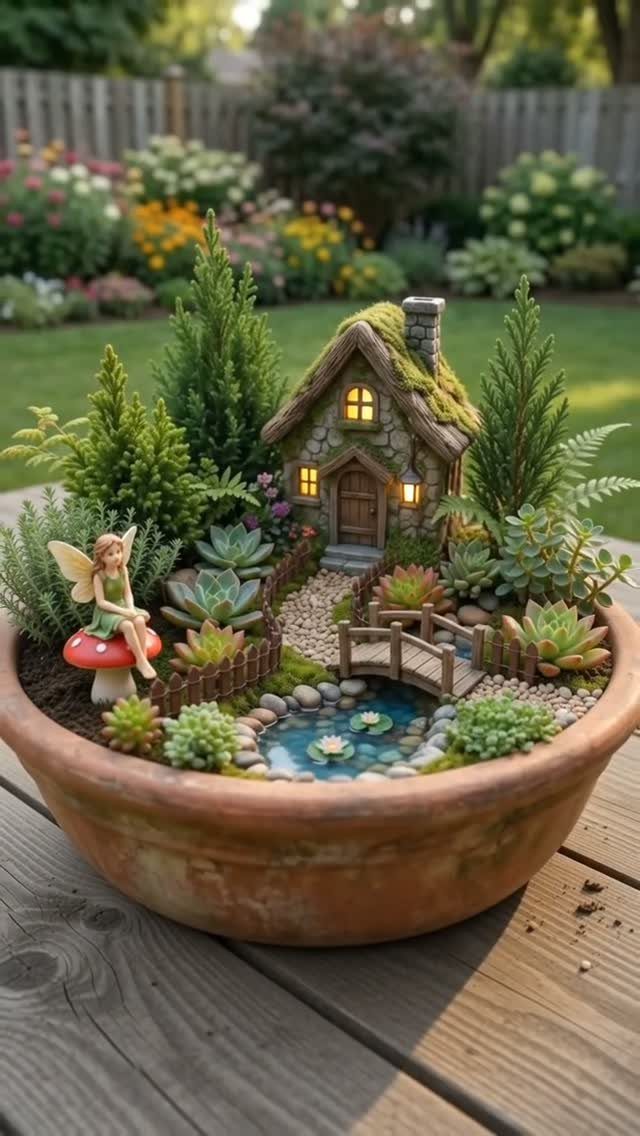
A small pond is the detail that makes a terracotta bowl feel like a place instead of a pile of figurines. Water gives the eye something to settle on, and a little bridge across it gives the scene a destination.
Keep the pond shallow and low in the bowl, so the cottage and succulents can sit on higher ground around it.
I like a pond that curves instead of a perfect circle; it looks more natural next to a stone cottage.
2. Beach Fairy Garden
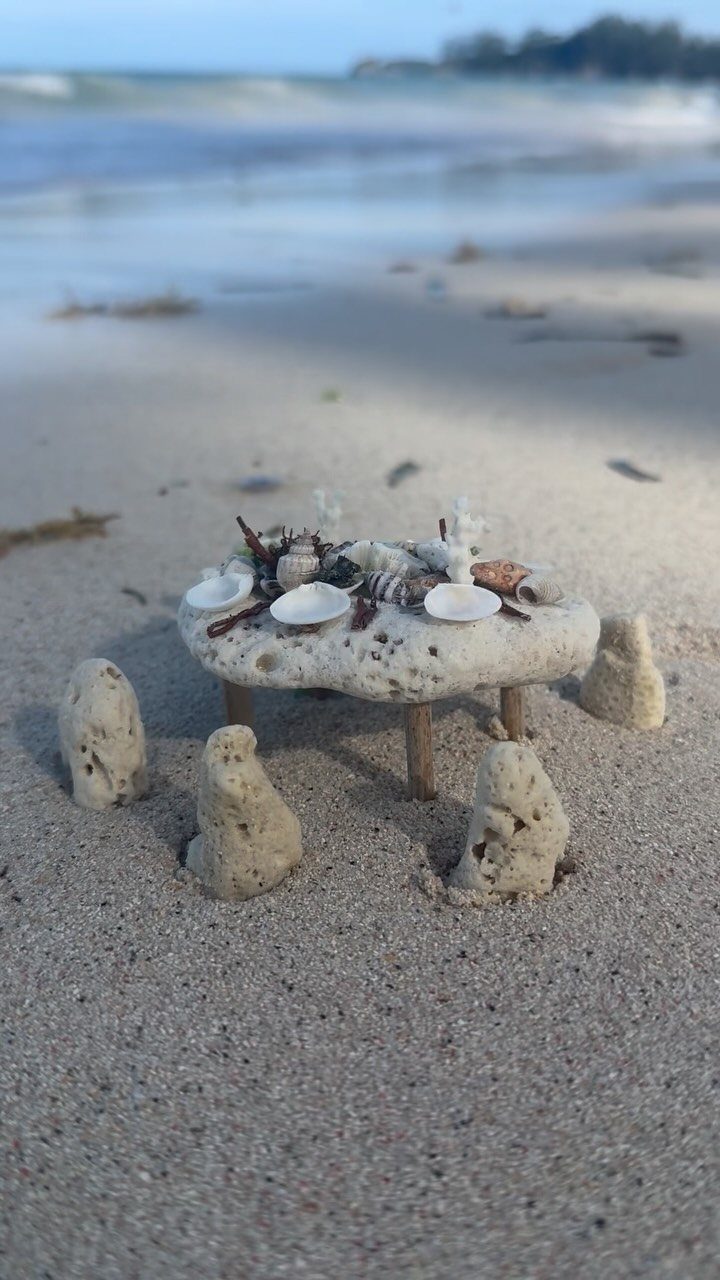
Sand, shells and a few stones are enough to build a fairy scene at the shore, and none of it costs anything if you collect it yourself.
A porous rock makes a good tabletop, with sticks as legs. Set a few shells on top as tiny dishes.
Small stacked rocks can stand in for the fairy folk, which keeps the whole scene made from beach materials. This one suits a trip more than a shelf, so photograph it and leave it for the tide.
3. Glass Bowl Fairy Garden
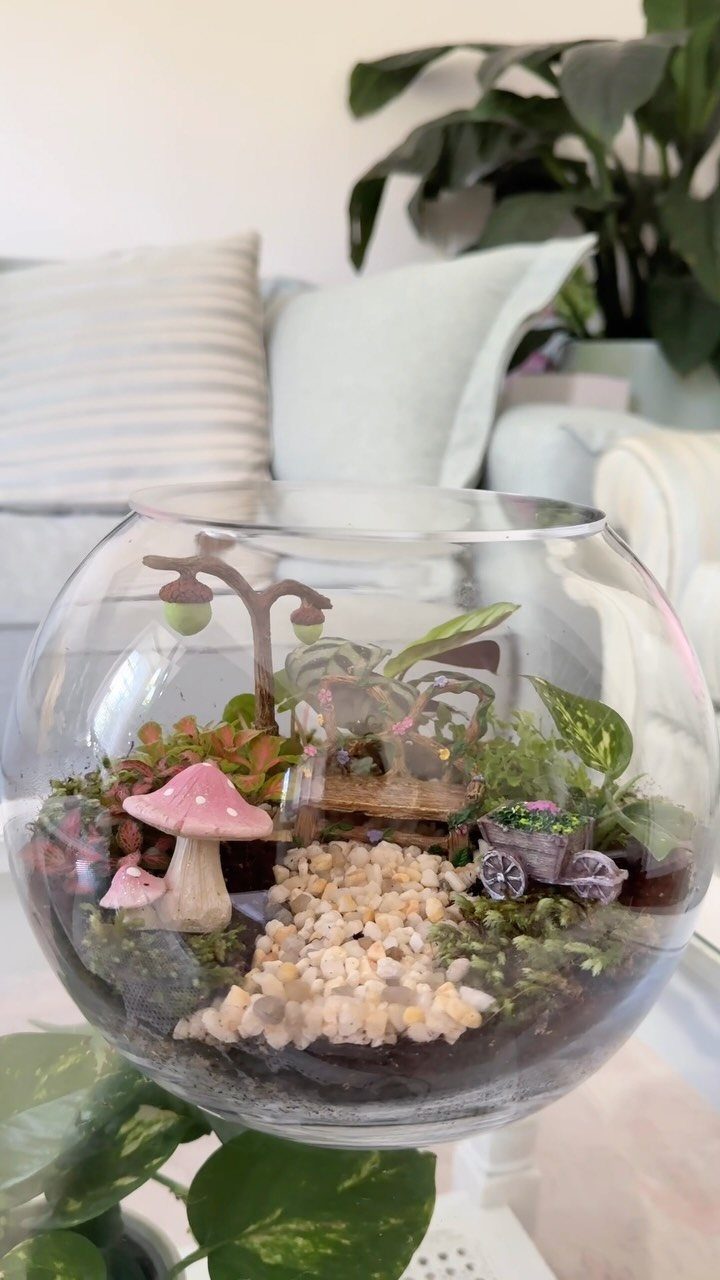
A glass bowl lets you see the whole garden from the side, so the layers matter as much as the top view. Pebble paths, a bench and a cart read clearly through the glass.
Because the bowl is open at the top, you can reach in and rearrange pieces easily.
Keep the plants small so the mushrooms and furniture stay in scale. A living room table is an easy spot, and a bowl makes a good starter project when you have little space.
4. Fairy House
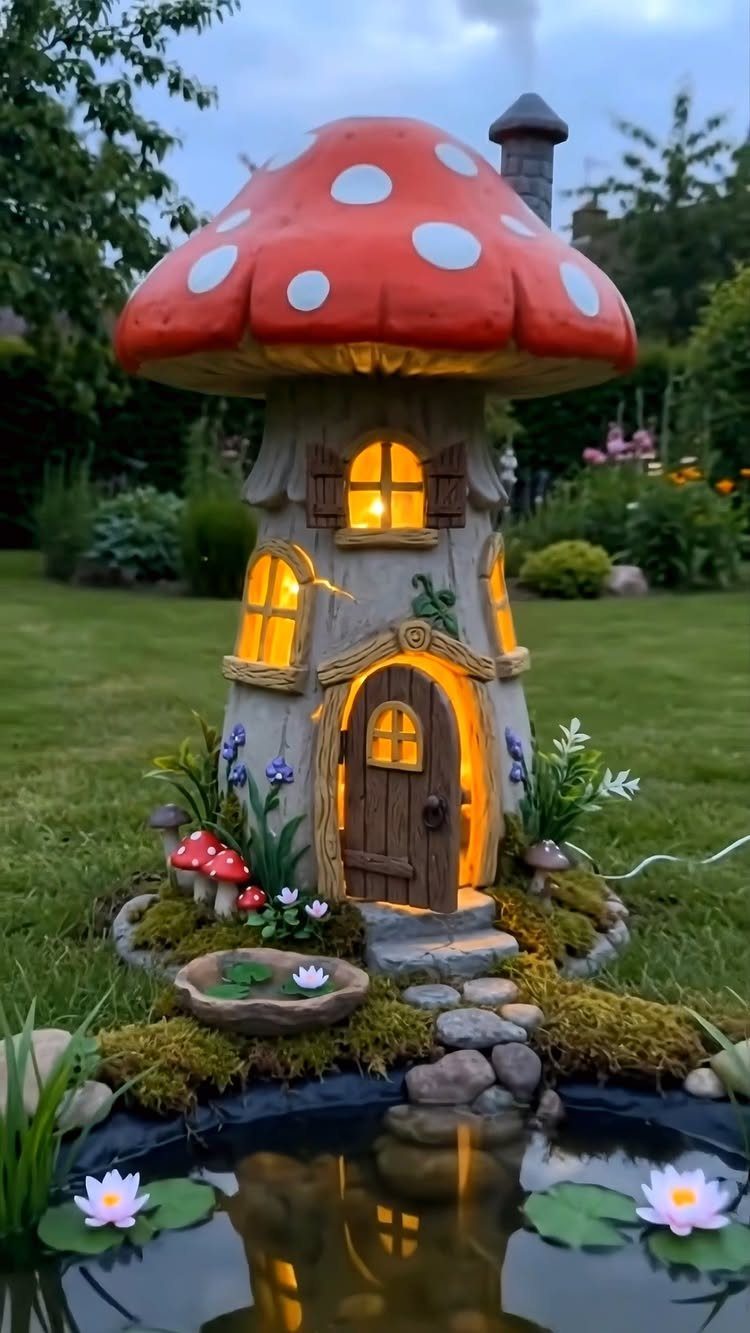
Few pieces do more for a fairy garden than a house with glowing windows. A mushroom-shaped one gives the scene a clear focal point, and the lit windows make it feel inhabited.
Place it beside water if you can; a small pond with lilies doubles the glow in the evening.
I would pick one house and let it be the star, then keep everything around it simple so it does not get crowded out.
5. Broken Pot Garden
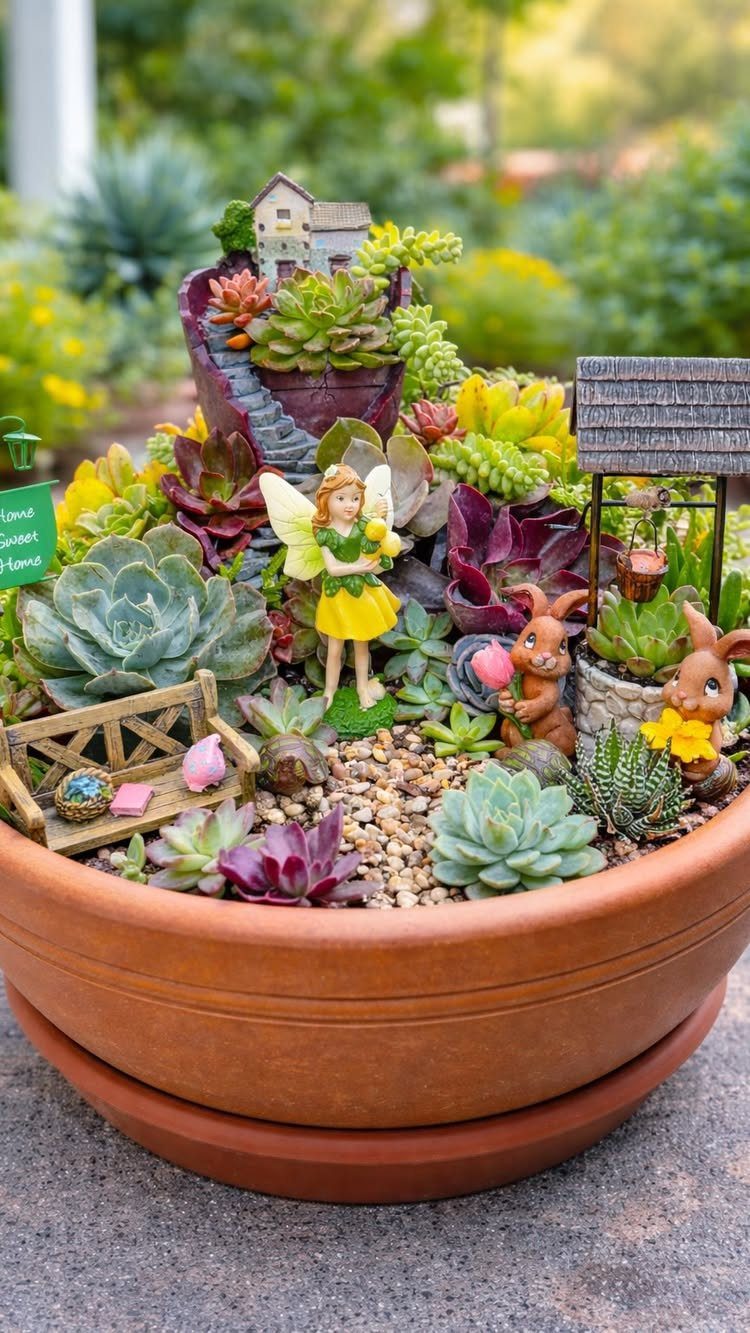
A cracked pot is already a hill waiting to happen. Tuck the broken piece into a larger terracotta pot at an angle and you get a second tier for planting, with no purchase needed.
Succulents fit the shelves it creates, and a bench or little sign sits well on the flat parts.
A purple broken piece, like this one, adds color against the orange terracotta. Choose the pot you were about to throw out.
6. Stone Steps
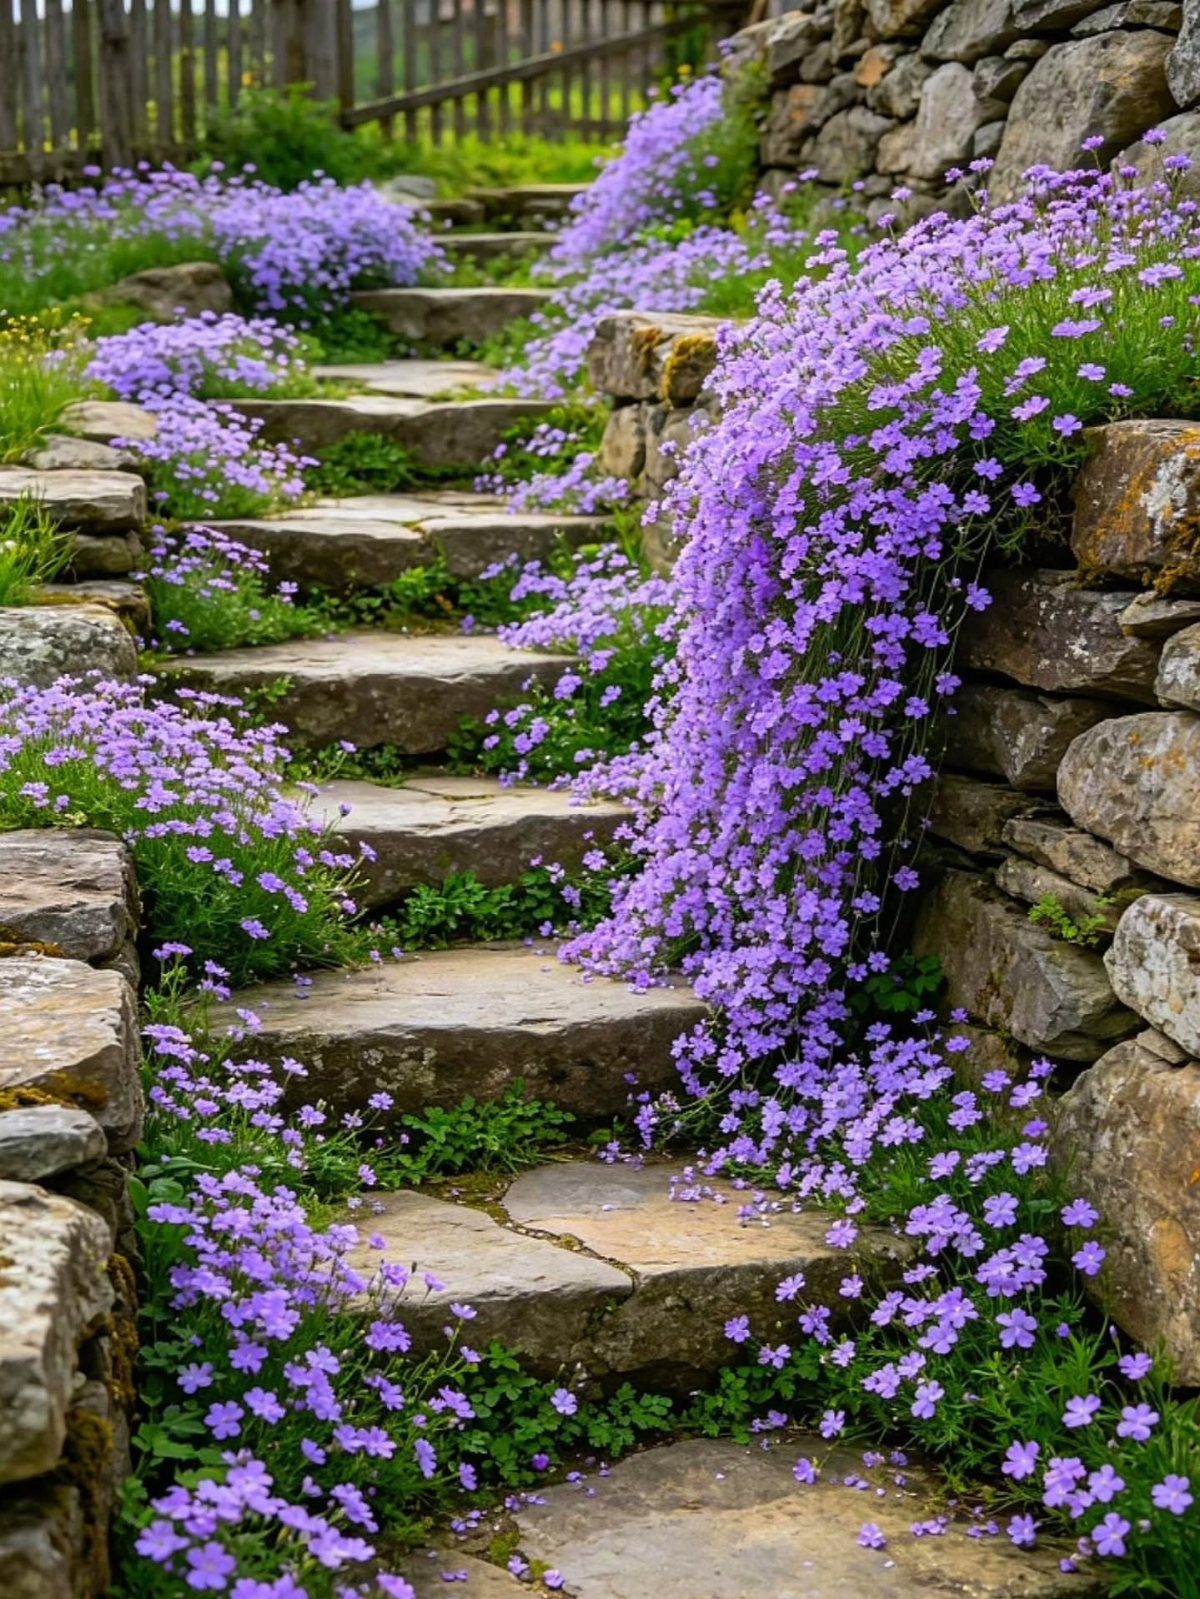
Stone steps give a garden a sense of climbing somewhere, even at a tiny scale. Winding them upward beside a low stone wall makes a small slope feel much bigger.
Flowers spilling over the edges soften the hard lines, and purple ones look lovely against gray stone.
I prefer irregular, rustic stones to matched ones, since they look like they have always been there. Use small flat stones if you are building a miniature version.
7. Enchanted Forest Fairy Garden
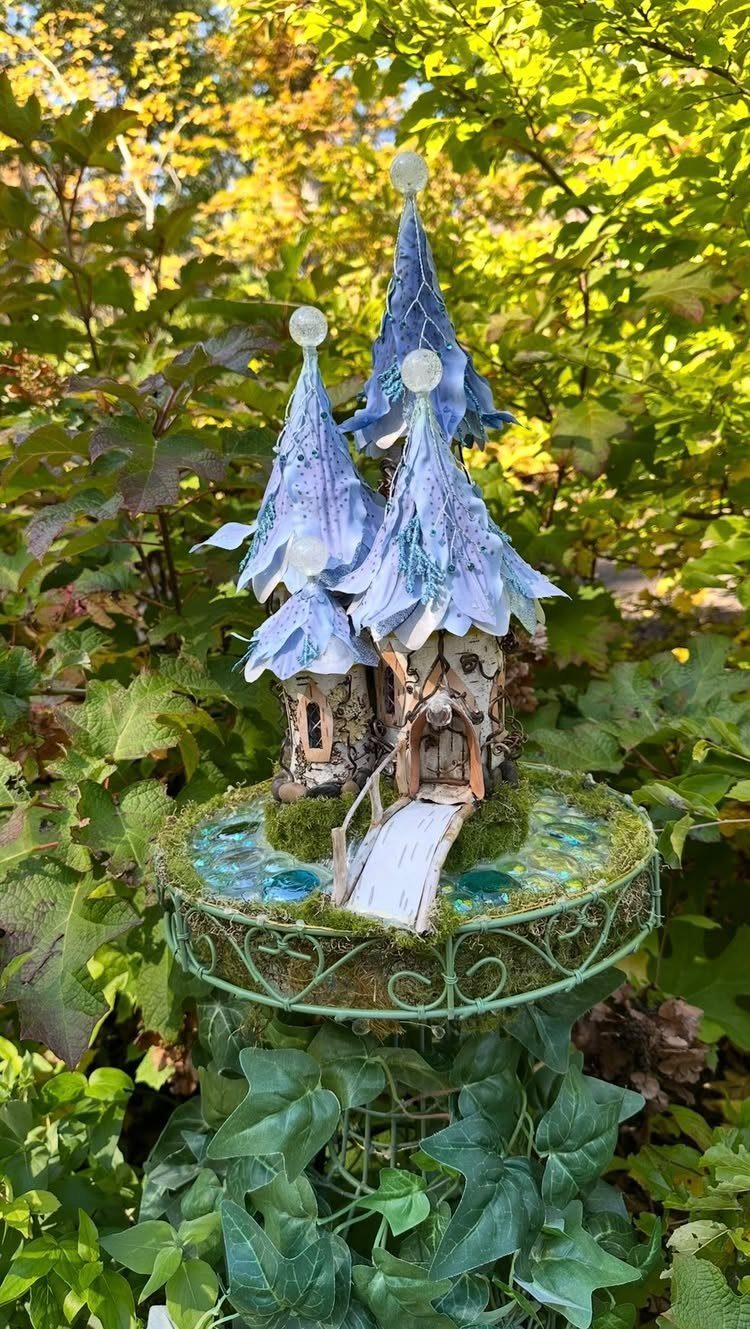
Blue and purple spires on a mossy base look like they grew out of the ground, and that is the effect to chase.
Cool colors against deep green foliage read as dusk, which suits an enchanted forest better than bright primary shades.
Keep the pond and bridge small so the house stays the tallest piece.
Moss on the base and leafy plants packed close around it will do more for the mood than extra accessories. Add glowing details, like tiny lights, as one finishing touch.
8. Succulent Fairy Garden
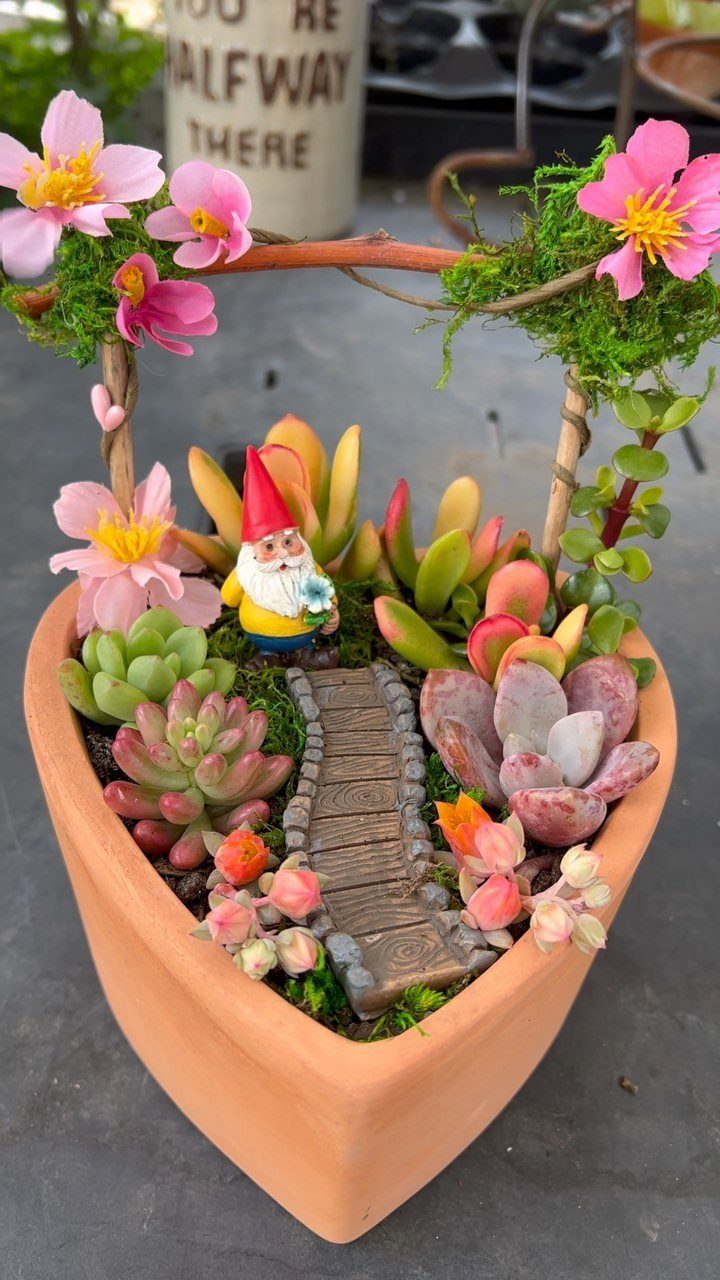
Succulents are the easy choice for a sunny pot, because they stay compact and ask for little water.
A heart-shaped terracotta planter gives them a ready-made shape, and a gnome, a small bridge and a floral arch fill it without crowding.
Pick small rosettes so the figures stay in scale. I would lay a stone path between the plants before placing anything else, then set the arch where the path begins.
Choose one pot and one gnome, and let the plants do the rest.
9. Fairy Swing
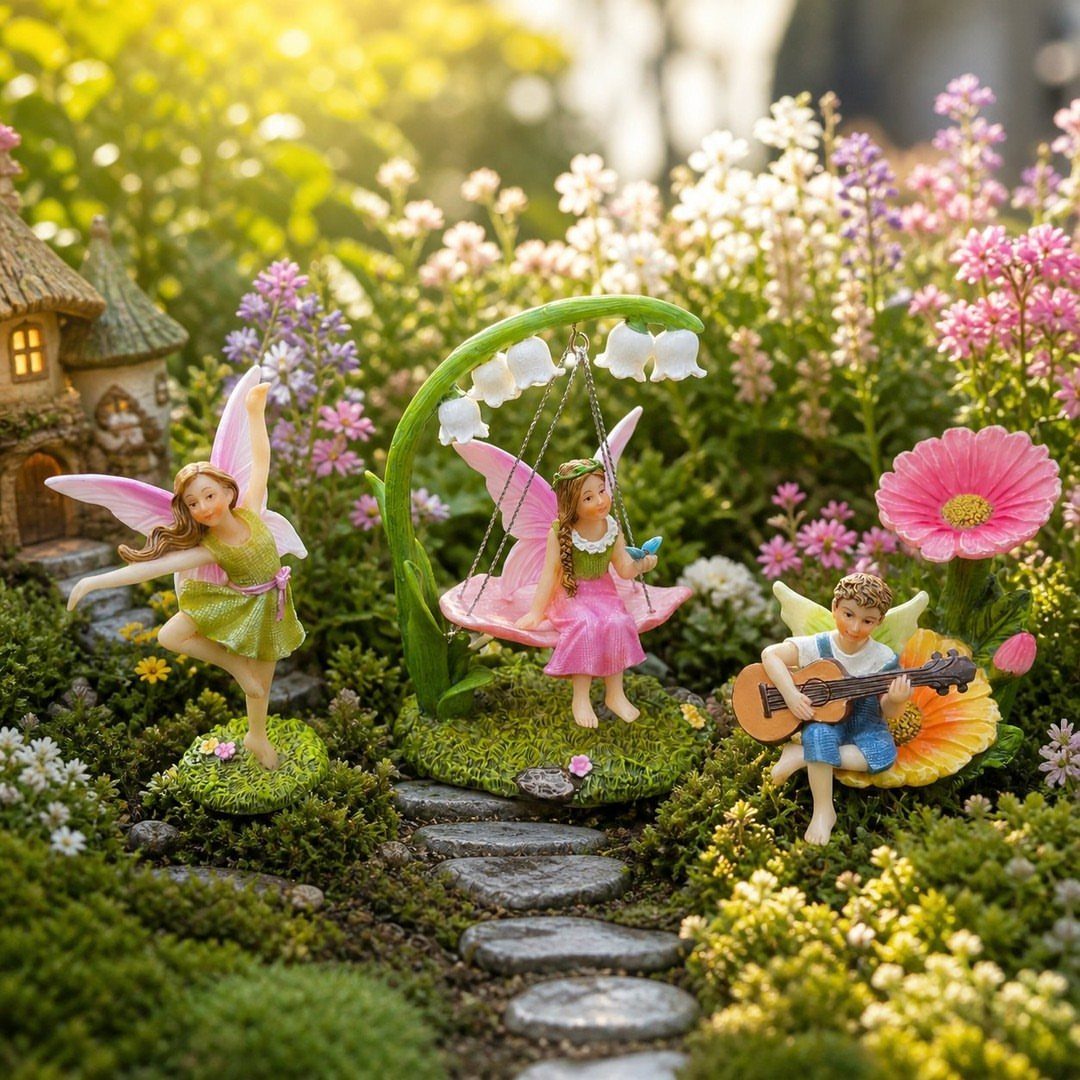
A swing gives fairies something to do. Hang a small pink one from a branch or a simple frame, seat a figurine on it, and the scene stops being a display and starts looking like play.
Surround it with flowers so the swing sits in color, and keep a small house nearby to give the figures a home base.
I like a seated fairy over a standing one, since the pose tells the story with no extra props. Let the swing be the main attraction and keep everything else low.
10. Mushroom Decor
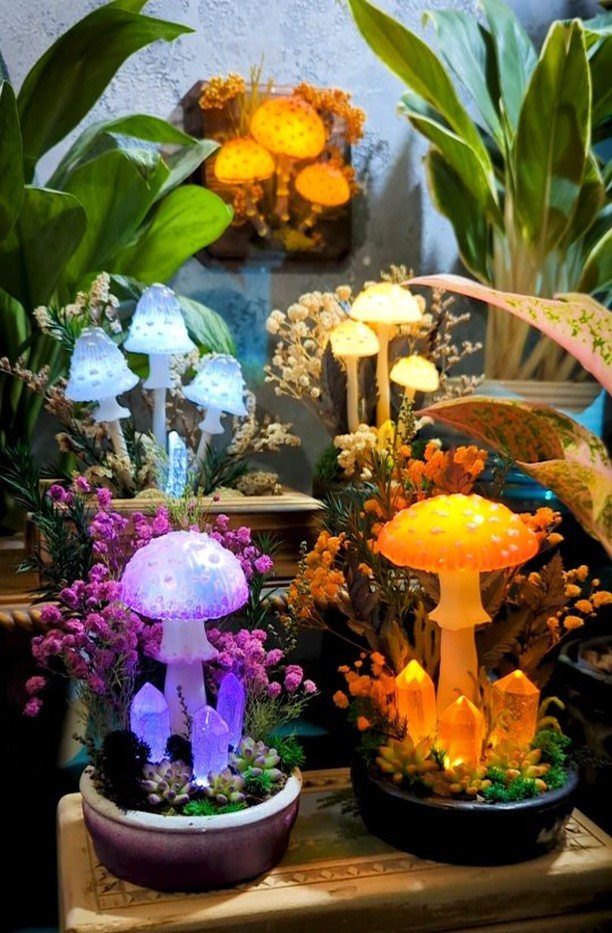
Glowing mushrooms turn a small planter into a night scene. Colorful LED mushroom lamps look best grouped in several small pots, with crystals tucked between them for a bit of sparkle.
Greenery and dried flowers keep the lit pieces from looking like a shop display. I would vary the mushroom heights across the pots and stick to two or three colors, so the glow looks planned instead of scattered.
These are artificial, so there is nothing to water, which suits a shelf or a corner indoors.
11. Teacup Fairy Garden
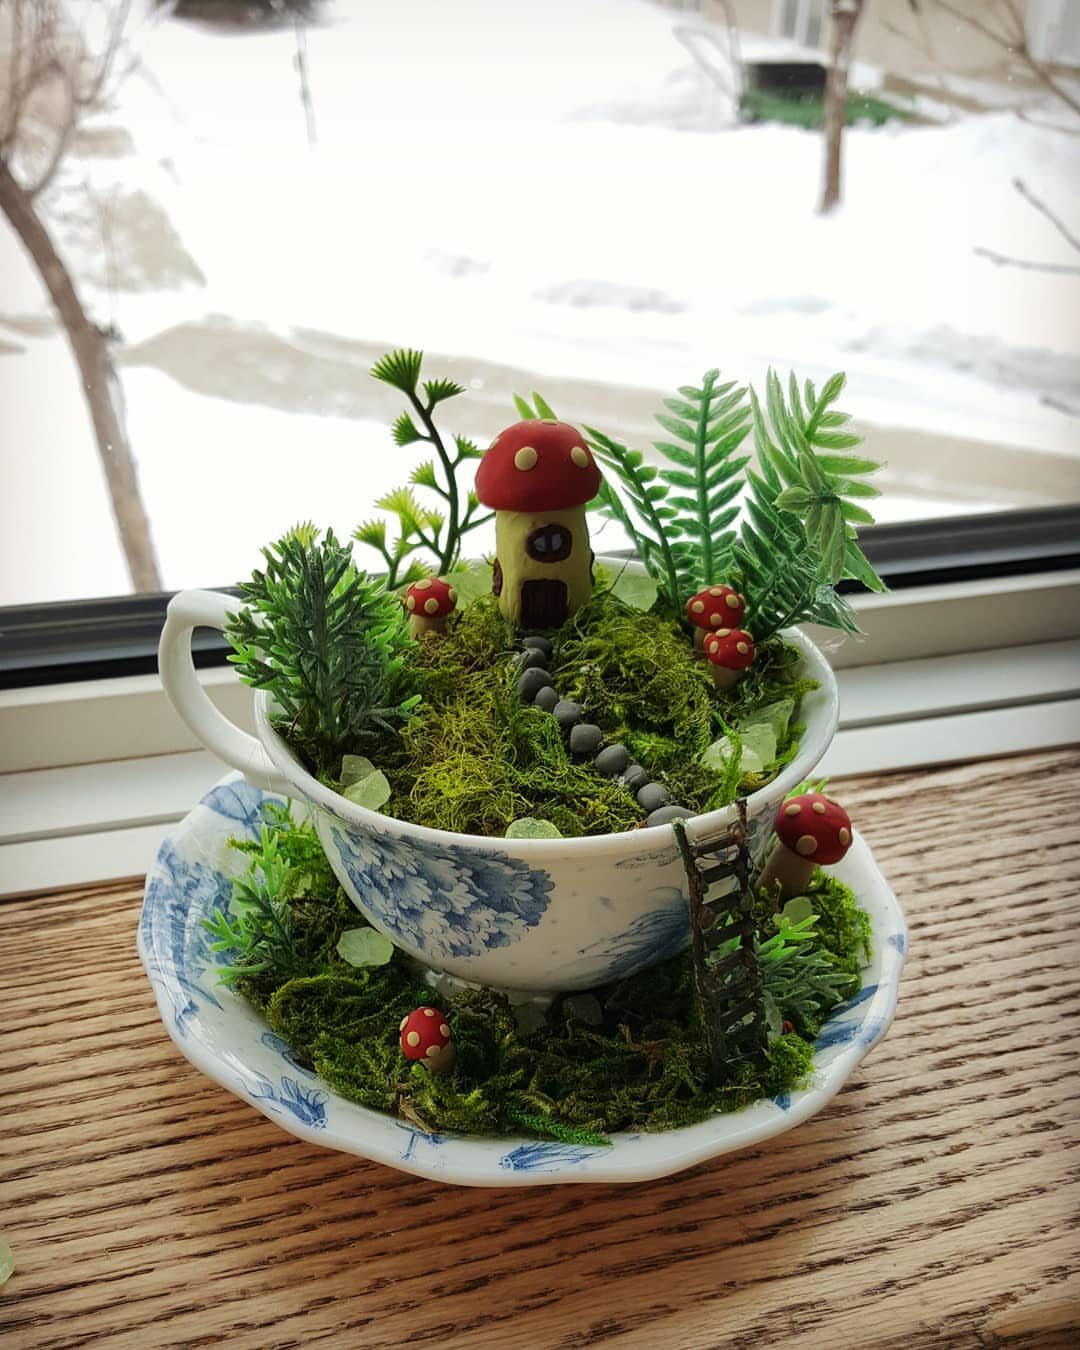
A teacup holds an entire garden: moss for the ground, a mushroom-style house, and a few tiny mushrooms beside it. The saucer works as the lawn, so let a little moss spill onto it.
A blue and white cup looks charming on a windowsill, and thrift stores are a cheap place to hunt for a mismatched one.
I would keep to one house and a couple of mushrooms; the cup is small, and crowding it spoils the charm.
12. Wheelbarrow Garden
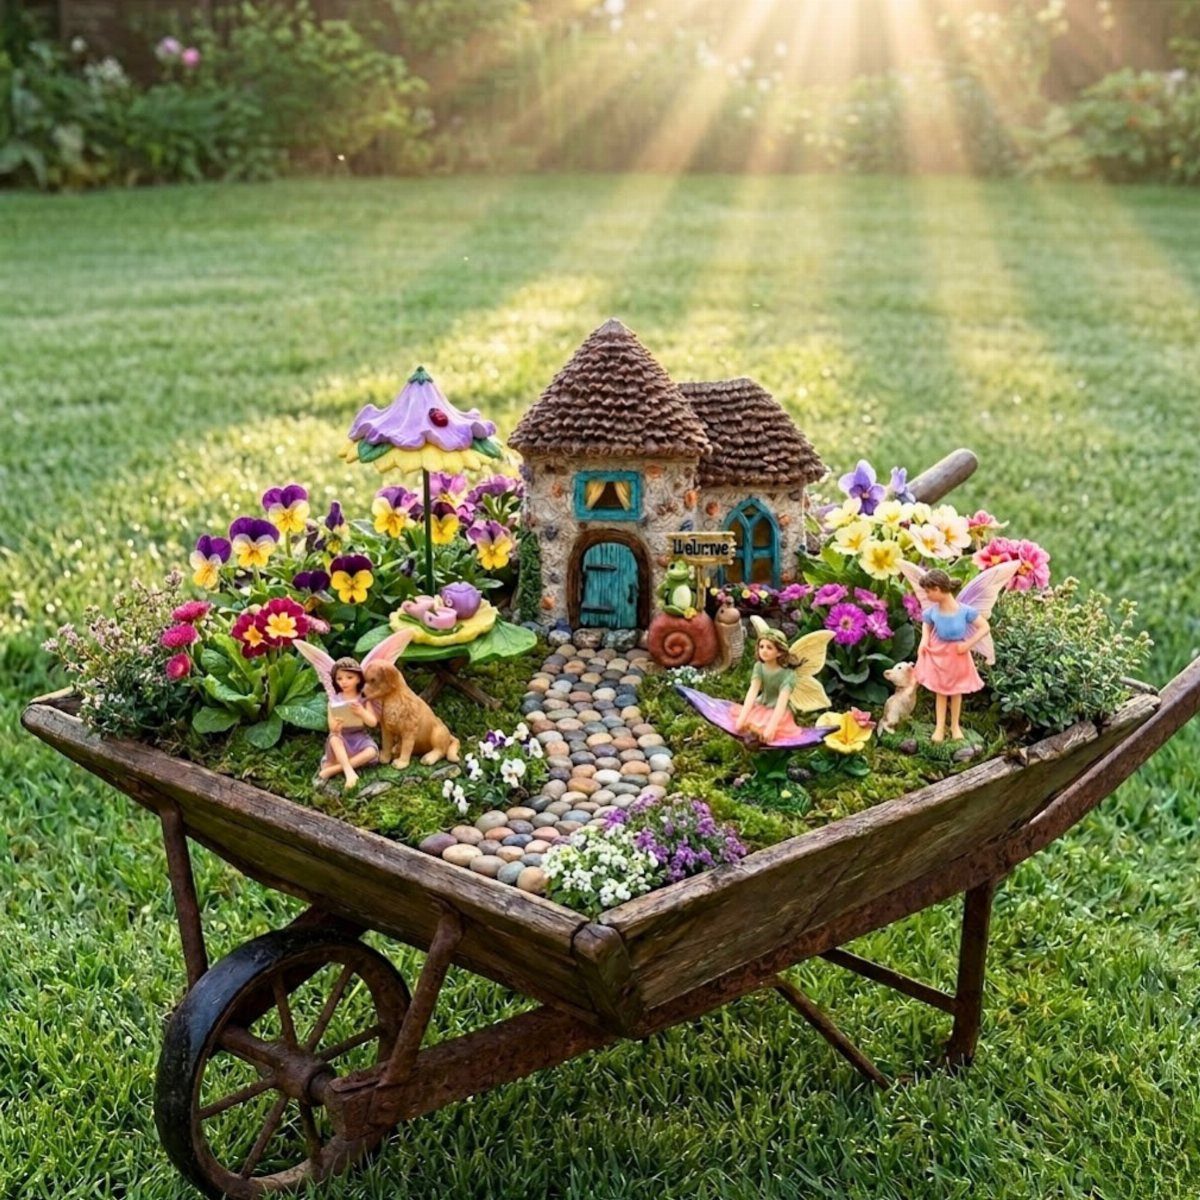
A rusty wheelbarrow already has the look of a garden that has been loved for years. Fill it with a cottage, a few figurines and flowers, and the worn metal makes the colors pop.
The open bed gives you far more room than a pot, so I would build a little hill at the back for the cottage and leave the front clear for figures and a path.
13. Tiny Fairy Statues
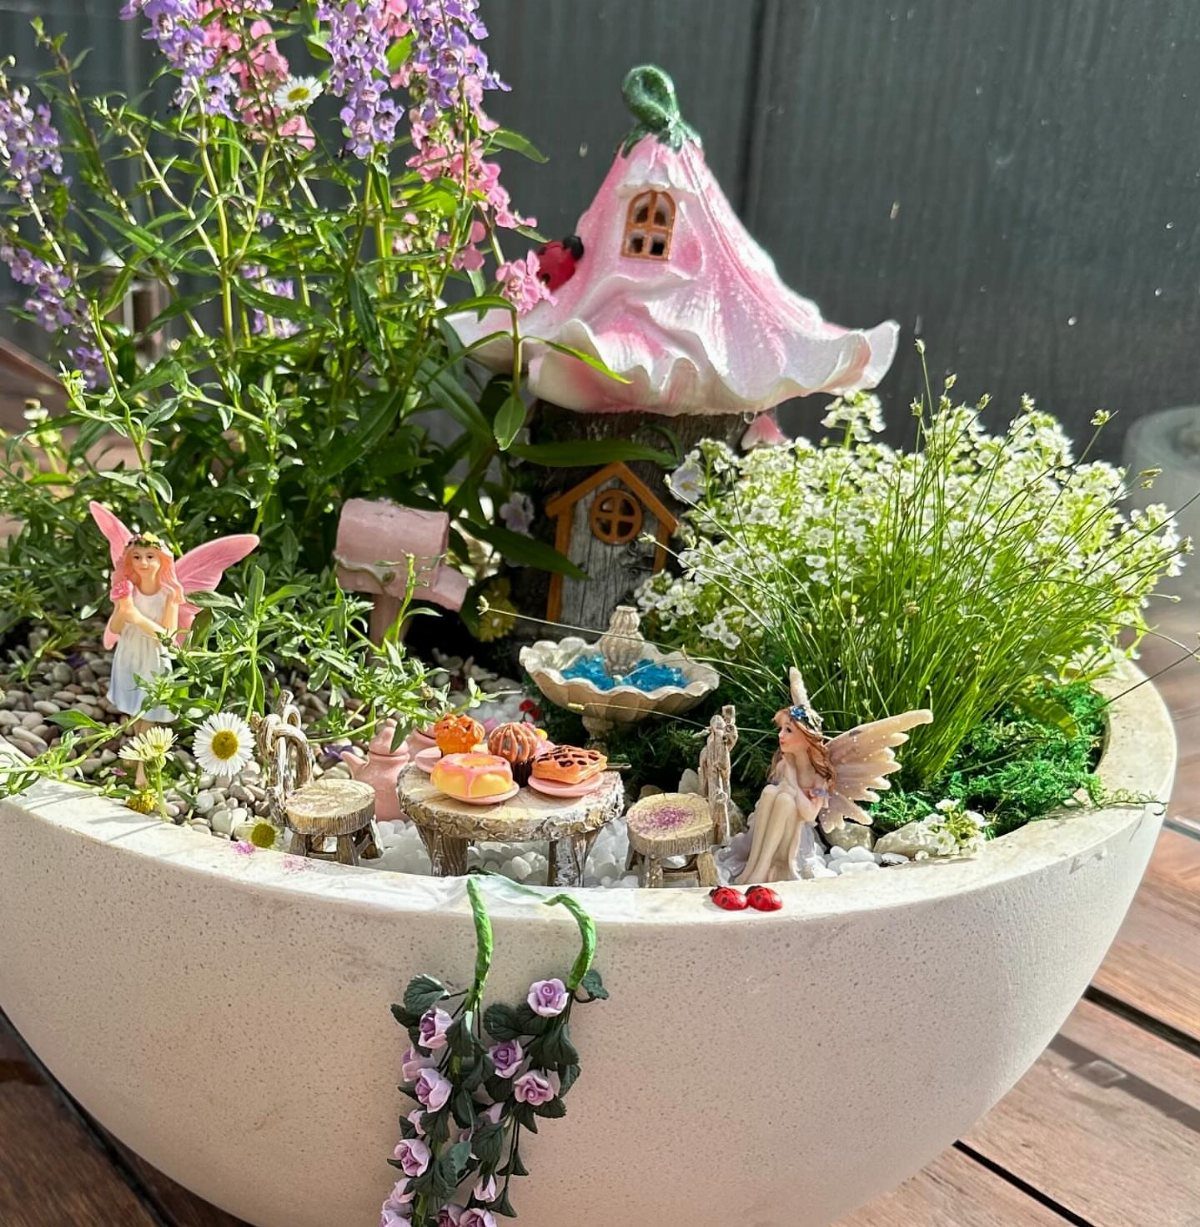
A single fairy figure gives a bowl garden its point of view. Add 2 small figures and a pink mushroom house with a few plants stops reading as a planter and starts reading as a place where someone lives.
Set them where something is happening, one near the house and one out in the plants. I would keep the figures small next to the house so the scale holds, and stop at two in a bowl this size.
14. Hand-Painted Signs
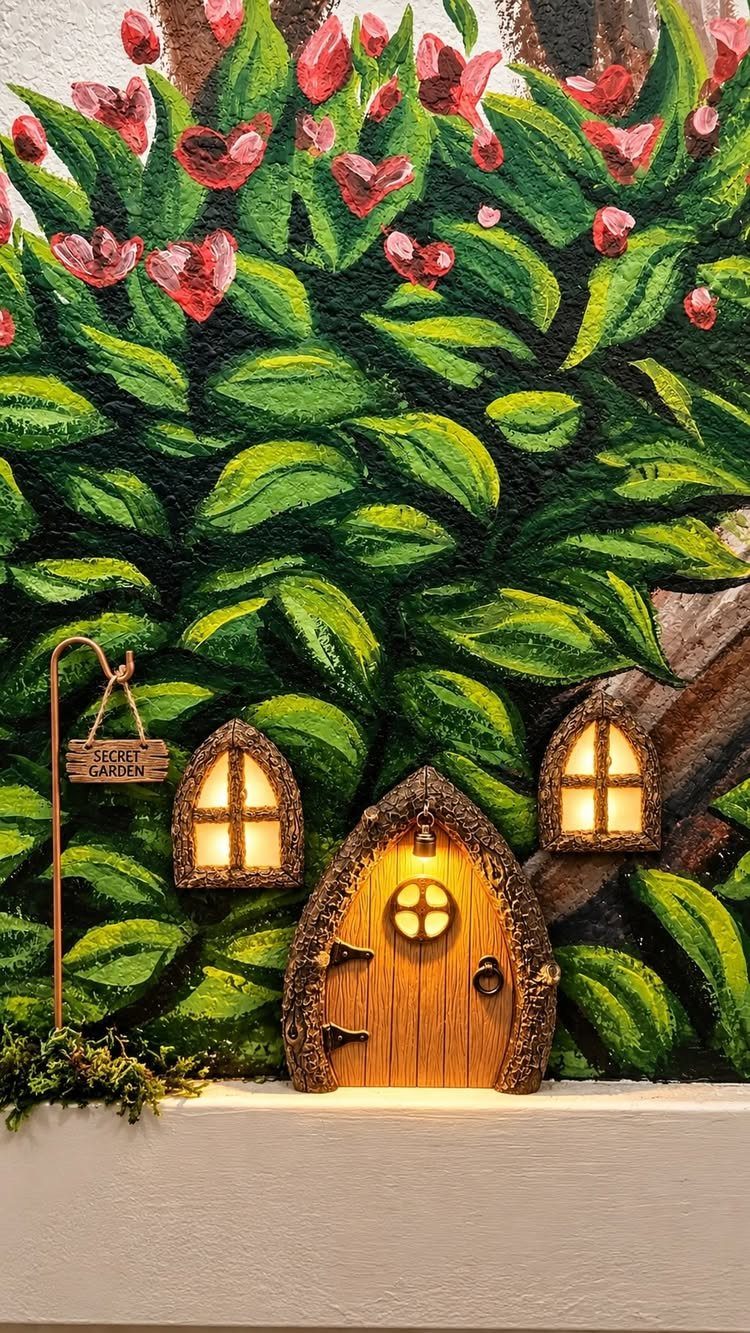
A tiny wooden sign costs a dollar or two at a craft store and gives a miniature garden a personality right away.
Paint the lettering by hand, since slightly uneven letters suit the scale better than stencils.
Keep the wording to a word or two so it stays readable. Set the sign low, beside the glowing house, where a real sign would stand.
15. Flower Bed Fairy Garden
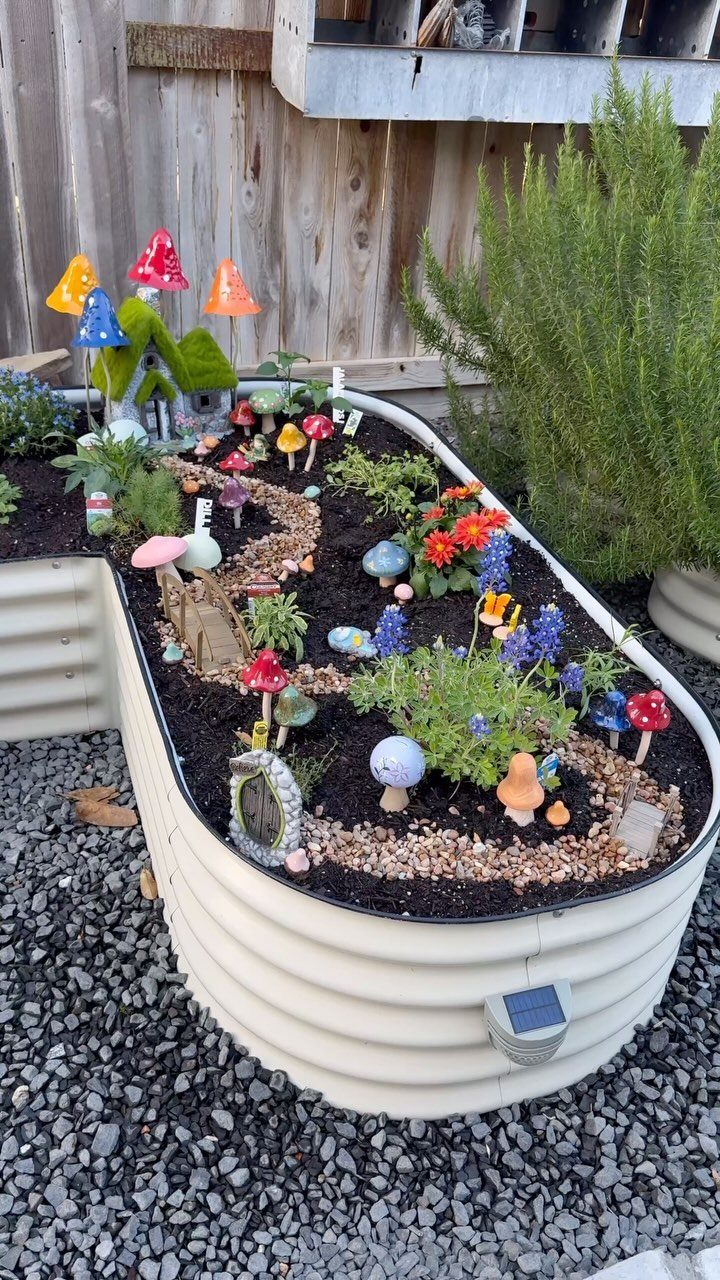
A raised bed gives a fairy village a defined edge, and that edge keeps a small scene from getting lost in a backyard.
Tuck the village into one corner and let the house, mushrooms and bridge share the ground with pebbles and low plants.
I like a gravel or pebble path winding between the pieces, because it ties the village to the gravel around the bed.
Pick low, small-leaved plants such as baby tears or thyme so the house stays the tallest thing in the corner.
16. Indoor Fairy Garden
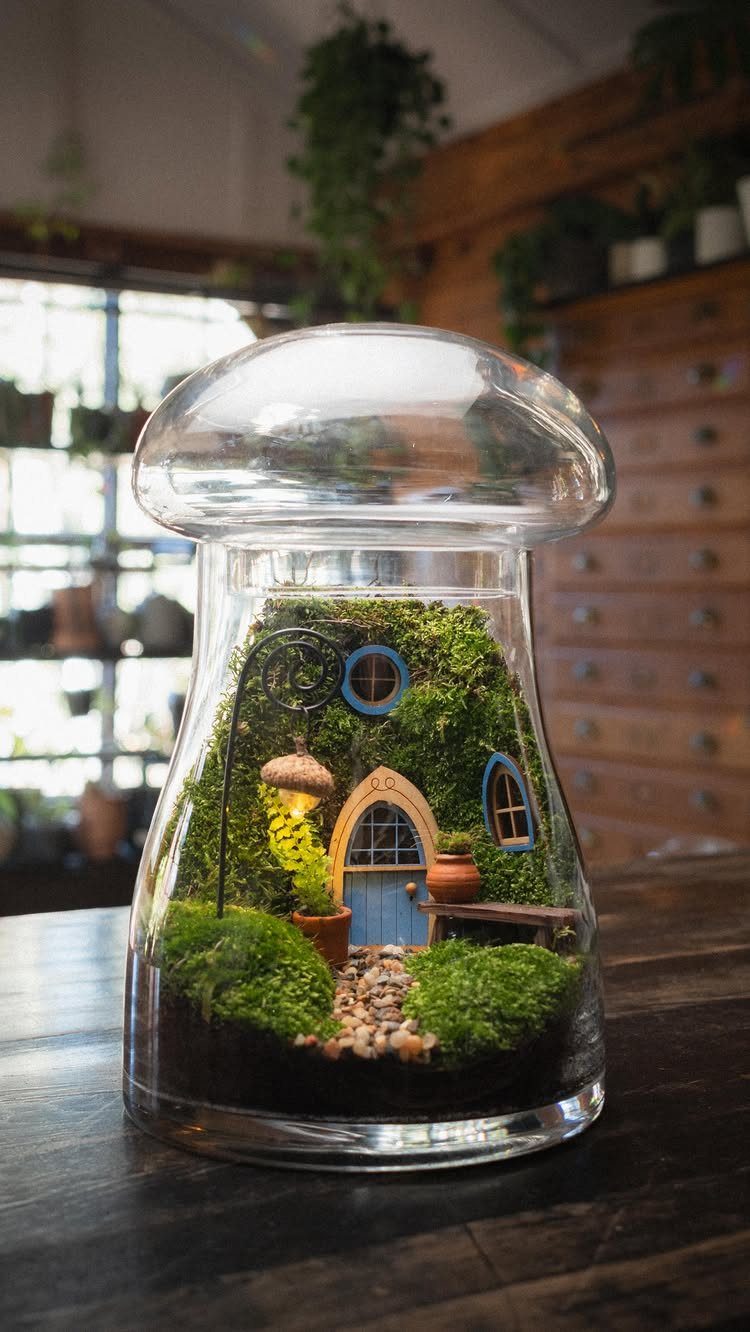
Under a glass cloche, a fairy garden becomes something you can set on a dark wooden table and leave alone. A small house, a bed of moss and a tiny lamp fit inside one jar.
The glass frames the scene like a display, so keep the contents few and tidy.
Moss covers the base, the house sits off center, and the lamp goes beside it. Place it among your houseplants, where the greens echo the moss.
17. Fairy Door
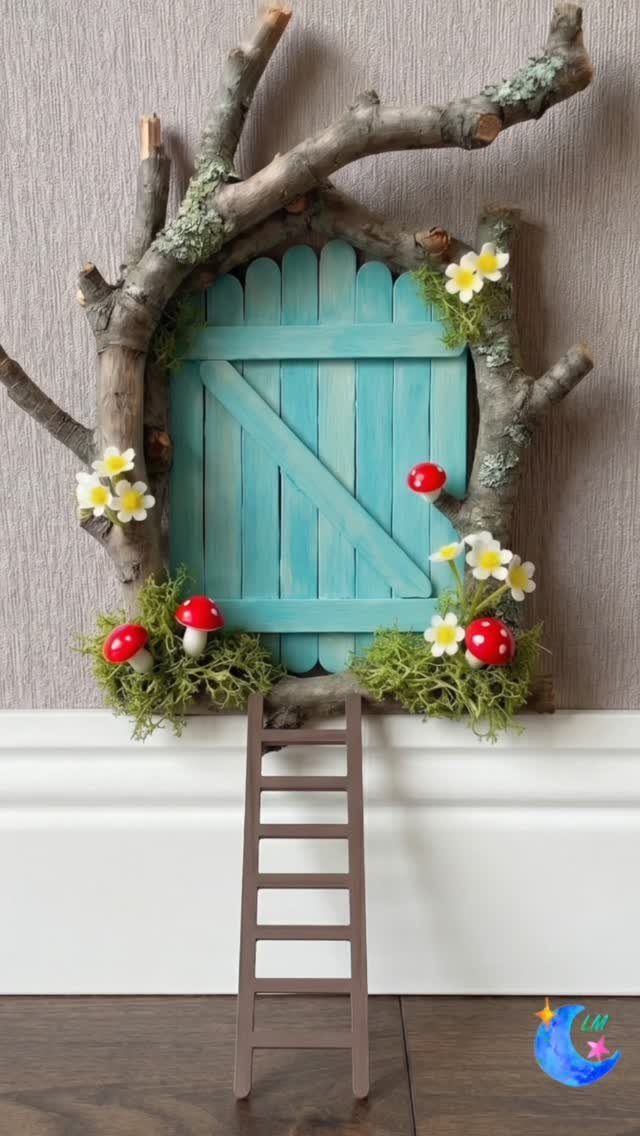
A fairy door hangs on the wall, not in a pot, which makes it the easiest idea here for a tight space. A small blue wooden door with a little ladder leaning against it suggests someone lives behind the plaster.
I would pick a pale color like this blue, which stands out against a neutral wall.
18. Hanging Basket Fairy Garden
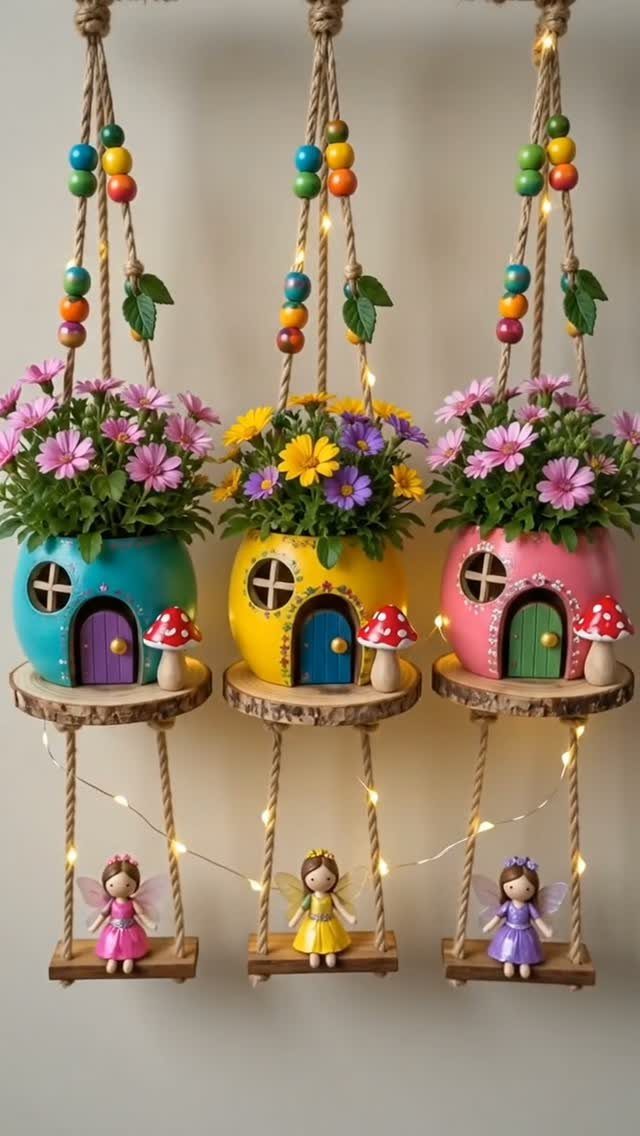
Hanging fairy gardens free up the ground, which matters when you have no yard or no spare shelf.
Hang three at staggered heights, and string beads and lights between them for a village feel. I would choose bright, mismatched colors against a plain wall, since the wall does the quiet work and the planters get to be loud.
19. Fairy Garden Figurines
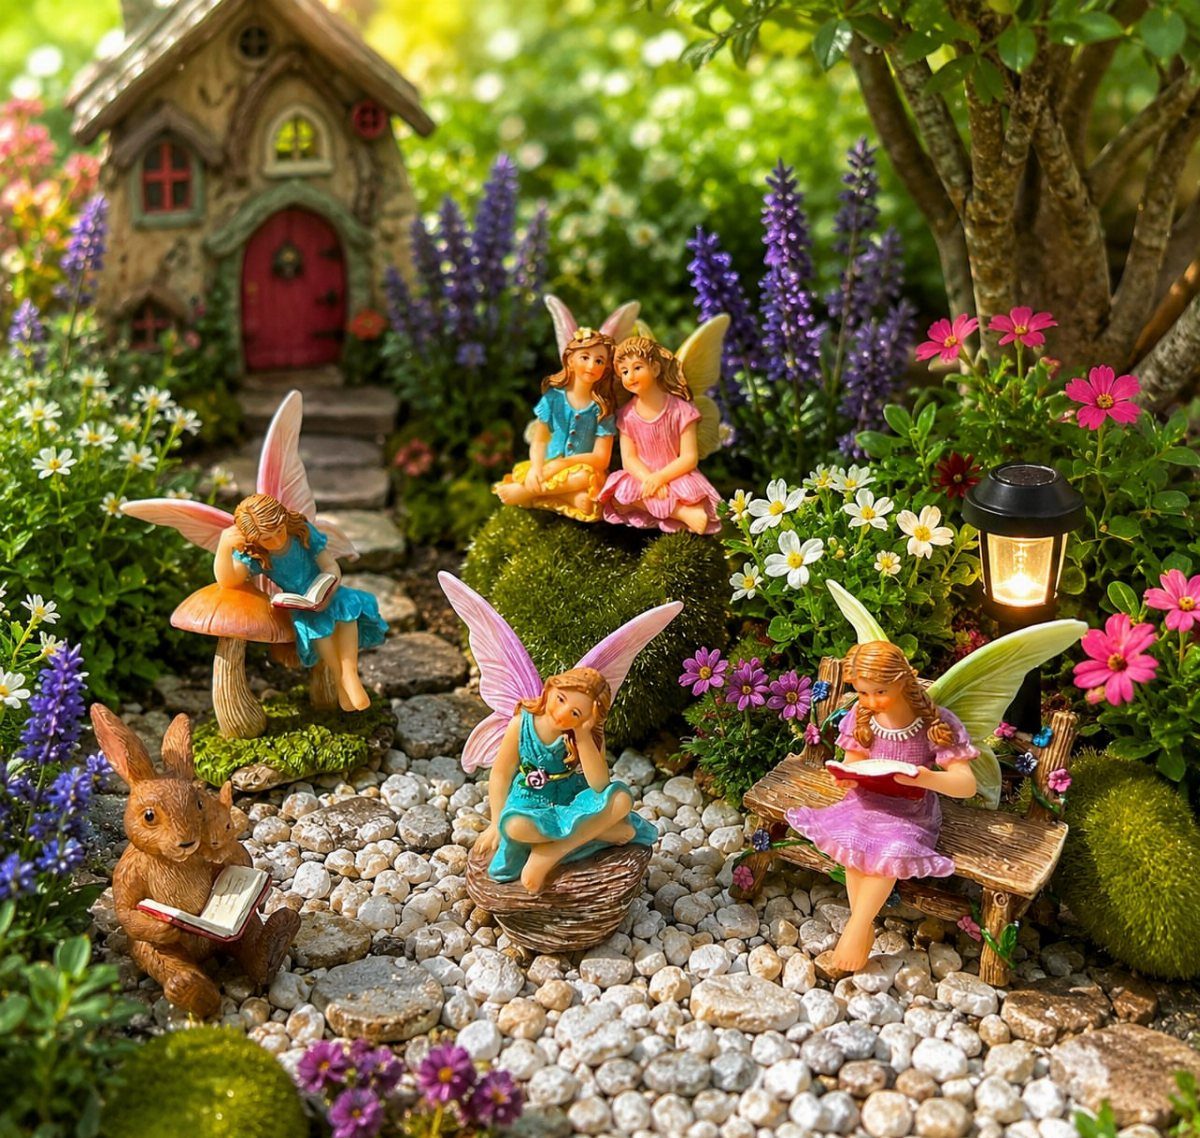
Figures give a miniature garden its story, and a figure with a book needs very little else. Group them in small clusters along the pebble path instead of spacing them evenly, so the scene feels like neighbors gathered.
Keep the figures close in size to the house, and let the rabbit sit slightly apart as the odd one out. I would limit the flowers to purple and pink so the figures stay the focus.
20. Birdbath Fairy Garden
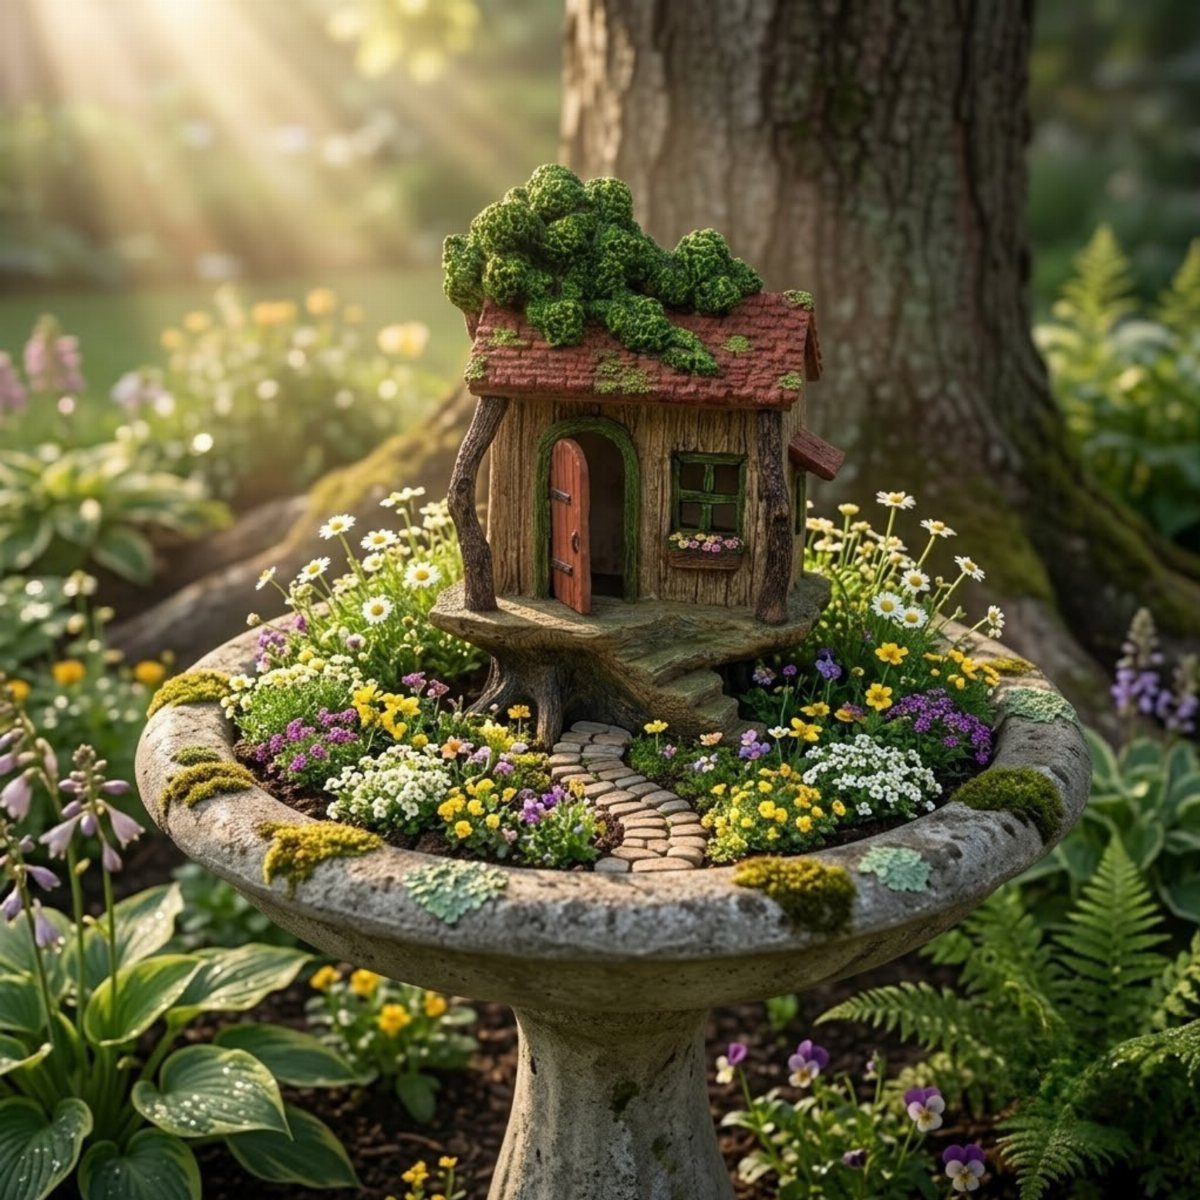
A cracked birdbath still holds soil, which makes it a ready-made planter with a pedestal built in. The wide, shallow basin suits a small house, a pebble path and a crowd of flowers.
Set the house toward the back so the path has room to approach it.
I would fill the basin with colorful blooms right up to the rim, since a full bowl looks lush from standing height. Place it near a tree for shade and a backdrop.
21. Park Teacup Garden
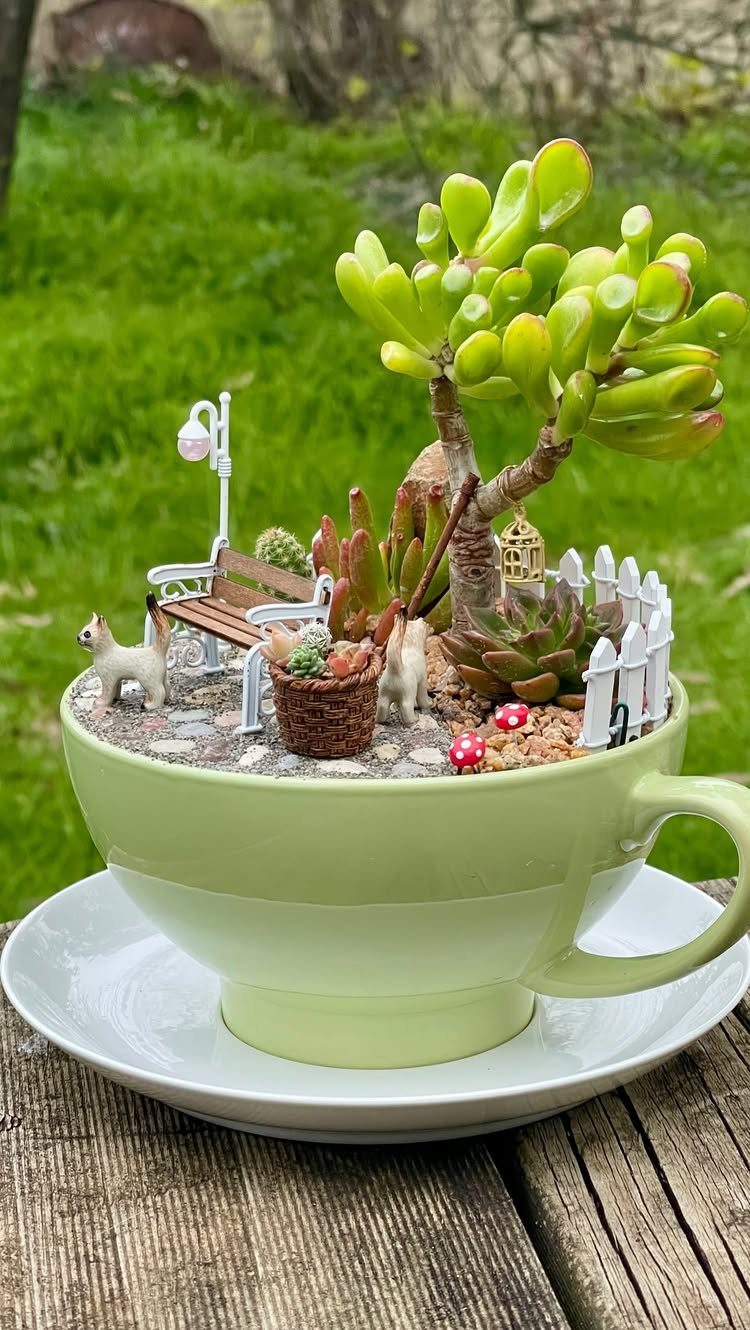
A teacup can hold a whole park: a bench, a lamp post and a white fence around a few succulents.
Pick tiny rosettes so the furniture stays in scale.
I would put the bench facing the plants, with the fence behind it, and leave a bit of open soil so the park does not feel stuffed. A pale green cup keeps the focus on the greens.
22. Mushroom Pedestal Fairy Garden
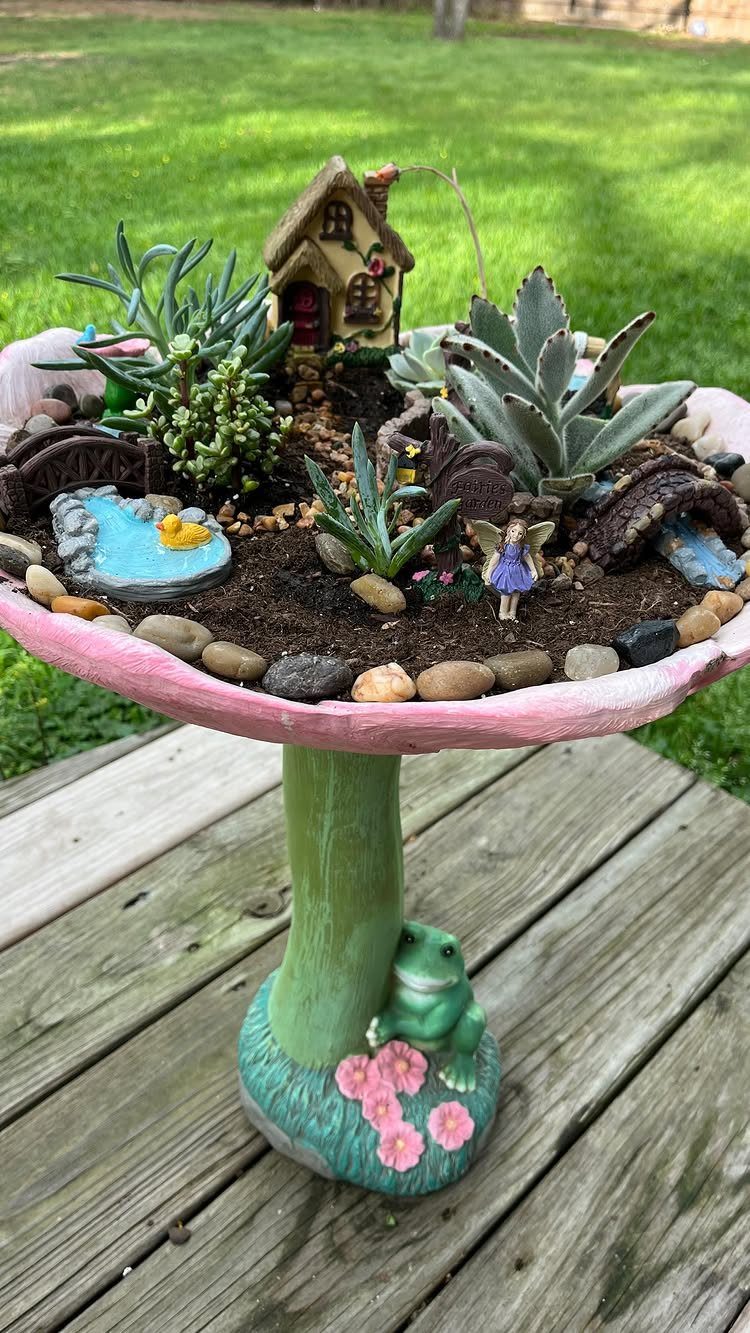
Raising a garden on a pedestal puts the scene at eye level, so you see it without bending. A pink mushroom base holds the cottage, bridge and succulents together with a storybook look.
Keep the top scene compact and let the frog sit at the base, where it surprises people.
I would use small succulents on the pedestal, because they stay low and leave the cottage visible. A deck or patio table makes a good stage.
23. Fence Line Fairy Village
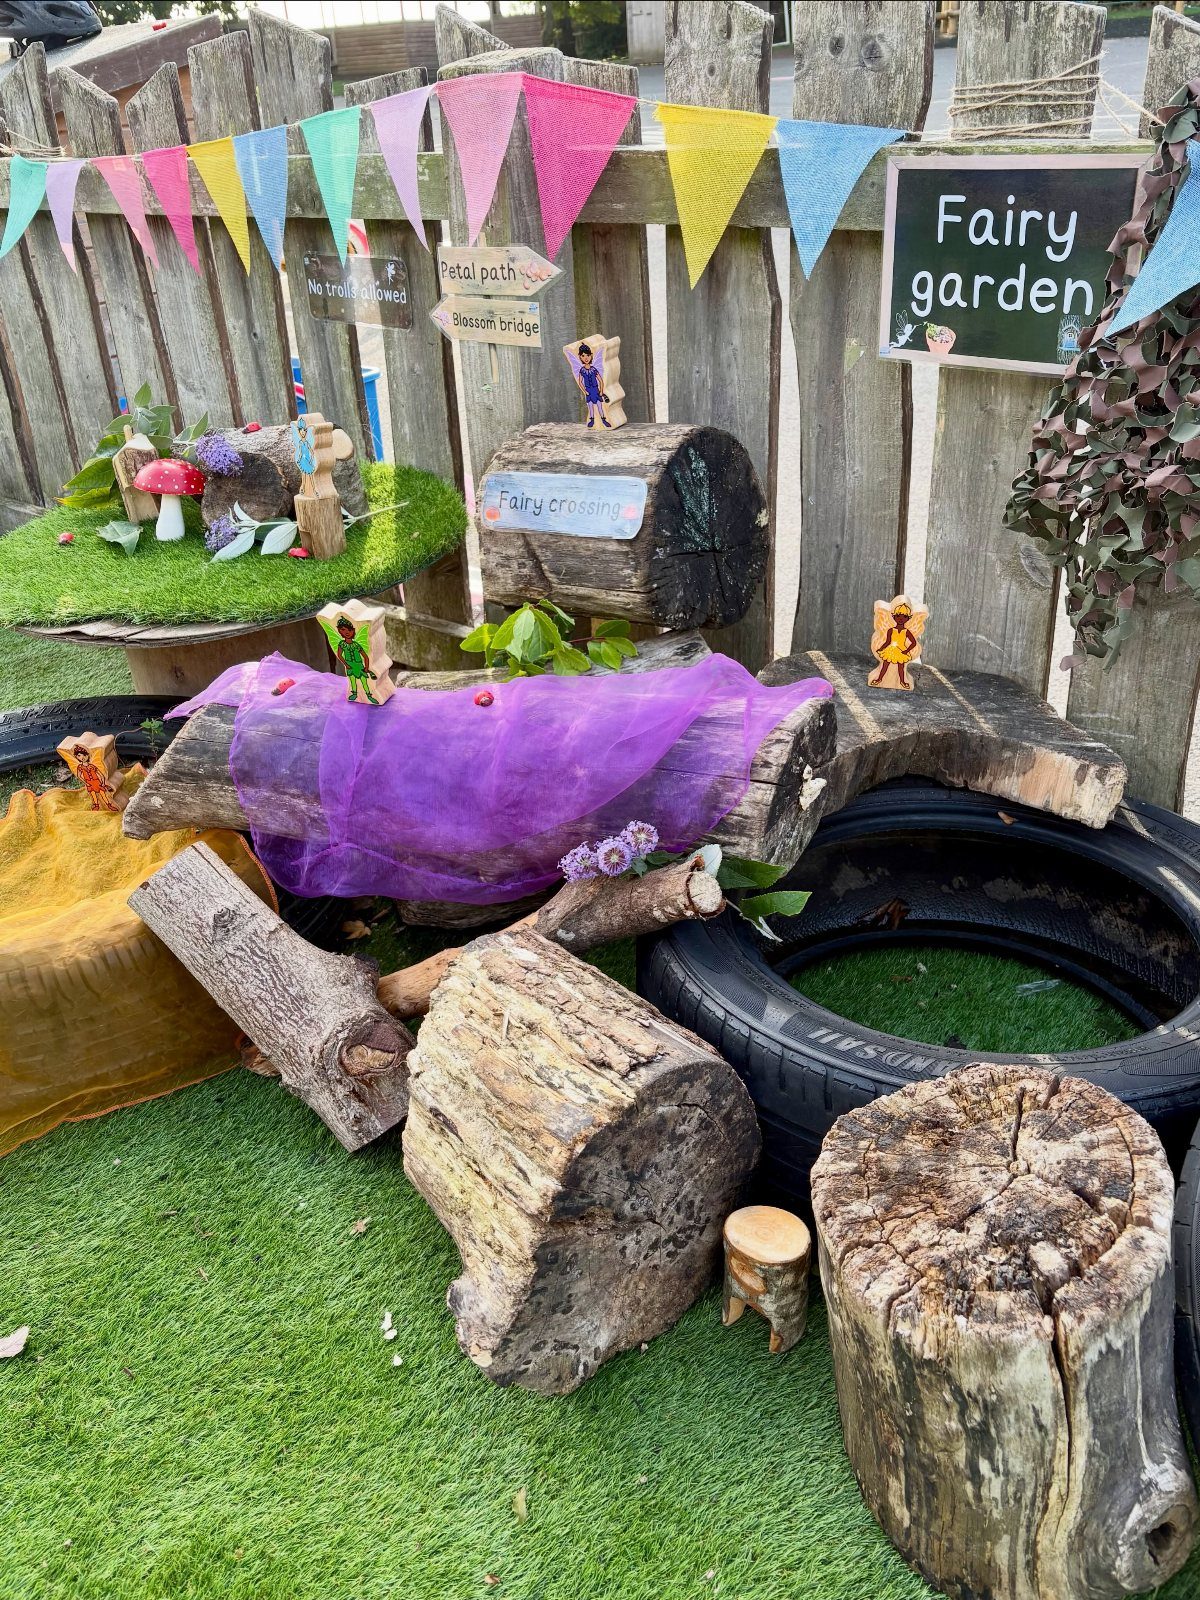
A plain wooden fence is a free backdrop, and it gives a fairy village a clear back edge. Lay small logs along the ground as borders, then drape purple fabric and string bunting along the boards.
Tiny signs do the storytelling here, so give each one a job: one for the entrance, one for the path, one for the bridge.
I would keep the sign wording to two or three words each, and hang the bunting low so it stays in scale.
24. Felt Woodland Fairy Setup
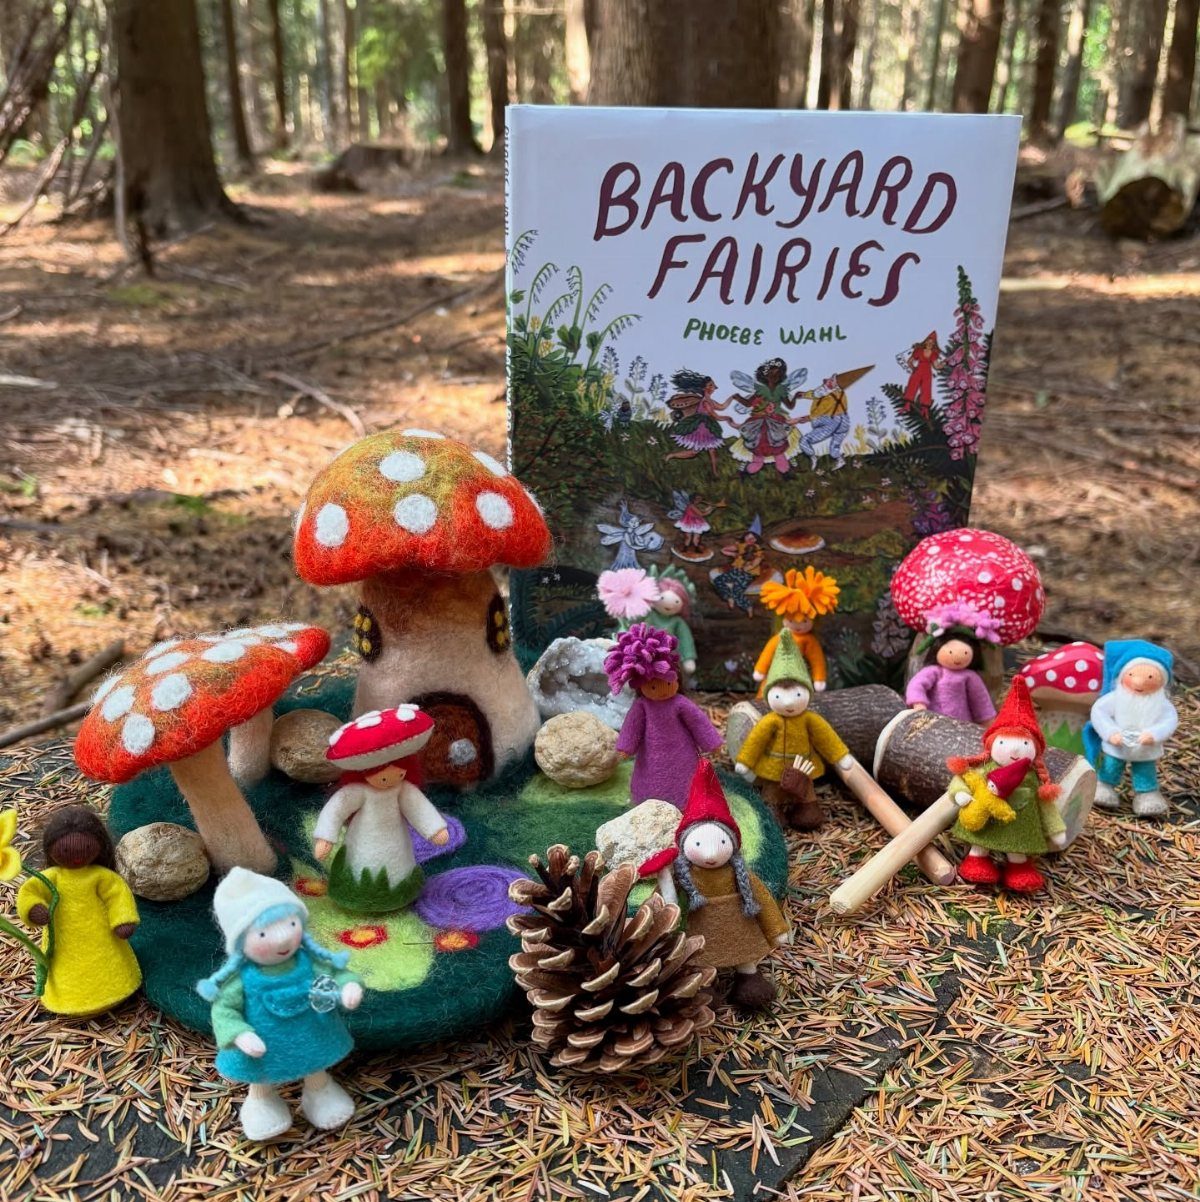
Felt fairies need no water, no soil and no sun, so this is the gentlest version of a fairy garden for a child.
Mushroom houses and small dolls sit well on a bed of pine needles with a pinecone or 2 as boulders.
I would set it up on the ground outdoors, then pack it away after playing. Pair it with a picture book about fairies to spark stories.
25. Hollow Log Fairy Garden
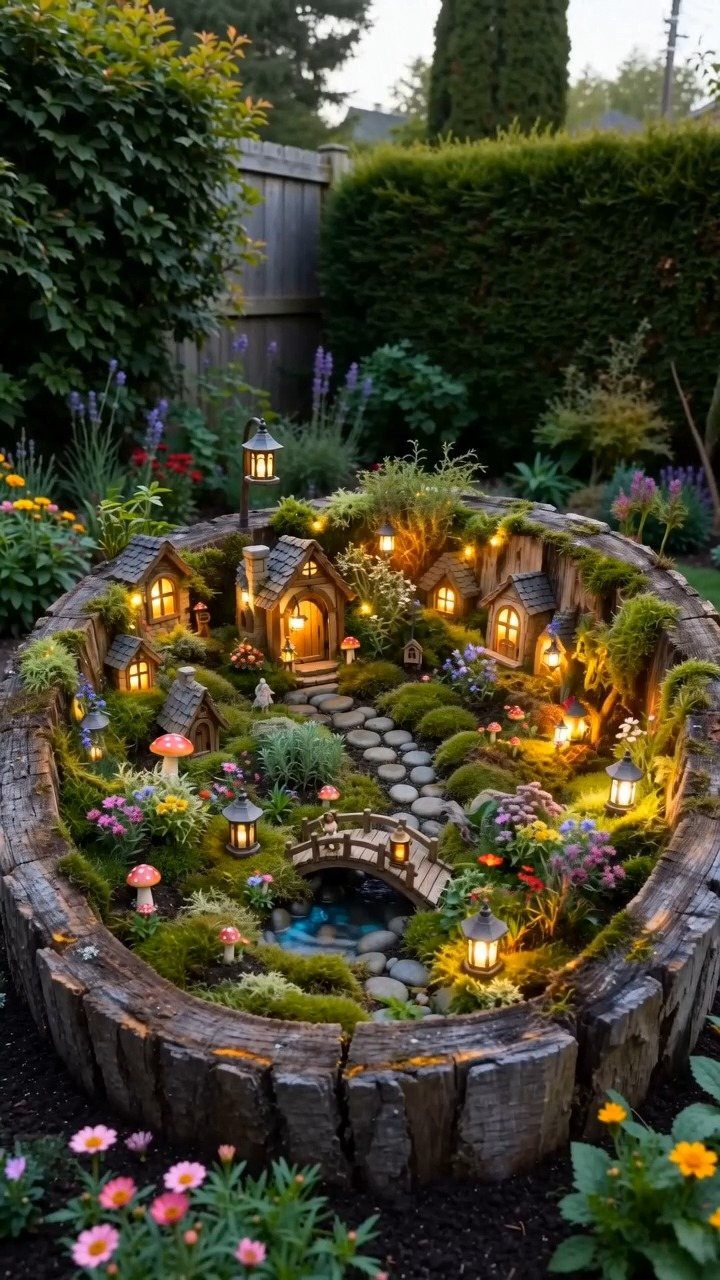
A log ring works like a built-in fence, holding soil, houses and a stream inside one tidy circle. The wood also gives the scene a natural edge that suits glowing cottages.
A low bridge matters for scale: if it climbs higher than the cottage rooflines, the whole scene reads as a giant’s yard instead of a tiny village.
I would pack small plants in the gaps between the buildings, since bare soil makes a village look unfinished. Set the lit houses toward the back, where their glow reads best.
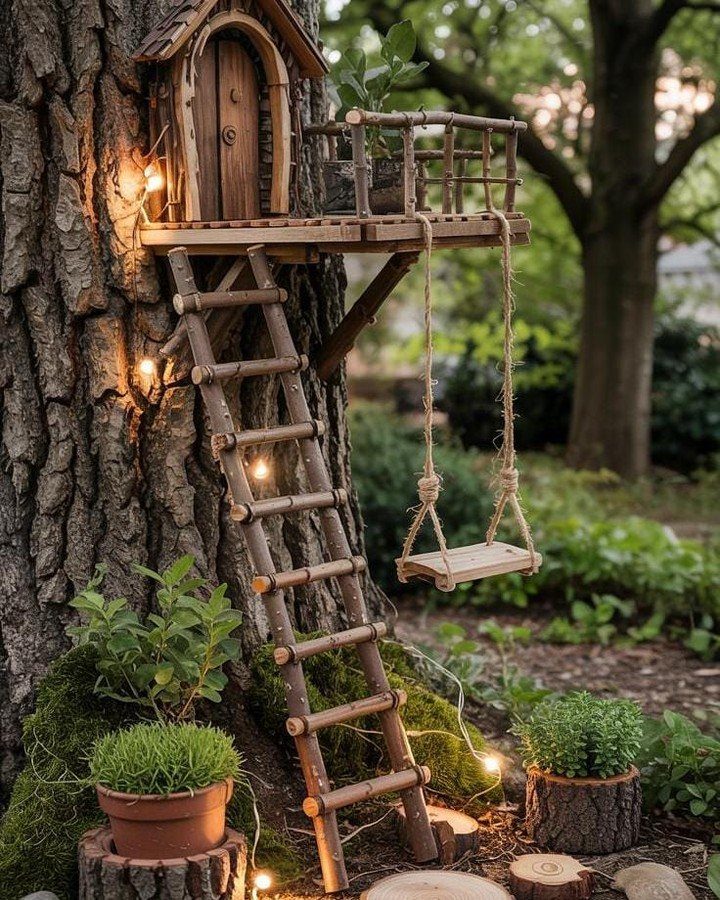
26. Tree Trunk Fairy Home
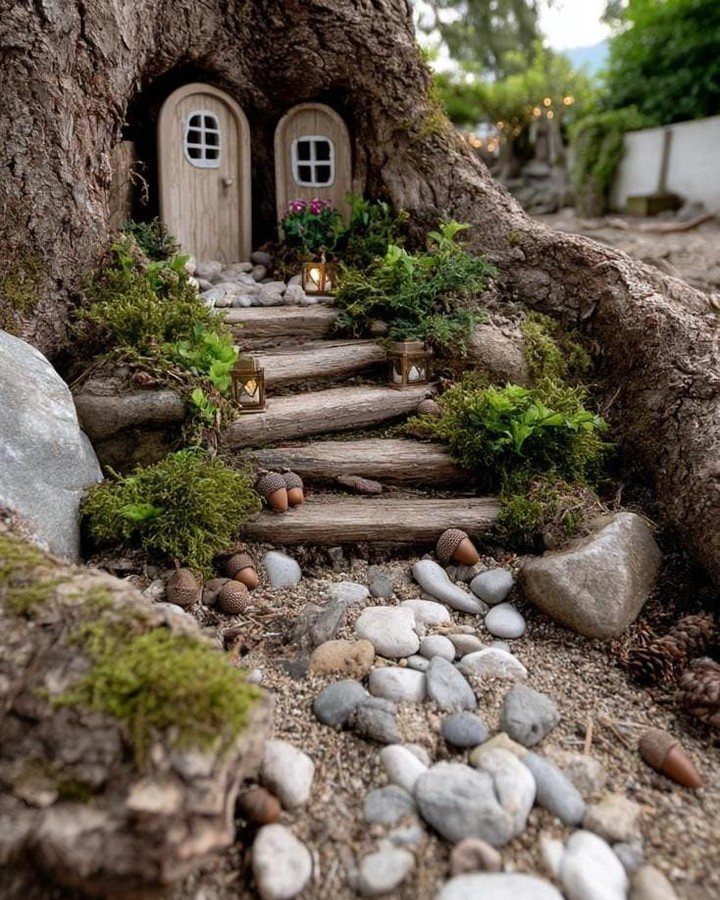
Roots do the hard work: the crevices at the base of a tree are already nooks for a door, a window and a few steps, so you only have to fit the pieces to what’s there.
A house built against the trunk looks like it grew there.
A pebble path to the door, with a lantern or two beside the stairs, tells the eye where the entrance is and gives the base of the trunk a finished look.
I would tuck small plants into the gaps between roots, so the house seems to sit in the tree. Keep every piece small enough to fit the roots.
27. Miniature Wishing Well
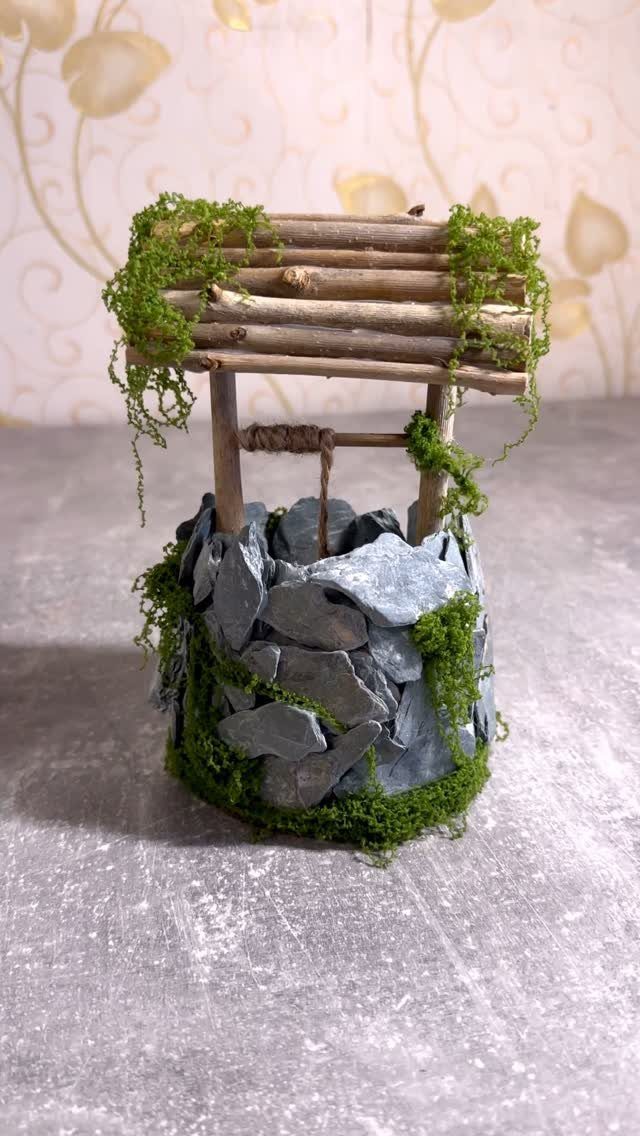
Slate stones, twigs and moss are all you need to build a wishing well, and none of it has to be bought new.
Stack small flat slate pieces in a ring for the walls, then lay twigs across the top as a simple roof frame.
Press moss into the seams so the stone looks aged.
I prefer uneven stones, since a perfect ring reads as a toy. Build it separately, then set it into the garden.
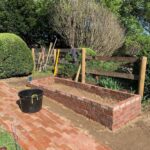
28. Brick Planter Fairy Village
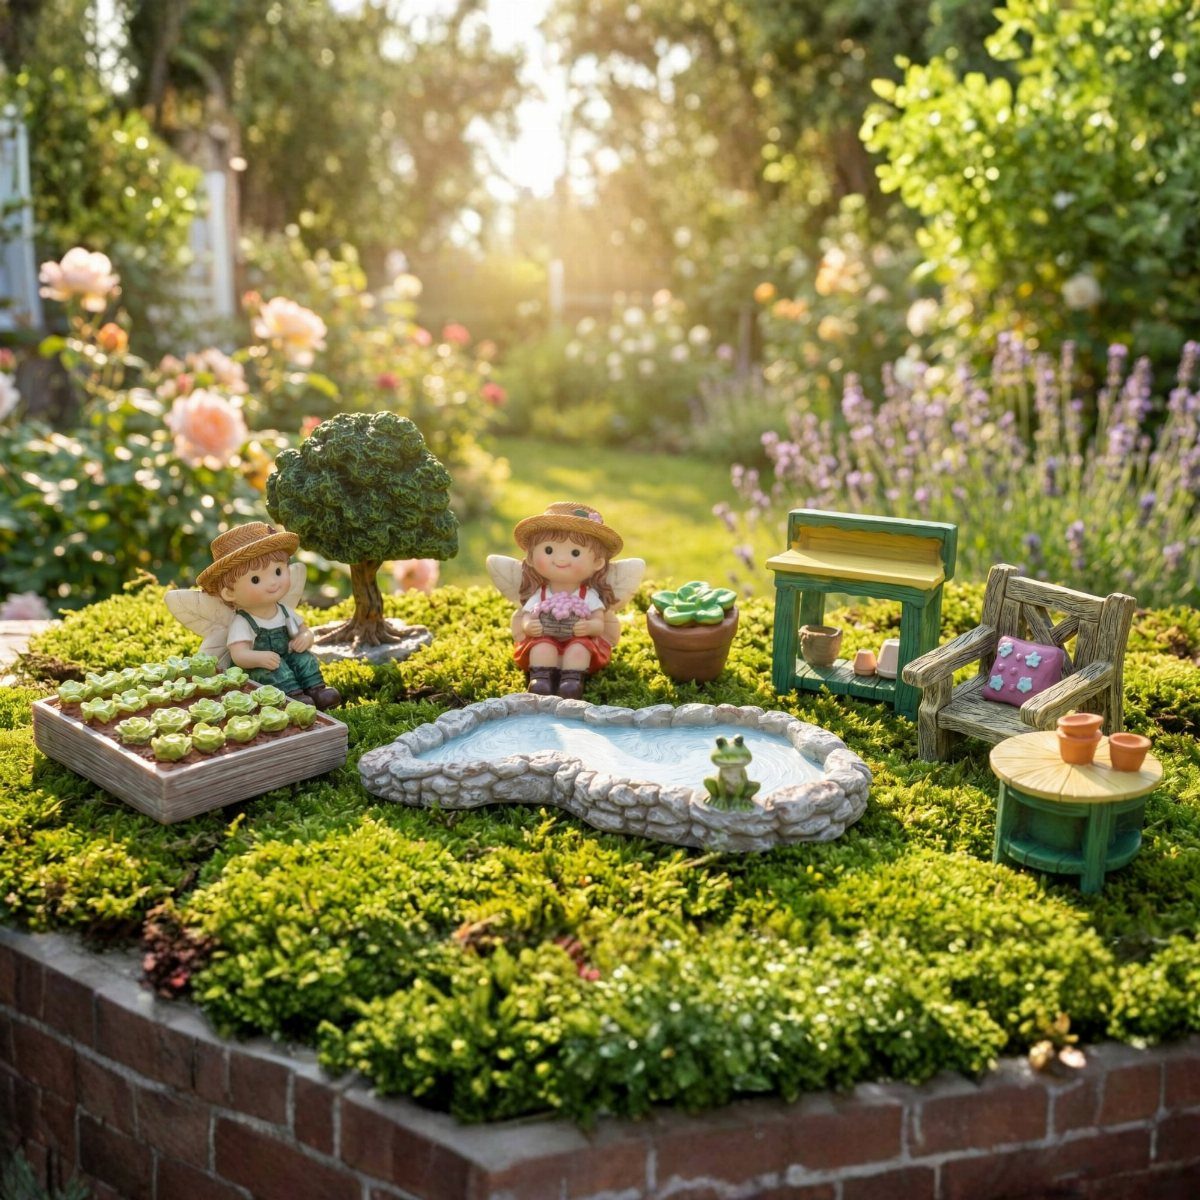
A brick planter is a ready-made stage, with walls that frame the village and hold soil in place. Furniture does the storytelling here: a tiny piano and chair tell you someone lives and plays inside.
Place the pond in the middle, then set the tree and the garden bed on either side so nothing blocks the figures.
I would keep the two fairies apart, one near the furniture and one by the water. Leave open soil between groups.
29. Stone-Bordered Garden Plot
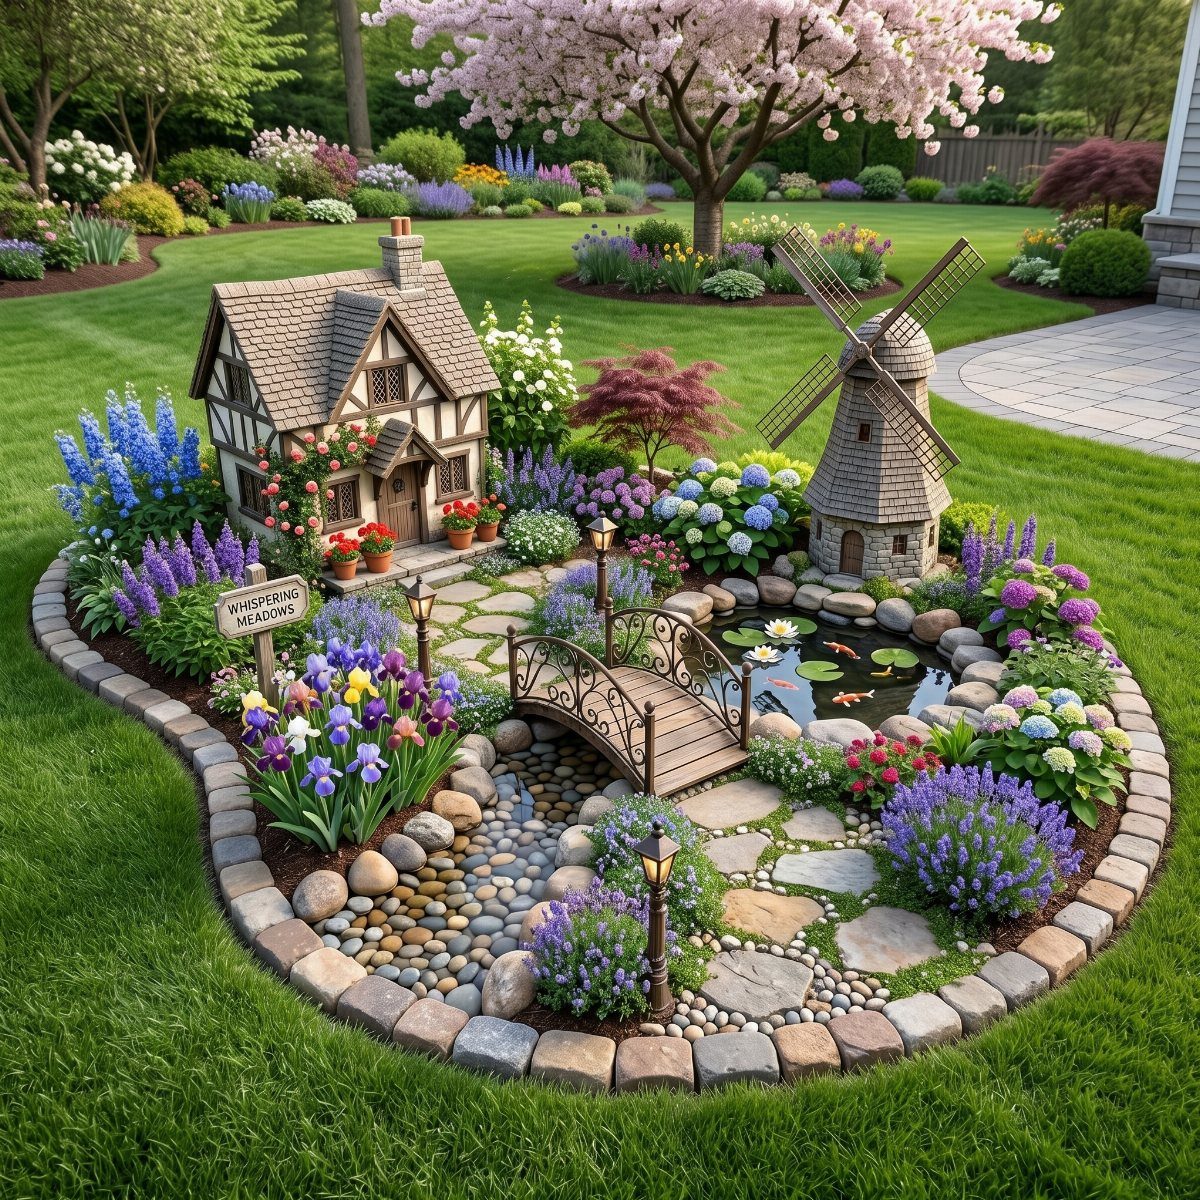
A circle of stones turns a patch of lawn into a garden with a clear boundary, so the cottage, windmill and bridge read as one place. The border also keeps mower and foot traffic out.
Fill the ring with soil and flowers, and set the windmill at the back so it stands above the cottage.
I would add a small sign, since a name makes the plot feel like a destination. Keep the bridge over the pond so it has a purpose.
30. Multi-Tiered Shelf Display
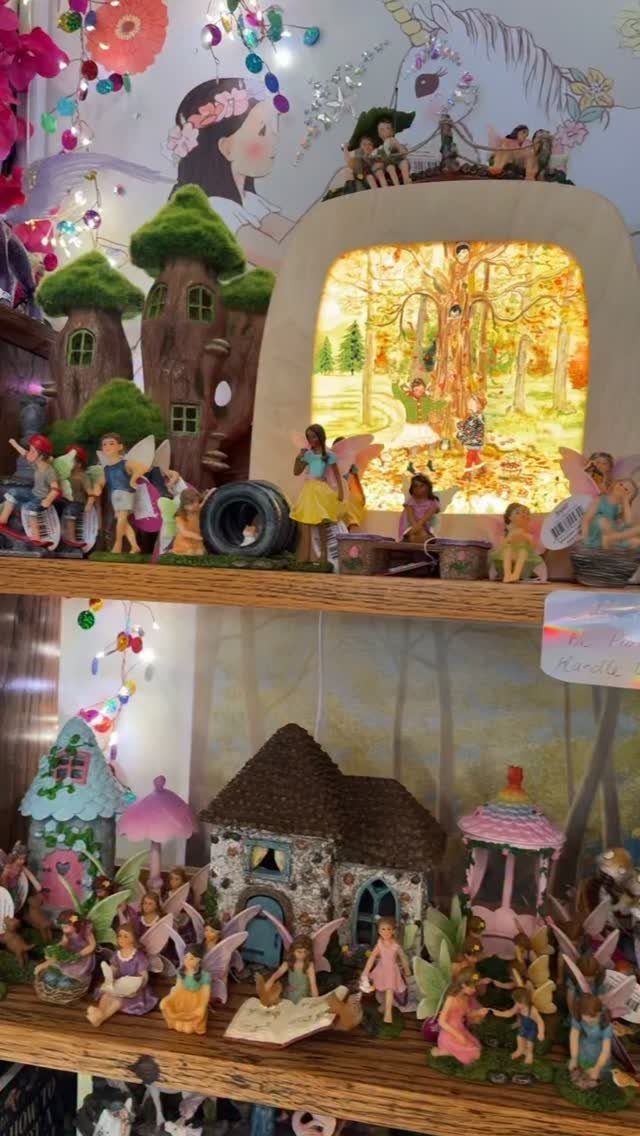
2 wooden shelves give a fairy collection a home without using any floor space. Cottages and mushroom houses sit on the lower shelf, with the winged figurines grouped on the upper one.
Group the figures in clusters instead of one long row.
I would add a small glowing light box behind them, since the soft light makes the whole display feel like a forest at dusk. Keep a gap between houses so each one reads on its own.
Plan Location and Layout
Choose a spot you walk past daily, close enough that you can tend it without leaning or reaching.
Track the sun on that spot through a full day, morning to evening, and only then start shopping. Sunny spots suit succulents and thyme; shady ones suit moss and ferns.
Paws, balls and strong wind can wreck a scene fast, so pick a corner that stays out of their way.
Sketch the layout on paper before you arrange anything. Settle on a size and a theme first, then use the sketch to decide what you can reuse from around the house and what you need to buy.
Container Drainage and Scale
Start small. A small build stays fun, and you can always add a second container later.
With low sides, pieces are easy to arrange and you can see in from above, and children can reach in without much risk of knocking things over.
Avoid anything too deep. Teacups, toolboxes and old wheelbarrows can all work as long as the depth stays modest.
Check for drainage holes before you plant. If the container will live indoors, set it on a saucer or use a liner so water has somewhere to go.
Larger containers need more plants and more supplies, so budget for that before you commit to a big one.
Ongoing Care and Protection
Water each plant according to its own needs; succulents and moss will not want the same schedule. Wipe dirt off the accessories now and then, and swap in seasonal decorations to keep the scene fresh.
If you have a portable garden, carry it under a roof or awning when heavy rain is coming; otherwise the soil washes out and tiny pieces drift off.
Delicate plants do better with some light shade in the afternoon when the sun is strong, and the figures will fade more slowly too.
Set the garden away from the paths pets like to take, because dogs and cats will cut across a low container as if it were a shortcut.
In windy spots, use heavier pots or discreet stakes to hold houses and fences in place.
After storms, hot spells or very cold nights, look the garden over. Fix paths, reset pieces and toss any accessory that has been damaged.
Frequently Asked Questions
How do I make a fairy garden?
Choose a spot you walk past every day, and spend a full day checking how the sun moves across it from morning to evening. Start with a small container, since you can always add a second one later.
What materials work best for fairy houses?
Wood, ceramic, stone, twigs and moss all work.
Moss, pinecone shingles or twigs can cover a roof, and flat slate pieces stack well for walls. Natural materials suit the scale, and many cost nothing if you collect them yourself.