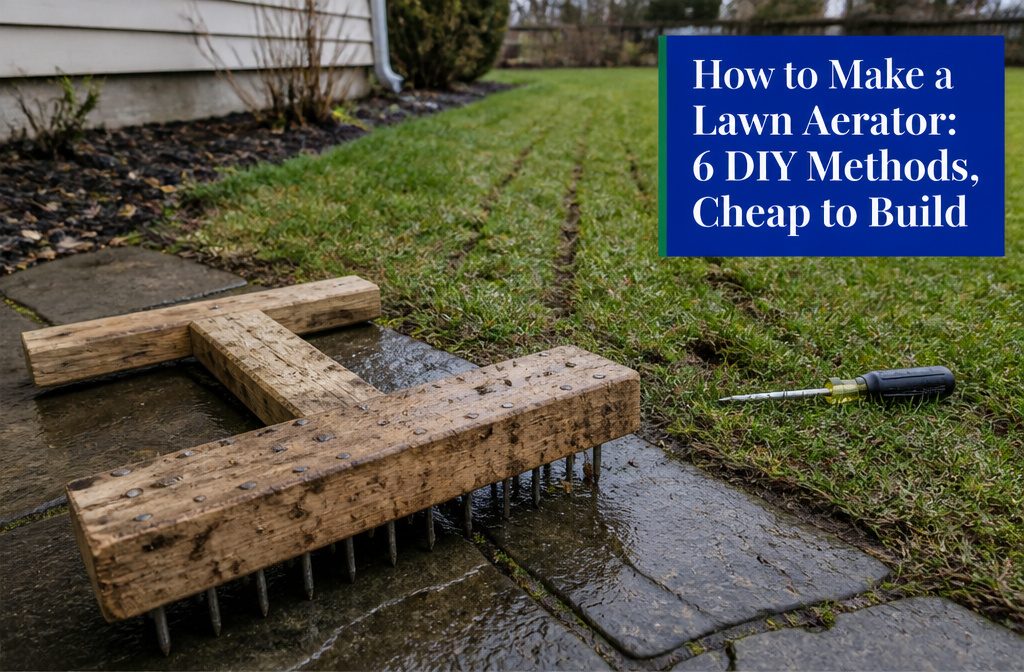
A nail-block aerator costs $6 to $8 and takes an afternoon with scrap lumber, a drill and 60D nails. The stage people get wrong is the one before building: testing for compaction.
If a screwdriver slides in 4 inches or more the day after rain, skip it. Spikes can also worsen packed soil, and only a core aerator fixes that.
1. Two-Block Nail Aerator
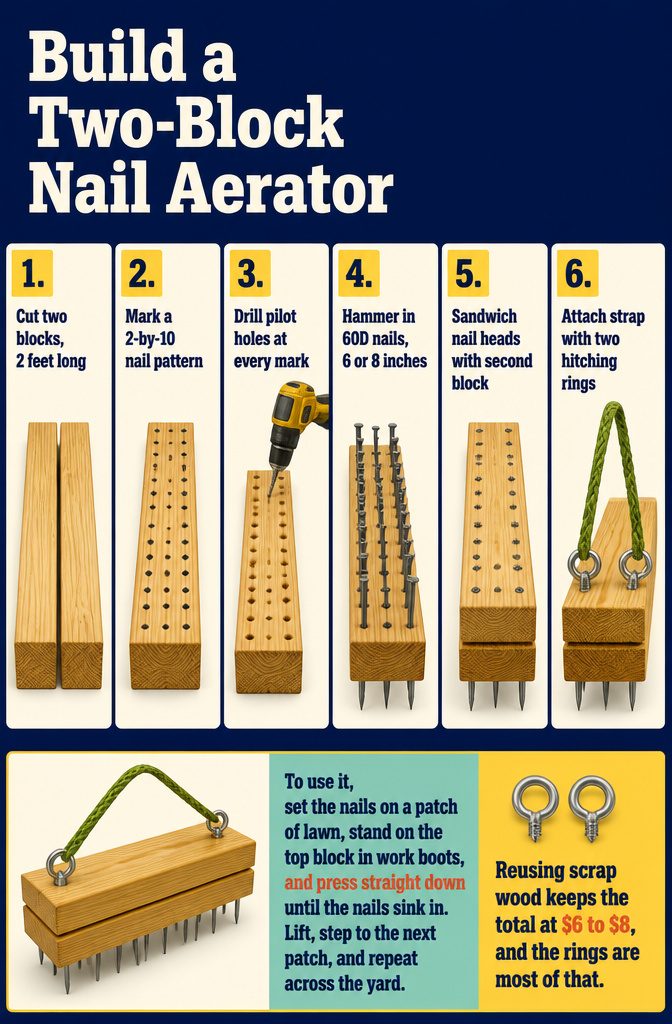
- Cut two 2-by-6-inch wooden blocks to about 2 feet long. Old lumber works fine here.
- Mark a 2-by-10 pattern of nail positions on one block.
- Drill a pilot hole at every mark so the wood doesn’t split.
- Hammer in 60D nails, 6 or 8 inches long, until the points stick out the far side.
- Set the second block over the nail heads and screw or nail the two together, sandwiching the heads.
- Fix a strap or rope to the top block with two hitching rings (Nation Hardware N220-640, two for $5.56).
To use it, set the nails on a patch of lawn, stand on the top block in work boots, and press straight down until the nails sink in. Lift, step to the next patch, and repeat across the yard.
Reusing scrap wood keeps the total at $6 to $8, and the rings are most of that.
2. Drum or Roller Aerator
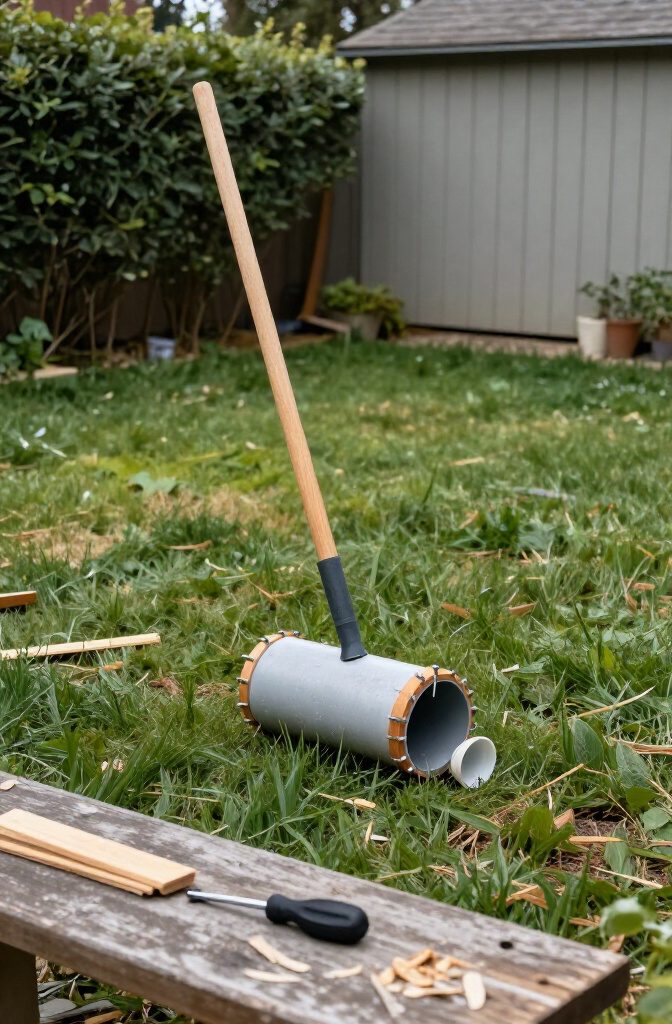
A 6-inch PVC drum with caps on each end is the heart of this build.
Strips of wood go on the outside, and 2-inch screws driven through them become the spikes. A length of ½-inch electrical conduit joins the drum to a wooden handle, so you push it across the grass like a small roller.
Of the six methods in this article, this is among the hardest and costliest to build, and I would skip it unless you already own most of the parts.
The screws could be longer, and the drum is light, so fill the pipe with sand for weight. Pre-drill every hole, or the wood strips will split.
The log version, with nails driven in, looks simpler than it is. The log has to spin on an axle, and that takes welding or real engineering skill.
3. Strap-On Aeration Shoes
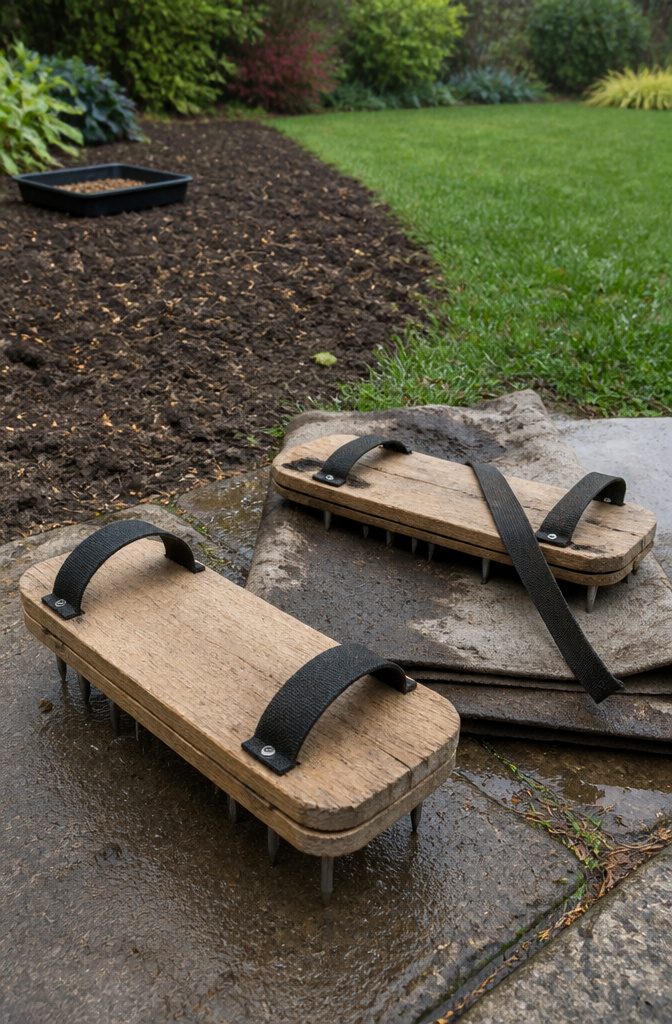
Aeration shoes are two boards with nails driven through them, the heads sandwiched between the layers, strapped to your boots so you can walk the lawn.
The shoe version of the block build uses 3-inch nails, which is far shorter than the long spikes on the hand-held block.
Ready-made pairs run around $20 (the Leweio shoes are $21.99), so a homemade pair only makes sense if it costs next to nothing.
The boards are easy. The straps are the weak point, and a loose band can let the shoes pull right off your feet in very wet or very dry soil.
I’d treat these as a seeding helper for a small lawn, not a fix for compaction. Their effect on compacted soil is questionable, and I’d skip them if that’s your problem.
4. Garden Fork
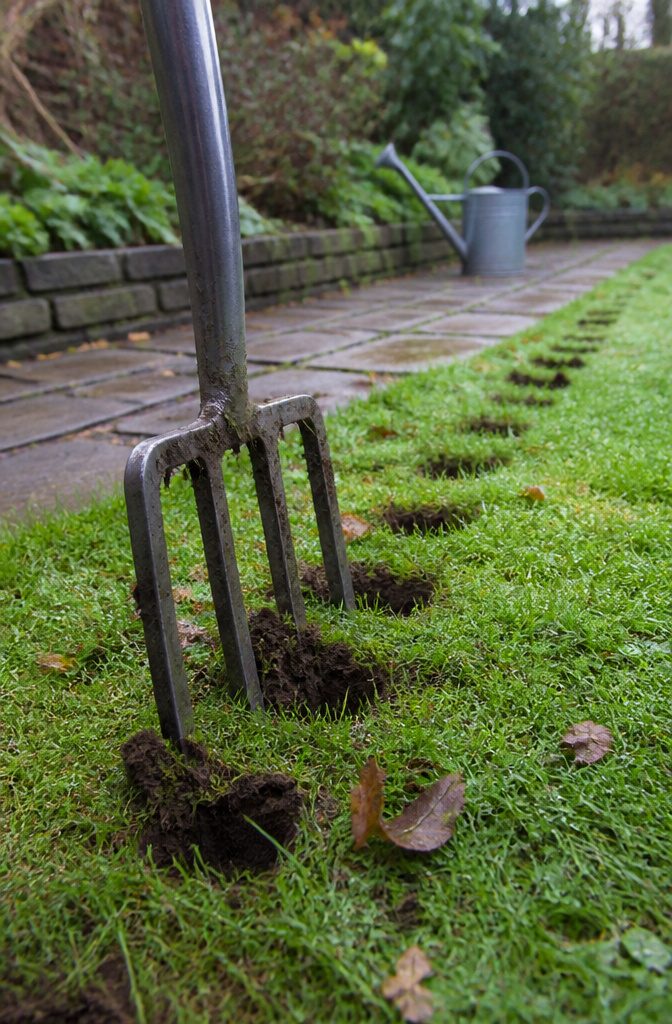
A garden fork is the one spike method most people already own, and it reaches deeper than the other DIY options.
Push it in at least 3 inches so the tines reach the root zone, rock the handle back and forth, then pull it straight out.
Rock until the grass lifts a little; that lift tells you the soil beside the tines has loosened.
As Hunker puts it:
Thicker tines are likely to increase compaction around the holes you make, but used properly a fork can also relieve compaction to the sides when you rock it.
— Hunker
So the rocking is what separates aerating from just poking holes. Repeat every 6 inches or less across the lawn.
5. Cordless Drill and Auger
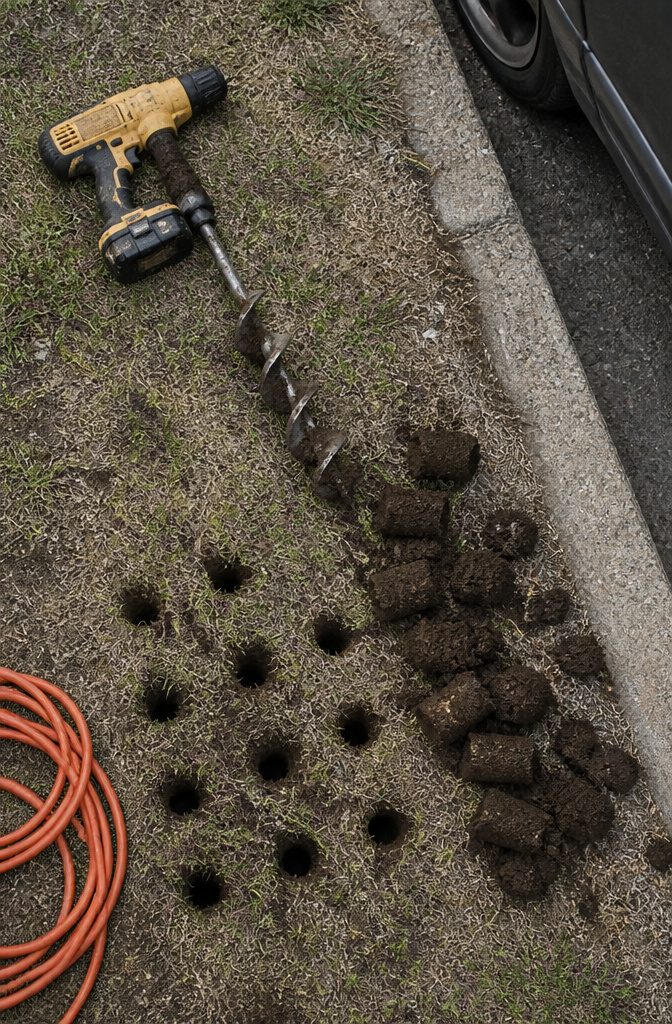
A cordless drill turns a compacted patch into a grid of holes, and a ¾-inch bit is about the right size.
It works, but slowly, so keep it to small trouble spots like a worn path or the strip where the car parks.
A small bulb auger bit or a large standard auger bit does better than a plain bit.
It pulls out curls of soil the way a core aerator does, and unlike spikes it shouldn’t add to the compaction. Swap the plain bit for an auger and you get real soil removal.
Expect to run through batteries and tire your wrists in a hurry.
A corded drill saves the battery problem, though you’ll be dragging an extension cord across wet grass. On anything bigger than a few square yards, I’d pick a different method.
6. DIY Core Aerator
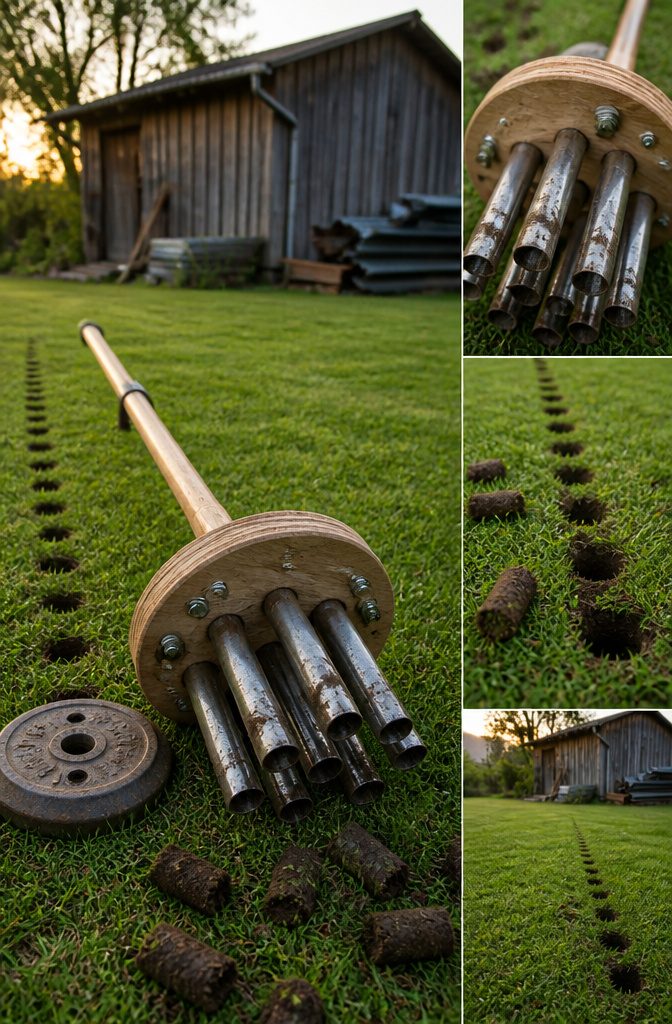
Seven steel-pipe coring tines on a weighted wooden disc, with a wooden handle, make a real core aerator for $164.40 in materials, just over half what a commercial core aerator costs.
Final assembly took under two minutes, since the tines are replicated parts that bolt or slot into the disc.
Ejecting the soil cores is the hard part. A hollow tine that pulls a plug has to let it out the top, or it clogs on the second pass.
Cutting, sharpening and relieving the pipe takes metalworking skill: a welder, a grinder and a steady hand. I’d skip this build if you rent or have no shop access.
Weight does the pushing. Other builds get it from brake drums or truck flywheels, which you can often find cheap at a salvage yard.
Test for Compaction First
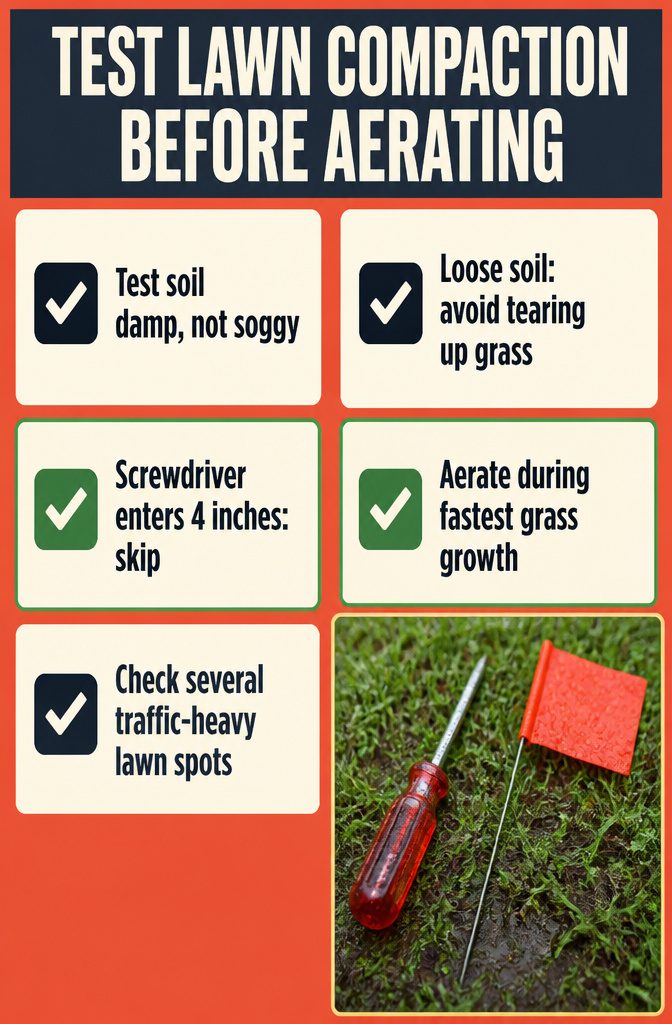
Check the soil the day after a good rain, when it is damp but not soggy:
- Push a screwdriver into the lawn. If it slides in 4 inches or more, compaction is probably not your problem.
- A landscape marking flag works too. If it goes in 6 inches without a fight, skip the aerator.
- If either one stops short or takes real force, the soil is packed and aeration is worth the effort.
- Test a few spots: near the driveway, along walking paths and in open turf. Foot traffic compacts some areas far more than others.
- Aerating loose soil tears up grass and leaves a mess without helping the roots.
- If the test says yes, aerate while the grass is growing fastest, so it fills in quickly. For most lawns that means early fall for cool-season grass and late spring for warm-season grass.
DIY Cost Against Store-Bought
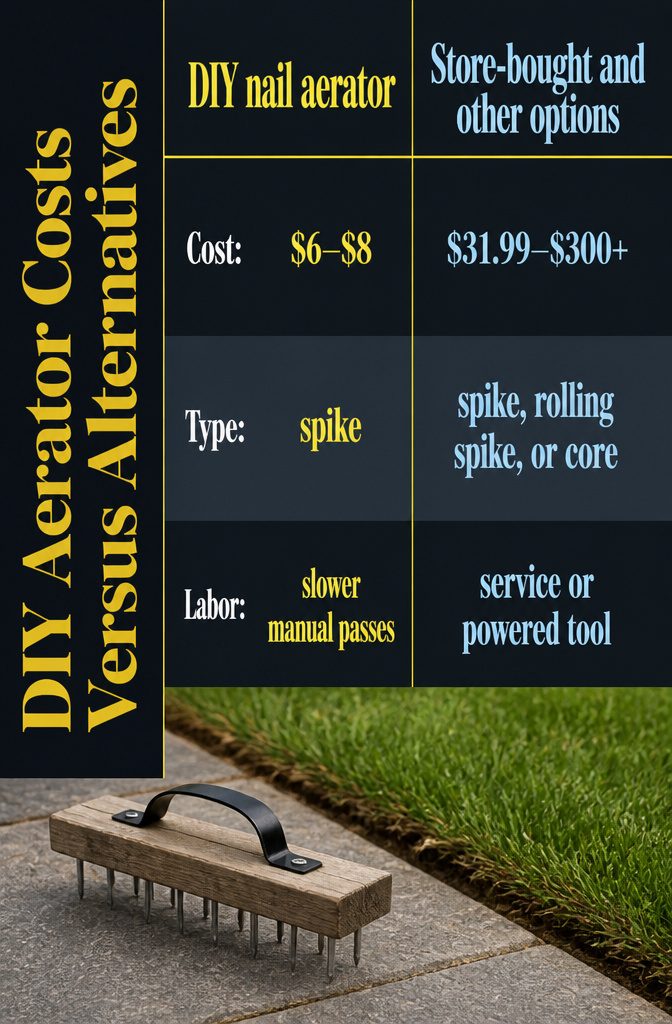
The nail build costs $6 to $8, which makes it the cheapest way to get spikes into turf. Ready-made spike tools start around $32, and a hired spike aeration runs $40 to $250 per visit.
| Option | Cost | Type |
|---|---|---|
| DIY nail aerator | $6–$8 | Spike |
| Walensee 15-Tine Spike Aerator (Walmart) | $31.99 | Spike |
| ANGELES Home Rolling Lawn Aerator (Home Depot) | $78.46 | Rolling spike |
| Professional service | $40–$250 | Spike, per visit |
| Powered machine | About $200 spike, $300+ core | Spike or core |
DIY suits people with more time than money.
You pay in sweat and slower passes across the yard. If you want plugs pulled out of the soil, a core aerator is the only tool above that does it, and it costs the most.
Limits of Spike Aeration
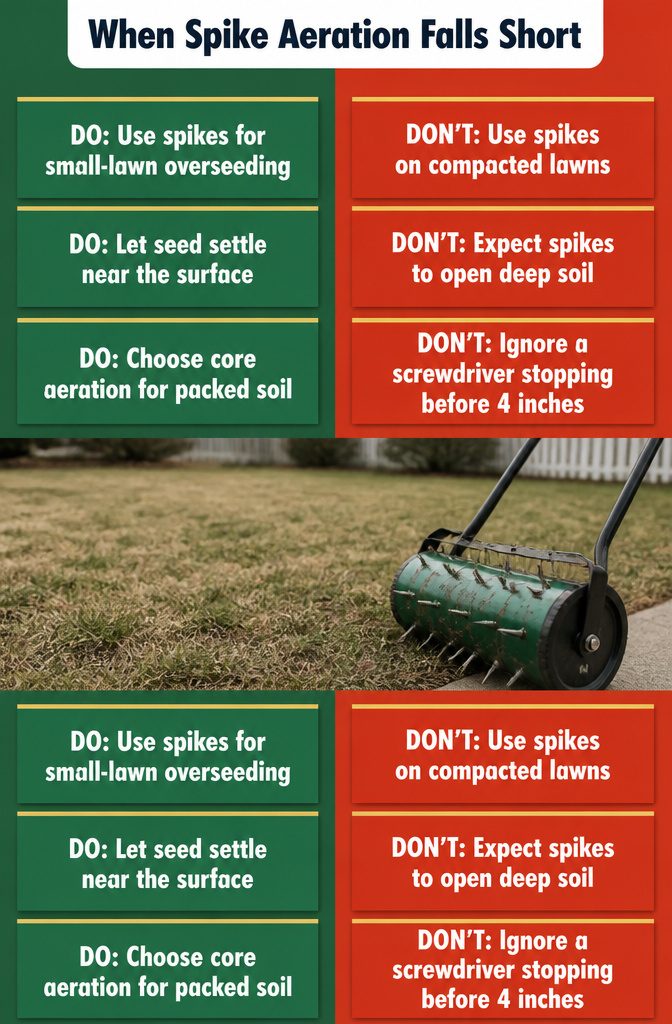
Spike aeration can make compaction worse.
Each nail or spike pushes soil sideways and packs the walls of its own hole, so water and nutrients get only a shallow, short-term path toward the roots. That holds for the nail blocks, the shoes and the drums alike.
I’d treat all three as budget tools, best for overseeding a small lawn, where you only need seed to settle into the surface. Skip them if your lawn really is compacted.
If a screwdriver won’t go in 4 or more inches the day after a rain, rent or buy a core aerator, which pulls out plugs of soil instead of squeezing it.
Costs run well above a DIY build, but it’s the only method here that actually opens the ground.
Frequently Asked Questions
How do you make a lawn aerator at home?
The cheapest build is a two-block nail aerator. Cut two 2-by-6-inch blocks about 2 feet long, drill pilot holes in a 2-by-10 pattern, and drive 6- or 8-inch 60D nails through one block.
Sandwich the nail heads with the second block, add a strap or rope with hitching rings, then stand on it and press straight down. Materials run about $6 to $8 with scrap wood.
What mistakes should you avoid when aerating a lawn?
The biggest one is aerating soil that isn’t compacted, which tears up the grass without helping the roots. Test first: if a screwdriver slides in 4 inches or more the day after a good rain, skip it.
Other common errors are relying on spikes for a truly compacted lawn, since they pack the walls of each hole, and aerating when the grass isn’t growing fast. Pre-drilling wood in your build also prevents splitting.
What month is best to aerate a lawn?
Aerate while the grass is growing fastest so it fills in quickly.
For cool-season grass that means early fall, and for warm-season grass it means late spring. The exact month depends on where you live, so go by the growth of your grass.